Help the site, share with friends:
Strawberry patterns and patterns: simple crafts
The seasonal variety of berries pleases the eye. Paper strawberries will help recreate the summer mood in the cold season. It can be applique, origami, three-dimensional berry. To work, you will need simple supplies. You can decorate the walls in your children’s room with bright crafts. Three-dimensional figures can become original packaging for gifts. In addition, creativity plays an important role in the development of children, helping them to master methods of working with paper and tools.
Master class “Strawberry” on 3D applique made of colored paper for Summer Berry Day
I am not a small bird.
I am a useful strawberry .
Who will make friends with me -
Don't catch a cold in winter!
Name " strawberry "
comes from Latin and means: fragrant or fragrant.
Agree, almost everyone loves strawberries . It has been familiar to us since time immemorial. But we never thought about what to call it correctly. But in vain, because strawberries are not a berry .
The fact is that a strawberry is not its fruit; from a scientific point of view, a strawberry fruit is a nut . What we eat is actually an overgrown, juicy colored bed in which small seeds of nuts are located.
This master class will be useful and interesting: for children of senior preschool age, teachers, parents for joint activities with children.
Materials for completing the master class : Colored paper , yellow cardboard , scissors, glue pencil, felt-tip pens , eraser, pencil, templates.
make strawberries on the entire sheet
Stages of the master class.
1. Cut out the template for the leaves and tail
2. Transfer the template to green colored paper and cut it out (green leaf)
3. Take 2 sheets of red colored paper and fold it in half.
4.Cut out a heart-shaped shape:
This will be our strawberry .
5. Then we glue one part to the base cardboard, and the second - we glue it only along the fold line.
6. We place leaf templates and a “tail” on top. The “tail” should not overlap the top (movable)
part
of a strawberry .
7. Using a marker or felt-tip pen, we mark the “seeds” of our strawberry .
8. That's all - voluminous paper strawberries are ready .
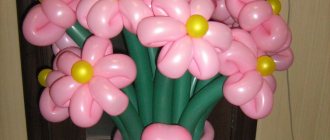
Vitamin boom with wine
And this bouquet will definitely come in handy for those who want not only to pleasantly surprise a person, but also to present him with a portion of joy and a lot of vitamins. What we will use when making this fruit bouquet with our own hands:
- lemon, kiwi, oranges;
- gloves;
- cutting board;
- skewers 30 centimeters long;
- scissors;
- knife;
- scotch;
- pruner;
- twine;
- hot glue;
- satin ribbon;
- kraft paper;
- greens (pistachio branch).
In our example, a bottle of wine and vitamins were added, but you can do without them. Now you can move on to the manufacturing process itself:
- First of all, let's fix the bottle. We fasten it around the bottom with wide tape. Apply several layers of adhesive tape and bring it to the center of the skewers.
- Let's work on the greens. For us it's pistachio. Use pruning shears to cut off excess branches and leaves. We attach several pistachio branches to the ends of the sticks. We fix everything with thin tape. If you cannot find such greenery, you can replace it with rosemary or eucalyptus.
- Let's move on to fixing the fruit. We will cut the lemon, kiwi and orange. After this, as in the first example, we wrap these products in cling film and fix them on skewers. Use at least five skewers for each fruit.
- Make sure the fruit is firmly attached. Place it on the table, if everything holds together, then you can use it in the composition. The remaining fruits can be immediately attached to sticks.
- To secure the grapes we will use twine and adhesive tape. We divide the large bunch into several small ones. Shake each one to make sure the berries don't fall off. We tie the twine to the grapes. After that, we wrap it around a stick and secure it with tape.
- Together with megamaster.info we begin to assemble a composition. We attach the largest components first.
We connect the bottle, pomegranate and apple using wide tape. At this stage, you can add a vitamin complex. After this, add small components. We insert pistachio sprigs between the fruits. We completely wrap the lower part of the sticks with tape. - We pack the product. We take craft paper with a size of 45 by 45 centimeters.
We cut off the bottom corner and make a cut in this place. Bend the ends towards the center and secure everything with tape. At the back we add another sheet of this kind in a similar way. We cover the lower part with a sheet of 25 by 25. We fold it at an angle and attach it with a stapler. We also cover the leg with craft paper and glue it with hot glue.
To give the structure strength, we tie the leg with twine, and for a beautiful contrast, we decorate it with a satin ribbon.
Another good gift idea is a bouquet of chocolates.
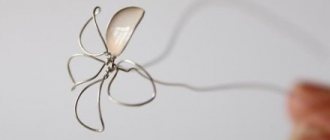
Strawberries from Kinder Surprise cases and a plastic bottle
A very cute craft can be made from a green plastic bottle and Kinder surprise containers. These will be almost real delicious strawberries that can decorate your home or summer cottage. A whole bush of such luxurious strawberries with berries and flowers looks beautiful.
To make this craft we will need a lot of things:
- wire,
- cases for kinders – 5 pieces,
- green plastic bottle – 1 piece,
- scissors (for leaves you can use curly scissors),
- acrylic paint red, black and yellow,
- brushes for applying paint (medium and thin),
- green insulating tape,
- a little foam (so that it sits tightly in the pot you are using),
- a small flower pot or any suitable jar,
- a little green sisal
- candle,
- decor of the pot - optional.
To begin with, I prepared a pot for planting our strawberries, which can be decorated in any available way. First we place a piece of foam inside and decorate it. I decorated it with jute rope; for children's crafts, you can use corrugated paper and other suitable materials.
Each Kinder Surprise container must be pierced with scissors or an awl and a wire inserted into this hole and bent slightly.
Close the container and so on for all 5 pieces.
These are the preparations...
Paint with acrylic paint...
Next, you need to cut the green plastic bottle, and then cut out the sepals and leaves from it. For convenience, we use any marker. I cut it with curly scissors, but you can use regular scissors.
The leaves must be cut with cuttings to make it easier to attach them to the stem.
The sepal and leaf blanks can be slightly heated over a candle so that they are slightly deformed and take on a lively appearance.
We pierce the sepals with an awl or scissors in the center and put them on a wire for each berry.
Then, using green insulating tape, we wrap the stem-wire in a spiral, attaching the leaves. Insulating tape can be replaced with corrugated paper, tape or green yarn.
From such blanks we make a bouquet by piercing the foam in the pot with wire.
Let's add a few flowers for beauty.
They can be made from any available material; I have white felt and ready-made flower centers. You can use a white bottle or yogurt jars. We also use any suitable material as the center; you can even cut it out of a bottle and paint it with yellow acrylic paint.
We fix the flower on the wire... Depending on the material used, the wire can be slightly bent at the tip, and the middle can be glued on top of the glue. We wrap the wire stem with electrical tape and plant it in a pot.
An attractive strawberry bouquet of kinder surprises will look good both in the interior and in the garden. It can also be a wonderful handmade souvenir gift, for example, for March 8th!
Where to get the material
You can find polystyrene foam in any household appliance box. Don’t throw it away when you buy it again; it’s better to put it in the pantry, take it to the dacha or hide it on the mezzanine. It won’t take up much space, but it will be a great help when you have the time and desire to get creative.
Please note that if you do not plan to buy equipment in the near future, do not be discouraged and do not rush to go to the art store - although they have blanks, they are at high prices. You can buy relatively cheap polystyrene foam wherever building materials are available. A sheet of 100*100*10 cm will cost approximately 270 rubles. In a craft store you would get a very small piece for the same price.
DIY strawberry craft
Crafting strawberries, made with your own hands from scrap materials together with your child, is one of the best ways to preserve warm memories of the passing summer. Since even the youngest connoisseur of beauty can draw strawberries, you can safely involve children of different ages in the work.
Very touching strawberries are made from the handprints of small children and adults. To complete this craft, we will need to make a red pen print on plain white paper. Wait until it dries. Cut it out. Glue it onto a colored piece of cardboard.
DIY strawberry craft
Using your fingers or brush strokes, draw black seed dots and a green leaf on top of the strawberry.
Strawberries from fingerprints
The smallest of them will surely be able to do and enjoy this strawberry paper craft. With our own hands we cut out the contours of the berry and sepals from paper,
Paper strawberry 2
and invite the child to apply the characteristic pattern that small seeds form on real strawberries. To do this, you need to prepare in advance a stamping pad or a piece of fabric soaked in black paint.
Paper strawberry 3
We lower our finger onto the pad and move it to the silhouette of the berry. The result is an interesting spotted pattern.
You can decorate paper strawberries in a more sophisticated way - using black buttons of different sizes. We glue them to the paper with transparent polymer glue.
Strawberry with buttons
To obtain an image of a strawberry, you can use ready-made heart-shaped molds, which are often found in modeling kits.
Strawberry stamping pattern 1
And to obtain sepals, we twist the chenille wire in the form of a bow.
Then we immerse the mold in pink and the wire in green. We put our fingerprints and get a real strawberry.
Strawberry stamping pattern 3
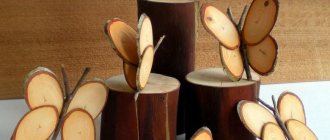
Interesting strawberries are made from... ordinary stones. Each of them can be turned into a berry, you just need to choose the appropriate shape and shades of color. Such voluminous strawberries will be an excellent decoration for an apartment or yard. And if you coat them with varnish so that your hands don’t get dirty, you can get a bright, attention-grabbing aid for doing math.
Strawberries made from stones
An equally interesting voluminous DIY strawberry craft can be made from salt dough or modeling mass.
In our work we use various molds and tools that children love to experiment with.
Strawberries made from salt dough 1
And to add originality to our craft, we use strawberry seeds.
Strawberries made from salt dough 2
The berries can be left separately, or they can be used as a basis to create a beautiful volumetric applique.
Strawberries made from salt dough 3
If you place the applique in a frame, you can decorate any corner of your home with it.
These simple ideas can be used to create truly summery, juicy strawberries.
Christmas balls
When it comes to using foam plastic, the first thing that comes to mind is crafts made from foam balls. You can buy ready-made balls or make them yourself. To do this, cut out a cube from a foam sheet, and then gradually cut off its sharp corners.
Sandpaper will help achieve perfect smoothness. Just be sure to wear a respirator mask when working with polystyrene foam; inhaling its small particles can be very dangerous.
Styrofoam balls are very easy to turn into Christmas tree decorations. The ball can be decorated with gouache, smeared with PVA and sprinkled with glitter, and other decor can be glued on.
To prevent the ball from peeling off, coat the finished product with varnish, and so that it can be hung on the Christmas tree, thread a regular thread through it (thread it into a needle and pierce the ball right through).
DIY paper strawberries (idea for packaging sweets)
Many people have already become “bored” of standard packaging for candies, which means it’s time to come up with and recreate something interesting! Today the website “Confetti.ru” will demonstrate how to make strawberries from paper with your own hands. You will need to pack sweets in these paper strawberries.
Paper strawberries can be given to colleagues at work, or given to friends and relatives. Moreover, they will be appropriate on absolutely any holiday, from Valentine’s Day to March 8 or New Year.
- Box of strawberries (master class).
- Stages of creating a box in the shape of a strawberry.
- How to make a strawberry-shaped box without a template (video):
Fruit bouquet with berries
We continue to create fruit compositions. In this tutorial we will use nectarines, apricots, cherries and blueberries. Among the tools and materials we will need the following:
- skewers;
- scotch;
- scissors;
- pruner;
- quiet (tissue or corrugated paper);
- wrapping paper;
- satin ribbon.
Let's look at how to make a bouquet of fruits with your own hands step by step:
- First, string nectarines onto skewers. We choose fruits that, in your opinion, are denser. In our case, we used 8 pieces, we strung each one onto three skewers.
- After that we move on to apricots. Here we use two skewers. We pierce the fruits from different sides so that the bouquet does not look monotonous.
- Lastly, we deal with cherries. One stick is enough for each berry. The tails and leaves do not need to be removed.
- Let's start assembling. Combine apricots and nectarines, add cherries. We insert new fruits and berries one by one. When the set is compiled, wrap it at the bottom with tape. To diversify the composition, you can add plant leaves. If there are gaps in the bouquet, you can insert cherries strung on toothpicks.
- Let's start packing. Let's take 4 sheets of paper, fold them in half and compress them. Lay out two sheets of wrapping paper. Fold them diagonally. We wrap the bouquet in packaging. We squeeze the place where the leg is located. We bandage this place with tape. We carefully insert silence between the paper and the bouquet.
Almost ready, all that remains is to decorate the composition with blueberries. We attach it using toothpicks in random order. Now you know how to make a beautiful bouquet of fruits and berries with your own hands step by step.
Box of strawberries (master class).
To work you will need:
- Thick red paper;
- Glue;
- Scissors and pencil;
- Green thick paper;
- Green rope or ribbon;
- Hole puncher;
- Ruler and needle;
- Candies in foil;
- Printer for printing the template.
Stages of creating a box in the shape of a strawberry.
Let's start with the fact that you need to print the template on a printer or redraw it by hand. The first photo shows a strawberry and hat template. The second photo shows various variations of hats, you can choose to your taste.
Cut out the printed strawberry template, place it on a sheet of red paper and trace it with a pencil. Then we outline the cap on the green leaf.
We cut out the blanks and use a hole punch to create a hole in each petal. Then, using a ruler and a needle, we draw fold lines on each petal (we lay down the ruler and draw a line with a needle). After which the workpiece must be bent along the drawn lines.
DIY paper strawberries.
Apply glue according to the mark on the template (it says “glue”). We glue the product.
We thread a thread or ribbon alternately into each hole on the petal of the strawberry blank.
Place the candy in foil inside. Why in foil? Yes, because otherwise it will be unpleasant for a person to eat “fingered” sweets.
We tighten the threads, take the hat, in its center we also create a hole with a hole punch, thread the threads connected together into it, and tie it with a bow on top. The strawberry is ready! According to this scheme, you need to create as many packages as you intend to give candies. If there is a lot of sweets, then all the strawberries can be presented in a small wicker basket.
Strawberry meadow with roses
The next fruit bouquet you make with your own hands will be very tasty and aromatic. And all because it will contain roses and strawberries. In addition to these elements, prepare the following materials:
- gloves;
- skewers;
- pruner;
- scissors;
- stapler;
- flower flasks;
- twine;
- scotch;
- satin ribbon;
- wrapping paper;
- matte tracing paper.
All is ready? Then let's get started:
- We put on gloves, as we will have to work with products. We begin to thread strawberries onto skewers. We do this until we reach class=”aligncenter” width=”1024″ height=”680″[/img]If you pierced the berry again, then it is better not to use it, otherwise juice will begin to flow out of it at the most inopportune moment. Try to choose harder berries; you can leave them in the refrigerator for an hour, then it will be more convenient to work.
- Using pruning shears, trim the roses and remove excess leaves. In our lesson we use spray roses, they are more fragrant. Pour water into floristic flasks and place roses. We place the flowers tightly so that if the flask turns over, water does not leak out of it.
- Let's start putting together the composition. Take three berries and secure the skewers with thin tape. We will place all subsequent elements at an angle after each subsequent berry; we will wrap the skewers with thin tape. This composition technique is called spiral. During the composition process we add flowers.
- After this you need to level the bottom. We do this using pruning shears. We cut everything so that all the sticks are the same length. We wrap the handle with wide tape.
- Let's start packing. We take matte tracing paper with a size of 25 by 30 centimeters. Fold and secure with a stapler. We will need about five of these pieces. We pack the bouquet with them in a circle and secure the material with tape.
- Now we need wrapping paper, prepare 4 sheets of 30 by 50 centimeters. We fold them diagonally and in half, fasten everything with a stapler. We wrap the composition. We secure this package at the bottom with twine.
- Let's pack the leg. Let's prepare 3 sheets of 15 by 15 centimeters. Fold one corner, apply glue and glue it to the base.
The final stage remains. We tie a ribbon on the stem and the bouquet is ready, and you can make a card for it.
Crochet rowan with diagrams and job description
I would like to share a diagram of a rowan brush for a crochet hook.
The leaf is knitted according to this pattern.
- Cast on 10 air loops (VP) in the chain.
- Next we knit in the back loop, insert the hook into the second loop and pull it out.
- Yarn over.
- Insert the hook into the next back half loop and pull out the loop. There will be two loops on the hook.
- Yarn over to the end of the chain and pull out a loop in the next back half loop. There should be a total of 18 loops on the hook.
- We close the loops. We make a yarn over. Pull the yarn through the first three loops in one go.
- After yarn over, pull the thread through the next three loops again. Repeat until there are 4 loops left on the hook.
- Yarn over three loops; there will now be 2 loops on the hook.
- Yarn over and pull the thread through the remaining 2 loops, the row is closed, and 1 loop remains on the hook.
- After this, the second side is knitted, the knitting is turned to the other side and knitted on the opposite side with a chain of air loops, each time inserting the hook into the remaining half-loop
- Insert the hook into the second loop from it, pull it out and yarn over.
- Pull out the next loop, leaving four loops on the hook.
- Repeat until the end of the chain.
- Closing the loops. Yarn over Pull the thread through three loops at a time. Repeat yarn over and pull through. Until there are four loops left.
- Yarn over Pull through three loops, two remain.
- Yarn over, pull through two.