Home » Animals and insects » How to make a lizard from beads? Weaving pattern for beginners
Animals and insects
Irina Vyshivaikina 07/15/2019
0
A funny beaded lizard is an excellent basis for a brooch or bracelet or other accessories. It can even be a children's toy if you use bright and large beads. This craft will help beginners master various weaving techniques. Before making a lizard from beads, it is important to select a ready-made pattern and all the necessary tools.
How to make a lizard from beads
The creative process of creating a lizard involves the use of various methods and color schemes. To begin with, you can try to weave a lizard from one color, then move on to different color options, use transitions.
Important! It is better to choose a bead size that is not very large, for example, 10 or 8. The brighter the colors, the more interesting the product will look.
For the base, you can use fishing line or wire, although the latter is better suited for creating voluminous lizards.
The beads themselves are also different: iridescent, mother-of-pearl, matte, transparent, with lines inside and patterns. Everyone chooses according to their taste which option is suitable for the job.
It is important to choose the right combination of colors; the overall impression of the product depends on this. Harmony of tones is the effect of the interaction of several shades. This factor is subjective, everyone has their own preferences. But non-contrasting shades that are similar in character, light or combination always look harmonious.
To create a calming and comfortable effect on the perception of the product, you can use a color wheel.
The ideal combination is for colors located next to each other, and to emphasize some detail, you should choose contrasting colors: warm and cold or different in lightness
Which terrarium to choose?
Lizards that exist in nature vary in species. Depending on this, the conditions for keeping them at home are different. A terrarium for land-dwelling lizards, such as the common lizard, should be horizontal.
When choosing its area and volume, the size of individuals and their number are taken into account. For example, for two ordinary lizards it is enough to equip a house measuring 60x40 cm. You can calculate the design parameters yourself. A terrarium for lizards should be twice the length of the animal in height, and one in width.
Techniques for weaving a lizard from beads
The following basic weaving techniques are distinguished:
- Monastyrskaya. This option involves dense weaving, in which the beads are located at right angles in each individual section. Every 4 of them look like a cross. For greater effect, you can combine several colors. Monastic weaving technique is the simplest type, which results in a mesh fabric
- Mosaic. Carrying out the work in this way produces a dense canvas in which the beads are arranged in a checkerboard pattern. To make the product look neat, you should use beads of the same size
- Needle-shaped. This technique involves connecting beads in a certain order, as a result of which the woven elements look pointed. Needle weaving is used to create various needles, petals, tassels, earrings and other details
- Parallel. Use parallel technology to create three-dimensional products
- Loop technique - weaving in the form of loops. The loop method is used to create flowers, leaves or branches
- Circular is one of the most complex and fascinating techniques. Circular weaving is used to create elements on wire
- Brick. This type has a weaving feature in which a fishing line or wire is attached to the threads of the previous row. The first row of brick weaving is performed using other techniques described above
- Mesh. A common method of beading, it is often used in the manufacture of cases for mobile devices, necklaces, or for weaving objects with beads. Openwork decorations made using mesh technology are original and simple
- Volumetric. Figures, necklaces or plaits are made in this way; as a result, the products look very impressive. Simple steps allow you to create products that look very natural
Plants
It is very important to observe the permissible combination of plants. Of course, any greenery can give a terrarium a natural look; with its help, humidity is maintained and the air becomes cleaner. But many indoor plants are not suitable for a lizard house.
Pets live according to their own schedule. They will dig soil in flower pots and make burrows. It is unacceptable to place plants in a terrarium for lizards whose stems are covered with thorns, thorns, piles, and whose leaves have jagged edges. Representatives of flora that differ in the content of toxic and sticky substances are not used.
To arrange the interior space of the terrarium, it is recommended to use bamboo, aucuba, indoor grapes, saxifrage, common ivy and others.
Plants are placed in a place inaccessible to reptile activity. For example, a container with them can be placed on a pyramid made of stones, hung from a lid, or completely isolated with a screen.
Necessary materials
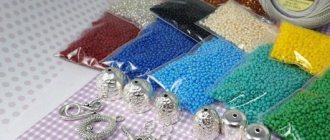
First of all, you need beads for work. You can choose any color: make the lizard either exactly as it happens, or fantastic. Why not? To begin with, you can make a one-color figurine, and only then study the creation of a colored one, with color transitions. The beads should be small enough, it is better to take two sizes, for example No. 8 and No. 10. Beads that are too large will not be suitable for work - such a figurine will not hold up. The main condition is that the beads must be beautiful and bright, so that the lizard turns out bright and cheerful. To work you will need:
- 10 g beads of the main color (for example, green);
- 5 g of beads of a similar shade, to create color transitions on the back;
- 5 g of light-colored beads - for the abdomen.
Additionally, for the work you will need 4 bright beads of size No. 10 - to decorate the eyes and nostrils. The color must be chosen in such a way that it contrasts better with the main one - otherwise the lizards’ faces will turn out “blind”. For the base you will need a thin, strong fishing line. If it is not there, you can use ordinary sewing threads, but with them the figurine may not be rigid and strong enough. If threads are used in the work, then you will need to take a needle - thin enough to easily pass through the holes of the beads. To create a voluminous lizard, it is better to use strong but fairly thin wire. The finished volumetric lizard made of beads is often stuffed with filler; you can replace it with regular polyethylene; you also need to stock it up before starting work. With it, the finished figurine will look better, and it will also be quite suitable as a toy. Cellophane can also be replaced with crumpled paper. We will cut the thread using scissors or wire cutters. But the most important thing you need for work is patience. There is nothing complicated about weaving a lizard, but it can be difficult for beginners to work with small material for a long time.
Basilisk: keeping at home
This reptile is the most popular to keep in the house. It should be borne in mind that individuals taken from the wild do not take root well in an unnatural environment for them. Therefore, for home breeding and keeping, it is better to take lizards bred in an incubator. Living in a terrarium, the reptile's color changed. It turned bluish. The lizard will be sad alone. Therefore, these reptiles are kept in pairs.
Nutrition should be balanced. The basis of the diet is vegetation. Lizards eat sprouted wheat, carrots, bananas, apples and other fruits well. But they also need other food: small rodents, lizards. Animals lay their eggs in a nest, the bottom of which is covered with sand and wet moss. The eggs are taken from the female and raised for 30 days in an incubator.
Knitting elastic bands with knitting needles. Scheme. Photo. Elastic patterns knitting patterns with descriptions Classic Polish elastic
Squares, cells with knitting needles - simple patterns
Highlights of the work
Before making a lizard from beads, we need to determine the basic techniques that we will use in our work.
To create a three-dimensional lizard figurine, we will use the parallel weaving technique. For ease of operation, the remaining leg parts can be woven separately and then attached to the body. If during work you need to connect two threads, it is better to do this using a knot: this will make it easier to hide the ends in the hole of the bead. In order not to get confused in the work, you can print out the weaving diagram on a separate sheet and use it to mark the progress of the work. It is also easy to navigate the required length of fishing line and the order of weaving parts. All color transitions are also marked there. If necessary, you can use your own color schemes; instructions on the order of beads in the diagram will help you cope with weaving. To weave our lizard, we will use the following pattern:
The benefits of lizards in the country and how to attract them to your garden
Lizards are not just funny reptiles that can be interesting to watch. These creatures bring great benefits to the site. Where they settle, the number of harmful insects is reduced significantly, and the number of treatments of plants with insecticides is reduced to a minimum.
Why are lizards useful?
In the middle zone you can most often find the sand lizard or the common lizard. Since the main food of these small reptiles are insects and their larvae, lizards are of great benefit to us gardeners. They eat almost all pests that spend at least a small part of their time on the ground. This:
- all types of weevils;
- potato and tomato moth;
tomato cutworm, caterpillars of cabbage and other butterflies, cabbage fly, onion hoverfly, cruciferous flea beetle, carrot psyllid, beet flea beetle and beet bug, melon aphid, slugs, thrips, click beetle and its larva, nightshade miner, cicada, whitefly.
How to attract beneficial reptiles to your property
There is no doubt that lizards in the garden are useful. But how can you attract these little helpers to your garden beds? Since lizards are always found in abundance in my area, I analyzed and identified those factors that turned out to be most favorable for them:
1. Leave areas of natural vegetation in the garden. Lizards avoid large open spaces lacking natural shelters. The thick grass is home to the prey of reptiles, so they willingly populate heavily overgrown areas. Next to well-groomed beds there should be small clearings of untouched grass.
2. Use large stones and pebbles in your landscaping. In the morning hours and cool spring days there is still little heat, so lizards choose places and objects that are well heated by the sun and accumulate heat. Rocky edges of paths, free-standing boulders and stones on an alpine hill are very attractive to reptiles.
3. Arrange places convenient for living and spending the night. In my case, the location where the garden shed adjoined the gravel path turned out to be successful. The lizards made their burrows in the pebbles, and their nest itself, apparently, is located in the cracks of the foundation. Often lizards also settle near woodpiles and in other places where there are small secluded openings.
4. Don't use chemicals. Lizards, like all animals, are sensitive to chemicals that the gardener uses to treat plants. Chemicals for reptiles can be very toxic. I use only natural insecticides (Actofit, Boverin, Verticillin), so the reptiles in my area are safe and comfortable.
Take note of my advice, dear gardeners! Living in harmony and unity with nature is easy, pleasant and interesting!
Process description
To master lizard weaving is a parallel weaving technique. The result will be a voluminous, flexible figurine with an original design. You should work strictly according to the scheme in order to remember the basics.
To make a simple beaded lizard, you need to master a pattern for beginners, which contains 2 colors. The main shade is black, with gold beads for the eyes and edging of the paws. If you use parallel weaving of beads, the lizard will immediately turn out voluminous, without filler.
To properly weave a lizard from beads, you should count the number of beads of each color in advance. It is better to print out the diagram and keep it in front of your eyes so that you know the sequence of actions. A detailed master class will tell you how to weave a lizard from beads for beginners. Let's start with the diagram:
Parallel weaving creates rows of beads that themselves fold into an accordion. This is worth considering before weaving a lizard from beads. The pattern is universal and allows you to turn the finished figurine into a bracelet, brooch or keychain.
We start weaving a lizard from beads from the head.
- We collect the first 3 beads on the fishing line. Carefully pull the opposite end of the thread through them, you get a triangle, something like this:
It will turn out like this:
- Next, we collect 4 beads: one gold, two black, and another gold. We thread the second end of the fishing line. Tighten to press tightly to the first row.
- Using this pattern, we make the following 2 rows: one for 3 black beads, one for 2.
- We tighten it, the head is ready.
The result is an elastic weaving of beads. A beaded lizard for beginners is woven on one thread.
Before weaving a lizard from beads, it is important to check the proportions. The main part is the torso. To begin with, we weave the front legs.
- We collect 3 black and 3 gold beads, thread the fishing line through the 3 beads closest to the body.
- We pull the line back and tighten it. One front paw is ready.
- The paw is made in the same way on the other side.
- We weave the body in the same way as the head. According to the scheme: 1 row of 4 black beads, tighten. The second and third – 5 black beads each, fasten.
- Fourth row – 4 beads, fasten. Fifth – 3 black beads, tighten. The sixth and seventh rows - 2 black beads each, tighten the thread.
The body is ready. This is the most labor-intensive part of the master class “How to weave a lizard from beads.” The scheme involves the alternate connection of elements. The density of the canvas must be the same so that the finished structure does not “creep”.
Before weaving the tail, we braid the hind legs to the body. We do this stage according to the same scheme as the front ones.
To secure, we collect 2 black beads and stretch the opposite end of the fishing line.
Then we start weaving the tail.
- We collect 1 black bead on the fishing line. We pull the second end of the fishing line through it and tighten it.
- Repeat the procedure until the desired tail length. The optimal length is up to 6 black beads.
It is advisable to weave the paws simultaneously with other elements. Braiding on one line is a way to get a flexible, yet durable structure.
Types of techniques
One of the interesting crafts is a lizard made of beads. The diagram determines the appearance of the finished accessory and a step-by-step algorithm of actions. Having mastered several types of weaving, you can come up with many original accessories: a brooch, keychain, bracelet or decorative element.
A lizard can be woven using several techniques:
- volumetric;
- flat brick;
- mosaic;
- parallel.
Each of the schemes creates its own, original drawing.
Volumetric
An original craft - a three-dimensional lizard made of beads. The diagram allows you to make a realistic figurine without filler.
Weaving algorithm:
- We string 3 main beads onto a fishing line and place them in the center.
- Hold the first bead in the row and pass the end of the fishing line through the remaining 2 beads. We tighten the line.
- We collect 3 more beads. Similarly, we pass the fishing line through the last 2 beads, holding the first one.
- Using this principle we weave the following rows.
The result is a three-dimensional lizard made of beads. Beginners are advised to use ready-made patterns until they develop some skill. To get a cute beaded lizard, the weaving pattern for beginners should be as simple as possible.
A three-dimensional pattern of weaving a lizard from beads will help you quickly weave a realistic animal. Then you can try more complex options. For example, this is Ndebele lizard beadwork.
Brick flat
The brick technique is most suitable for animal figures and other irregularly shaped elements. A diagram will be useful for mastering.
Weaving algorithm:
- We string 2 beads onto a piece of fishing line.
- We pass the fishing line through both to form a loop. Gently tighten.
- We string a new bead.
- We pass the end of the bead up through the first bead.
- In this way we weave the fabric to the desired length.
The result is a neat, high-density beaded fabric.
Parallel
The parallel weaving technique is as simple as possible for beginners. Creates three-dimensional figures, including animals. Weaving algorithm.
- String 3 beads onto a fishing line. This is the basis for the first and second rows.
- Pass the end of the fishing line through the first 2 beads. Both ends of the thread should be directed towards each other. The tips must be the same size, this affects the quality of the finished fabric. Tighten on both sides.
- We string 4 more beads. We stretch the ends of the fishing line in both directions in the same way. We pass through new beads and tighten.
According to this pattern we weave the required number of rows.
Mosaic
Mosaic technique allows you to create an openwork, elastic canvas. Weaving is carried out according to a simple pattern.
Mosaic weaving rules:
- Before starting, be sure to secure the beads;
- We do weaving on one thread;
- be sure to follow the order of weaving the first and second rows;
- To make weaving easier, we use an even number of beads.
It is important to maintain the same density of the fabric. This will prevent the finished weave from “creeping”.
How to weave a simple lizard from beads
Materials to create a simple lizard:
- green beads – 2 g;
- shiny green beads – 1 g;
- beige beads – 2 g;
- 3 black beads;
- fishing line measuring 0.16 mm.
It’s interesting to weave a simple lizard together with a child with your own hands
Take 1 black and 2 beige beads and stretch the fishing line through the last 2.
Further weaving of the lizard from beads is carried out according to the following scheme:
3 rubles – 2 light green beads;
5 rub. – 3 light green;
6 and 7 r. – 4 beige and light green beads, respectively;
9r. – 1 light green, 1 black, 1 light green, 1 black, 1 light green;
10 and 11 r. – 4 beige and light green beads, respectively;
13r. – 1 light green, 1 glitter. green, 1 light green;
15 rub. – 1 light green, 2 shiny. green, 1 light green;
17r. – 1 light green, 1 glitter. green, 1 light green, 1 shiny green, 1 light green;
18 rub. – 6 beige beads.
Now you need to make the front legs: pick up 6 light green beads from both ends of the fishing line and return through the last 3 beads with the end of the fishing line, pull them up.
19-27r. – 1 light green, 1 glitter. green, 2 light green, 1 shiny green, 1 light green;
28 rub. – 6 beige beads.
At this moment you need to make the hind legs, similar to the front ones.
29 rub. – similar 19-27r.
Now you need to make a ponytail, narrowing the rows: 2p. 5, 2 rub. 4, 4 rubles each 3, 4 rubles. 2 each and the last row - 1 bead.
If you add shiny beads, the product will sparkle and shimmer effectively.
After each row, the product needs to be tightened so that the line does not sag and the lizard is tight. This beaded lizard pattern will help beginners make simple projects and move on to more complex ones.
Visual process of making a lizard
How to feed?
The lizard needs to be given food when it is in a state of activity. If there are several pets, each is fed separately. When the reptile is showing normal activity, drinking as usual, but eating little, there is no need to worry. She also has fasting days. Young lizards are fed using tweezers, while adults eat on their own from a plate. In summer, pets are fed 3 times a day, and in winter - only two. They feed on:
Master class on weaving a three-dimensional lizard from beads
Weaving of a lizard starts from the head, then the body and tail are woven, and the last are all 4 legs. The diagram below shows all the work very clearly:
On it, horizontal lines separate the rows. Each even number will be the front side, and the odd number will be the back side. Or in relation to a lizard - the back and tummy, respectively.
So, you need to take a piece of wire 3 meters long. Place 5 beads of the main color on it and place them in the center. Then pass one of the ends in the opposite direction through 2 beads so that you get a tight ring. Tighten the wire. Next next to the left segment, according to the weaving pattern, place light green, black, and again the same beads and 4 beads of the main color. Pass the right piece through the last three so that they form a circle.
In the third row, add blue beads to the color of the lizard by collecting 2 beads of this color, then 2 light green and repeat the first set, then 4 main ones. Pass the wire through them in the opposite direction. Thus, continue weaving the lizard’s head until the 7th row. According to the above diagram, it will be performed like this:
- 4th row – blue, black, blue, 3 light green, blue, black, blue and on the reverse side 6 light green;
- 5th row – 3 blue, 3 light green, 3 blue and from the tummy side 6 beads of the main color;
- 6th row – 2 blue, 6 light green, 2 blue and on the reverse side 4 beads of the main color;
- Row 7 – blue, 6 light green, blue and on the tummy light green, yellow and light green.
Next, you need to make the neck and body of the lizard. To do this, collect seven beads of light green color on one end of the wire, and on the other one light green, 2 yellow and one more of the main color. Then cross them so that the first set is on top and the second is on the bottom. Thus, then the entire body is made together with the tail according to the given weaving pattern. It is worth noting that in order for the lizard to look natural, lighter beads are complemented with dark green.
After finishing weaving the tail, tie both pieces of wire, cut off the remaining ends, and hide the knot inside the lizard. Also, so that it holds its shape well, you can stuff it with transparent cellophane. This must be done until the 22nd row, that is, before the thin tail is woven. It is also worth noting that you need to keep an eye on the wire while weaving. It should not bend or cross, as in this case it can easily break. All that remains is to attach 4 legs to the lizard.
To weave them, you will need 4 pieces of wire, each 20 cm long. They need to be threaded symmetrically on both sides: through the outer beads of 11 and 12 rows - for the front paws and through 20 and 21 - for the hind paws. Then start weaving them according to the attached diagram.
It is advisable to do this at the same time in order to immediately indicate the position of the paws. Namely:
- dial 3 light green ones on one end and 3 yellow ones on the other, pass both ends in the opposite direction;
the next 2 rows are performed in the same way, only 2 beads of the same colors in each;- in the fourth row you need to collect only 2 beads of the main color, and thread one of the ends through the previous row so that the foot bends at a right angle.
- make 2 more rows consisting of 2 beads of selected shades for the back and tummy;
- for the first finger you need to collect 4 beads on one of the segments, then thread the rest of the wire through the last 3 beads;
- make 4 more fingers in the same way, connect the wire at the end and cut off the excess.
Actually, this is how all 4 legs of a lizard weave. With the production of the latter, the weaving of the lizard also ends.
With this figurine you can decorate any flower arrangement, make a brooch or keychain out of it. It can become an original gift for acquaintances or friends. In general, how to dispose of it is up to the needlewoman herself.
If you want your own iguana, or How to sew a funny toy
I would like to share my own pattern “Iguana”.
The stuffed toy is 60 cm in length. For the iguana, prepare: green fleece (cut 25 cm wide), a 10*15 cm piece of red fabric, holofiber, plastic eyes, acrylic fabric outline green, black, a small piece of fleece of a different color (I have light green), white plastic, glue.
And we begin to cut out the parts. We can just use regular paper for the pattern.
All patterns are inserted into the master class, on A-4, so when printing, place them on the entire sheet.
I used colors and letters to mark the joining places of the parts. All details are drawn on A-4, the dimensions should not shift when printed.
All details where two pieces are written must be transferred to the fabric, turning the tracing paper over, first on one side, then on the other for symmetrical display
2. We sew the legs together in pairs. First the feet, then the legs.
Colors and letters indicate where to sew which paw to the body.
3. Belly. I advise you to orient the part along the legs.
After the entire body is sewn, we turn it inside out and stuff it with holofiber
You can start making a “face”. In the picture the details are clearly arranged as they should be.
Then we sew the “face” of the side part to the body, sew on the forehead part (1 part), the lower jaw (1 part).
We fill our heads. Insert eyes.
4) Mouth (picture just above): sew the parts together at the base. We sew it to the head with a hidden seam, leaving 2cm. We fill it up and sew it up completely.
Next we decorate. We paint with contour paints - we imitate scales, paint the eyes (it turns out well - right at the seams). If necessary, we tighten the muzzle with threads from above and below so that it is not so round.
To intimidate, we'll make teeth. We stick small plates out of plastic and put them in the microwave (if you don’t have an oven) for 2 minutes at minimum power. Once it dries, you can instantly insert it into the mouth with universal glue.
Source
Step-by-step weaving of a lizard according to the pattern
You will need the following list of materials:
- yellow, green, red and dark beads;
- thick cardboard with PVA glue;
- brush, wire, thread and needle and a piece of newsprint.
Cut out the base for the lizard's body from cardboard, as shown in picture number 1. Make a double tongue using red. Take a wire seven centimeters long and place a piece of glass on it. Then the main material needs to be twisted in half and two beads placed on the two ends of the main material, as shown in Figure 2 a. Take three more elements to the first tip and pull two pieces of glass through it in the opposite direction. String an additional five pieces onto the two ends, and then close them together.
Use yellow beads to weave the tail of a lizard. Take a piece twelve centimeters long and pick up the elements, and then fold the main material in half. String ten more pieces on two edges. Then string eight pieces of glass on one tip, and nine on the second. The wire must be twisted near the beads themselves, as shown in diagram No. 3.
For the paws you will need fourteen centimeters of wire and yellow beads. The front leg is woven from the toes. Then add two more beads to each end and three more to each end. One edge needs to be bent, making an angle of ninety degrees in the place where the beads are finished, and string three more things. Place one piece of glass on the opposite edge, and then thread it through three more elements on the first edge. The edges of the base material should be spread out. Make the second foot in the same way, but only by making two folds, as shown in figure number 4.
On all bead blanks for a lizard, it is necessary to trim the wire, making a tail of one and a half centimeters. These blanks need to be glued to the cardboard in those places where they are indicated by a stroke, as in diagram 1. All made elements should be placed so that they lie on the cardboard, and the part woven from beads is located near the cardboard. Make small scraps of paper with your own hands and glue them onto cardboard. They should go over the other part and go around the edges. The paper will need to completely cover the base material. Wait until the glue is completely dry.
Additional pattern for weaving lizards with beads
Take a thread one and a half meters long and string seven centimeters of yellow beads onto it. Lubricate the reptile's head with glue and wrap the thread around the wire near the lizard's tongue. The glass must be moved towards the tongue and the beaded low head of the reptile must begin to be wrapped. Place the coils tightly against each other on both sides of the cardboard base. This is shown in diagram number 6. Arrange the first tiers and press them against the paper. Then attach the remaining tiers. You need to carefully ensure that the beads are positioned as closely as possible to each other.
After four rows have been made in this way, string yellow glass pieces and two dark elements. The dark beads will be the eyes of the reptile. The location is shown in diagram 1. Next you will need to make a few more bright coils, and then collect several other bright beads. When the glue dries, cut the thread and straighten all the other elements. Now the lizard is completely ready. And you can explore other weaving options.
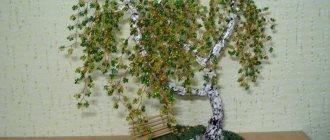
Lizard - DIY interior decoration!
Wall lizard. MK Morskay10
This is the lizard that settled on our wall in December 2012!
It all started with the fact that my colleagues gave their son a beautiful lizard, like this one!
And I was inspired to make one for myself! I traced the lizard, my friends helped, and cut out a silhouette from plywood.
Then, using napkins and PVA glue, I created volume for the lizard. It turned out like this:
Then, I waited for several days until it dried well.
The final stage
Having completed all the necessary elements, proceed to assembling the product. The legs are attached to the body (in the diagram of a beaded lizard, these places are marked with arrows). The finished product is given a wave-like shape, imitating the body of a lizard in motion. The applique is attached to the brooch blank and the result is enjoyed. The lizard beadwork is complete.
If desired, the composition can be complicated by using several harmonizing shades when making the body. It is important to ensure that the symmetry of the pattern is maintained. Now you know the beaded lizard pattern and can safely use it in your work. I wish you creative success!
Step-by-step photo lesson:
Select a green (or any other) block of plasticine from the set and prepare a stack. Also in this case, you will need the body of a ballpoint pen; we will use it to imitate the rough skin of a lizard, and below we will show exactly how.
Divide the green block into one large portion - the main one - and four small ones.
Turn a large green piece into a carrot. One side should be sharp, the other wide.
Next, use your fingers to define the relief of the lizard’s body shape. Make a depression in the form of a neck, highlighting the head, and sharpen the tail even more.
With an empty pen, start piercing the plasticine on the back, head and tail. Create rough scales to show the texture of the lizard's body.
To sculpt the hind and front legs, make four spatulas.
Make two cuts on each spatula, sharpen the toes and attach the legs to the body.
And at the last stage, be sure to design the muzzle. To do this, just cut the wide mouth with a stack, pierce the plasticine with the tip of a spatula and insert the eyes into place.
The plasticine lizard is ready, it is quite simple to do. If you wish, you can decorate the product with darker stripes or make it speckled.
Tips for weaving lizard and beads
- You should not weave a lizard from beads of the same color - it will turn out unnatural. It is better to dilute it with beads in a similar range. Moreover, regardless of what main color of the lizard is used, it is better to take several shades of beads, skillfully combining them in your work.
- For weaving, you can use strong fishing line, or you can use thin wire. But as for three-dimensional lizard figures, they should be made only of wire - then they will keep their shape well.
- If it is more comfortable and familiar to work with fishing line, then when creating three-dimensional figures you can use, for example, polyethylene. Before completing the lizard and securing all the threads, it is worth filling the figurine with polyethylene (or any other suitable material). Then it will be voluminous and can well be used as a toy.
- If you need to fasten two pieces of wire or fishing line, you should try to do it as discreetly as possible. It's best if the knot ends up inside the bead. You can also fasten the fishing line and direct the remaining ends in different directions to stretch them through the beads that are gradually strung.
- If you don’t manage to create the figure you want the first time, don’t be discouraged. And, especially, don’t give up trying to bead. Hard work will lead to success.
Sources:
- https://mimiledi.ru/rukodelie/podelki/kak-sdelat-yascheritsu-iz-bisera-master-klassy-s-foto.html
- https://domigolki.ru/zhivotnye-i-nasekomye/kak-sdelat-jashhericu-iz-bisera/
- https://handmadebase.com/lizard-of-bead-weaving-volume-f/?getoriginal_lang=translate
- https://ProPovyazki.ru/pletenie/yashcherka-iz-bisera.html
- https://artzacepka.ru/kak-sdelat-iz-melkogo-bisera-yashcheritsu/
- https://biserok.org/yashherica/
- https://tandem-psy.ru/biseropletenie/yashcherica-iz-bisera.html
Common lizard in nature
Such a reptile that lives on land is also called a “snatch”. This is an exotic pet. To ensure that keeping lizards at home does not cause any problems, you should become familiar with their natural habitat.
In the wild, the reptile prefers damp wetlands, mixed forests, conifers, steppe and forest-steppe zones. It is found in rocky, dry areas. Leads a terrestrial diurnal lifestyle, but easily climbs trees and rocky slopes.
Fast lizards do not move long distances from the territory they inhabit. They live in narrow burrows, digging them in the ground. The size of the sand lizard differs depending on the subspecies. The length with tail is 5-25 cm. Typically, males are larger and brighter in color than females.
The reptile has an interesting feature. If you grab the tail sharply, the lizard will attempt to bite or escape. The tail will remain in the hands of the offender. It will grow back soon, but will be shorter than before. This feature must be taken into account when planning to keep a reptile at home. Lizards live friendly with people. They get so used to their owner that they are not afraid to take food from his hands.
Basilisk - an amazing lizard
This reptile has a crown-shaped crest on its head. The Basilisk lizard has an amazing feature: it runs on water at a distance of 300-400 m. But only young individuals whose weight does not exceed 50 g are endowed with this gift. Scientists conducted a lot of research before understanding how it manages this. It turns out that this phenomenon is accompanied by the structure of the paws and tail, low weight and speed. For this ability, the reptile was called the Jesus Christ lizard.
The reptile is an excellent swimmer. The Basilisk lizard can stay in the water for 2 hours and is able to move on its hind legs and climb trees. This nimble and fast reptile can run 10 km in an hour.
A characteristic feature of the lizard is its omnivorous nature. It feeds on insects, plants, berries, small rodents and lizards, as well as its own young. They produce offspring four times a year and live up to 10 years in a family of one male and several females. He is awake during the day and sleeps at night. When resting, they become easy prey for mammals, birds of prey and large snakes.
Source
How to make a craft yourself
It is recommended to look at several ways to make a lizard out of paper. With the help of the presented instructions, parents or teachers will be able to conduct an activity with their child or show their own imagination.
Required materials and tools
For work, it is recommended to prepare all materials and tools at once. This will help keep the child interested in making crafts. Materials are selected in accordance with the selected type of product, but the general list includes:
- Colored paper or white office paper. With its help, you can make both an applique and a three-dimensional craft using the origami technique.
- Scissors or utility knife. Only adults use knives. Children must learn to work with scissors correctly and accurately.
- PVA glue or pencil. The type of glue is selected in accordance with the capabilities and age of the baby.
Microclimate
The animal feels normal at room temperature, but if a representative of one of the southern subspecies lives in the terrarium, then the temperature should be maintained within the range of +25 to +30 degrees during the day and from +18 to +20 degrees at night.
The temperature regime can be ensured either with a thermal mat or with an ordinary incandescent lamp with a reflector. But in this case, the lamp should be located out of reach of the animal.
Humidity should be maintained at least 75–80%, which is achieved by regularly spraying the interior of the terrarium.
To organize feeding, you need to install a food cup and drinking bowl. Over time, the lizard gets used to one place for eating and drinking.