Handmade products have always attracted fashionistas. This is not only a unique accessory filled with soul and love, but also a wonderful field for creativity. Even from simple improvised materials, which are found in almost every home, you can create a real work of art.
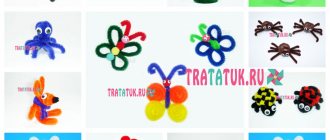
Today we will look at how to make flowers from nail polish and wire. This needlework technique is not at all expensive, it is quite exciting and simple, so that even a novice master can cope with it, and the finished result will definitely please you and will not leave others indifferent. Such flowers look very impressive, and at first glance it will be difficult to even understand what they are made of. At first glance, many people think that this is the finest work of porcelain.
special instructions
In order for the creative process to be easy, fun, and homemade flowers made from wire and nail polish to look beautiful, you need to choose the right materials.
- First of all, it is better to take nail polish a little dry. It’s easier to work with, and the flowers will turn out neat.
- The wire should be relatively soft and pliable. Don't take the thick one. A special wire for handicrafts, 0.2-0.6 mm thick, which can be purchased at specialized handicraft stores or hardware departments, is ideal. You will need it to create a frame for future flowers, so the color does not really matter. Choose the one that you like or is suitable for a specific decoration.
- But the wire cutters can be replaced with large scissors (if, of course, you don’t mind them, because during the work you need to be prepared for the fact that they may break).
- When creating flowers from nail polish and wire, it is quite possible to do without special tools such as pliers and round nose pliers. Since they are only needed to give the wire the desired shape, they can be replaced with improvised materials, such as a pencil, felt-tip pen or other frame for your future petals. In addition, if a sufficiently thin wire is used in the work, then all manipulations can be carried out manually, giving the product the desired shape.
- To fix the work done, as well as to ensure that the flowers made from nail polish and wire dry neatly, you will also need a washcloth in which you can place the finished workpiece, or a paper clip to hang it. The drying stage usually takes several hours, so to be safe, it is better to leave the workpiece in this form overnight.
- Before starting work, prepare the work surface and cover the table with paper, newspaper or unnecessary oilcloth to prevent varnish from getting on it.
- Always have wipes on hand to remove excess varnish and liquid with acetone in case you accidentally get dirty yourself.
- It is recommended to work in a well-ventilated area.
Tree
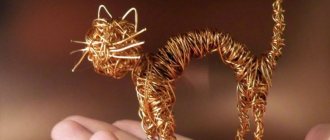
Using pliers, solid wire and beads you can create amazing jewelry. Having twisted several pieces of thick wire into a spiral trunk, we take them out into graceful branches. They can intertwine with each other, and then grow separately, giving the tree a spreading appearance.
Red fruit beads appear in the loops, oblong green bugle beads cover the strong branches with thick foliage. It is important to firmly strengthen the rhizome of the tree in a flowerpot with pebbles.
Flowers made from nail polish and wire: master class
Before you start work, think over all the necessary parts and their quantity. Draw a layout of the proposed craft. You can create not only flowers from nail polish and wire, but also butterflies, figures (hearts, stars) and so on - there is no limit to your imagination. The only condition is that the product must be small in size. If you are planning to make a voluminous item, then assemble it from several parts.
Experience shows that a separate part should be equal in diameter to a varnish brush. But it might be a little less. In this case, you can easily cover it with a layer of varnish, and the craft will be beautiful and neat.
DIY cup for pens made from pencils
Before you make a convenient and beautiful cup for stationery that will decorate your desktop, purchase the following items:
- Plastic glass;
- Eraser;
- Scissors;
- Beads;
- Uninsulated and colored copper wire.
Let's start creating a beautiful and practical craft:
- Make a hole in the glass above the bottom.
- Thread colored wire into the hole and tie it into a knot.
- Wind the wire around the glass so that it completely encircles it. When the wire reaches three cm, put a bead on it.
- Tie the new piece together with the old one in a knot, and then continue winding it around the glass.
- Make a hole at the very top of the glass, thread a wire through it and tie it in a knot. Place 2-3 beads on the tip of the knot.
- Use copper wire to form a hook for an eraser and hang it on the side of the workpiece. The glass is ready!
Progress
Cut the wire into small pieces 20-25 cm long. There should be as many of them as the parts you need. For example, in order to make five flowers for a hairpin or brooch, you will need, respectively, five segments.
We take one such piece and bend it in half, placing a pen or felt-tip pen in the middle so that the free ends of the wire hang down.
Holding the wire, we turn the handle three or four times. Do not apply too much force or twist too tightly to avoid tearing the material.
After such simple manipulations, the first petal of your future flower is already ready. Do the same procedure four more times. You will get a flower consisting of five petals. To give it volume and more naturalness, lightly press each petal in the middle with a handle, as if making a small indentation. This way you can create other variations of colors, different sizes, using handles of different diameters.
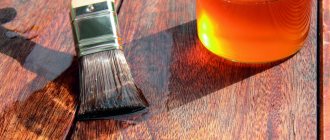
Now you can move on to the most exciting part - varnishing. We take the varnish and carefully paint the petals. It should be thick (slightly dry) and seem to hang from the brush. On the back side of the flower, carefully draw along the base of the petal and remove the varnish from the brush. It is very important that the latter completely covers the entire width of the petal.
The main, most labor-intensive part of the work is completed, and all that remains is to dry the blanks and assemble them into the final composition. Knowing how to make flowers from wire and nail polish, try to place the finished flowers close to each other, twisting the wires together. Carefully cut off the end and fold each free section inward under the last petal. From such a bouquet you can make hairpins, brooches, necklaces, rings, earrings, elastic bands or hoops. It all depends on your imagination and creativity.
flower composition
The basis for creating any composition is to wrap the wire in one turn around a pencil (pen, felt-tip pen). The ends of the wire are connected together and securely twisted together. The result is a loop - the petal of the future flower.
Make the required number of petals: the more there are, the more magnificent the flower will become. Use your fingers to shape the petals: squeeze, stretch. Each element is slightly curved at the base.
After this, the petals are painted in one of two ways:
- Pour varnish into a small container and dip the part so that a varnish bubble forms in the center. Leave the product to dry by attaching it to a paperclip or sticking it into plasticine. After dyeing and drying all the petals, the flower is collected: a bead (core) is put on a wire, the ends are bent and twisted. All the petals of the flower are attached to the middle.
- Place a brush moistened with varnish against the base of the petal and stretch the bubble over the entire surface. After drying, you can apply a layer of varnish of a different color to the same petal, but on the other side. When ready, the petals are collected into a flower in the same way.
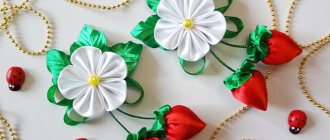
To form an original composition, you need to prepare several flowers of different shades, shapes, sizes, and with unequal cores. Take any suitable pot, make a trunk and leaves from a new piece of wire by bending it, and fix it all in the pot. If desired, wrap the wire with green woolen threads, securing them with superglue. Leaves can be made from wire spirals:
- Twist the spiral around the shaft from the handle.
- Remove the workpiece and straighten it with your fingers.
- Pinch the tip.
- Tie the ends of the wire together.
- Wrap with green woolen thread.
The base of the flower bouquet is decorated as desired with threads, paper, and beads. The composition is ready.
Letter Design Combined with String Art
Letter design is a long-known interior trend; it was introduced by Western designers. Letters, words, phrases - all these elements are quite appropriate in decor, and in combination with threads and nails they turn into stylish voluminous home decorations.
Absolutely any letters on the wall will enliven the interior! And if they form a word, for example, a meaningful “OK” - that’s even better)
For a step-by-step master class on creating such a picture, see the link, where you can download a free template with letters.
The original master class is in English, so for your convenience we offer a brief translation of the process of creating this painting.
Materials and tools are standard: blue threads, brush, hammer, scissors, nails, dotted sketch on paper, tape.
Print the templates, glue the word from A4 sheets. Place the sketch on the base and drive nails into the points on the drawing. Remove the sketch from the base.
Tie a knot on the first nail and start winding the thread around the perimeter of the pattern (letters “OK”).
Next, wind the threads around the resulting letters, gradually filling the background. You can wind the thread randomly, or you can wind it in a certain specified order. Don't forget to change the color of the threads according to the chosen color scheme!
This composition is made according to the same principle. The marine theme in letter-string design will appeal to everyone who loves the delicate color combination of blue and white)
Such a heartfelt personalized gift will definitely pleasantly surprise)
A bright accent in a delicate children's room can be given by a panel with a very important word on it!) An alternative could be a similar panel with the name of the owner of the room or other warm words)
Despite the sharp nails, the String Art style can be very gentle)
Tenderness is in hardness
How do you like such a bright greeting in the living room?)
Or a soulful picture in the hallway:
As they say “Don't worry – be happy!” String Art will help bring positivity into every home!)
Oil burner
This specimen is not the lightest, but it is the most functional; we will try to tell you detailed instructions on how to produce a useful item from wire.
We bend a circle from thick wire and solder its ends with a soldering iron. On this base we solder five equal pieces of medium-thick wire at equal distances and bend it slightly in the middle. Then we bring the ends together to one point and solder them to the base of the floor lamp, a circle made of thick wire.
From a metal plate we make a bowl and a side with an indentation of zero point five millimeters. Now, for the upper part, we make four squares of different sizes from medium-thick wire, and cut four identical pieces from the same wire.
Solder a short piece of wire at an angle to the largest square, a slightly smaller square onto it, and so on. We make a circle from the middle wire, and attach it to the last smallest square on the legs from the same wire.
We cover all parts of the lamp with silver spray paint. Then we pass thin copper wire along the entire body of the floor lamp and weave beautiful large beads into the pattern, at the same time connecting the two parts.
Historical reference
When translated from English, the word "String" means "rope", or "string", or "tension". Accordingly, String Art is thread art or. Isothread is embroidery on cardboard, that is, on a hard surface, and String Art is already an interweaving of threads on nails.
String Art is not a new creation at all, but it is very famous due to its beauty and originality!
This art came from England. Four centuries ago, English weavers used nails and thread to decorate their homes in this way. They drove nails into wooden planks and pulled threads onto them in a certain sequence. This is how openwork products for wall decoration were obtained.
Then the invented thread weaving technique was transformed and improved with the help of the English researcher Mary Bull. With the help of threads and nails, she taught children algebra and geometry, and thus the string art technique from Mary Bull appeared.
We invite you to watch a short tour of the String Art technique and a master class by Diana Kiseleva:
Animalism in String Art
Very often, using the technique of weaving from threads and nails, various animals and birds are depicted. Animalism, as a decorative trend, never goes out of fashion, so such products are always relevant.
It won’t be too difficult to make such an elegant deer yourself, especially since you will need one or two colors of thread, nails, and a contrasting base.
You can make an original picture in the form of a horse's profile using thick threads. Studs and a piece of leather will complement the image of the horse.
A stripe is black, a stripe is white – and a spectacular zebra is ready! For this you will need a white base, carnations and black threads, it looks very stylish!
These small birds of different colors can decorate the interior of a nursery!)
The elephant in many nations means wisdom, strength and prudence. A serious, big-nosed friend with tusks is a wonderful present for a serious man’s office!)
A thoughtful monkey and cute roe deer - these works were made by true masters of their craft!
“Fish looks for where it’s deeper, man looks for where it’s better” - with these words you can give a panel like this with a fish!)
The theme of Africa is still relevant and colorful. What do you think of the triptych idea?
A wolf against the backdrop of the mesmerizing Moon will not go unnoticed if it “settles”, for example, in the living room of an avid bachelor:
Basic techniques: angle, circle, circle, arc
Mastering the art of creating pictures from nails and threads starts with learning the basic principles of filling an angle and a circle. All other shapes (circle, oval, square) are derivatives.
To practice your skills, you can draw a right angle on paper (side lengths 10 and 5 centimeters). Divide the long strip into 10 equal parts of 1 centimeter each and number each of them. Divide the short strip into 10 smaller parts and also number them. This way you will prepare a mini-scheme for yourself. Next, you begin to work with the thread: lead it from one point to another (see diagram below):
After this, you can similarly practice your skills in working with a circle and then proceed to crafts using the String Art technique that are more complex.
We invite you to hone your skills by making a round panel using threads of different colors. Master class by Diônatan Bertelli.
Here's a great example of filling an arc:
Additionally, I would like to note that it is not necessary to strictly follow the rules described above for filling out corners, circles and other shapes.
String Art also allows for arbitrary winding of threads on nails.
You can draw the drawing template yourself. It's better to start with simple drawings:
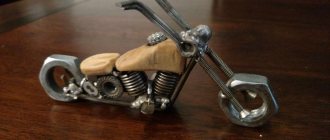
Figures and decorations
By twisting thick wire with round-nose pliers, you can create a mysterious frame for unusual bottles, jugs or vases. Also mesmerizing are the jewelry made of copper wire, which seem to hold precious stones in their paws, wrapping their hands around the wrist, finger or ear like a snake.
Such handmade jewelry is filled with pleasant energy and will always be an exclusive addition to your look.
Trees, animals, mythical creatures, abstract figures can become holders for jewelry and jewelry, keys, business cards, tools and gadgets, and making crafts from wire will become a favorite pastime for children and adults, if you do not limit your imagination and use your favorite images.