This article was a logical continuation of the previously described worklog “Steampunk Flash Drives”. After the publication of the FAQ on creating steampunk flash drives, a lot of questions were asked by those who wanted to reproduce what they saw. But it is simply physically impossible to answer everyone, which is why I decided to describe my new work and, if possible, understand it with at least some of your questions.
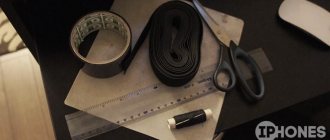
If you want to save time and nerves, then use a brass pipe from a water tap as a basis for work, because... after heating and tempering, it can be given almost any shape. Alternatively, you can bend the desired shape from a sheet of metal, but this will take more time, and the seam at the fitting site will still remain noticeable.
The simplest option is to squeeze the pipe in a vice and give it an oval shape.
This is what happened as a result
In this photo, the file served as a mandrel.
The nuts are screwed onto a long bolt, and after a couple of hours the first result is visible - a hexagonal base for a steampunk flash drive.
The shape of the future product depends only on your imagination and endurance. The main rule is to first release the material as described in the previous article. I was a little lazy, so I left the shape of the pipe untouched and simply cut it with curly cuts.
For accuracy of calculations, it is better to carry out all measurements on graph paper. First, I cut out a square from a sheet of graph paper to fit the size of the pipe, then tried it on, marked it, and only then glued the graph paper to the workpiece.
Next comes the work of drilling holes using a drill. First, it is better to take the smallest drill (in my case it is 0.8 mm), and then drill the hole to the specified diameter.
Now it's the turn of the Dremel. The first pass is done in thin circles.
The result after passing with a reinforced circle.
Having slightly corrected the unevenness, we get rid of the paper.
Personally, I found the result boring. Therefore, it was decided to add volume. At maximum speed of the Dremel, chamfering in the right places (even with sandpaper with a 413 nozzle according to the Dremel catalog) is not a difficult task. Here is the result after polishing.
While we're on the topic of polishing, let's look at another frequently asked question. Based on my experience, I can say: “the choice of polishing paste, like the polishing method, is of secondary importance.” The main thing is to take your time and prepare the surface very well. You will need a lot of time and sandpaper of various grits. In fact, polishing is the penultimate step to the finished product, and the final result will depend on its quality. Even artificial aging of the surface is best done after polishing. When I get an almost perfect surface, I carry out subsequent finishing with regular GOI paste using a Dremel and a “felt” attachment 414 or 429.
After polishing, according to the intended design, the surface of the brass/copper needs to be somehow protected. Among the methods I have personally tested, I can suggest:
DIY flash drive modding
Creating unusual cases for flash drives has long been a separate trend in modding. Many craftsmen work exclusively with flash drives and, moreover, even sell their mods through online stores and auctions.
It would seem like an ordinary compact USB drive - why exactly has it become so popular? Before the advent of flash drives, almost every PC was equipped with a floppy drive for reading and writing floppy disks. Unfortunately, floppy disks were not very convenient and significantly limited the capabilities of users.
A flash drive has become a step forward - a compact device, characterized by reliability, lightness and the ability to accommodate a large amount of memory.
A flash drive has become a constant companion for many people, because carrying disks or bulky external HDDs with you is very inconvenient and it is much easier to take a neat keychain that stores all the necessary information.
Since this thing is always at hand, many began to think about the external design and style of USB drives. Modding a flash drive does not require a huge amount of materials, a lot of money and time. There are a huge number of ways to decorate your flash drive or make it a full-fledged custom case with a unique design, and many are within the capabilities of even beginners and inexperienced modders.
Steampunk appeared relatively recently, but its popularity is only growing with each passing year. Many designers have even begun to focus exclusively on steampunk, as the demand for such unusual and original things is growing at a tremendous speed. Steampunk style occupies a special niche in flash drive modding.
Particularly popular is the direction of alternative-historical steampunk, which is based on stylization of the real historical world of the 19th - early 20th centuries.
Modder Rob Smith, also known under the nickname Back2root, became famous in the foreign modding scene precisely thanks to his high-quality work on creating custom cases for flash drives. For all his mods, he uses wood, elements from old mechanical watches for styling, and small inserts of copper and brass.
Each USB drive has an interesting design and convenient housing. Here, for example, is a stylish flash drive capable of storing up to 16 GB of information in a new case in the steampunk style:
Almost all flash drive mods from Back2root have a similar body design. First, the modder removes the flash drive from the standard case, then makes a wooden base, and all the decorative elements are attached to this base. Here are some more photos of this modder's most interesting projects:
It is worth noting that Rob Smith is also involved in modding very compact flash drives. An example of such modding was a stylish pendant in the steampunk style. Inside there is a 4 GB flash drive:
Hand steamer
Price: US $73.83 / 5453.23 rub.
An incredibly convenient, functional device that will allow you to quickly and easily iron and steam your favorite evening dress, oversized outerwear or massive curtains without removing them from the curtains. The most powerful steam flow smoothes any fabric, and it will not spoil even silk or synthetics. The device reaches a temperature of 180 degrees in a matter of seconds. There is a nozzle for delicate ironing.
Making a flash drive in Steampunk style is easy!
This article was a logical continuation of the previously described worklog “Steampunk Flash Drives”. After the publication of the FAQ on creating steampunk flash drives, a lot of questions were asked by those who wanted to reproduce what they saw. But it is simply physically impossible to answer everyone, which is why I decided to describe my new work and, if possible, understand it with at least some of your questions.
Basics or a few words about design
If you want to save time and nerves, then use a brass pipe from a water tap as a basis for work, because... after heating and tempering, it can be given almost any shape. Alternatively, you can bend the desired shape from a sheet of metal, but this will take more time, and the seam at the fitting site will still remain noticeable.
- The simplest option is to squeeze the pipe in a vice and give it an oval shape.
- This is what happened as a result
- In this photo, the file served as a mandrel.
- The nuts are screwed onto a long bolt, and after a couple of hours the first result is visible - a hexagonal base for a steampunk flash drive.
The shape of the future product depends only on your imagination and endurance. The main rule is to first release the material as described in the previous article. I was a little lazy, so I left the shape of the pipe untouched and simply cut it with curly cuts.
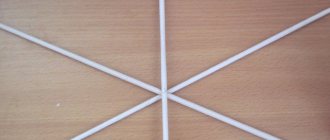
For accuracy of calculations, it is better to carry out all measurements on graph paper. First, I cut out a square from a sheet of graph paper to fit the size of the pipe, then tried it on, marked it, and only then glued the graph paper to the workpiece.
Next comes the work of drilling holes using a drill. First, it is better to take the smallest drill (in my case it is 0.8 mm), and then drill the hole to the specified diameter.
Now it's the turn of the Dremel. The first pass is done in thin circles.
- The result after passing with a reinforced circle.
- Having slightly corrected the unevenness, we get rid of the paper.
Polishing and glossing
Personally, I found the result boring. Therefore, it was decided to add volume. At maximum speed of the Dremel, chamfering in the right places (even with sandpaper with a 413 nozzle according to the Dremel catalog) is not a difficult task. Here is the result after polishing.
While we're on the topic of polishing, let's look at another frequently asked question. Based on my experience, I can say: “the choice of polishing paste, like the polishing method, is of secondary importance.” The main thing is to take your time and prepare the surface very well. You will need a lot of time and sandpaper of various grits.
In fact, polishing is the penultimate step to the finished product, and the final result will depend on its quality. Even artificial aging of the surface is best done after polishing.
When I get an almost perfect surface, I carry out subsequent finishing with regular GOI paste using a Dremel and a “felt” attachment 414 or 429.
After polishing, according to the intended design, the surface of the brass/copper needs to be somehow protected. Among the methods I have personally tested, I can suggest:
Varnishing
Varnishing with a quick-drying transparent insulating varnish to protect printed circuit boards PLASTIK 70. At the time of writing, the price list of a local store selling radio products was just over 500 rubles for a 400 ml aerosol can.
Some features of working with this varnish:
- It is better to degrease the surface with acetone;
- Before applying the first layer of varnish, it is best to warm up the part a little; I left it on the windowsill (in the sun). A battery will also do;
- when spraying, you should not make hasty conclusions: until the varnish has completely dried, the surface will be slightly cloudy;
- It is better to clean up spills immediately. For example, traces after touching the side surface of the eye of a needle are practically invisible, but the excess part of the varnish “goes away” remarkably.
Aging
Aging of the material is carried out by heating it on a gas burner/stove. The surface becomes distinctly yellow, while hands do not leave marks as a protective film is formed. However, over time, the part darkens a little, but without leaving streaks. This method may well be suitable for parts that do not have soldering.
Passivation
Passivation or a chemical method of protection is good for everyone, with the exception of the chemicals used - two types of acids and chromium. Details can be found online, but I can only say that the color of the metal becomes more pronounced. Looking ahead a little, in the final photos the difference in the color of polished and passivated metal will be noticeable.
Video intercom
Price: from US $29.19 / 2156.03 rub.
A very useful thing to improve the security of your home. With this video intercom, you will always see who is approaching the front door, you can answer guests and hear what they are talking about. Moreover, the device has a built-in camera that records sound so you can see if anyone approached the gate while you were away or asleep. The camera records in excellent quality even in the dark. The model is powered by a 2600 mAh battery, which needs to be charged only once a month.
Set of magnetic bits with screwdriver
Price: from US $19.26 / 1422.58 rub.
The set includes over 120 magnetic bits, as well as an extension cord and a miniature screwdriver. The tools are ideal for repairing electronics such as computers, phones, tablets, smart watches, set-top boxes, and so on. All positions are made of high-strength steel, the density of which reaches HRC62. The package includes a convenient, durable case with compartments for each tool.
Friends, many other excellent products can be bought inexpensively on AliExpress, you will find them on the ALIEXPRESSO SHOP in Telegram, as well as in the VKontakte , Odnoklassniki and Facebook . Subscribe, there are always new and inexpensive offers!
Orthopedic pillow
Price: US $11.43 / 844.24 rub.
With this orthopedic pillow you will learn what a healthy, comfortable sleep with complete relaxation is. You will forget about pain in your neck and spine, you will gain vigor and a great mood for every day. The product is made of PVC foam, which has a memory effect, i.e. the pillow seems to remember your dimensions and adapts to you. The outer fabric is a mixture of polyester and cotton, pleasant to the touch.