What to do with a child
Newsletter closed
Upon closing, subscribers were transferred to the “Let's Maintain Good Relationships in the Family” mailing list, which we recommend you subscribe to.
You can find mailings on similar topics in the Mailing Directory.
| May 2011 | ||||||
| 1 | ||||||
| 2 | 3 | 4 | 5 | 6 | 7 | 8 |
| 10 | 11 | 12 | 13 | 14 | 15 | |
| 17 | 18 | 19 | 20 | 21 | 22 | |
| 24 | 25 | 26 | 27 | 28 | 29 | |
| 31 | ||||||
Author Masha
Statistics
1,042 subscribers -1 per week
- Issues
- Statistics
All episodes
Preview:
How to make an hourglass from plastic bottles
An hourglass can be useful in many cases when you need to count a small interval of time: during a short speech, quick meditation, holding your breath, a short telephone conversation, a break while studying with a child, and so on. These watches are fun to make with your own hands, they are easy to make, and they can be used in a variety of situations.
Find two clean plastic bottles of the same size and shape. The lower the bottles are, the more stable your watch will be. It is better to use pear-shaped bottles, for example, from Orange lemonade. Remove all labels from bottles. Remove stickers from bottles using soap and water. After this, wipe the bottles with rubbing alcohol.
Remove the caps from the bottles, glue them together and wait for the glue to dry. Apply glue along the edges of the first cover. Be careful not to get any glue in the center of the lid, otherwise you won't be able to make a hole in it. After this, press the second lid onto it. Make sure that the lids are tightly sealed in flat areas. As a result, only the inner surfaces of the covers will remain visible.
Use a strong glue such as superglue or epoxy glue. Regular paper glue or hot glue glue is not strong enough.
Make a hole in the center of the lids glued together. This can be done using an electric drill or a nail and hammer. Experiment with hole diameter. The larger the hole, the faster the sand will pour out through it. With a smaller hole diameter, sand will fall out more slowly.
If you are a child, ask an adult to help you make the hole.
Some lids have a plastic disc inside. In this case, making a hole will be more difficult. Poke the disc with a screwdriver before drilling the hole.
Place the cap on the first bottle and screw it on as you normally would. The only difference is that there is a second cap glued to the top of this cap - ignore that for now.
Make sure the sand you use is dry. If you take wet sand, it will get stuck in the neck of the bottle. Even if you purchased sand in a store, it is better to pour it onto a baking sheet and leave it in the sun for one hour.
Try using colored sand. It can be purchased at a craft store or children's supply store.
Add some fine glitter to the sand to give it a more colorful look. Simple sand with gold glitter will look quite impressive. You can also use white sand and rainbow glitter.
Take the second bottle and pour sand into it. If you don't care how long it takes for your watch to lose sand, fill the bottle two-thirds full. If you want your clock to count down a specific time interval, use a stopwatch when pouring sand. For example:
If you want the hourglass to count down exactly 1 minute, pour sand into the bottle for 1 minute.
Screw the empty bottle onto the sand bottle. Place the bottle of sand on the table. Take an empty bottle and turn it upside down. Align the lid with the neck of the sand bottle. Screw the cap onto the sand bottle tightly.
Try the hourglass. Turn them over so that the bottle with sand is on top. After this, the sand will begin to pour into the bottom bottle. If you want to know what time interval the hourglass is counting, start the stopwatch and stop it as soon as all the sand has poured into the bottom bottle.
Be careful when handling the hourglass. Remember that you have attached the covers with glue, and if not handled carefully they may come off each other. Take the hourglass by the narrow place (neck).
If any changes are necessary, make them after all the sand has been poured into the bottom bottle. Place the bottle of sand on the table and unscrew the caps. If the sand does not flow smoothly enough, enlarge the hole. If the bottom bottle takes too long to fill, reduce the amount of sand. If the sand pours out too quickly, add a little sand. After the necessary modifications, reassemble the watch and screw the caps on the bottles.
Wrap the junction of the bottles with tape. Once you have adjusted the time interval, secure the bottles together more securely. Take some adhesive tape (tape) and wrap it tightly around the joint. Start at the neck of the bottom bottle, work your way through the joint, and finish at the neck of the top bottle. For greater security, apply several layers of tape.
Use an hourglass. Place them on a flat surface so that the empty bottle is at the bottom. After a certain time, all the sand will be poured into the bottom bottle. If you want to count down a given time interval again, turn the watch over.
Improvement of the hourglass
Draw two large squares on a piece of cardboard. The side length of the squares should be approximately 2.5 centimeters greater than the diameter of the bottom of the bottle. Use a ruler to ensure the squares are even.
Cut squares from cardboard using scissors or a cutting knife. If you are a child, ask an adult to help you.
Find four wooden rods that are the same height as your hourglass. If the pins are longer, cut them off. If you don't have similar rods on hand, glue three wooden skewers together and you will get one rod of the required thickness. For four rods you will need 12 skewers.
Paint the cardboard and rods and wait for the paint to dry. Use acrylic or spray paint. You can use one or several different colored paints. When painting, be sure to not miss the edges of the cardboard squares.
Exercise stress
In order to lose weight with an hourglass figure, physical activity must be balanced. This could be daily jogging, swimming, Pilates, yoga, training in the gym or at home. The main thing is to maintain muscle tone, so any physical activity should be regular, especially if you are on a diet.
But it should be remembered that in most cases the extra centimeters are distributed evenly, and girls with such a figure need to do workouts for all muscle groups. There is no need to focus on anything specific (unless that area has suffered the most, of course). Try to fit exercises for all muscle groups into one workout. Such a complex is called circular.
Circuit training is a set of exercises that are done several times in one approach. Its advantages are speed and lack of monotony. Within the framework of such training, there is practically no place for rest, and exercises quickly replace each other. Most often, 5-6 exercises are performed. Also, this type of training effectively burns calories. The result will be 40% better than if it were classic training in the gym.
With an hourglass figure, you can often encounter a problem associated with the development of cellulite. Therefore, in addition to sports activities, do not forget to do additional anti-cellulite procedures. This could be a bath, massage for problem areas, various masks and wraps.
Remember that the first signs of cellulite appear on the legs.
On the topic: methodological developments, presentations and notes
Interesting crafts made from waste material.
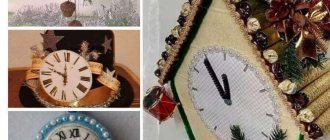
Presentation of the Master Class “Crafts from plastic bottles “BUTTERFLIES”” Various decorations in the form of butterflies are now sold in stores. Bouquets are decorated with butterflies on wire if the wire is standing up.
an environmental action carried out in a preschool educational institution in order to preserve the environment.
Photographic material depicting crafts made from plastic bottles painted with acrylic paints is presented.
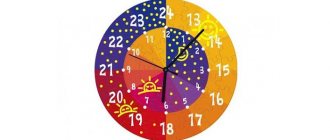
Every month children draw a month in the form of a man of approximately the same height. By the end of the year, everyone’s creative folder will have 12 months that make up the annual cycle. To some of them the child will develop an o.
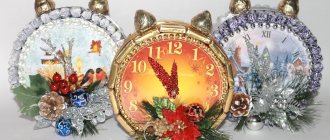
Christmas tree made of plastic bottles An indispensable attribute of the New Year holidays is a fluffy Christmas tree, but it does not necessarily have to be natural. Christmas trees made from plastic bottles look very unusual.
Summary of the lesson in the graduate group “How to make an hourglass and a water clock” I love hourglasses. Even if they are inaccurate... But they are pleasing to the eye, And time can flow backwards