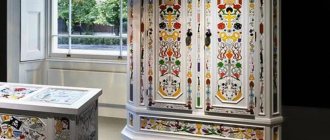
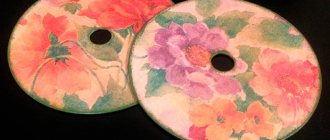
How to decorate a photo frame and make it unique - use our master class “Decoupage in Shabby Chic Style for Beginners” or “Decoupage Photo Frames Using the Mixed Media Technique.” For those who do not know what the decoupage technique is, it is the decoration of objects of various sizes using paper, napkins, fabric, and so on. Decoupage also uses: acrylic paints, sponges, brushes, PVA glue and varnish.
- If you have ever tried to create using this technique, then you know how you can turn an ordinary bottle or jar into an exquisite decorative item.
- Products coated with varnish are not afraid of moisture, they are durable and will delight the eye with their original decor for many years.
Frame Painting + artificial aging (flat surface patina)
- We do not prime the frame with anything, or we apply one thin layer of primer and do not sand it . This painting will be slightly aged, and I need a surface with the texture of untreated wood so that the patina composition can be retained in it.
- Paint the frame in the desired color (1-2 layers). I chose the color from the very motif - it’s milky white and here and there, although it’s not visible, there are light yellow stripes (about uneven painting of the surface, see here, how to evenly apply primer, paint, varnish - here).
- a mixture of brown paint and a drop of black with water (the shade can be changed, make it more brown or more black, or yellowish-brown; you can make it more or less dark; the saturation will depend on the amount of water). And we apply this dark water to the frame and immediately wash it with a dry or slightly damp cloth . If the surface of the wood is uneven, you will get this texture:
4. Cover with matte varnish in 2 layers.
We get a stylish picture, which I already showed in the previous master class:
This is interesting: Lilac curtains in the interior: romantic options (25 photos)
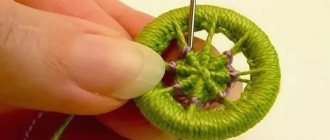
Thread selection and hook size
An important issue when crocheting napkins for beginners is the choice of yarn and tool to start working with.
When choosing yarn for needlework, you need to remember that the thicker the thread, the denser the finished product will be. The most popular threads for knitting accessories are cotton or silk.
An important condition for obtaining a high-quality result is the choice of the right hook. For knitting thin accessories, metal utensils with or without a plastic handle are well suited. When purchasing a tool, you should pay attention to its head: it should be smooth and without protrusions.
Hook size by yarn type
To determine the appropriate thickness of the hook, you should pull the selected thread into the recess under the head of the tool. A correctly selected thread should fill the entire opening without going beyond the edges.
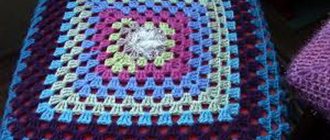
Combinations of hook and yarn sizes are suitable for knitting napkins:
- size 1 – 2 mm. for thread 50 g / 800 m;
- 2 – 2.5 mm. for thread 50 g / 160 m;
- 3 – 4 mm. for thread 50 g / 100 m.
Frame Faux abrasions plus dry brush aging.
Here I have chosen a marine motif, there are “antique nautical things” on the chest of drawers, so the frame should match the motif. Our motif determines the style of the frame , so decoupage of a painting always takes less time than decorating the frame for this painting. So, here is the picture itself (there was no frame yet):
There were two options - abrasions on a candle or “on a wash”, but I chose abrasions on a wash, because in our motif the abrasions are more reminiscent of “o ))))))
Let's try to repeat this aging on the frame.
- We paint the frame brown (you can prime it, you don’t have to prime it, that’s fine). Not even brown, but as brown-earthy as in the motif. Let it dry and you can varnish it (I didn’t cover it).
- Mix blue, as in the motif (keep in mind that acrylic darkens slightly when it dries), paint one side with one layer.
After a few minutes, when the paint has dried, we begin to wash with a slightly damp cloth in those places where there should be abrasions . If you erased more than necessary, no big deal, you can re-touch it. If you have not yet watched the video on the box with abrasions on the launder, watch it here.
It turns out something like this:
- When all sides are ready, we take artistic bristles with white paint and, using the dry brush technique, we go over the entire surface, whitening it quite strongly .
Working with a dry brush is as follows:
- Take a small amount of paint on the brush;
- Wipe off almost all the paint on a napkin so that the brush is almost dry;
- We sweep over the surface - and the remaining paint clings to surface unevenness or simply leaves intermittent stripes, as if dusting the surface. We always work from the edge of the workpiece, without leaving clear brush marks.
Here on the frame I poked it further with a brush, leaving white spots. It turned out very picturesque