House on chicken legs out of a box
This is the simplest solution. The assembly sequence is as follows:
- Choose a box of the right size.
- Cover it with white paper.
- Draw the logs.
- Mark the windows and door. They can be made using the appliqué technique.
- Make a roof from the corner part of a cardboard container. Can be stationary or removable.
- Make chicken legs and attach them to the hut.
In a similar way, it is possible to create an “ice hut” craft. You just need to remove the chicken legs and use white and blue paint to draw frosty patterns and icicles.
It is also appropriate to decorate the building with carved paper snowflakes.
Stitched house
Sewing lovers can make their own version of the hut. Making it with your own hands using a thread and a needle is simple, especially since for such work you only need scraps of fabric. Even a child can make a sewn hut. In addition to the sewn house, you can crochet Baba Yaga; for this you will need a hook, a pattern and threads.
Yaga's home
By inviting your child to make a “Baba Yaga’s hut” craft, you will keep him busy for a long time. After all, during the manufacturing process you can tell interesting stories about it.
Fairy tales about a mischievous and treacherous old woman with magical powers have always been very popular among children.
However, it is not only the heroine who is entertaining. The house where she lives is very colorful.
It stands, according to legend, on real chicken (chicken) legs. He is also an animate object and can carry out various orders.
Today there are many exhibitions dedicated to this topic. Theatrical productions on such themes are also not uncommon.
Stitched hut
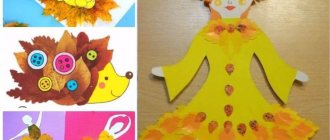
A hut is not necessarily Baba Yaga’s home. You can make a rather cute “Zayushka’s hut” craft with your own hands using multi-colored woven scraps and thread and a needle.
Such impromptu can be done not only by an adult, but also by a child.
The house is a combination of natural materials and clothespins.
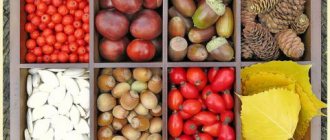
Required:
- dry moss;
- any bumps;
- dried and ironed leaves;
- berries (rowan, rose hip, hawthorn);
- clothespins (made of wood).
Buy glue, preferably liquid nails.
Progress:
- Take apart the clothespins and form them into a hut. Glue is suitable as a fixing material.
- Place the house on a cardboard base. Cover the surface of the base with moss. Place it on the roof of the building. For decoration, add leaves and berries.
- Paint the cones in a pale blue tone - these will be blue spruce trees.
- Make residents. Here you can use plasticine, foam plastic, twigs, pine cones.
House on chicken legs out of a box
This is the simplest solution. The assembly sequence is as follows:
- Choose a box of the right size.
- Cover it with white paper.
- Draw the logs.
- Mark the windows and door. They can be made using the appliqué technique.
- Make a roof from the corner part of a cardboard container. Can be stationary or removable.
- Make chicken legs and attach them to the hut.
In a similar way, it is possible to create an “ice hut” craft. You just need to remove the chicken legs and use white and blue paint to draw frosty patterns and icicles.
Pumpkin house
Here's a quick guide:
- We decide on the design.
- Prepare the pumpkin by removing the seeds and pulp.
- We mark with a marker the places for the windows and doors.
- Carefully cut out the parts with a knife. For greater effect, you can use curly nozzles.
- We make a roof from half a zucchini. We install a chimney made of fir cones. Decorate with glitter and dried berries.
- We are preparing the installation. We place the house on zucchini cut into rings and decorate with leaves, dried flowers and herbs.
To summarize, we will answer the question of how to make a craft hut. All you need is a developed imagination and perseverance. Nothing else. No expensive materials or special skills.
paper and wood options
You can make original and beautiful crafts from natural materials. Children love to take part in this kind of work. They make various decorations, toys and souvenirs, little animals and people. In today's article we will make Baba Yaga's hut with our own hands. We hope that this idea will interest not only children, but also adults who will also want to participate in the process of creating this craft with their children.
For work you will need the following tools and materials:
- Colored cardboard;
- Stationery glue;
- Super glue;
- Bark of tree;
- Tree branches;
- Cones;
- Plasticine;
- A piece of fabric;
- Scissors;
- Paper;
- Markers;
- Threads;
- Pine branches;
- Cardboard box.
When everything you need is prepared, you can start working.
First, let's take cardboard, which will become the basis for the future craft. Glue the yellowed leaves onto the cardboard. Pay attention to the photo.
Now let's start building a wooden house. To do this, take branches of the same length and thickness and use glue to make a house out of them. The glue must be allowed to dry and set.
Next, you need to cut out the roof from paper. Colored cardboard is also suitable for these purposes. Fold the cardboard in half. In order for the roof to hold, you must first attach the base and then glue the roof onto it. The base in our case was a cardboard box of plasticine.
The roof needs to be decorated. To do this, we will use dried tree bark. We will glue it to the cardboard roof on both sides.
As you know, Baba Yaga's hut is on legs. In order to make them, we will make two holes in the base of the house so that two branches can be firmly fixed in them. To make the hut more stable, take thicker branches.
We will make a stupa from a small log, onto which we will glue Baba Yaga’s cone-torso onto plasticine. We will make a face out of plasticine, tie a scarf on our head, which we will make from a piece of fabric prepared in advance. Let's take thin twigs and make hands from them, also fixing them with plasticine to Baba Yaga's body.
For Baba Yaga you also need to make a broom. Let's take very small branches and tie them together with threads. Then we attach them to the branch-base of the broom. Let's attach it to Baba Yaga's hands with threads.
Now let's start making the stairs. To do this, take two long branches and 4 short ones, which we will fasten together with threads.
For decoration, we will make a Christmas tree, which will be located near the hut. Take small pine branches and tie them together with threads. To fix the Christmas tree, you need to insert a twig into its top and attach plasticine to the base.
Let's make an owl. To do this, take a small chic and turn it upside down. We will make the owl's wings from the leaves, and we will make the eyes and beak from plasticine. We'll put the owl on a branch and decorate it. In our example, physalis flowers are used for decoration.
Now the composition needs to be put together. Let's take our base with leaves and install our hut on plasticine. We cut out a window and a door from colored paper, which we attach with glue. Next to the hut we will install a branch with an owl. Let's attach the ladder. Near the hut we will also install a Christmas tree and a stupa with Baba Yaga.
You can imagine many options for creating Baba Yaga's hut. You can make an applique, a massive craft, or even a whole hut that can easily accommodate a child.
It is very important to take part in creating such crafts with your child, then he will feel family help, love and support. It must also be said that such joint work brings parents and children very close.
It would also be a good idea to simultaneously study fairy tales with Baba Yaga and create similar crafts, then the child will have a better idea of what they read to him or what he saw in cartoons.
As you have already seen, to create such an original and very “live” craft, you did not need to purchase a lot of materials for the work. All that was used were natural materials that can be collected in the garden, local area or park, and threads, scissors and glue are always available at home.
The main thing is the desire to create something with your own hands, a creative mood, good company and quite a bit of free time.
I would like to end this article with a useful video collection in which we will present some more interesting ideas for creating Baba Yaga’s hut. We hope you will like some of the options and want to repeat it with your child. Please take a few minutes of your time to watch the video on this topic.
Master classes
A do-it-yourself hut on chicken legs will be a beautiful addition to the interior or perfect for a child’s kindergarten craft. To prevent the creation process from turning into a routine, you need to approach this matter with enthusiasm and faith in your own efforts.
For newbies
A hut on chicken legs is not a simple craft for all people. For beginners, creating such an item with your own hands sometimes turns into an impossible task. The simplest possible master class will allow you to make it quickly but beautifully. This option is suitable for those who urgently need such a craft. For example, a child in kindergarten.
To create you will need:
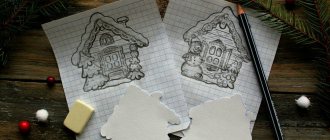
- Sketches of a wooden wall, windows, doors, roof. They can be found on the Internet and printed in the desired size. On the Internet you can choose a picture to suit every taste. For example, the walls of a house are made of logs, the roof is made of spruce branches or tiles. It is also worth printing out a background image to decorate the chicken legs.
- Paper box – suitable for many products (tea, cocoa).
- Cardboard for the roof. You can cut up an unnecessary paper box.
- Landscape sheet or just thick paper (for legs).
- Glue or double-sided tape.
- Scissors.
Step-by-step instruction:
- Sketches of windows, doors, walls and roofs are printed on plain paper.
- Cut out all items from the templates.
- Make a roof from cardboard or pieces of thick paper.
- Attach the roof to the paper box.
- Paste sketches of the walls onto 4 sides of the container, then onto the roof.
- The house is complemented with windows and a door.
- 2 tubes for legs are rolled out of paper and fixed. They must be of such a size that the hut can stand on them stably.
- Attach the tubes to the bottom of the hut using glue or tape.
- Glue a pattern of chicken legs onto the legs.
The hut will turn out even more beautiful if you are not lazy and put it on some kind of foundation. It could be a clearing made of cardboard. You can also supplement it with printed templates of mushrooms or trees.
From a paper box
The simplest version of a do-it-yourself hut on chicken legs is made from an ordinary paper box. Containers for crafts can be of any size - it all depends on the person’s preferences. Don't just take boxes of dairy products.
To create you will need:
- Paper box – 1 pc.
- Cardboard.
- Scissors.
- Plasticine.
- Toothpicks or skewers for decorating the roof (you can come up with another option: twigs, moss).
- PVA glue or any other glue that has a liquid consistency. You can also take a regular glue stick.
- White paper.
- Paint brush.
- Gouache or watercolor paints.
- 2 wooden twigs that look like chicken legs.
Hut on chicken legs made of natural material - step by step instructions.
Craft diagram:
- Blanks for the roof are cut out of cardboard: 4 triangles.
- Glue them together and secure them to a paper box. You should not use tape, as it will interfere with further work.
- The box is covered with white paper and allowed to dry a little from the glue.
- They paint the walls in the form of logs, simultaneously finishing the windows and doors.
- Attach the legs to the hut using plasticine.
- Toothpicks or skewers are glued to the roof (depending on the size of the roof).
The hut can be placed on a pedestal or a homemade moss lawn. If you can’t find twigs, you can make chicken feet from plasticine, just choose the right color. In this case, legs made of this material are attached to the paper tubes at the bottom.
From pseudo-tree
A do-it-yourself hut on chicken legs looks very impressive if it is made of wood. But not everyone has the opportunity to process the blocks or find suitable sticks. In such a situation, a little trick comes to the rescue: make a hut from pseudo wood.
To create a craft you need:
- Self-adhesive paper, stylized as wood.
- Twigs or straw.
- Glue or double-sided tape.
- Paints and a brush for drawing (can be replaced with colored pencils or felt-tip pens).
- Album sheets.
- Whatman.
- Scissors.
- Cotton wool.
- 2 hut foot sticks.
Creation scheme:
- A square is made from whatman paper - the basis of the hut and the roof.
- Connect the parts together in any convenient way.
- Self-adhesive paper is glued to album sheets on one side.
- Cut out strips of glued paper of such a size that they can be conveniently rolled into a tube. These will be log blanks.
- The resulting pseudo-logs are attached to the house on all sides so that there is room for windows and doors. To do this, some tubes are shortened.
- Circles are cut out of self-adhesive paper to fit the diameter of the hole in the tubes.
- Circles are glued onto small pieces of cotton wool and inserted into the hole of the logs. This will close the voids in them.
- Windows and a door are painted on the walls of the house.
- The roof is decorated with straw or twigs.
- They attach the legs to the hut.
Working time depends on the size of the craft. The larger the size of the house, the longer the process of creating the craft will be.
A little advice when making tubes: you can take a simple pencil, put it on a sheet and roll it up. The remaining tip of the paper is greased with glue and the slate tool is removed - a smooth and beautiful tube is obtained.
Original
You can make a house on chicken legs from a wide variety of materials. This master class is suitable for people who have the time and opportunity to collect the necessary parts. But the painstaking process of creating crafts will delight you with its excellent result.
For creativity you will need:
- Moss (slightly dried).
- Cones.
- Toothpick.
- Tree branches.
- Conifer needles.
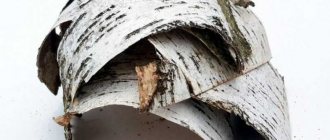
- Thin bark or birch bark.
- Brown threads.
- Wire.
- Paper box or thick Whatman paper.
- Glue (you can take it hot).
- Window and door templates.
- Paints and brush for painting.
- Scissors.
Process of creation:
- A hut blank and a roof are cut out of whatman paper.
- Holes are cut out in the hut for windows and a door.
- Paste templates of windows and doors from the inside of the house.
- 2 legs are formed from wire and secured to the bottom of the hut in any convenient way.
- Make 2 tubes of paper with a length commensurate with the wire.
- Place the tubes on the wire, masking it. Paint the paper to match the chicken legs.
- Connect the hut and the roof.
- The roof is smeared with glue and bark or birch bark is fixed on it.
- Tree branches are used to line the outer walls of the house, leaving a small gap between the sticks.
- Coat the holes between the branches with glue and apply moss to it. You can help with a toothpick.
- A ladder is made from the remaining branches, tying everything with brown thread.
- Attach a ladder to the hut.
- Conifer needles are sprinkled on the roof of the house. The scales are separated from the cones and secured to the legs of the hut.
This master class is highly complex due to the large number of materials used. But the result is very unusual and beautiful. A little advice: you need to dry the moss. If you use it freshly picked, then after some time it will dry out, and bald spots may appear on the craft. It will not decorate the house.
Made of fabric (option 1)
An original and fairly simple way to make a craft is to use fabric. Almost every home has scraps of material or a wardrobe item that you wouldn’t mind using to create a house. This could be a T-shirt, sweater or any clothing made from natural fabrics, not synthetics.
If you don’t have anything suitable at hand, you can purchase a piece of material in the desired color at the store. The cost of fabric is calculated in meters. But it is not necessary to buy such a volume; sellers can cut off 20 or 30 cm, as much as the buyer wishes.
Necessary materials:
- Paper box.
- Album sheet.
- Scissors.
- Glue.
- Fabric (burlap works great).
- Sewing needle.
- Twigs or any other material for the legs.
- Threads to match the color of the fabric + jute or sisal.
- Buttons for windows.
Process of creation:
- The roof is made from paper.
- Attach the roof to the house.
- Pieces of fabric are cut out to line the walls of the hut and its roof.
- Buttons are used to form windows and a door. Sew to the blanks.
- Using glue, attach the fabric to the house.
- Attach the legs.
- They are wrapped with jute or sisal thread.
It is not necessary to overcast fabric pieces. If PVA glue is replaced with hot glue, the threads will stick firmly to the hut.
Made of fabric (option 2)
For the craft you need the following materials:
- Fabric for the hut.
- Needle and thread for sewing.
- Wire for legs.
- Cotton wool or padding polyester.
Process of creation:
- 5 squares are cut out of fabric.
- The edge of each workpiece is overcast.
- Windows and doors are embroidered on the walls of the house.
- Sew all the pieces together, leaving a small hole for stuffing.
- They stuff the hut and sew up the hole in the fabric.
- They prepare the roof and repeat the same as with the walls of the house.
- Connect the roof and the house by sewing the 2 parts to each other.
- The legs are made from wire.
- They are attached to the bottom of the hut.
- Wrap the threads around the wire.
The hut will turn out soft, beautiful and unusual. You can make legs out of fabric and also stuff them with cotton wool. But then, in order for the hut to stand firmly, you need to pour pebbles at the base of the legs and insert a wire.
From toothpicks
Making a hut out of wood is very difficult. Not everyone has the opportunity to cut and select planks of the same size. But in almost every apartment there are toothpicks. They will help you make an excellent craft, even if you don’t have good wood at hand.
Necessary materials:
- Paper box.
- Glue or double-sided tape.
- Paints and brush for painting.
- Paper for legs.
Process of creation:
- A hut is made from one part of the box, and a roof from the other.
- Connect all the parts using glue or double-sided tape.
- Attach toothpicks to the walls and roof of the house in a similar way.
- Paint the walls and roof of the crafts.
- Draw windows and doors.
- Tubes are made from paper and attached to the bottom of the house.
- Color the legs.
If toothpicks are missing, you can replace them with skewers.
From the vine
An unusual version of the craft can be made from wicker.
To create you will need:
- Vine branches. They should be collected in advance, cut to the required length and allowed to dry for 1-2 days.
- Paper box.
- The paper is white.
- Paints and brush for painting.
- Paints.
- Toothpicks.
- Hot glue (thin stick).
- Cotton wool.
Algorithm of actions:
- The vine branches are cut to the required length.
- A hut blank is made from a paper box.
- The vine branches are secured with hot glue to the walls and roof of the house. You need to imitate log masonry.
- Using a toothpick, cotton wool is pushed into the holes between the branches.
- They make legs from twigs and attach them to the bottom of the hut.
- They make windows and doors out of paper and paint them.
- Glue the remaining elements to the craft.
The vine grows almost anywhere. Its shoots are flexible and this provides a good opportunity to work with them. Even with ordinary scissors you can form the desired size of sticks.
From matchboxes
Creating crafts from matchboxes will take a minimum of time. Even if you don’t have the required amount of such material on hand, it can be easily purchased at any store. The low cost of such a product is a big plus in the creative process.
For the craft you will need:
- Paints and brush for painting.
- Scissors.
- Twigs or dry grass.
- Matchboxes (the quantity depends on the size of the craft).
- The cardboard is thick.
- Glue.
- Toothpicks.
- Paper.
Process of creation:
- 2 squares are cut out of cardboard: the top and bottom of the hut.
- Matchboxes are glued onto one of the squares.
- When gluing, holes are formed for windows and doors.
- After reaching the desired size of the house, the 2nd square is glued to the top, thus fixing the craft.
- A roof is cut out of cardboard and secured to the house.
- Using glue, fix toothpicks to the roof.
- Windows and doors are cut out of paper. Color them.
- Fix the elements in the corresponding openings of the house.
- Tubes are made from cardboard for the legs of the house and attached to its base.
- The paws are made from twigs and inserted into the bases of the tubes.
- Paint the legs with paint.
- Decorate the hut with twigs and dry grass.
Such a hut is easy to make, and therefore children can also be involved in its creation.
Complex option
A complex version of the craft consists of a large set of materials:
- Foils.
- Paper (needed to create tubes).
- Hot glue and a hot glue gun for it.
- Self-hardening clay DAS.
- Cotton wool.
- Cardboard.
- Seine.
- Dry moss.
- Wires.
- PVA glue.
- Acrylic paints.
- Wooden branches.
Process of creation:
- Tubes are made from paper.
- Cut out blanks for the house.
- Cut out windows and doors with scissors or a stationery knife.
- Using hot glue, all parts of the walls are connected to each other.
- The tubes are glued to the house.
- A roof is made from cardboard and secured to the house.
- The space in the tubes is filled with cotton wool.
- Paint the entire house, except the roof, with watercolors.
- Small holes are cut on the sides of the roof.
- Strips are cut from cardboard.
- Cut out a pipe from cardboard and attach it to the roof.
- Cover the roof with PVA glue.
- Glue strips of cardboard.
- Paint the house with paint.
- Four wires are collected together and twisted into an arc.
- Cut out a square from cardboard - the basis for the hut for the legs. Make 2 holes in the middle for the wire.
- The wire is pulled through the holes in the square and the legs are formed.
- Cut out a second square - a smaller one. A small rectangle is cut out in the middle.
- Place a square with a hole on the base of the hut. The wire should fit into the hole of the smaller workpiece.
- Wrap chicken legs in foil. Everything is fixed with hot glue.
- Polymer clay is used to decorate the legs of the house. Using a toothpick, draw lines.
- They make windows out of cardboard and glue them into the openings of the house. Coloring.
- A door to a hut is made from cardboard and foil.
- The roof and other parts of the house are decorated with moss. Tree branches are fixed in random order on the roof. Cotton wool is applied in small quantities to the walls of the craft and painted gray.
- They connect the legs and the hut itself together. If desired, you can use the remaining materials to create a surrounding environment for crafts.
This craft takes a lot of time, but it looks very realistic.
House with paper logs
Materials:
- corrugated cardboard;
- ordinary cardboard;
- White paper;
- glue Moment;
- PVA glue.
Operating procedure:
- Make a hut frame from corrugated cardboard: two pentagonal walls (together with an attic), a floor, two side walls.
- Choose the sizes yourself.
- Glue the parts together. Mark the door and window.
- Using a pencil, roll the paper into tight tubes. Tape them around the edges to prevent them from unraveling. Some of them will need to be cut to beautifully cover the frame of the house.
- Connect everything with Moment glue.
- Cut suitable strips from thin light cardboard and paste them over the joints of the parts - corners, edges, slopes of the future hut.
- Make a roof out of ordinary cardboard. Cut out a rectangle of suitable size and bend it in the middle.
- Make chicken legs. Roll two wide-diameter paper tubes. Glue them to the foundation of the hut - a thick piece of cardboard or other material. Roll up a couple of thinner tubes and insert them into the thick supports.
- Make holes in the bottom of the hut. Thread thin tubes into them. And glue the upper edges of the thick ones to the bottom. As a result, the house should be stable.
- Make it out of paper and glue 3-fingered paws to the hut.
- Attach a cardboard threshold to the door. From it, lower a ladder made of the same cardboard to the ground.
Using paper vine
When weaving a hut from newspaper sticks, the result is a decorative and very original craft. This method is a simple and cheap alternative to using willow vines. Sticks are made by rolling newspapers, and a small box will be needed for the base of the hut. This is the box we will braid.
To begin with, you need to make only half of the house, and then all the frame elements are secured with paper clips or clothespins on top of the box. We braid the racks, going around them alternately in front and behind with a working tube. As soon as the “vine” begins to end, we begin to increase it to the required length. It is better to hide all the joints of the tubes inside and glue them well. You can paint the hut both after weaving (coating the paper with the desired color) and before twisting. Legs, roof and decor are made using any of the above methods.
Baba Yaga's hut made of paper logs
To create a toy house, ordinary paper can be used. This option is a little more complicated, but it looks very impressive.
The “paper hut” craft is made like this:
- Cut the paper into rectangles, the length of which should correspond to the dimensions of the house.
- Roll the blanks into tubes. For reliability, coat the joint with glue.
- Cut circles for the ends of the prepared tubes. Collect logs.
- Fold the walls and frame.
- Make a roof from a sheet of paper.
- Paint the finished product in the chosen color.
If you choose white, you will get a “winter hut” craft.
Cut out the door and windows, glue them to the appropriate places, draw the details.
If desired, make chicken legs from plasticine and attach them to the house.
How to make a stupa?
In fairy tales, the grandmother moves through the forest exclusively on a mortar, controlling a broom. The stupa has the shape of a truncated cone. Therefore, in the manufacture of this transport, a plastic disposable cup is used. First, the plasticine is softened and the outer part is completely coated so that the branches are firmly attached and do not slip on its surface.
They should not be thick, as the glass will be deformed. In order for the sticks to hold well, you need to tie them with thread. All that remains is to plant Baba Yaga’s craft inside.
DIY Baba Yaga's house photo
Everyone in childhood read fairy tales, where one of the main characters was Baba Yaga and her hut on chicken legs. A hut seems to be an inanimate object, but miracles happen in fairy tales, so the hut can become a living character. For productions or exhibitions, you may need just such a hut. In this article we will tell you how it can be made from different materials.
Cardboard hut
The simplest option for making a hut involves using an ordinary box, that is, the hut will be made of cardboard.
We find a box of a suitable size, first make a base out of it from glued white paper. Afterwards we paint its walls and make them look like logs; the most convenient way to do this is with paints. We finish drawing the windows and doors. For a more impressive look, add convex elements to the walls. The roof is also made from a box, cutting off part of it and leaving only one corner.
The legs are made of driftwood or a frame; you can also use the papier-mâché technique.
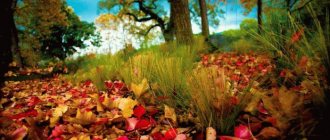
Natural hut
If you want to make a hut from natural materials, then for this you will have to collect small pieces of natural materials. Let's collect small quantities of moss, thin branches, a few cones, and find a small, stable snag.
First, as in the first case, we will make a frame from cardboard, and we will glue natural materials onto it. It is convenient to use a heat gun for such purposes. Branches are suitable for the walls; stack them one on top, imitating the logs of a real hut, and cover all the walls.
If you decide to use cones, first soak them in the adhesive solution. Moss is suitable for decorating the roof. And a piece of driftwood that is quite stable will replace the legs of the hut. This craft is as close in appearance as possible to a natural fairy-tale hut. You can sew a pipe from matches, and use pieces of colored gray cotton wool to depict the smoke coming from it.
Stitched house
Sewing lovers can make their own version of the hut. Making it with your own hands using a thread and a needle is simple, especially since for such work you only need scraps of fabric. Even a child can make a sewn hut. In addition to the sewn house, you can crochet Baba Yaga; for this you will need a hook, a pattern and threads.
Original version
We will show you a master class with photos on how to make an interesting hut. You will learn how to make a whole composition - a hut, Baba Yaga and even a mortar with a broom.
For such a composition you will need the following things:
- Set of colored paper, plain paper;
- Glue for paper, Glue moment;
- Leaves, slightly dried, a small piece of tree bark, branches, cones, moss;
- Fabric, thread, scissors;
- Felt pens and plasticine;
- And also a box for making a model.
The work begins with creating a base; we cover a regular cardboard lid with dry leaves. These can be the leaves of absolutely any tree.
Then we move on to creating the walls. The collected twigs are cut into sticks of the same length and the box is covered with them on all sides. After each side, give the glue time to dry and set well.
The roof is made from a sheet of cardboard. A rectangle of the appropriate size is bent in half and the walls are covered with it. When we glue the roof and it dries well, we decorate it with bark. We stick the legs to the bottom of the box and secure them well.
A piece of a very thick branch or a small log will serve as a mortar for our future Baba Yaga. We will mold it from plasticine. Let's take a color similar to your complexion - beige or any other light color. Let's glue parts of the face onto it, also from plasticine. Let's make the eyes black, with lighter pupils, the nose the color of the body and the mouth. We will tie a scarf on our head. Thin branches are quite suitable for hands.
We will put the finished Baba Yaga in a mortar. Now let's create Baba Yaga's indispensable tool - her flying broom.
Let's collect the thinnest branches and gather them all around one larger one and tie them together. Using threads or glue that dries instantly, attach the broom to the Yaga’s branch arms.
- The house should be supplemented with a ladder, which can be built from threads and branches.
Just four short crossbars and two long twigs are enough. Since we are preparing a composition for the purpose, and the house is located in the forest, we will make small pines from pine branches. To do this, we connect the prepared pine branches into a triangular shape, just like real trees.
- Let's put a sitting owl made of pine cones and plasticine on a branch.
Now let's put the whole composition together. To do this, next to the hut installed and secured with plasticine, we begin to install all the prepared elements. We secure the owl's home - a branch with colorful lanterns. We install the stairs and glue the paper doors. Not far from the house we put a pine spruce, and next to it is Baba Yaga in a mortar.
Both children and adults will really like this hut with its inhabitants, and you can make it with the whole family.
Recommendations for making crafts
A do-it-yourself hut on chicken legs is a unique craft that is created from natural material.
Options for materials for manufacturing can be completely different:
- Cardboard.
- Tree.
- Textile.
- Cones.
There are a large number of master classes consisting of a different set of materials. This provides an excellent opportunity to choose the appropriate option, taking into account individual financial capabilities and aesthetic taste.
A few tips can make this job easier:
- It’s worth deciding in advance what material the craft will be made of. You need to choose a method that not only appeals to you, but is also accessible to your individual abilities. If a person knows how to knit well, the craft can be made from threads. Woodworking lovers will find options made from this material.
- Don't be afraid to fantasize. It is not always possible to follow master classes. You can deviate from the rules and add your own notes to the craft. For example, replacing one material with another. However, this must be done in such a way as not to damage the structure. For example, you can’t make the top wooden, and the leg of the hut made of cardboard. A heavy top can break the product, thereby nullifying all efforts.
- For independent creativity, you do not need to buy any professional tools. This rule also applies to crafts made from natural materials. You can purchase a hot glue gun, because if the materials need good adhesion, PVA from a tube is unlikely to provide it.
- The hut on chicken legs craft contains elements such as windows and a door. You can draw them, or you can use a printer and print out the necessary elements.
- A hut on chicken legs will look most impressive in the appropriate surroundings. It won’t be superfluous to create a clearing on which the craft will stand, make trees from twigs, decorate the hut with berries or artificial mushrooms.
House on a summer cottage
Such a fairy-tale house, although not so often, is still found in summer cottages. For adults, such a structure may not be of any use, but for children it causes a lot of delight.
The easiest option is to order a log hut from professionals based on your own sketches. That is, find a company that cuts log huts. You can complicate the task and simply order some log blanks and then assemble them yourself. It will undoubtedly be cheaper this way.
So, a hut on chicken legs, with strictly vertical walls, made of purchased logs.
- For the greatest resemblance to the hut of the real Baba Yaga, it is necessary to install a pair of “chicken” legs. These can be rhizomes of old coniferous trees (pines or spruces). These roots must be thoroughly cleaned of soil and bark. Then soak it in several layers with antiseptics and cover it with an anti-rotting agent.
- To make the hut stable, its legs-pillars, after antiseptic treatment, are deepened 50 cm into the ground and, if possible, concreted.
- A large role is given to the base - the frame of the hut. You need to put powerful beams with a cross section of 20/20 cm across the legs. And secure them with anchor bolts and washers. The third support will be a porch with two steps in front of the front door. The floor is lined with edged boards. Walls made of timber are mounted on it. The walls are paved with tow.
- The gables of the house will look more natural if they are also made of logs. The settlement of the house lasts about a month. In this case, it is best to tap the logs with a sledgehammer several times to ensure complete settlement.
- It is not recommended to make a ceiling; it will reduce the volume of the room. Therefore, roof rafters should have only rafter legs, without bases.
- The hut window and door should be made small in accordance with the style of ancient Russian architecture. Door and window frames are made from edged boards 15 centimeters wide.
- Making window and door units can be difficult for a non-professional. In this case, to speed up the process, they can be ordered from a sketch workshop.
- The roof of the hut should be stylized as antique.
- The roof overhangs are made with a margin so that rain does not flow in and wet the walls.
- Wooden surfaces must be coated with any light-colored composition that emphasizes the structure of the wood.
- The door handle and hinges are overhead and massive.
- The hut can be decorated with two or three crafts made of wood and other materials.
- Wooden figurines of Baba Yaga herself, the Serpent Gorynych, a cat and an owl are perfect. They can be placed both outside and inside. The photo shows several options for such huts.
Simple hut
Since there are several possible manufacturing methods, we will consider them in turn. You can make a wooden version, in which case you will need a log house or boards. It is better to give preference to boards, they are easier to work with, but the log house will of course look more like a real hut, but it will also be more difficult to process.
Construction has certain stages:
- The basis of the hut is the legs. Initially, they have to be secured, because this is the basis of the entire structure.
- Next, the base for the floor is prepared.
- Afterwards the walls are erected and the roof is placed on them.
- The penultimate stage is the staircase, which also serves as a support.
- And my favorite stage is decorating and finishing the house.
As described in the step-by-step sequence, let's start construction from the feet. For them we will need two logs, they should be approximately a meter long.
To protect the legs from premature wear, we thoroughly saturate them with a rot-protective agent. Now let's dig two holes in the ground, half the length of the logs - half a meter each.
And having firmly secured the logs there with small stones, we fill everything with cement.
Alternatively, you can use pipes rather than logs, which after installation are decorated with driftwood.
Once the concrete is completely dry, it's time to install the subfloor. In this master class it is proposed to make a hut 1.8 m long. Therefore, it is precisely these beams that are taken and secured, stretching through two logs. The width of one bar is 20*20 cm.
The walls are also created from logs or boards; the inside can be covered with paper. To secure, use self-tapping screws rather than nails.
Since the building is not large at all, think about whether you need a ceiling in it, because you can simply make a roof. This will save more space.
When installing a ladder, it is important to check its stability and, if necessary, secure it with concrete.
Read this: Candy Arrangements: Works of Sweet Art
And now, when the entire structure is ready, you can begin decorating and decorating the hut. Here you can rely on your taste or on the description of fairy-tale houses. In any case, it will turn out very original and unusual.
Second option
A simpler way to build a wooden hut is to build a wigwam. Children can enjoy this Baba Yaga house even on an ordinary playground. We will prepare the following materials:
- Poles one and a half meters long;
- Tarpaulin for walls or thick fabric with good density;
- For fastening, wire and strong threads.
All poles on one side are fastened with wire, and on the other side, each twig is stuck into the ground. This way we get a semicircular frame in the shape of a cone. Its walls are covered with prepared tarpaulin or fabric.
The floor is insulated from all kinds of floor coverings or left completely bare. Now the most important moment is to decorate our building so that there is no doubt that this is Baba Yaga’s hut. A decoration for the entrance is created from beads, threads and sticks - wind chimes.
Dream catchers are also good; a broom and ladle pans are placed at the entrance.
Mini hut
And if you need a hut made at home, then this is also not a problem. You will need to find any street snag, the main thing is that it is stable.
Then saw off what is unnecessary from a small block and leave a small square. A hole is made inside this block to secure the snag leg.
The roof is assembled from wooden pieces. The entire building can be slightly burned, which will give it a specific look.
- Since our hut is miniature, all elements can be easily held together with PVA glue. The roof of the hut is decorated with beautiful lush reeds or fluffy fabric, as in the photo:
Windows and doors are made of wood that can be easily painted in any color. Don't forget about the small ladder. To revive Baba Yaga's hut, it is recommended to place some characters near it.
These can be hand-knitted toys or any purchased ones. You can additionally build a broom from the planks, then it will be clear at first glance who lives in such a hut.
To create Baba Yaga's hut you need very few materials, and all of them are easy to process and connect, so don't miss the moment to have fun with your children.
Video on the topic of the article
Source: https://knittochka.ru/raznoe-2/izbushka-baby-yagi-svoimi-rukami.html
Natural hut
If you want to make a hut from natural materials, then for this you will have to collect small pieces of natural materials. Let's collect small quantities of moss, thin branches, a few cones, and find a small, stable snag.
First, as in the first case, we will make a frame from cardboard, and we will glue natural materials onto it. It is convenient to use a heat gun for such purposes. Branches are suitable for the walls; stack them one on top, imitating the logs of a real hut, and cover all the walls.
If you decide to use cones, first soak them in the adhesive solution. Moss is suitable for decorating the roof. And a piece of driftwood that is quite stable will replace the legs of the hut. This craft is as close in appearance as possible to a natural fairy-tale hut. You can sew a pipe from matches, and use pieces of colored gray cotton wool to depict the smoke coming from it.
Making a hut from natural materials
What you find in the forest can easily be used in making not only Baba Yaga’s hut, but also any other craft. Materials of natural origin are perfect for manufacturing , such as:
Natural materials can be used to cover a cardboard frame with them or to directly make things from them themselves. We cover the box with bark or branches so that as few gray spots of cardboard as possible are visible. Using a heat gun or PVA glue and unopened fir cones, we assemble the walls of the future hut.
In order for the cones to keep their shape longer, they must be soaked in an adhesive solution immediately after you bring them home from the forest. We make a beautiful roof from moss and bark, and driftwood is perfect for legs. This craft will not only look beautiful, but also match the fairy-tale image as closely as possible.
Many people who like to make crafts often combine different methods of making them. For example, you can glue twigs onto a cardboard roof and add moss to paper tubes.
Do it yourself: Baba Yaga's house with a real swamp
“> We decorate the interior to the delight of ourselves and the children in an absolutely non-trivial way - we are making a house for Baba Yaga with a soft green swamp. Create your own fairy tale at home!
Where did it all start? Back in the summer, I accidentally saw 20x20 slats with a length of 200 mm on the market for 35 rubles apiece - a rare size - and I couldn’t pass it up, I bought it to “think about it.” During the New Year holidays, my hands were itching to cut, especially since the weather was favorable - I could safely do dusty work outside. I’ve been working with wood for a long time, I have enough tools, but I haven’t made models of buildings before. We must try it sometime!
Main process steps
At first I used a circular saw, a milling machine and a Soviet model machine “Skillful Hands”, which I somehow found in the bins of my homeland. I sawed blanks for the walls of the same size with a circular saw, “With skillful hands” I made cuts in the timber (let’s call it that) and used a milling machine to slightly remove the corners, giving the timber a natural look. I removed the excess with sandpaper and sharpened the ends.
Baba Yaga’s house, as usual, is shabby and crooked, so the blank had to be “aged” - for this I used a gas burner. I burned the walls one by one and let them cool, then I cleaned each element of the model with an iron brush and numbered the timber.
I drew windows and doors on the inside and disassembled the model.
I decided to assemble the model with a layer of tow - for the surroundings. The beams were fastened together with small finishing nails - it turned out securely and crookedly, just like a real Baba Yaga. I decided not to bother with the roof gables and made them from furniture panels. There is no rafter system as such, I just glued 3 bars from each slope between the gables and attached the roof to them. I made the roof slopes from “boards” - cut pieces of larch decking boards into sticks of equal thickness and placed them on glue. In fact, this design is far from perfect, but I did not redo the roof, I left it as an experience for the next models.
The chicken legs at the house are purely nominal: I sawed off the slingshot, trimmed it and installed it. I prepared a base for the model from a piece of furniture - I attached the slingshot to the base for stability.
And what would Baba Yaga’s house be without driftwood on the roof? I found a suitable one in the forest, cleaned it, trimmed it and installed it.
Let's move on to "makeup"
First, using scissors, a knife, a blade and a lighter, I trimmed the tow that I used to lay the timber. I made window and door jambs from larch scraps. I adapted bamboo kebab sticks for the “crosshair” of the window. I glued the door together from several scraps and added “fastening” boards.
The gables and roof slopes were covered with boards from below. It took about 3 hours to make the porch with the stairs - I used the already tested “aging” technology using nails, glue, a saw and a miter box. And then an interesting thought came to mind: shouldn’t we make a “swamp” around the house?
The children had an almost unused sandbox at home, and they decided to donate it to art. What grows in the swamp? That's right, moss!
The moss was not yet covered with snow, so I carefully cut it off with a garden shovel and placed it in the sandbox. At the same time, I studied options for growing moss at home - I don’t know how it will behave, whether it will survive, but so far the result is pleasing to the eye.
I stained the roof and gables with vinegar with a metal mesh for washing dishes soaked in it - this is a known method of giving wood a grayish color to naturally age. The color initially turned out brownish, but after sanding it took on a gray tint.
I worked a little more with sandpaper, and here and there with ebony stain and decided to call it a day. In total, the work took approximately 3 full working days.
In terms of materials, it turned out to be budget-friendly: I spent only on the “timber”, stain, glue and nails, the rest was assembled from leftover scraps. And once again I was convinced how much having the right tool simplifies the job!
This is how Baba Yaga “settled” in our house. True, she has not yet flown to her new possessions, but the children really hope to see her.
Vladimir Shashkov
Check out other master classes on working with wood:
Making a feeder with your own hands
Hurry up to hang your birdhouse before the end of March!
Life hacks
If a person wants to make something with his own hands for the first time, but has zero knowledge of homemade, modern technologies come to his aid. In craft stores you can find convenient options for houses that can be assembled in a couple of minutes. If you add a little creativity, you will get an excellent craft option. To create a house, the main thing you will need is to purchase a blank for it.
Craft stores have the following options:
| Name | Description | Price |
| “Astra & Craft” wooden blank for decorating “Baba Yaga’s House” L-652. | Beautiful blank for crafts. Width – 12 cm, length – 13 cm, height – 14.5 cm. The set includes parts of the house and decorative ornaments: an owl, a cat, a stand for crafts. | From 300 rub. |
| Rectangles 150x93 mm, 140x90 mm. | Such parts are sold without additional decorative details. From these you can form the main parts of the hut. | From 20 rub. for 1 piece |
| Blank for a wood mill house. | Pine blanks for a wooden house. The size ranges from 5 to 8 cm in width, from 3 to 4.5 cm in thickness and from 5 to 10 cm in height. | From 10 rub. for 1 house. |
| Wall for a house made of plywood from dljatvorchestva | Wooden blanks for a house with windows already cut into it. Size 9 by 10 cm. | 5 rub. for 1 wall. |
Purchasing such a blank greatly simplifies the process of creating a house.
An approximate master class using such material will additionally require:
- Paints.
- Twigs.
- A piece of fabric to imitate curtains in a window.
- Dry berries.
- Moss.
- Glue.
Process of creation:
- Fabric is glued to the inside of the house blank, simulating tulle.
- Assembling a house blank from Astra & Craft.
- Using paints they paint the hut.
- Let the paint dry.
- Using glue, decorate the roof of the house with twigs, pieces of moss, and berries.
- Under the hut they make a clearing of moss.
This is the fastest craft option, which even with zero knowledge of creativity will turn out beautiful and neat. Very often, parents in kindergarten are asked to participate in various handicraft competitions. A craft in the form of a hut on chicken legs can surprise even the most fastidious jury. In addition, creating such a masterpiece with your own hands will allow you to take time and get closer to your children.
Playground house
The master class on how to build this structure with your own hands is addressed not to children, but to their parents. A wooden hut can make a children's playground more beautiful and bring a fairy tale to a private yard. The object is made from solid logs or hewn boards. In the second case, the structure will be lighter, safer, but less durable.
The construction of a hut can be divided into the following stages:
- The construction of chicken legs is the basis and support for the future structure.
- Installation of the base. The “floor” of the hut will subsequently fall on it.
- Construction of walls.
- Roof laying.
- Assembling and securing the ladder. It will also serve as additional support.
- External and internal decoration of the hut.
Attention!
There is no need for a ceiling in such a building. She is already modest in size. The overlap will take away the space needed for play. The basis of the hut is wood in several variations. For the work you will need a full set of carpentry and construction tools. Fastening materials - anchor bolts (30-40 cm long), self-tapping screws. Use concrete to form the foundation.
Making a layout:
After the entire diagram is drawn on paper, all that remains is to cut out the future building, bend the lines marked with a blue dotted line and cut the windows with a construction knife. Use a modeling board. It allows you to cut out parts from cardboard and then glue them together much more conveniently. The scheme presented in the photo above is suitable for the production of the simplest houses. A more complex structure will literally have to be made up of several parts. By the way, the layout can also be made to open (so you can see the interior of the house). It is on this principle that children's doll houses are made, which can be purchased in the store.
To make such a layout (photo), it is advisable to use the thickest cardboard you can find. In order for part of the wall to open, an appropriate fastener is used (this can be found in old Soviet-made boxes) or simply a piece of cardboard bent in half. Doors can be made to open in the same way.