A picnic is a fun, country walk. We would like to add that this is not only a walk, but also eating all sorts of goodies together in the fresh air. This type of recreation appeared a long time ago and remains especially popular in our time. After all, sometimes you want to escape from the bustling city in the company of loved ones and enjoy pleasant communication in the vastness of untouched nature. But in order for your picnic to truly bring a lot of pleasure, consider some nuances and take with you everything for a comfortable stay.
What to take on a picnic?
Bag (basket) or picnic set . Of course, you can put all the food and dishes in bags, but it will still be more aesthetically pleasing and convenient to use a large basket. This way, the food will remain intact (not wrinkled), and the dishes will not break, and everything will be at hand.
By the way, having a basket with compartments and pockets, you will never forget all sorts of “needs” - just make sure that all the pockets are filled (an empty compartment will immediately lead you to think about a forgotten item).
In the store you can buy a plastic basket or thermal bag for a picnic and even special picnic sets of various configurations - this is a convenient bag with items already folded in it: cutlery for several people, napkins, a tablecloth, a cutting board and a knife for cutting meat, glasses, an opener and jars for spices. Everything is provided for your comfort.
Picnic mat . Usually the rug is a home blanket. But on sale you can find special handle-clips that will make your bedspread convenient to transport (it will not constantly unfold) or sew them yourself. Stores sell a mat-briefcase, a mat-bag, which fold conveniently and do not take up much space. These rugs are made from moisture-resistant material. Convenient and practical.
You can also take with you transformable chairs or seat cushions (if you sew them yourself, then everyone in the family can have a personal pillow).
Placemats for dishes. Everyone has probably encountered such a problem at a picnic as drinks spilled on a blanket. The problem can be solved with the help of special stands for glasses, bottles or cans of drinks. Such stands can be spiral-shaped metal for one glass or wooden in the form of a mini-tabletop. They are easily strengthened in the ground.
You can make cup holders yourself from stiff wire.
Step-by-step master class: How to make a bag for skewers with your own hands
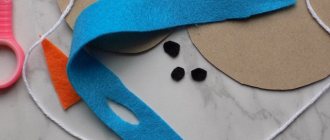
Materials you will need to make a skewers bag:Backpack fabric (or jacket), 80 cm) Reinforced material (polytent), 10 cm Nylon braid, 2 m Metal tips, 2 pcs. Metal connection frame x 1 Tools:Pin, square |
1. Cut out a rectangular canvas measuring 47 x 68 cm from backpack fabric; and from reinforced strips: 47 x 10 cm - to reinforce the bottom of the bag and 26 x 7.5 cm - for the pocket in which the knife is placed. Sew a bottom reinforcement strip along the short side of the bag base. The sewing machine does not “go” well on polytent, so place the braid on the edge and stitch along its edges.
2 Sew the pocket to the middle part of the fabric, also using braid.
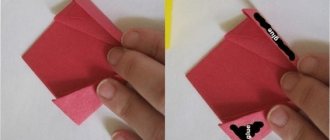
3 Sew a strap for the handle from a strip of 100 x 7 cm. Fold it in half lengthwise, iron the fold, and turn the edges inward. Sew stitches along the edges.
4 Sew the ends of the belt 4 cm from the long edge of the base fabric (along the vertical cut), leaving 13–15 cm at the bottom and top. Use a metal connecting frame so that you can adjust the length of the handle. Pass the belt through it and secure it with a knot or secure it with a special stopper.
5 Make loops for the cord to tighten the top of the bag. Fold the top edge twice, mark the places for the loops in the middle front. Finish them with a sewing machine and cut them with a seam ripper.
6 Sew the long sides of the base fabric with a seam 2 cm from the edge. Finish seams with a zigzag stitch. Sew a stitch covering the bottom of the bag, 1cm from the edge. Process the cuts with a zigzag.
7 Stitch the corners to make the bottom of the bag voluminous.
8 Fold the top seam allowance twice and stitch the drawstring with a seam 2 cm from the edge. Insert the braid through the remaining loops.
The skewers bag is ready!
Picnic ideas
If your picnic will take place near a pond, take inflatable children's sleeves with you. They will come in handy for storing drink bottles in cool water. Great idea! We are sure you have never thought about using children's watercraft in this way.
Hang an open umbrella on a tree branch to create an original container for all sorts of small items or products. By the way, if you hang several bright umbrellas like this, you will simultaneously shade and decorate your resting place.
Secure the hammock between the trees. After all, no matter how much you rest, you will definitely get tired. For shading, install a tent: with clothespins around the circumference, attach the curtain to a plastic circle, and the circle, respectively, to a tree.
Sew practical picnic napkins from fabric, lace or old jeans with pockets for forks and spoons. Now plastic cutlery will not crumble or fly away from a gust of wind, and napkins will decorate your table.
The camp bar is a convenient bag with external compartment pockets for bottles and cans of drinks. This bag can be fastened to a bicycle frame, or you can carry it over your shoulder while walking.
An LED bedding as a night light will come in handy if you and your friends stay up late. Not afraid of dampness, light and durable. What else is required?
Manufacturing instructions
Draw patterns for the future bag on cardboard. In the simplest case, it will be a rectangle measuring about 75x50 cm with fold lines and oval cutouts for handles. For a more complex design, it is better to draw it on a computer and then print it on thick paper. Transfer the pattern onto two pieces of fabric, then perform the following sequence of actions:
- Cut out the main pieces of the bag from the fabric.
- Sew the blanks together with the wrong sides facing each other, if necessary, place a sealant or foil paper between them. It is also worth sewing a foam rubber seal onto the bottom.
- Cut oval holes for the handles, reinforce them with thin strips of fabric and sew them with a zigzag stitch.
- If you want to divide the bag into several compartments, sew partitions from one layer of thick fabric inside.
- If you are making a thermal bag, sew a zipper 5–10 cm below the handles, and also make pockets for cold batteries.
Please note that on future trips, the external pockets of the bag can also serve well, in which you can place travel small items - from matches to a folding knife.
Choosing a place
Summer is, of course, the most anticipated and most suitable time of year for outdoor recreation. But don’t be upset if summer has passed and you still haven’t left the city. A picnic can be organized on a clear autumn day, on a sunny winter day or with the first rays of the spring sun.
A place to relax can be a clearing near a river or lake, a forest, a grove or a city garden, even the roof of a house and a balcony (but we still recommend getting out into nature). Make sure that your picnic area is protected from drafts and located away from anthills, beehives and thickets of burning grass. It is desirable to be able to choose where to sit: in the sun or in the shade.
For lovers of romance, the roof of the house is also suitable for a picnic. A picnic for two in a boat on the lake will be unforgettable and romantic. Extreme lovers can find a place in the mountains. Just don't forget about safety!
Having decided on a place for a picnic, you should make a list of everything you need for a comfortable holiday in accordance with the time of year and your preferences. Fold your bag by crossing off items on your list so you won't forget anything.
Adviсe:
- If you are going on a picnic for the whole day, take with you sunscreen, mosquito and tick repellent, a mini first aid kit, sun hats
- the camera will complement and capture your vacation
- take plenty of drinking and technical water for washing your hands, and garbage bags are also useful to clean up trash after yourself
- It is better to take non-perishable products (sandwiches, canned food, cookies, fruits, meat for barbecue and vegetables for grilling)
- It is better to store food in separate containers; use foil for thermal insulation
- Freeze the juice and water in advance so they will keep the temperature in the grocery basket
- To organize the lamp, pour vegetable oil into a tin of drinks. Place an improvised wick there from a piece of cloth soaked in the same oil and set it on fire. This torch will solve the lighting problem for several hours.
- If you are going on an overnight picnic, do not forget warm clothes, as it can be cool in the evening, especially near the pond.
A picnic is a fun, country walk. We would like to add that this is not only a walk, but also eating all sorts of goodies together in the fresh air. This type of recreation appeared a long time ago and remains especially popular in our time. After all, sometimes you want to escape from the bustling city in the company of loved ones and enjoy pleasant communication in the vastness of untouched nature. But in order for your picnic to truly bring a lot of pleasure, consider some nuances and take with you everything for a comfortable stay.
Preparation of materials
This project uses parts that are easy to find at home or at a thrift store:
- Basket (large enough to hold picnic items).
- Folding chessboard (for lid).
- Durable canvas/denim fabric (for lining).
- Large adjustable wooden embroidery hoop (to support the handle).
- 2 leather straps (for handle).
- Glue.
- Wooden button for fastening.
- Wire for fixing parts.
- Sewing Tools: 4 clamps (as an extra set of hands), wood glue, hacksaw, awl and drill are also useful but not required. The large wooden handle (embroidery hoop) will be reinforced with 2 leather straps.
The wood and leather combination handles provide great support and add a rustic appeal. If you prefer a more casual look, the steps related to attaching the wooden embroidery hoop can be ignored.
Instead of our “Ku-ka-re-ku!”: Australians wake up to the hubbub of parrots (video)
Food against depression: what to eat for mental health
Who to call mom: Semyon Treskunov about relationships with his stepmother and natural mother
What to take on a picnic?
Bag (basket) or picnic set . Of course, you can put all the food and dishes in bags, but it will still be more aesthetically pleasing and convenient to use a large basket. This way, the food will remain intact (not wrinkled), and the dishes will not break, and everything will be at hand.
By the way, having a basket with compartments and pockets, you will never forget all sorts of “needs” - just make sure that all the pockets are filled (an empty compartment will immediately lead you to think about a forgotten item).
In the store you can buy a plastic basket or thermal bag for a picnic and even special picnic sets of various configurations - this is a convenient bag with items already folded in it: cutlery for several people, napkins, a tablecloth, a cutting board and a knife for cutting meat, glasses, an opener and jars for spices. Everything is provided for your comfort.
Picnic mat . Usually the rug is a home blanket. But on sale you can find special handle-clips that will make your bedspread convenient to transport (it will not constantly unfold) or sew them yourself. Stores sell a mat-briefcase, a mat-bag, which fold conveniently and do not take up much space. These rugs are made from moisture-resistant material. Convenient and practical.
You can also take with you transformable chairs or seat cushions (if you sew them yourself, then everyone in the family can have a personal pillow).
Placemats for dishes. Everyone has probably encountered such a problem at a picnic as drinks spilled on a blanket. The problem can be solved with the help of special stands for glasses, bottles or cans of drinks. Such stands can be spiral-shaped metal for one glass or wooden in the form of a mini-tabletop. They are easily strengthened in the ground.
You can make cup holders yourself from stiff wire.
Step-by-step master class: How to make a bag for water and other drinks
1 Cut out one rectangular piece of fabric measuring 78 x 45 cm. Fold them face to face and stitch along the short sides (picture). Turn the workpiece inside out. Place two lines in the middle, 12 cm apart. The stitched bottom should include a strip of camping rug 42 x 11 cm.
2 Make a paper pattern for an oval handle cutout 14 x 5 cm (drawing) and apply its contours to the fabric. Sew along the marked line. Cut a hole, making a cut 0.5 cm from the seam.
3 From the finishing fabric, cut out a bias tape 3.5 cm wide (at an angle of 45° to the grain thread) approximately 50 cm long. Sew it “face” to the front side of the lining with a seam 0.5 cm from the edge of the cutout. On “sharp” turns, stretch the binding, pulling it towards you - the facing will fit better.
4 Leave 2-3 cm of the neckline unstitched to accurately stitch the binding into a ring. Bring the ends of the binding together at a 45° angle, stitch them together and trim off any excess fabric.
5 Turn the binding onto the front side of the bag, fold the edge twice and baste. Sew the binding close to the edge, remove the basting.
6 Cut out 2 rectangles measuring 15 x 20 cm from the finishing fabric. Finish the long sides by folding the edge twice. These parts will allow you to divide the internal space of the bag into 3 parts. Pin one short side of each piece (folding the edge) along the marking lines in the drawing. Sew them to the base along the front side.
7 Fold the dividers in half. “Close” the bag by aligning the cutouts of the “handles.” Pin the free edge of each divider to the other side of the bag. In this case, the edge also needs to be folded so that the length of the dividers is 12 cm - the width of the bottom of the bag.
8 Sew the dividers along the right side using the arm of the sewing machine.
9 Cut out 2 side pieces measuring 13 x 42 cm from the quilted fabric. And from the finishing fabric - 2 of the same pieces, only 3 cm longer (13 x 45 cm). Place them together in pairs, wrong sides together, aligning along the short side. Wrap the remaining 3 cm seam allowance of the lining around the cut of the quilted fabric piece. Sew along the edge.
10 Sew the side pieces into the base. To do this, sew the side seams and sew the bottom lines, laying a line 0.5 cm from the cut.
11 Open the bias tape to a width of 3.5 cm and process the open sections of one side of the bag with it (see the description of processing in steps 3-5). Sew horizontal stitches 3.5cm from the top edge of the bag (see picture). Cut strips measuring 3 x 42 cm from the travel rug and insert them into the “handles”. Insert the seal into the “bottom”. Apply bias tape to the edges of the other side of the bag.
12 The two outer compartments of the bag are designed for bottles with a capacity of 1.5–2 liters. The middle compartment can be used for cups or sandwich containers.
Picnic ideas
If your picnic will take place near a pond, take inflatable children's sleeves with you. They will come in handy for storing drink bottles in cool water. Great idea! We are sure you have never thought about using children's watercraft in this way.
Hang an open umbrella on a tree branch to create an original container for all sorts of small items or products. By the way, if you hang several bright umbrellas like this, you will simultaneously shade and decorate your resting place.
Secure the hammock between the trees. After all, no matter how much you rest, you will definitely get tired. For shading, install a tent: with clothespins around the circumference, attach the curtain to a plastic circle, and the circle, respectively, to a tree.
Sew practical picnic napkins from fabric, lace or old jeans with pockets for forks and spoons. Now plastic cutlery will not crumble or fly away from a gust of wind, and napkins will decorate your table.
The camp bar is a convenient bag with external compartment pockets for bottles and cans of drinks. This bag can be fastened to a bicycle frame, or you can carry it over your shoulder while walking.
An LED bedding as a night light will come in handy if you and your friends stay up late. Not afraid of dampness, light and durable. What else is required?
Decorate your vacation spot by hanging balloons, lights, bells, bright ribbons or origami. All this will give you a special holiday atmosphere and relaxing in nature will charge you with energy and positive emotions. Let's all go to a picnic!
Picnic is different from picnic. It could just be a calm atmosphere, light music, a blanket and a tent for shade, a barbecue being prepared nearby and a game of checkers.
An active version of a picnic with dancing and singing with a guitar, outdoor games such as football or volleyball also takes place.
You can set up an open-air cinema by bringing a projector and a white sheet.