A mushroom costume for the New Year or a children's masquerade ball is an original idea. To construct it, you will need available materials: felt or any other fabric, colored paper and foil, perhaps an old hat that no one will wear anymore. An outdated headdress will make a wonderful honey mushroom or boletus hat. Sewing a mushroom with your own hands is very simple. Along the way, you can introduce your child to different “gifts of the forest” and which of them are edible and which are poisonous.
Master Class. Carnival costume “Boletus Mushroom”
From the Author: “New Year is a wonderful holiday with a lot of joyful chores - gifts, festive table menu - everything needs to be thought through, bought, made! And, of course, an important part of the holiday is carnival costumes!
My friend’s sons, twin first-graders, are participating in a New Year’s performance. The characters, I must say, they got some intricate ones - “Boletus Mushroom” and “Komarik”! A friend tried to buy suits, but it turned out that finding beautiful suits in the right size was not so easy! As a result, I made the “Mushroom” costume.
So, “Boletus Mushroom”. I’ll say right away that other “mushrooms” can be made in this way. For example, "Amanita".
The costume consists of a hat, trousers, turtleneck and cape. This option is suitable for both boys and girls. The costume is quite simple to make. The materials are also easy to choose. In a mushroom costume, “it’s all in the hat”!
For production we will need:
- a hat with a wide brim (preferably with a hat braid along the inside of the crown). It is important that the brim of the hat is not curved.
- brown fabric - 0.6 m
- fabric (preferably knitwear) white or light beige - 0.5 m
- proclamelin (can be replaced with white calico or non-adhesive interlining)
- 0.8 m - synthetic padding (you can use scraps)
- 0.5 m - brown and white threads, scissors, needle, pins, measuring tape or ruler;
- wish. patience and time."
Master class review
01. First, we select a suitable hat. We “found” straw in the pantry, but felt would also work. There are plenty of suitable, inexpensive hats on sale.
02. Let's start cutting the top and bottom parts of the hat. We put the hat on a brown fabric (I picked up the lining - a good, calm shine and inexpensive) and outline it with chalk. Then add 8-10 cm around the circumference and draw a circle.
Let's cut it out. This is the top part of the mushroom.
03. For the lower part we take white or light beige fabric. To simplify the work, it is better to use knitwear. In the future, we will need to “clean” the hole for the head, so the fabric must be elastic. You can use an old T-shirt to great effect (and it's great if it's no longer stark white!).
So we put the hat on a white cloth, outline it with chalk, then add 3-4 cm and draw a circle. Cut it out.
Why are we adding less than the top circle? The volume of the top part of the hat will increase significantly during the “mushroom formation”.
Turning the hat over, place a white circle on it and mark a hole for the head with chalk. Don't forget to add 3-5 cm to the hem! It’s better to make extra stock - then we’ll adjust it. Cut a hole.
We're done with the cutting - let's move on to the next stage.
04. Next, “form a mushroom.” To do this, we take padding polyester - we used scraps - and “loose” it.
05. We cover the hat with padding polyester, capturing the edges of the hat.
The result is something like this.
We cover the hat with a proclamelin, aligning the center of the circle and the center of the hat. Using pins, pin the proclemelin to the padding polyester along the edges of the fields. Turn the hat over. We lay a thin layer of padding polyester on the back side of the hat brim.
Now you need to secure the proclamation along the edge of the crown from the wrong side. We lay the folds and pierce them with pins.
07. We cut off the excess fabric.
We sew the proclamelin with large stitches to the hat.
08. We got this mushroom shape.
This preparation is also suitable for fly agaric.
09. And we continue to sculpt the boletus. Take the previously cut brown circle (top of the hat). Place it on the mushroom, aligning the center of the workpiece and the circle. Pin along the edges.
To ensure that the fabric lies evenly, first pin the pins crosswise, then divide the circle into eight parts, etc.
11. Now the fabric needs to be carefully sewn around the circumference with an “over the edge” seam.
12. Next, we need to “cleanly grind” the lower part of the mushroom: we place the mushroom on the previously cut out lower part and, if necessary, cut off the extra centimeters.
The hem margin should look like this.
13. Important! Before cutting off the excess, check the alignment of the head hole! I always remind you: “Seven times on the inner edge.
Now let's look at the result!
21. Well, the most important part of the costume - the hat - is ready. There is only one small thing left - to dress the child!
A matching white turtleneck was found in the children's wardrobe. It can be replaced with a light shirt or long-sleeved T-shirt.
The cape shirt front was “inherited” from the previous costume. In principle, you can cut such a cape from any suitable piece of fabric and sew on ribbon ties. Or choose a light vest.
But I sewed the trousers from the same jersey as the inside of the hat. Again, after rummaging through your wardrobe, you will probably find some light-colored trousers or jeans; and leggings are also suitable for girls.
The “Basic Set” has been assembled. Let's add accents. I added "grass" to the bottom of the pants. For this I needed yarn, which is called “grass”. The color is brown-green melange (very suitable for boletus!).
We randomly lay out the grass along the bottom of the trousers by hand or in a large zigzag on a machine. If you “accent” your child’s jeans or trousers, which he will continue to wear in the future, it is better to sew on the decor by hand - this will save the fabric and make it easier to rip off later.
22. I also added “along the blade of grass” along the edge of the cape and along the sleeves of the turtleneck. Slightly.
23. You can choose a different yarn, both in color and texture. You can also use braid, cord, fringe, etc. for decoration.
Imagine! And don’t forget to wear appropriate shoes for your child! Every little detail is important in a suit!
Happy carnival to your child and success in your creativity!
How to make a mushroom cap Our children
- Whatman
- Scissors
- Glue (you can use any one, but I prefer the “Crystal” moment, because it grabs any material very firmly and quickly, plus it is transparent, that is, the excess that comes out will not be visible).
- Red paint (I took gouache)
- Wide brush (I painted with a construction brush - it’s wide enough and comfortable, and I didn’t have to spend any money).
- Sintepon (optional)
- A hat elastic band (I bought it once, it still helps me out; alternatively, you can do without it, replacing it with two ties).
- Pin
- Thread
- Pencil
The radius of the fungus is 25 centimeters. Cut the thread 10 centimeters longer. At one end, attach the thread to a pin, and at the other to a pencil.
Place the pin in the center (you can stick it in, you can hold it with your fingers). Hold the pencil strictly vertically, that is, perpendicular to the Whatman paper.
Cut out the circle. Then we outline the sector needed for cutting. Draw a radius from the center. We retreat 10-15 centimeters from it and set aside the second radius. Don't forget to leave 3-5 centimeters for gluing. This is what it looks like for me.
I inserted the ropes into the mushroom hat from both sides and tied a kind of figure eights from the rope at the ends.
To be even more reliable, we make a “crown” like this around the circumference of the child’s head.
First, cut out a strip from whatman paper. Measure around the child's head and glue it together. Cut a fringe at the end. Glue it from the inside to the mushroom cap.
Now the hat will definitely not fall off!
Color the fungus to suit your taste.
Then cut out white specks for fly agaric, 5-7 centimeters in diameter, from the remains of whatman paper. You can do it bigger. To your taste! This time, in order to draw circles without using a compass, I used the upside-down neck of a glass.
Don't forget to glue them to the places where the hat elastic is attached.
All! The mushroom hat is ready.
Related messages:
DIY mushroom costume for a boy
The Autumn Festival is already a fairly common event not only in kindergartens. Gifts of autumn are often used as costumes. If you need a mushroom costume, then we offer a bright and beautiful fly agaric outfit. This option is intended for any age group, and can be sewn in a few hours. Based on this master class, by changing the color of the material and the shape of the cap, you can make costumes for other mushrooms with your own hands.
Necessary materials:
Making a fly agaric mushroom cap
Transfer the contours of the pattern onto the foam rubber and cut out the segment.
Make a full circle on the red fabric.
Cut the same circle from the padding polyester lining. I used the leftovers, which I stitched together into one piece.
Prepare small ovals or circles from white fabric. In extreme cases, you can get by with cotton pads. Join the cut on the foam by hand.
You will end up with a cone.
Baste a circle of synthetic padding to it.
Place the white stripe and red circle face to face and stitch.
Along the bottom side of the white stripe, make a 1.5 cm hem and stitch, leaving a small hole in order to thread the elastic.
Take a hairpin, thread the elastic, connect the edges, straighten and stitch the hole. Pull the cover over the cone. Glue white circles to the hat using cobwebs and an iron.
To fix it on the head, sew an elastic band or ribbons from the bottom of the mushroom as ties.
That's it, the main part is ready.
We sew a cape and apron
Process the side and bottom cuts. If you have an overlocker, you can use it. If it is not there, then use a Moscow seam or hem with a closed cut. On the front of the cape at waist level, sew two stripes with finished edges. These will be the ties. That's it, the DIY Mushroom express costume is ready. If you have time and strips of fabric, you can gather it into folds or a frill and trim the neckline with such a border. In this case, it is better to treat the neckline with bias tape. We put on an apron-cape and tuck the sides of the back under the front. We tie the belt with a beautiful bow.
On your feet, white tights or knee socks, or maybe green ones. Our DIY fly agaric mushroom costume is completely ready.
Options for hats for the New Year's outfit Fly Agaric
Use your imagination, sometimes a cardboard and painted hat looks no worse than an embroidered one. You can insert hat wire, which easily bends in waves, if you wish.
Or the fabric is laid as a cone for the upper part and spots characteristic of this mushroom are glued onto it. Whatever you invent, make sure that the headdress for a children's party, and even such a fun and memorable one, is not overshadowed by it being uncomfortable, heavy and sliding down one side or the other.
Children's New Year's parties are always a hassle and additional worries for parents. The process itself is best turned into joint creativity with the child. From idea to implementation. Come up with a fairy tale where he himself will be the hero. Entrust feasible operations. Maybe in the process of work, it is worth telling the child where the New Year tree came from and where Santa Claus came from.
All this, coupled with the creative process of creating a costume, will increase interest and make your stay at the New Year’s Eve meaningful. Just imagine that your son or daughter will remember the holiday itself and the preparation for it together with mom and dad forever. And they will tell their children. There is nothing more valuable than childhood memories, when parents were nearby and everyone felt warm and comfortable together.
Golden autumn
Autumn is the time of all kinds of gifts that nature showers us with. This is a huge amount of colors and shades in nature. Therefore, the Golden Autumn costume will be just as bright and elegant.
If it is not possible to specially sew a dress that will serve as the basis of a costume, do not be discouraged. Any red, yellow or orange dress will do.
Fall Costume Ideas
This is the base of the future suit. Now let's move on to the most important process - decor. First of all, for decoration, let's take elegant autumn leaves. They can be collected in advance and carefully dried, and then secured with a thread and a needle on the dress.
If it is not possible to collect leaves, you can cut out leaves from colored cardboard (white cardboard covered with colored paper) according to a template, and then sew them on the costume.
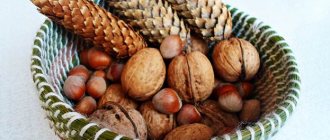
Additional elements are also suitable for decoration - small cones, chestnuts, acorns, bunches of rowan berries, artificial berries and mushrooms.
Creating an image depends entirely on your imagination and the details with which you decorate the costume. You can complement the look with a bracelet and beads of bright colors or make them from acorns or autumn berries - rose hips, rowan.
Make a crown, hat or wreath on your head from maple leaves with sprigs of rowan, rosehip, autumn flowers and artificial fruits.
You can also decorate your hairband with leaves.
If the baby’s wardrobe does not have a dress that matches the color scheme, you can very quickly make a skirt from bright tulle. Let's measure a wide elastic band according to the girl's waist, attach strips of tulle to it (the more of them, the fuller the skirt) and sew the ends together.
In this article we have already shown in detail,
How to simply and beautifully make an elegant tulle skirt with your own hands.
We decorate with leaves, rowan berries, artificial flowers or fruits.
An autumn costume for a boy can be made in a similar way.
Take a bright or brown shirt and pants as a base and decorate with autumn-themed leaves and accessories. You can make a cape like a cape and throw it over your shirt. Make a wreath or crown of leaves on your head.
Not a gloomy cloud at all
A rain cloud costume would look perfect for an autumn matinee. Especially something so unusual and funny.
To work you will need:
- an old or unwanted hat;
- cotton wool or holofiber;
- glue;
- scissors;
- felt, other dense material or cardboard;
- blue or blue thick threads.
We make the main attribute of the costume - a cloud hat.
We take a hat and a large amount of cotton wool or holofiber (it can be taken from an old unnecessary pillow or blanket).
We paste the hat with large flakes so that our cloud turns out fluffy and beautiful.
Now let's make raindrops. They can be cut out of blue or blue felt or other dense material that you can find at home (drops can also be cut out of colored cardboard). Glue threads of similar color to the cut out droplets.
We will make a kind of garland from them and attach it to the hat.
This is how our rain cloud turned out.
droplet
We will sew a cape, panties and beret from light blue or dark blue satin or twill. We cut out droplets from satin, organza or any shiny silver fabric. We glue (sew) them to the main suit in a checkerboard pattern.
This outfit is equally suitable for both girls and boys.
Autumn fungus is a favorite children's holiday character
A mushroom costume is, indeed, one of the most common outfits for a children's autumn party.
The most important thing about it is the hat. There are a great many options for its manufacture. The simplest one is to cut out a circle from colored material or cardboard and, folding it into a cone, fix it with a stapler or glue (if you took cardboard, then paint it according to your idea). The radius of the circle is approximately 45 cm.
Fly agaric hat
To work you will need:
- red cloth,
- white shreds,
- cotton pads,
- glue,
- scissors,
- padding polyester
Cut out a circle from red fabric (see figure above). The width of the circle is taken arbitrarily, but not more than 50 cm.
We randomly sew cotton pads onto the fabric. Sew the edges of the product from the inside out.
From white fabric we make a circle of slightly smaller diameter than the previous one. Both pieces, leaving a hole of about 2-3 cm, are sewn together with their right sides facing each other. We fill this hole with padding polyester and sew it up.
We make small ribbons. You can put a white organza ribbon along the edge. This will give the hat a fluffy look.
Boletus mushroom made of papier-mâché
To work you will need:
- unnecessary beach ball,
- paste,
- foam rubber,
- scissors,
- newspapers,
- White paper,
- gouache.
Watch how to make papier-mâché paste in this video master class.
We tear the newspaper into small pieces. Using paste, glue half of the ball with these pieces. Paste it in several layers.
We are waiting for it all to dry well.
We also make small pieces of white paper and cover half of the ball with them again.
Let it dry thoroughly.
We deflate the ball. We trim the edges evenly and cover them with brown paint.
We make a circle out of foam rubber, leaving a slot for the head. We put the foam circle into the hat and fix it.
The top of the hat can be decorated with leaves and mushrooms made of colored cardboard.
DIY autumn mushroom costume ideas
Back 1 Of 7 Next
Mushroom passions
Needlewomen manage to create any kind of mushrooms from fabric: honey mushrooms, boletus mushrooms, fly agaric mushrooms, toadstools, champignons.
Textile mushrooms are a fairly popular decor for children's rooms. Pillows, rugs, organizers, mushroom-shaped ottomans are a favorite design for children of all ages.
Housewives use mushroom motifs to decorate the kitchen: potholders, lunch mats, imitation dried mushrooms.
Accessories made in the shape of a mushroom can be considered a special exclusive - handbags made of fabric for young fashionistas. Such textile miracle mushrooms are decorated with applique in combination with embroidery, which looks simply magical.
Fabric mushrooms, made and painted in a special way, claim to be particularly realistic; they are almost impossible to distinguish from the real thing.
Elegant tree
This is a very original idea for a costume for an autumn ball, which will suit both boys and girls.
Costume for girls
Sew a spacious robe from thick brown fabric (burlap can be used). Sew cut paper or dried leaves onto it in a loose order. You can sew a hat on your head that imitates a bird's nest or a crown of leaves.
Boy's suit
Take a thick fabric (burlap, as an option) and cut the cape in the form of a long apron. Using a darker colored braid or a dark brown marker, we will make circles or stripes that imitate tree bark. We will decorate with sewn leaves, and on the head we will make a crown either with leaves or with flying branches. And the outfit is ready!
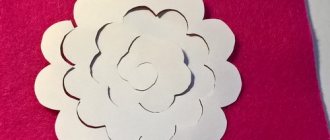
Magic felt mushrooms
Felt is famous for its pliability and versatility; almost everything is sewn from it. Felt mushrooms, voluminous and surprisingly realistic, are most often sewn by hand. Carelessness in their execution looks very artistic if you choose the threads to match and have a sense of proportion.
Mushrooms are sewn from felt according to the same principle as boletus mushrooms, only the stem can be formed from a single piece in the form of a tube. Such a mushroom will be stable, especially if the base for it is made of a green felt meadow-stand. Needlewomen often do embroidery on felt mushrooms and decorate them with beads, beads, and wooden fittings. This gives the work a unique style and originality.