Why bind a book? How will this master class be useful? The answer is quite simple. Maybe the cover of your old but beloved book is torn or doesn’t look as attractive as it did when you bought it. Or maybe you printed it from the Internet. After all, it would be more pleasant to store a printed publication not as a stack of sheets, but in a bound form. Or you wrote your novel, a collection of poems, and the printing house asked too high a price for a couple of copies. This is where our interesting educational master class on how to bind a book at home comes in handy.
DIY book binding
Of course, it will not be possible to achieve the same quality as in a professional printing house, so if you need to bind a book for sale, it is better to turn to professionals for help. If for home use or as a gift, then our master class on how to bind a book yourself is what you need. Who doesn’t love handmade work - it increases the value of the gift. And also such a handmade item can serve as a new interesting decor for the home.
When designing a book, you can give free rein to your imagination, play with the colors of the cover, the main material, and decorate it to your liking. In addition, if you are interested in how to bind an old book at home, then our master class is an excellent way to restore your favorite literature.
Do-it-yourself hardcover binding of publications is a very interesting, accessible and not too complicated hobby that can be done by a craftsman with any experience. Moreover, homemade hardcover books are not that expensive. It does not require complex equipment, expensive tools, or large space for work.
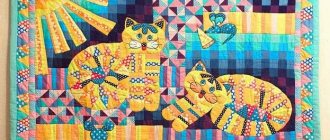
Crochet option
We invite you to view patterns for creating covers with crochet and knitting.
Cover based on belts.
Book cover.
Scheme of a cover for a book.
Book cover with a pattern.
Required material
Before we get started with the master class on how to bind a book yourself at home, let's talk about what materials and tools we will need.
First of all, for binding you will need PVA glue; it perfectly bonds paper, fabric, and thick cardboard. You will also need white threads for stitching; thin wool or iris threads are perfect. If there are none, take a thin white rope.
Thick gauze or a piece of cotton fabric to create a tight, strong spine.
Cardboard of any color to strengthen the cover. Choose a very dense material so that it barely bends. It can be difficult to purchase one, but it can be replaced. To do this, glue 2-3 sheets of cardboard together.
To cover the cover, you can use either colored paper or fabric: choose according to your taste or depending on the design of the book. You can also print the image on paper that is not too thick.
The spine cover is a small cloth roller. To get an idea of what we're talking about, look at the spine of a regular hardcover book. You can buy one in craft stores or online. You can replace the material with dense canvas. In general, a captal is a decorative detail that covers the unsightly spine and insides of a book, so you can do without it.
Required Tools
And of course, before you bind a book at home, you need to prepare the necessary tools. There are not many of them, but they will definitely come in handy during the work process.
For such purposes you will need:
- two boards;
- two clamps;
- metal file;
- paper knife (stationery);
- scissors;
- glue brushes, tightly packed with bristles.
Having prepared all the materials and tools for work, you can begin to learn how to bind a book yourself.
Before starting work
Before you bind a book into hardcover yourself, take some leftover material that you won’t mind throwing away if it fails. After reading the master class, try to make your first binding on them - a rough draft, so as not to spoil the good material and the printed book.
To understand the principle of assembling a hardcover book, we strongly recommend that you carefully examine the printed products from the store. If there is a book that you don’t mind throwing away, then take it apart, inspect the spine, cover, feel the density so that you have an idea of what we need to do with the finished print.
Paper wrapper
The process of making a wrapping cover can be followed in a small master class. To work, take a paper wrapper.
I put the paper on the table. We measure the dimensions of the book and place it in the middle of the paper.
Then draw horizontal lines along the top and bottom edges of the book. Then we bend the paper along these lines.
Place the book back in the center of the wrapper.
We bend the edges along the width, then we bend the book and turn in the other side.
Related article: Modeling from polymer clay for beginners: master class with video
We thread the book through the cover and that’s it. The cover is ready.
At the end, you can decorate the book to suit your taste.
Preparing a book or working with sheets
The book can be printed in any size, but the optimal size is A5. Once you've printed the stack (or perhaps you want to restore an old edition), you need to line it up. To do this, tapping on a board or desktop from all sides, collect all the sheets into an even stack. Before doing this, be sure to carefully review them so that they are smooth, beautiful and fully printed.
When the edges become, in your opinion, even, very carefully place the stack on the board so that the future spine protrudes slightly beyond its limits by a few millimeters. This makes it easier to apply glue. And also carefully place the second board on top of the stack - the press. Thickly coat the protruding edge of the book with glue, possibly in several layers. Let it dry, 2-3 minutes is enough, but it’s better to wait 5-7.
There is another way to create a hard and strong root. This method is most often used in printing houses. It's called a "notebook". However, in this case you will have to do a little more work. Each notebook (a stack of 6 sheets) will have to be stitched manually or using a high-quality sewing machine.
In addition, to prevent the book from looking square, you will have to trim the edges, which is almost impossible to do at home.
When the glue dries, the pack can be moved. But still, carefully remove the top board and slowly slide the spine back onto the table. Clamp the future book between the boards with two clamps. Leave for several hours. Ideally, PVA glue needs 12 hours to dry, but you can continue working after 3–4.
You cannot clamp a book with clamps without boards, otherwise marks will remain.
The initial gluing of the sheets is necessary so that the pack holds more firmly, does not move, and is more convenient to work with later. This is an important stage of the master class on how to bind a book at home.
...About Blozhe
I've been wanting to print my own book and make a hardcover for it for a long time.
But in order to make a hardcover book, you need a lot of time, and there’s always not enough of it, and you don’t even want to print it anyway. And recently I had free time and a book that I couldn’t buy anywhere.
David Flanagan's book “JavaScript. A Detailed Guide” (6th edition) turned out to be a tough nut to crack; I couldn’t find the book in all of Ufa, and if I ordered it, it would cost about 2,500 rubles. I was able to find the electronic version (downloaded from VKontakte), but I have a problem: I don’t like reading books from a tablet, especially technical ones. Therefore, I decided that I should still try to print the book.
I want to start the article by showing what happened. There are more than 1000 pages in the book, and since I printed on regular sheets, I had to divide the book into two volumes, because regular sheets are much thicker than those used in printing.
These articles inspired me when printing and assembling the book:
- A short guide to creating a book, nothing more.
- A thorough and detailed article on swag with a photo report.
- The main focus is on creating the binding.
- In this article, the author uses cuts to “reinforce” the spine of a book.
- Another great article on swag.
- And again an article where they use cuts.
Since our book is very thick, we will print in blocks of 8 sheets, then fold them in half and get a small brochure (notebook). Then we sew all the notebooks together and voila, we get a book!
But unfortunately there are many nuances here, for example, how to print these brochures so that by connecting them we would get a book. I advise you to convert the book to pdf (fortunately, I already had it in pdf format) and use the free version of Adobe Reader.
First, you need to write the range from which page to which brochures will be, for example, I have brochures of 8 sheets, on one side there are 2 pages, it is printed on both sides, and there are 32 pages from the book on 8 sheets.
Here's an example of how I wrote ranges:
- 2 – 33
- 34 – 65
- 66 – 97
- ………..
- 1026 – 1057
After we have decided on the ranges, click print in Adobe Reader, after which the window shown in the figure below will appear.
In the page size and handling settings, you need to select the “Booklet” type, then in the booklet range, select “Front Side Only”, and finally specify sheets: from 2 to 33. After printing 8 pages, turn the pages over and print on the back side, specifying the same settings , in addition to the booklet range, you must select “Back Side Only” here. Thus, we print the same range of pages (from 2 to 33) twice, first with the “Front side only” setting, then “Back side only”.
Having printed all the brochures, we will end up with something similar to what is shown in the photo below.
Now we need to bend the sheets so that we get neat brochures of 8 sheets, a spoon will help us with this. It is convenient to press the fold line with a spoon.
We need to make a press for the book; we will need it more than once. In order to do it we will need:
- two planks;
- drill;
- hacksaw;
- scotch;
- two bolts.
You can wrap the boards with tape if they are untreated.
Let's move on to stitching the book block. For this we need:
- awl;
- cardboard (for template);
- thick threads;
- large needle;
- PVA glue;
- brush;
- gauze (for gluing the end of the book);
- narrow tapes for “reinforcing” the end of the book;
- a small wide piece of tape for captals;
- good paper knife.
Before sewing a book block, you need to make holes in each notebook with an awl; I refused to make cuts. First, we will make a template; to do this, we will mark on the cardboard the places where the holes will need to be pierced. There should be 6 holes, they should be located approximately the same as shown in the figure below. It is necessary to pierce from the inside.
The distance between holes 2, 3 and 4, 5 should be a couple of millimeters wider than your “reinforcement” tape, take this into account in your template. The tape will be located between these holes.
We take our “reinforcing” tapes and glue them with electrical tape to the edge of the table (for fixation), now we proceed to stitching the block. To prevent the notebooks from moving relative to each other when sewing, you need to use a weight, as shown in the figure below.
Exactly how to stitch a book block is shown in the figure below. I confess that I took the photo for this collage from this article. As they say, it is better to see once than to hear a hundred times. I forgot to take my own photos while stitching.
Now you need to trim the uneven edge with a paper knife, take this seriously, I personally couldn’t do it evenly enough.
We fix the edge of the book block (the one that we will trim) into our clamp, take a good paper knife and change the blade to a new one (break it off), everything is ready, we proceed to straightening the edge.
Now we need to increase the strength of our spine; to do this, we will glue gauze to the end of the book using PVA and place it under a press. After the gauze has dried, you need to glue the captals to the bottom and top of the spine.
Captal is a strip of material with a thickened edge, glued to the edges of the spine of a book block to increase strength.
We cut out two pieces of cardboard from the folder; they should be larger in size than the book block by a few millimeters on each side. Between the cardboards there is a strip of cardboard - this is the end of the book. The distance between the cardboards is 5 millimeters.
I secured the cardboards with tape, this was a mistake, I had to glue the binding with glue at the moment. It was necessary to use either paper tape (for windows) or a fabric-based medical adhesive plaster.
In fact, I will cover the book with something other than fabric, or more precisely, not fabric at all. I will cover the binding with spunbond (non-woven material made from melted polymer), it is cheap and you can find it anywhere, in particular disposable medical gowns are made from it, and I took it from a bag that was sold along with the blanket.
If you cover the binding with spunbond the same way as I do, then don’t repeat my mistakes. It cannot be ironed directly, only through a thick layer of gauze.
After all the preliminary preparations, cut out a piece of fabric of the required size and make markings, as shown in the photo below (the inner rectangle is the size of the cardboard).
Now we need to connect the binding to our book block. To do this, you simply need to glue the endpapers to the binding. To do this, we lubricate the endpapers with glue, and so that there are no dry places left, we use a brush.
Well, as a finishing touch, I decorated the cover in the style of the cartoon Gravity Falls, all I have to do is get the third volume and I will be omnipotent)))
In conclusion, I want to say that the process is still quite labor-intensive, but you can express yourself and approach the process creatively. You can make absolutely any book, here you are limited only by your imagination.
Creating a spine
Let's proceed to the second stage of the master class, how to bind a book with your own hands. Remove the clamps after drying. Move the book again to the edge of the table by 3 centimeters. Holding the product with a clamp, use a pencil to make marks along the spine every 2 cm. On the marks, make even cuts with a depth of at least 1 mm. They should be even and perpendicular to the spine.
Insert the white rope into the cuts; it should fit very tightly there. This is an equally important stage in creating the spine, because the threads will help strengthen the book and prevent it from breaking or falling apart. Coat the spine and thread with PVA glue, making sure it flows into the cuts.
While it dries, prepare the material. The piece of gauze should be 1 cm smaller than the spine, but the width should be equal, and add 2 cm on both sides. Prepare a piece of captal.
In addition, for the spine you will need a small piece of paper, the size of which is 7–8 mm less than its length.
Thickly coat the edge of the book block with glue, and also saturate the gauze and captals with it. Do not glue the excess edges of the fabric to the sides of the book; they should hang freely. Apply gauze to the spine, a piece of captal on top and bottom, and a piece of paper on top. Press both the gauze and the paper firmly into the stack. Leave the product to dry overnight.
Book cover design
The last part of the work remains, which includes making the cover.
From decorative paper
Making a cover from decorative paper is very easy and simple. Thick paper, scissors, sketch, book will come in handy.
Process of creation:
- Fold the sheet face down and place the book in the center of the sheet. Fold the edges of the paper over the cover of the book and iron the folds.
- Opposite the spine, form a notch - a trapezoid.
- Determine the folds of the cover of the book, the cover will fold towards the long side, then towards the short side.
- Secure the cover with tape and hold it in place.
- If desired, write the title of the book on the cover.
Leather cover
To make a leather cover you will need leather, paper, cardboard, and cotton wool.
Process of creation:
- Cut the pre-prepared sheet, the height is equal to the pages, the width is 2 times larger.
- Fold in half twice to provide protection. You need 2 pieces of these parts.
- Attach 2 folded sheets of paper to the book on each side. Glue the endpapers to 1 page.
- Glue the fabric onto the spine and smooth it out
- At the end of the spine, glue the fabric, apply glue in the center and glue the thread.
- Cut out 2 cardboard rectangles to form the base for the cover. Place the cardboard over the book, folding it if necessary.
- Lubricate the outside of the cardboard with glue, attach the skin and connect it to the cardboard, do not stretch the skin, only press lightly.
- Trim the skin, leaving 2.5 cm, cut off the corners.
- Glue the cover, fold in the seams, and finish the folds.
- See how well the cover holds up.
We made a wonderful leather cover!
From fabric
To make a fabric cover, you will need scissors, fabric, thread and a needle, a ruler with a pencil, and a button.
Manufacturing process:
- Measure the book. Write your measurements on the wrong side of the fabric. The width will double and the width of the spine will increase. If the cover width is 15 cm, the spine is 2 cm, measure 15 cm + 3 cm + 15 cm = 33 cm. Add 1 cm on the sides. The width will be 35 cm, length L+2 cm.
- Cut out the base of the cover, cut the fabric the same length as the length of the book + 2 cm and the width of the cover. (for example, width 15 cm, length – 15 + 3 cm). Cut a piece of fabric in half - the flaps. Choose the width of the clasp according to your taste, its length is greater than the width of the spine, add seam allowances. Cut out the parts for the fastener.
- Place the fastening pieces right sides together and sew. Place one of the ends to the center of the base of the cover and sew.
- Add a button to side 2, sew the button into the fastener, and secure the magnetic part of the button.
- All that remains is to assemble the cover - sew the flaps to the base. Turn the cover over and sew the flaps to the edges.
This article discussed in detail the main ways to create a book with your own hands. We hope our tips and recommendations will help you create a unique little book with which you will surprise yourself and your loved ones.
Endpapers
The next stage of the master class on how to bind a book into a hardcover yourself is the creation of the hardcover itself.
Take several sheets of thick paper, you don’t have to choose white, you can use any color. Fold the endpapers in half. If your book is A5 format, and whatman paper is A4, then its edges will have to be trimmed a little so that they are not larger than the book.
Having folded the endpaper, try it on the book, and then, smearing a strip of glue at the fold (4 mm), glue it to the block. Turn the book over, glue the second endpaper and put it under a press to dry for half an hour.
At this time, you can start creating the cover.
Beautiful and stylish
If you want to make a good and high-quality hardcover, then the next master class is just for you. The first step is to measure the dimensions of the book, cut out a couple of parts from birch bark. We apply the pattern to the birch bark. You can make beautiful various curls, flowers and notches.
You can apply patterns to only the front part or to both parts. We cut out patterns using a special tool. We cover the cover with varnish or some kind of paint with a matte tint. We glue the birch bark parts to the finished fabric cover.
Cover
First, cut out the cardboard. The hardcover is in three parts. Measure the dimensions of the block and then mark them on pieces of cardboard. Two identical crusts should be 8 cm longer than your block of sheets and equal in width. The spine should be as long as the crust and as wide as the block.
Next, select paper of a suitable color and cut it out. In height, it should protrude beyond the crusts by 2–3 cm on each side. On its reverse side, make the following markings, starting from the middle: the dimensions of the cardboard spine, the crusts on both sides, 8 mm indents on each side and 2–3 cm to the edge.
Then glue the cardboard and paper together. Glue the spine and two crusts onto the markings.
Stepping back 3–4 mm from the corner of the cardboard, cut the corners of the paper diagonally. Coat the protruding edges on the sides of the future cover with glue and stick them on the cardboard.
Place the press on the cover and leave for 1 hour.
After that, we move on to working on the cover decor. You can sign the book manually by drawing a picture or gluing a printout or sticker. It's a matter of taste here.
LiveInternetLiveInternet
Quote from message Galina_Andreevna_555
Read in full In your quotation book or community!
How to bind a book yourself (hardcover).
This is an article from the website “Country on the contrary” by Elena Fedoseeva.
Why bind books yourself? Well, for example, you wrote a novel or a collection of poems and want to give them to friends, but you don’t have money for printing. Or you downloaded your favorite book from the Internet and want to have it not only in electronic form, but also in regular paper form. I encountered the problem of hardcover when I prepared for publication a collection of local history by I.M. Ulyanov (two volumes) and wanted to print it in a printing house at her own expense in a small edition - no more than 50 copies. The collection had a large number of color pictures, and it turned out that it would be unreasonably expensive. Then I decided to print it myself - at home, on my own laser printer. The cost of printing turned out to be quite reasonable and I successfully printed the first few copies, intending to have them bound in a professional bookbindery. I definitely wanted a hard binding, always with a dust jacket, so that the book would look beautiful. It turned out, however, that the cost of hardcover exceeded the cost of printing, and then I had to think about it. Everything together (printing + binding) turned out to be too expensive... There was only one way out - to bind it yourself. After listening to the advice of my husband, who had the “Young Bookbinder” set as a child, and having found a couple of articles on the Internet (which, as experience has shown, were not very good), I got down to business. The first pancake turned out to be lumpy (some essential details were not reflected in the found articles), but the second one turned out to be quite durable and beautiful, at least I was quite pleased with the result.
.Books you can make yourself. Of course, it is impossible to achieve typographic quality at home (the biggest problem is with trimming the edges), but if you need the book not for sale, but as a gift (as was the case in my case) or for home use, then it is quite suitable. In addition, its “gift” quality can be emphasized by playing with the color of the cover and its design - there is a lot of room for imagination here. Hardcover turned out to be a very interesting business, simple and surprisingly cheap (one can only wonder why it costs so much in bookbinding shops), accessible to everyone - man, woman, and child. No special equipment, no expensive tools, no space is required - everything can be done on the kitchen or desk, using practically “available” tools. I want to share my experience here, maybe it will be useful to someone.
Tools needed: 1. Two boards 2. Two clamps 3. Metal file 4. Glue brush 5. Scissors 6. Paper knife Materials needed: PVA glue. Thick white threads or not too thick white rope. The material is like gauze, but more rigid. You can buy it at the Fabric store - similar material is used to strengthen the sides of jackets, etc. Gauze is also good, but it is difficult to cut evenly. Cardboard (any color) – for a hard cover. The cardboard should be very dense and almost rigid. If such cardboard is difficult to buy, you can use regular cardboard, but then you need to glue it in two or three layers. Colored paper (for covering the cover). Any paper will do. The best one is not too thin and not too thick, say, something between whatman paper and wrapping paper (in terms of density). Fabric roller for spine. This is the most problematic (in terms of purchase) element. Look at the spine of any hardcover book you buy and you'll see exactly what's needed. However, it is difficult to buy. At first, in the absence of a roller, I simply used braid with a similar outline from the Fabric store. Then I managed to buy what I needed at a specialty store, but finding it was not so easy. This detail is purely decorative, covering what remains inside the spine, so in principle you can do without it.
Spine with roller; strips with a roller, purchased at a specialty store. Before you begin, take a close look at how any hardcover store-bought book is made, and try to look inside the spine to get an idea of how your book should look as a result. For the first time, I advise you to try it on “waste” so that you don’t feel sorry for throwing it away. The second copy can be made completely white. Step #1 So you have a thick stack of printed pages. They can be of any format (in my case - A5). Now you need to align the edge as evenly as possible. You can level it by tapping different sides of the stack on a level table, making sure that no page sticks out. You especially need to pay attention to the left and top edges - the one where the spine will be, and the one that will be visible when the book is on the shelf. The other two edges are not so important. When the edges have become fairly even, very carefully (so as not to knock them down) place the stack on the table or board (so as not to stain the table with glue), with the spine facing you, so that the edge of the stack sticks out slightly beyond the table (then it is more convenient to smear it ). Very carefully (again, so as not to knock down the edges) place some temporary weight on top, say, a book. Then thickly coat the spine with PVA glue and let it dry slightly (2-3 minutes is enough).
You can, of course, print a book from notebooks, as is done in printing houses - most printers allow this. But then two problems will arise. You will need to sew each notebook by hand, which will take time, especially if the book is thick and each has, say, 20 notebooks (one notebook usually has 16 sheets). It will be necessary to trim the edges because... in notebooks they will never be even. My experience has shown that it is almost impossible to trim the edge evenly at home, so I settled on printing in separate sheets - then the edges look much better. The binding turns out to be quite strong, does not “break”, and practically does not “eat up” the left margin (so when printing, the left and right margins can be left the same). When the glue has dried slightly and moving the pack is no longer so scary, remove the temporary weight and carefully move the future book a little further from the edge of the table or board so that the spine no longer hangs. Place the second board on top (so that the spine does not stick out, but is pressed on top), clamp everything tightly with two clamps and leave it to dry for several hours. (It is believed that PVA glue dries completely in 12 hours, but at this stage 3-4 hours will be enough). This initial gluing is necessary to make sawing easier - so that the stack of sheets holds together more firmly and does not move.
Stage No. 2. Remove the clamps and again move the stack and boards to the edge of the table, so that the boards protrude 3 centimeters beyond the edge of the table (so as not to accidentally saw the table), and the edge of the paper stack protrudes beyond the edge of the boards by 2 millimeters. Clamp everything with clamps. Mark the protruding edge with a pencil at even intervals (I do them at 2 cm). In the marking areas, use a metal file to make cuts 1 mm deep. Make sure that the cuts are smooth and strictly perpendicular to the spine.
Now you will need glue, a brush and rope. The rope is inserted into the cuts; its thickness should be such that it fits into the cuts quite tightly. If you use threads, you need to twist them 5-6 times. If the rope is too thick, you can unravel it into pieces. Saws and rope are needed to strengthen the spine - they hold it firmly enough and the spine does not “break”, as often happens in glued store-bought books. Without this, your book may simply fall apart. At this stage, you need to have pre-cut gauze and rollers ready. Cut the gauze like this: the length should be 1 cm less than the length of your spine. The width is equal to the width of the spine + 2 cm on both edges. If, say, your spine is 21 x 2 cm, then the gauze should be 20 x 6 cm. You need two rollers, the width of each equal to the width of the spine. You should also have a strip of paper at the ready, which is glued to the spine over the gauze and rollers, so as not to smear your hands with glue when smoothing the gauze to the spine. This paper can be anything, it will not be visible. I use regular brown wrapping paper. Its length dimensions are 7-8 mm less than the length of the spine, and its width is equal to the width of the spine.
When everything is ready, start the process:
Thickly coat the spine with the cuts with glue, making sure that the glue flows into each cut. Insert ropes into each cut (I also coat them with glue beforehand), so that their ends stick out 2-3 cm. Pull the ropes by the protruding ends so that they sit tightly in the cuts. Again, coat everything with glue and stick on gauze, then rollers. You again coat the outside of the whole thing with glue and glue a strip of paper, smoothing it to the spine so that everything is well glued together. In this form, everything must be left overnight so that it dries well.
Stage No. 3 (next day) The internal block of the future book is ready. Remove the clamps and cut off the excess ends of the ropes with a knife.
Endpapers Next, let's move on to the endpapers. They should be made of thick Whatman paper, because... carry half the structural load - it is on them (and also on the gauze) that the cover is supported. (By the way, they can be colored, not necessarily white). If your book is A5 size, then the endpaper is A4 size, folded in half. The outer edge needs to be trimmed a little, because... the ends of the ropes protrude slightly from the spine; they will interfere with the endpaper sticker. (It is impossible to cut them completely flush). When the endpaper is folded, fitted to the book and trimmed, apply glue to a strip at the fold (3-4 mm) and stick it on the block. Then turn the book over and stick another one on it. Leave it under pressure for at least half an hour, and in the meantime you can start working on the cover. Cover First we cut out the cardboard. This is a hard base cover, consisting of three separate parts - two equal-sized covers and a spine. The crusts should be 8 mm higher in height than the height of your glued block (so that they stick out 4 mm on each side), and equal in width to the block. Those. if your block is A5 format, i.e. 21 x 14.8 cm, then the dimensions of the crusts are 21.8 x 14.8 cm. The height of the spine should be equal to the crusts (21.8 cm in the case of A5), and the width should be equal to the thickness of your block. It may be made of thinner cardboard. Choose paper of a suitable color, cut it out: In height, it should protrude beyond the cardboard crusts by 2-3 cm on each side. In width (dancing from the middle): spine width + 8 mm interval on each side, + width of cardboard crusts on each side + 2-3 cm on each side (see photo). It would be nice to make markings on the inside of the paper; it makes the layout much easier.
Next comes gluing. Apply glue to one side of the crusts and the spine, stick it on, and press it. Cut the edges of the paper diagonally (with an indentation of 3-4 mm from the corner). Apply glue to the protruding edges, bend them over the crusts, and press. At this stage, it is better to leave the cover under weight for at least an hour. In principle, the cover is ready.
Then the question of its design arises. Even if a dust jacket is planned, the author's name and title (or in my case, volume number) should still be written on the cover and spine. How to do it? Not everyone, even architects, can make an inscription by hand absolutely accurately. I tried to write using a stencil, but it turned out sloppy. The solution came to this: print on a printer a slightly modified fragment of the dust jacket with the author and volume number, and then stick it on. Simple, but it looks, from my point of view, quite decent.
Paste the printed title onto the cover. It is better to do this with pencil markings - so that the inscription on the spine is in the center, and nothing would move anywhere. The cover is ready. Then comes the not difficult, but crucial moment - gluing the inner block and the cover together. This moment requires great precision, so fitting is necessary first. Place the block into the cover so that the edges of the cover stick out evenly, and BE SURE to mark the corners of the endpapers with a pencil. Apply glue to one edge of the gauze and glue it to the endpaper. Now apply glue to the entire endpaper along with the gauze. To prevent excess glue from sticking the pages together, you can place a sheet of paper inside the endpaper. Lift the book (with the cover lying on the table), turn the smeared endpaper down and glue the endpaper to the cover, starting from the edges - aligning the edges of the endpaper with the pencil marks.
Place the book on the table (glued side down) and apply glue to the gauze on the other side, glue it to the endpaper, then apply the entire second endpaper. My experience has shown that it is most convenient to simply “put” the cover on the endpaper without lifting the book from its place. Usually, in this way, the edges of the endpaper are most evenly aligned with the pencil marks, but you still need to check whether the corners are aligned with the marks, and if not, then align them while the glue is wet. You can run a wooden template (or just the corner of a plastic ruler) along the spine, but be careful not to tear the paper. This gives the spine a “spiciness”.
Now you need to put the book under the press overnight so that it dries well. By morning your book is completely ready. A dust jacket is just a sheet of paper (its dimensions are easy to calculate). The only point that needs to be taken into account here is that you need to make the final design of the dust jacket after the first hardcover is ready - only then will you know the exact size of your book. (With the A5 page format and the height of the cardboard crusts 21.8 mm, the height of the dust jacket is exactly 22 cm (the paper used to cover the cardboard also gives thickness). With the A5 book format, the length of the dust jacket is slightly longer than A3. I print it on two sheets of A4 (you need good quality paper) and glue it from the inside with tape. On the sides (which will be folded inward) I add white stripes to the required width. Since the dust jacket is colorful, the gluing from the outside is almost invisible.
Compound
All we have left is to connect the block and the cover. Place the book against the cover, making sure it is not upside down. Then coat the spine with glue and press it to the block. Lubricate the hanging several centimeters of gauze with glue. Glue it to cardboard - the crust of a book. When applying, firmly press the parts together. Then attach the endpaper side of the book to the cardboard, thereby covering both the gauze and the side pieces of paper.
Close the book and run a ruler or corner of a ruler along the spine to sharpen it.
Put the book under the press overnight, and it will be ready in the morning.
Our master class on how to bind a book at home is completed. After spending a few days, you can design any collection, your own or a book printed from the Internet, without spending a significant amount at the printing house. We hope you find the knowledge of how to properly bind a book useful, because using this method you can create many other useful things, for example, albums, sketchbooks or notebooks.
Antique effect
If you prefer antique books, then this master class is just for you.
To create this effect, take books, regular paint, then aging paint, rubber seals and stamps, stamp paint.
Take the books and clean them of excess, degrease them with acetone.
We cover the book with regular paint.
Then we apply aging paint and stamps to the books.
These are the old books we got.