I have long wanted to buy a frame backpack, something like the Tatonka Lastenkraxe. But the price tag for such a frame is not at all humane. That's why I thought about making a homemade product. The network mainly describes how to make a pony or a replica of ALICE Large from polypropylene pipes. I know about the concept, but recently the question arose about making a series of similar backpacks for transporting not very heavy, but large things. Therefore, the strength and load-carrying capacity of this frame were not in first place. The ability to load oversized items and maximum repeatability for people who do not have the technical means for metalworking are required. Maximum drill and screwdriver. What was confusing about the polypropylene version was that it required bending the sticks using a hair dryer. Many acquaintances immediately said that it was better to make a ponyag, but in urban conditions it is not so easy to find thick tree branches or spears. And the poplars growing in our urban conditions are not at all suitable for any work. For busy field work with oversized loads, I would recommend the same Tatonka.
Although, after reading the technical characteristics of the Tatonka Lastenkraxe, you can find out that the suspension system of this backpack is designed to transport a weight of 25 kg. Everything else is the responsibility of the user of this frame and after exceeding such loads, warranty service is not provided.
Again, discussions on tourist and survivalist sites show that the main criticism of simple homemade structures comes from hunters and survivalists who require a platform capacity of at least 120 kilograms. In this case, there are no such requirements for the frame; they are designed for a weight of no more than 15 kg. Yes, and this weight is slightly overestimated. The main requirement is the ability to attach oversized cargo and distribute the weight on the straps.
Summary to date
Well, that's all. I drew three different frame options for myself and will continue to see what suits me best for my tasks. Naturally, I do not set out to solve anyone else’s issues. The fact is that I often meet people who do not have tasks that should be solved by one tool or another, and for this reason they criticize the choice of a person who needs this particular tool.
The structure will be made of aluminum with fastening made of molecularly cross-linked polyethylene fittings for pipelines. The frame is small in size, about 50 by 30 centimeters. The frame is flat with polyurethane foam inserts on the back side. I'll try to install a weight belt in this design. I will try to squeeze in a shelf even if I have to sew on a plastic plate. To secure the load, I will try to provide a Molle fastening and a stretchy mesh. All sewing work will have to be organized so that it can be done as much as possible by hand, or cheaply in an atelier.
While everything is at the project stage, I will wait for questions and feedback. Then I will post the version that I like best. No intermediate options.
• Go to archive
Photo
It is intended for older children going on multi-day hiking trips.
Several designs of easel backpacks have been developed. We are talking about one of them today.
The design of the proposed easel backpack is relatively simple, and its manufacture requires basic metalworking skills and the ability to sew on a sewing machine.
When placing equipment in a backpack, you can place the load more rationally, since thanks to the machine, the contents of the backpack do not touch your back, and therefore it is not necessary to put soft things under your back. Distributing the load along the back in the form of a flat rectangle creates the least load on the back and abdominal muscles.
The general view of the easel backpack is shown in Figure 1. The backpack is assembled from a machine (1), a fabric bag (2), a U-shaped bracket (3) stretched on the frame, supporting the upper rear edge of the fabric bag, two shoulder straps (4) and two transverse straps (5) with which the backpack rests on the back.
The design of the backpack frame is clearly visible in Figure 2. It consists of two longitudinal and five transverse pipes, as well as two duralumin rods parallel to the longitudinal pipes. Curved structural elements (upper and lower cross tubes) give the frame the necessary rigidity when moving in the plane of the frame. The three lower transverse pipes have a slight (40-T-45 mm) deflection in the direction perpendicular to the plane of the frame (Fig. 2, right), due to which the tourist’s back does not touch the frame pipes.
The most suitable for the manufacture of the frame are thin-walled duralumin pipes D16-T and D1-6 0 18-22 mm for longitudinal pipes and 0 14-^-16 mm for transverse ones. The front of the flexible pipe must be tightly filled with sand and plugged with wooden plugs. Heat the bending areas red-hot and, after bending, immediately cool them in a bucket to preserve the strength of the material.
The joints of longitudinal pipes with curved transverse pipes are shown in Figures 4a and 4b. Duralumin wire 03+4 mm can be used as rivets.
Figure 4c shows the method of attaching the bag to the backpack frame. The eyelet 1, riveted to the fold of material formed by the front 2 and side 3 walls of the bag, is put on a pin protruding from the longitudinal tube of the frame. Then, through the hole at the end of this pin, a wire pin 4 is passed from top to bottom, which does not
allows eyelet 1 to fall down and holds the bag on the frame.
The pins to which the top and bottom eyelets of the bag are attached are aluminum rivets 0 6 mm, at the ends of which a hole with a diameter equal to the diameter of wire pin 4 is drilled perpendicular to the axis. The length of the rivet pins is selected depending on the thickness of the eyelets and the diameter of the longitudinal pipes of the frame. Steel wire 0 3 mm long and 500 mm long with an end bent on one side at a right angle can be used as pins 4.
The fastening of the middle eyelets of the bag to the frame and the method of connecting the transverse pipes of the frame with the longitudinal ones are shown in Figure 4d.
Inside the transverse pipe 5 there is inserted a plug machined from duralumin, which is attached to the pipe 5 with a fastening pin 3. The transverse pipe 5 is inserted into a hole drilled in the longitudinal pipe 4. The end of the plug of the transverse pipe 5 forms a pin onto which a grommet 1 is placed, riveted to bag material 2. Through the hole drilled at the end of the plug pin, a wire pin 6 is threaded, holding the grommet to the frame.
Figure 3 shows a general view of the fabric bag.
The top front edge of the bag is attached to the frame with two sewn canvas loops. A U-shaped wire bracket is threaded through the rear upper edge, supporting it in the position shown in Figure 1. The lower bent ends of the bracket are inserted into the corresponding holes in the backpack frame. The bracket, like the longitudinal rods of the frame, is made of 0 6 mm duralumin wire.
The pattern of the bag (given without seam allowance in Fig. 5) is designed for the width of the tarpaulin - 85: 90 cm.
The seams connecting the front and side walls of the backpack form a fold to which the eyelets are riveted.
The design of a homemade grommet is shown in Figure 6. It consists of two brass washers 1 with an outer diameter of 14-15 mm and a copper or brass tube 2. Material 3 is laid between washers 1 and tube 2 is flared on both sides (Figure 6, 7).
It is best to sew a bag and cross straps (8-10 cm wide, folding the material in half or three times) from a thin, durable tarpaulin
Any large ready-made backpack you have can also be used in this design. You just need to sew a strip of tarpaulin to it with eyelets for attaching it to the frame and sew on a new (large) flap.
Each young tourist can carry out a detailed study and adjustment of the design of the backpack to his height independently, changing the length of the shoulder straps and moving the transverse straps up and down the frame.
A. LEVANSV Fig. B. LISENKOVA
Comfort in a backpack
(End. See page 11 for beginning.)
Flashlight dimensions: height - 68 mm, diameter - 25 mm, weight with battery - 38 g, without battery - 18 g.
CHAIR AND TELEVISION
The trolley chair of Moscow tourist V. Stroganov has been tested on hikes for four seasons and has proven itself well.
This cart can hardly be called a cart. It looks more like a bag on wheels. Nevertheless, it is indispensable for transporting a kayak. To make it, you need to have a folding fishing chair, two wheels (preferably inflatable ones from a children's bicycle), a piece of steel tube for the axle on which the wheels are attached with cotter pins, and two couplings, which are two flattened pieces of duralumin pipe with holes.
To transport a packed kayak, you insert the U-shaped tubes from the fishing chair into the through canvas pockets sewn onto the kayak cover. Place couplings with an axle and
wheels. Secure the couplings to the tubes with cotter pins and transport the kayak.
When transferring from one body of water to another or when crossing rapids, the cart is tied under the bottom of the kayak, and it can be easily transported with things without completely unloading it. On such a cart you can transport two three-seater Salyut kayaks and a Salyut-2 motor, securing it to the axis. To reduce the overturning moment, it is necessary to slightly modify the design by increasing the base of the trolley.
BACKPACK WITH SEMI-RID FRAME
When going on a trip, a tourist will first take care of his backpack. A comfortable, well-packed backpack will save you from many troubles along the way. Now our industry produces several types of backpacks: hunting, children's, expedition, etc.
What should a tourist do when going on a hike for the first time?
A tourist from the city of Rubtsovsk, V. Nuzhny, proposes to modernize an ordinary hunting backpack: make a semi
rigid frame and canopy cape (cover) for a sleeping bag.
SEMI-RID FRAME - a 0 22 mm duralumin tube sewn into the upper part of the back wall of the backpack allows the backpack to maintain a flat shape. By making slits in the backpack, you can attach straps to the frame, which bear the main load and often come off in a regular backpack.
CAP LOGO (COVER) makes it possible to change the volume of the backpack by attaching the sleeping bag from the outside. The upper part of the canopy-cape is fastened with buttons, the lower part is secured with straps that are sewn to the backpack. The canopy-cape must be sewn from dense, preferably waterproof material.
To change the volume of the backpack, there are also Ribbons that are sewn inside the backpack: three on the left and three on the right. Zip ties divide the internal cavity of the backpack into three parts - this allows you to properly distribute things and products.
It is most convenient to place the heaviest objects in the side sections of the ryunzan, obtained from the screed.
On weekend trips, when there are few things and provisions and additional capacity is not needed, this backpack can be compared to a regular hunting backpack.
class="subtitle">
When you go hiking, you want your back to be as comfortable as possible. Even if you don't know this before the hike, in the mountains you understand it within the first hour. Because if your back is uncomfortable, it’s uncomfortable for you, the group, the leader, even the mountains seem to be sad because the backpack doesn’t fit correctly on your back. So, to make your back comfortable, you need to choose a backpack with a frame that suits you
.
So, here they are, views of the “back” of tourist backpacks.
Maybe a cargo platform?
Naturally, at home it is difficult to make a frame from fiberglass or carbon fiber with a given rigidity and dimensions. Moreover, it will take a lot of time to calculate and try it all on. But such a frame can be made from duralumin tubes, fortunately the D16T alloy can be found in most hardware stores, but the question will arise of how to connect them. Although I have studied this issue and I think that the best option would be to connect using corners to make a polyethylene pipeline. These corners hold both cold and pressure, are resistant to ultraviolet radiation, and generally have very good internal diameters. Moreover, it is glued using epoxy resin.
The cargo frame has a couple of disadvantages. There is no shelf and it is below neck level.
The shelf is of high importance for my case, since we planned to use these frames to transport things that need a flat surface for support. But when using a loading platform, this event will be difficult
But I can somehow figure out a more optimal placement of the load above the neck using hangers and ties. Since one of the uses of this equipment is the transfer of seedlings, I would like to firmly fix them along the entire length, but making a frame about two meters high is not rational. Prefabricated structure is not desirable.
To the question of why you can’t just use a large expedition backpack, I’ll answer this way. I tried several different versions of backpacks, but the branches inside them broke, and it was impossible to pull it down to a flat rectangle using standard methods. As a result, we had to install corrugated boxes tied with tape inside the backpack and then had to tighten it from the outside with additional slings. When tightened, the backpack bag tends to be the size of a pipe, not a sheet. Also, the reason for which it is being developed is low cost and repeatability for volunteers. Most of them cannot afford to buy an expedition backpack, and there are no sponsors who will just buy 30 backpacks. It’s hard to find people here for this kind of work.
Alternatives?
Technically, there are many alternatives. But the goal of creating this particular frame is to make an open area for meager money with maximum repeatability from available materials.
In general terms, you can go crazy and buy a series of backpacks. But the conditions and purposes of using such frames sometimes include transporting things such as firewood. Any sane tourist will not stain and tear an expensive backpack with the same firewood. You can offer to chop firewood on site, but this can only be afforded by a fisherman or hunter. But when organizing various kinds of sporting events, which involve cutting down trees for firewood for a group of people, everything works differently. Here the forester walks through the forest and marks the required number of trees for felling. And these trees can be tens or hundreds of meters away from the camp site.
Sometimes it is necessary to transport oversized items, for example, length racks. They reach a length of two meters. Moreover, their diameter is thirty centimeters. If the neck of the backpack can somehow be narrowed, then the bottom of the backpack has to be stuffed with some things. And any extra thing has weight and makes it difficult to deliver cargo to the camp site.
Often a field stove is carried on a frame for winter hikes. Few people will want to stuff it into a backpack. And carrying a bag in your hands is not very convenient. In these cases, people also advise taking a sled with you, but no one talks about how to drag this sled with you. Although the sled often covers the load on the frame to which the sled is attached. So, you can’t go anywhere without a frame.
Separate boxes. There are times when you go to the forest and there you pick a bunch of mushrooms and berries. To transport them you need several boxes. In a regular backpack, it will all get mixed up and break. In industrial boxes made of sheet aluminum, everything will be much better. But it’s more pleasant when you go into the forest with a small easel backpack that gradually turns into a box. Although real fishermen can already build a ponyag on the spot, tie their backpack to it and collect quintals of mushrooms and berries.
Which backpack is better, easel or anatomical?
Disputes over the advantages and disadvantages of this or that model have not subsided for many years. Proponents make compelling arguments for their choice, but there is no definitive answer. A powerful advertising campaign for high-tech anatomical products, from the point of view of fans of easel backpacks, is shattered when they propose to stuff a model with a soft back with things, food, canned goods, and then put it on. The difference is significant. Owners of an anatomical backpack will have a hard time, as hard objects will put a lot of pressure on their back.
In turn, fans of anatomical designs quite reasonably prove the validity of their choice by the fact that the product is more ergonomic than an easel backpack. The backpack itself is lighter, and traveling with it is more comfortable. In fact, it is better to use each type when it is most appropriate. It is no coincidence that many experienced tourists have several models that they choose depending on the situation.
It should be recognized that technological progress and the capabilities of modern industry have led to the fact that the latest generation of anatomical backpacks is in great demand. There is a logical explanation for this. They are more comfortable to use. When storing them at home, they are easier to put on a shelf, since there is no rigid frame. An easel backpack can only be placed or placed on a very large shelf. True, you will have to pay a little more for such convenience.
A special category of backpacks with improved characteristics is necessary for mountaineers and rock climbers. Often the product is made to order, or modified from a purchased model with your own hands. Moreover, stiffening ribs can be inserted into an anatomical backpack, and, on the contrary, some elements can be removed from an easel one. Thus, a kind of hybrid is obtained that has characteristics of both species. Perhaps the industry will begin to produce products that will not be similar to classic designs and will acquire new useful properties. At least, anatomical backpacks are increasingly equipped with rigid inserts, which makes them similar to their easel counterparts.
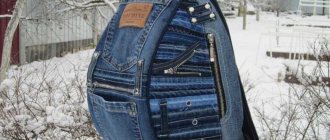
DIY backpack made from old jeans
To sew a backpack from old jeans we will need to take:
Master class: how to sew a backpack from jeans with your own hands
We start sewing a backpack from old jeans by unpicking the instep and back seams.
We rip the front seam along the pants to the codpiece (see photo), fold the parts as shown in the photo, and sew them together with a basting stitch.
We make the front seam.
Along the inside out side, cut off the excess fabric and sew down the back seam.
We connect the parts of the front and back, stitching them along the bottom.
We fold the parts on the sides with corners, forming the bottom. We do machine stitching.
For the straps, cut out strips of fabric and two triangles. We fold the strips in half, stitch them, and turn them inside out.
We fold the straps at the ends with a triangle as shown in the photo, sew along the line indicated by the yellow dotted line.
We insert straps with triangles at the bottom of the side seams and sew along the inside with one seam.
We turn it inside out. We sew the second strap in the same way.
We cut out the lining, repeating the dimensions of the bag. We perform the side and bottom seam. We decorate the bottom by stitching the corners.
Insert the lining inside and turn in the top edges. We machine stitch the belt stitching seam (shown by red arrows).
We cut out the valve. We sew a pocket onto it. You can use a ready-made pocket from jeans for a backpack or cut out a new one.
For the valve, we cut out a piece from the lining and sew a magnetic button onto it.
We fold the outer and inner parts of the valve and cover the sections with tape. If your machine sews leather, then you can use thin leather strips to process the cuts.
Cut out the wide parts of the shoulder straps.
We put a seal in the shoulder area of the straps. Sew it together (see photo), folding it right side inward. We sew on buckles to adjust the length.
To connect the shoulder strap with flap to the backpack, cut off the back part of the trousers (see photo).
We sew up, focusing on the photo.
We make a lace from the lining fabric.
We stretch it along the drawstring of the belt, cutting the entrance holes as in the photo (yellow dotted line).
We sew denim stoppers onto the ends of the cord.
We sew similar limiters at the bottom of the straps.
We complete the sewing by sewing on the second part of the fastener.
Comments
This site uses cookies to make it easier for you to navigate the site, offer only information that interests you, and make it easier to fill out forms. I assume that if you continue to use my site, you agree to my use of cookies. You can delete and/or prohibit their use at any time by changing the settings of your Internet browser.
Please notify me of any bugs you find at: [email protected]
.
All wishes and advice will be taken into account in the further design of the site. I am ready to cooperate with everyone. In some cases, the author's opinion may not coincide with the author's opinion! Phone:
+7-902-924-70-49.
Angles
One of the controversial and often discussed details is the protruding corners from the frame. Hunters want them so that they can hang a gun on them, and survivalists believe that this will make it more convenient to hang various things with grommets and eyes.
The protruding corners at the bottom make it easier to adjust the frame when walking and serve as some kind of legs on which this structure can stand without getting dirty.
For my purposes, these protruding parts are not critical, either on the positive or negative side. Perhaps in the future they will be needed to expand the functionality of the design. This solution increases the cost of the design by only one hundred rubles.
How to sew a backpack: cutting out the main elements
Sewing a tourist backpack begins with cutting out its main elements. After cutting, do not forget to melt the edges of the fabric with a lighter so that they do not fray. It is better to stitch the seams with nylon or lavsan threads, using a zigzag. If the machine does not sew with a zigzag, make two parallel lines.
Rice. 1.
The “body” of the backpack is 75*80-85 with designated places for pockets if you need them (I recommend only one - the central one). At the bottom in the corners you can immediately sew slings, 40 cm long and 25 mm wide, reinforcing them with fabric scarves.
Rice. a, b.
Pattern of pockets, you need to sew a zipper into them (we leave the place of sewing it at your discretion, we advise you to decide on this in advance before you start sewing a tourist backpack with your own hands).
Rice. 2.
The back of the backpack is 75*30 with a bottom 26*33 made of thick nylon. The bottom can be sewn separately, but it is better to cut them in one piece, which reduces the number of seams.
Rice. 3.
Shoulder straps: two of thick nylon, two of thin. You need to cut two blanks from isolon (foam) of the same shape. The second strap needs to be cut out in a mirror image.
Sew the thick and thin parts together, stitching them to each other along the contour. Turn it inside out and insert a strip of isolon inside. Sew a 25 mm wide sling on top of the thick side of the strap, stitching it crosswise in 3-4 places. The sling should end where the strap ends and end with a tightening buckle.
Rice. 4.
Valve 32*26. Cut and sew, sewing on thin fabric (Fig. c), as if making a box. Sew a 30 cm zipper, either along the seam or in the center of the wide wall, making a slit. Sew 4 tightening buckles at the corners.
Criterias of choice
When purchasing a product, you should pay attention to several important points:
Machine material. Carbon fiber is considered the most reliable. In terms of characteristics, it is superior to its aluminum counterpart and is more resistant to impact loads, more resistant to fracture, and lighter. It is recommended to purchase high-quality tourist easel backpacks in specialized stores. It is better to avoid products of dubious manufacture. You are buying a backpack for many years, so there is no point in saving on it. All straps and belts must be equipped with adjustment mechanisms, have sufficient strength, but at the same time be soft. The most important parts are metal, but to facilitate the design, some of the fittings are made of high-strength plastic. Shoulder straps must be anatomically shaped
They are curved outward, made of several layers: strength, decorative, softening. It is important that there are a sufficient number of internal and external pockets. When choosing the latter, it is advisable to pay attention to the presence of a through hole. The weight and size of the product must be selected taking into account your own height and anatomical features. A very important criterion is the capacity of the easel backpack.
Preference should be given to products from reputable manufacturers. The control system there is extremely strict - from the careful selection of fabric to the set of accessories and belts. An experienced tourist can determine the quality of a product by touch or appearance, so when purchasing it is better to take such a specialist with you. This will help you avoid unnecessary expenses and choose a product that meets the basic criteria the first time.
Decorating: the best ideas
Jeans in themselves are a beautiful material that does not require additional decor. But if you want to create a bright and unique thing, there are simply a sea of decorating methods.
The most popular ideas for decorating backpacks (not only denim ones):
- make scuffs and holes yourself (hooligan style);
- create an applique of rhinestones or small mirrors;
- metal rivets;
- embroidery, bright buttons.
It is also fashionable to decorate a girl’s backpack with drawings of cats and flowers. This is not the entire list of ideas circulating on the Internet.
Features and advantages of the design
The backpack got its name due to the presence of a metal structure that performs the functions of a frame and is called a machine. Traditionally it is made from light aluminum alloys
It was important for manufacturers to reduce the weight of the product as much as possible, giving it the necessary rigidity. Today the machine is made not only from aluminum
The best performance characteristics are characteristic of devices made of fiberglass and especially carbon fiber. The configuration of the backpack has also undergone significant changes. A rigid frame gives the traveler the following advantages:
- uniform load on the shoulders and spine, the ability to walk with a straight back;
- the presence of a large number of independent compartments for storing things with easy access to them;
- possibility of individual adjustment;
- ergonomic shock absorbers that ensure proper fit to the body and the necessary ventilation;
- free placement of internal contents, which will not interfere with the hike or put pressure on you;
- affordable price;
- reliability and durability.
Admirers of this model can be found on any tourist route: in the forest, in the mountains. They are in no hurry to change their comfortable and ergonomic easel backpack, giving preference to more fashionable trends. There are reasons for this. No other backpack model has such a rigid design. At a halt, it can be placed in a stable vertical position, which is sometimes necessary.
The disadvantages of the design include excessive rigidity of the product. Falling with a backpack is extremely unpleasant and often painful. For high-altitude travel, it is better to purchase other models of special design. They are significantly more expensive, and if the desire for snowy peaks is irresistible and hiking is frequent, then it makes sense to spend money on such products. For a regular tourist route, a good frame option is perfect. Due to the design features, items in a tourist easel backpack do not need to be packed using a special method. Even randomly placed hard objects will not put pressure on your back, causing discomfort when walking.
Useful tips
Recommendations from professionals are always useful:
- You can cut the fabric with a special soldering iron, in which case the edges will melt and will not fray;
- to get a backpack with a volume of 75 liters, reduce the main part on all sides and the height of the back by 10 cm, and the length of the tube part by 20 cm;
- shoulder straps are placed at a distance of 50 cm from the bottom for height 170 - 180 cm, for greater height - 55 cm and for shorter height - 45 cm;
- It is better to sew with strong nylon threads;
- To make the seams stronger, it is better to sew with a zigzag or double seam.
Patterns can be improved individually.
For example, increase or decrease the size and number of pockets. A backpack sewn by yourself will become an indispensable companion on any hike. How to darn woolen socks by hand? Sleeveless vest made of thick yarn knitted for women
