When in a dark car interior people begin to fumble with their hands along the trim in search of a handle, the driver can only hope for the efficiency and confident coordination of the movements of his passengers. Such situations happen all the time, and if you have to transport guests after a noisy feast, a country picnic or a barbecue party, the condition of the doors can deteriorate sharply.
Illumination of door handles, done independently and at no special cost, will help correct the situation. This is one of the interior tuning options, which is not a mandatory procedure, but, unlike many other types of finishing, can bring practical benefits.
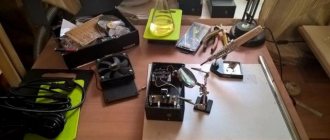
What do you need for work?
The first step is to prepare the necessary materials and tools. Will need:
- indicator LEDs with a diameter of 5 mm (any will do, but not too bright so as not to attract constant attention);
- ballast resistors;
- soldering iron and solder with rosin;
- electric drill and drill 5 mm;
- glue gun;
- wires;
- heat-shrink tubing;
- knife for stripping and removing insulation;
- insulating tape;
- Phillips and slotted screwdrivers.
The choice of LEDs is unlimited. You can use conventional indicator samples powered by 3 V; there are also more powerful “piranha” type LEDs that require 12 V to operate. The main selection criterion is the brightness level. Excessive saturation will result in a constant light stimulus being in the field of view and distracting the driver and passengers.
There are ready-made door handle lighting kits that only need to be installed in place and connected to the on-board network. In particular, such elements are produced for the Lada Vesta car and other models.
Ballast resistors are needed to ensure that the onboard voltage drops to the required 3 V. Different values are used, from 430 Ohms to 1.4 kOhms, depending on the type of LED and the required brightness level. The resistor is soldered in series to the positive electrode of the LED (this is a longer leg), the excess length of which is cut off for compactness.
Installation on Lada Granta, Kalina, Priora
- Treat the LED with fine sandpaper so that it shines not as a point, but as a scattering light.
- We make a hole in the plastic door handle of the required diameter (for example, 6 mm) using a drill.
- We install the LED in the hole and fix it with glue (for example, hot glue).
Result:
The installation process is also shown in the video:
Preparing and connecting wires
The next step is to dismantle the door trim. It is not practical to describe the procedure; it differs for different machine models and is described in detail in the relevant sections of the instructions. The wires are connected either to the power window unit or to the door card. It all depends on the vehicle’s equipment - it’s easiest with luxury models that have electrical devices on all doors.
On economy class cars you will have to pull the wires from the instrument panel. Here they act according to the situation, as is most convenient. Typically, a red rein is a plus, a blue (or black) is a plus, although there can be any variations. It is recommended to first study this issue in the instructions for the car so that you do not have to redo the work twice.
All connections should be insulated with heat shrink or electrical tape; it is recommended to fix the wires on the surface of the door with pieces of adhesive tape so that they do not dangle and create unnecessary load on the LED.
Installation on Lada Vesta, XRAY
Required
: standard LED backlight module 8450031185.
Procedure
:
- Make a hole for the backlight module diffuser.
- Fix the LED backlight module.
- Connect to the connector in the doors, which is available on luxury versions, or stretch the wires from the door to the passenger compartment. See connection below.
photo profy55
We similarly modify the Lada XRAY door handles
Photo by walla03
Main conclusions
Illumination of door handles in the car interior is a convenient and visually attractive tuning option that decorates and increases visibility in a dark interior. There are different options for implementing the method, from simply installing an LED on the back of the case, to using a special panel with a luminous inscription.
Perhaps there are other options, original, successful in decorative terms. We encourage all our readers who have their own experience in this matter to comment on this article and publish their own ideas, lighting options, or share thoughts on improving existing methods.
Previous
LEDsCharacteristics and advantages of Piranha LED
Next
LEDsFeatures, characteristics and maintenance of LED lamps for street lighting
How to troubleshoot door switches on a Grant
We invite you to study in detail simple methods for troubleshooting door limit switches on the popular Lada Granta. In practice, every car owner can cope with repairs. So, what can you do when, in the cold season, the door switch stops working correctly:
One of the simplest ways is to treat the surface of the mechanism with a water-repellent specialized liquid. This will help until the air temperature reaches minus 50 degrees. However, such a measure is temporary and rather short-term. It is necessary to remove the anthers from the end switches. It must be remembered that special rubber caps perform a purely protective function, and if you remove them, you will have to more carefully monitor the cleanliness of the mechanism
It is important that the anthers can be removed for a short time when there is severe frost outside, which negatively affects the operation of the device. It is recommended to lubricate rubber surfaces with silicone. However, this method will be useful to you at an air temperature of at least minus 10 degrees. Standard caps can be replaced with analogues
You can use boots from other mechanisms, for example, a good version of Toprun, they are almost identical to the original LADA Granta caps. The most important thing is that such anthers are made of a material that does not lose its elasticity in cold weather. You can install a small spring under the boot. To do this, you can use springs with a diameter of 12-13mm, a length of 18-20mm, with a wire thickness of 1mm. The springs are installed directly on the switch rods under the anthers. If the spring is good, then it will allow the cap to be compressed, and at a temperature of minus 40 degrees it will never let you down.
Features of LED strip installation
Installation of the LED strip in the leg area and in other places is carried out using glue. When forming the required length of the tape, it is cut with scissors; the cut must be made strictly along the round or oval marks.
Wires are soldered to the pieces of tape, and terminals are installed at the ends. All exposed wiring areas must be wrapped with electrical tape. The installation site of the tape is wiped with any degreasing liquid to ensure fastening strength.
It is necessary to connect the tape to the vehicle's electrical network in compliance with polarity.
Lighting systems with movable lamps on rails
Track lighting is a specialized lighting fixture or lighting system. The system is ceiling or wall mounted and accepts and powers individual luminaires or heads.
It is often used to bring light into corners and work areas in the kitchen. A section of heads can extend over the area where you walk and sit while you work, or a path can be laid directly over an island or peninsula with pendant heads to illuminate those surfaces. This type of lighting is often used in workshops and greenhouses.
A track lighting system can also be useful for delivering light into a long, narrow space such as a hallway. You can run the track parallel to a wall where photographs or paintings hang, positioning and aligning the heads to highlight every detail.
Connection to 220 Volt voltage
As mentioned above, to supply power to 12-volt spotlights, additional equipment, a converter, transformer or driver is required. However, recently a new product has appeared on the lighting market - spots operating on 220 Volts. In this regard, it became necessary to study in more detail the scheme for connecting and installing spots directly to a 220 Volt network, without using transformers.
Serial connection
The simplest scheme to implement, requiring a minimum amount of materials. Spots are connected sequentially one after another, but it is advisable that their number does not exceed five or six pieces. Due to the serial connection, interruptions in lighting may occur, and if one lamp fails, the circuit will break and the others will stop working. To restore the functionality of the circuit, you will have to disassemble it and check each spot separately.
To implement it, you need to connect the phase from one lamp to another, and connect the neutral wire to the latter. The phase is pre-supplied to the switch, which guarantees its functionality.
If you want to connect triple wiring, you need to connect the ground wire to each lamp by finding the appropriate terminals. Grounding can be done through the nearest outlet or switch.
Parallel connection diagrams
The approach is much more complicated than the previous one. There is a dependence: the more connected spots, the higher the cost of organizing lighting and time costs. On the other hand, when connecting each lamp separately, they will shine with the same intensity stated in the passport. Therefore, despite the difficulties, the current method is considered the most popular and widespread.
Parallel connection is implemented in two options:
- Beam method - each lamp has a separate pair of wires.
- Daisy chain connection - two wires are connected to the lamps alternately, and then fed from the output.
Methods
Parallel connection can be implemented in two ways:
- a pair of wires goes to each lamp (beam);
- daisy chain connection - when both wires alternately go to the lamps, and are fed further from the output. Two ways to parallel connect spotlights
Radial
The approach is the most complex, since a separate luminaire requires its own cable. The advantage is high reliability. If it fails, only the damaged spot will stop lighting. To implement the method, take the cable connected to the junction box and stretch it to the middle of the room. Secure using various elements, from here pull separate pieces for each recessed lamp.
Pay attention to safety as there are several wires radiating from one location. If a single-core cable is selected and a small number of spots are connected, the wiring is carried out using the twisting method, crimping with pliers and additional welding
The connection will be permanent. Another option is simpler: each conductor should be equipped with connectors that are inserted into the terminal block slot.
Daisy chain connection
The cable comes from the junction box and connects to the first lamp. Next, you need to take a piece of another wire and connect it to the output of the device, and the other end should be connected to the next spot. Repeat the steps for all spots until the circuit is connected.
The lamps will operate from one switch. If you need to divide them into two groups, then the connection should be made through a two-key switch. The circuit becomes slightly more complicated due to an increase in the number of cables. It is possible to install a backlit switch.
Stories from our readers
“Fucking basin. "
Hi all! My name is Mikhail, now I’ll tell you a story about how I managed to exchange my two-wheeler for a 2010 Camry. It all started with the fact that I began to be wildly irritated by the breakdowns of the two-wheeler, it seemed like nothing serious was broken, but damn it, there were so many little things that really started to irritate me. This is where the idea arose that it was time to change the car to a foreign car. The choice fell on the melting Camry of the tenth years.
Yes, I had matured morally, but financially I just couldn’t handle it. I’ll say right away that I am against loans and taking a car, especially not a new one, on credit is unreasonable. My salary is 24k a month, so collecting 600-700 thousand is almost impossible for me. I started looking for different ways to make money on the Internet. You can’t imagine how many scams there are, what I haven’t tried: sports betting, network marketing, and even the volcano casino, where I successfully lost about 10 thousand ((The only direction in which it seemed to me that I could make money was currency trading on the stock exchange, they call it Forex. But when I started delving into it, I realized that it was very difficult for me. I continued to dig further and came across binary options. The essence is the same as in Forex, but it’s much easier to understand. I started reading forums, studying trading strategies. I tried it on a demo account, then opened a real account. To be honest, I didn’t manage to start earning money right away, until I understood all the mechanics of options, I lost about 3,000 rubles, but as it turned out, it was a precious experience. Now I earn 5-7 thousand rubles a day. I managed to get the car buy after half a year, but in my opinion this is a good result, and it’s not about the car, my life has changed, I naturally quit my job, I have more free time for myself and my family. You’ll laugh, but I work directly on the phone)) If If you want to change your life like me, then here’s what I advise you to do right now: 1. Register on the site 2. Practice on a Demo account (it’s free). 3. As soon as you get something on the Demo account, top up your REAL ACCOUNT and go to REAL MONEY! I also advise you to download the application to your phone, it’s much more convenient to work from your phone. Download here.
This is my next craft, maybe it will be useful to someone, it’s not difficult to do, it just takes a little time. When I installed the EURO handles I immediately wanted to illuminate them, so I illuminated them, soldered the boards, and installed them in the handles. Now they are always visible in the dark, beautiful and convenient.
I brought the wires out to the door, but didn’t connect them. I wanted them to glow when you open the car with the alarm. I also wanted them to burn longer after opening, so I took a smooth fading circuit and soldered it, started checking it, I immediately didn’t like the fact that at first it shines brightly, and then barely shines for a long time.
Smooth fading scheme, still without additional ones. transistor
– I decided to connect a relay to this circuit, but it didn’t work at all, either there wasn’t enough current, or something else, I attached another transistor that would be controlled by the circuit, and the relay worked, now the LEDs shine brightly all the time and suddenly go out after 35 seconds . that suited me.
To supply the control minus to the circuit from the activator, I used a 5V relay, for some reason this is exactly what goes to the activators. 5V is supplied to the activator, the relay is triggered, negative goes to the circuit and the LEDs light up)
All this probably could have been done simpler, but I’m not that good at all of this yet, but Google will always help) and I already had 2 smooth decay circuits soldered, I had to dance from them)
board and 2 relays in an insulated case))
I sketched out a diagram in paint) maybe someone will understand))
The love of decorating your car is in our blood. And if it has practical benefits, so much the better. Today we will talk about such “cute” external tuning as illumination of car doors and thresholds. Yes, it looks beautiful and impressive, but you are unlikely to deny that it also increases safety in the dark.
The problem is that most motorists are inert people. Give them everything ready-made, and if they need to do something themselves, they say pass. They say your hands are crooked or you don’t have the necessary tools, much less experience. Well, you really have to work. But the participation of specialists is not at all necessary - all the work can be done independently.
Turn off the backlight in the switch
If there are no other ways to get rid of the flickering lamp lamp, you will need to completely turn off the LED or neon lighting on the switch. Let's look at how to do it yourself and what are the main stages of this procedure.
Preparatory stage
For those who have never installed switches or done electrical work, it is recommended that you carefully consider your actions. Pre-requisite:
- Disconnect the general power supply in the apartment/house from the switchboard switch (by checking its absence with an electrical probe or an indicator screwdriver).
- Prepare a set of necessary tools (mostly a flat-tip screwdriver).
Operating principle of the lighting device
To create illumination, an LED or neon bulb is introduced into the switch circuit parallel to the main contacts. The disconnected chandelier base circuit allows electrical current to reach the switch lighting system. Turned on, on the contrary, leads to disconnection of its power supply. The mechanism of action is based on the difference in resistance between the lamp and the additional light source.
The current passing through the switch LED is clearly not enough to heat the filament of the incandescent light bulb. However, if the chandelier contains an energy-saving lamp or an ice element, then a driver system is used that can operate on low current. Due to the latter, the semiconductor crystal may begin to blink due to the gradual accumulation of potential in the resistor and its periodic release.
What turns on the light
All LEDs and fluorescent lamps operate on direct current. Therefore, at the beginning of their case, a special driver is installed, which includes two required elements:
- Diode bridge – AC to DC converter.
- An electrolytic capacitor is a smoother for voltage pulse dips.
The latter is the main culprit for spontaneous turning on of the light. The fact is that, although weak, current passes through the backlight system - it is impossible to turn it off (only if you completely remove this parallel circuit) - and this is quite enough for the capacitor to accumulate charge. When its potential reaches a predetermined value, a discharge occurs - the light bulb flashes. Although such an event occurs fragmentarily, it nevertheless worsens the life of the lamp, especially gas-discharge ones. In addition, this reduces the comfort of a person’s stay in such a room.
Illuminated door handles - improving vehicle operation at night
Illumination of door handles is, without a doubt, necessary for every car. After all, door handles are exactly that part of the car that we constantly touch when entering and exiting our vehicle. Illuminated handles will be the best option not only for those who operate their cars at night, the products will also come in handy during periods of thick fog. Therefore, we will consider installing lights in car doors with our own hands in more detail.
1 Selecting and preparing tools
Before you begin installing the lighting yourself, you will need to prepare the necessary tools and material for this. So, we need:
- medium-sized diode light bulb;
- terminals and plastic plugs for them;
- small diameter wires;
- Screwdriver Set;
- blowtorch;
- electrical tape and knife
- drill;
- Super glue;
- pliers and ammeter.
After preparing the tools, you should decide on the door with which you will start. As practice shows, this does not matter much. However, some experts advise starting to install the lighting yourself in the front doors of the car, since the electrical circuit of the car is located next to them.
2 Connecting wires is a job worthy of a sapper
The work of installing the backlight will be quite dangerous for those who do not have experience in handling the electrical wiring of a machine. Not only can you get a serious electric shock, but there is also a chance of damaging the car’s standard terminals and completely cutting off the power. But, if you have already performed similar operations with your own hands, for example, worked on tuning the car interior lighting, then installing diodes in door handles will not be particularly difficult for you.
First, you need to disassemble the handle using screwdrivers. Next, take the LED and remove the plastic housing from it. At the end of the lamp you should see steel pins, which then need to be soldered to the electrical wires. To do this, first of all, you need to strip the wires and put our terminals on them. By doing this, you will achieve maximum illumination, and soldering devices will be much more convenient. After stripping the wires on one side, turn them and do the same in the other part, put terminals on these parts of the wires as well.
When doing the work yourself, it is worth considering one important nuance. Any door lighting consists of two parts. The first is the lighting device itself, and the second is the set of parts that power it. The lamp can receive its power both from the electrical part of the car and from a separate electrical card of the door. This is possible provided that the latter is connected to the car's electrical power supply. In the first case, you must calculate the length of the wires so that you have enough not only for convenient connection of the lamp, but also for optimal placement of the wiring in the car interior. For the second case, short-length wires are suitable, since their placement does not extend beyond the door handle.
After connecting the wires, take an ammeter and check the quality of the electrical wiring connection. I would like to remind you that if you are not confident in your abilities, it is better to use the help of a specialist.
3 The last step is installing the diode in the door handle
At the final stage we need to install a diode lamp. To do this, you need to try to firmly fix the diode in the handle, and then drill holes for illumination with a drill. After this, connect the lamp to the wiring and check the operation of the entire system. Most experts advise pointing the diode down the door, since in this case the backlight will well illuminate the handle and the part of the car around it.
Another useful tip is to connect the wires to the power window in the car door. In this case, the quality of the backlight will not change, but the lamp will not shine constantly. If you want the backlight to work all the time, then it is best to connect it with an amplifier to the car radio or to the cigarette lighter.
Once you have decided on your desires, all that remains is to connect the lighting. Next, we put protective plastic plugs on the small terminals and install the plastic LED housing. If you strictly followed our algorithm during the tuning process with your own hands, then you can rest assured that you will be satisfied with the result of the work.
Types of electrical wiring
Before proceeding directly to the installation process, we should decide on the type of wiring that we will install in each room. There are two types: open and hidden wiring. Each of these types has its own advantages and disadvantages.
Any of them can be used in any room, only the price and labor costs required to complete the work differ. Therefore, let's take a closer look at the installation standards for each of these types.
Open wiring type
The open type of wiring involves installing conductors along the surface of walls, ceilings or floors. In this case, wires can be laid both on the surface and inside special protective elements, such as ducts or pipes. In some cases, they require lining special materials between the wire and the wall. But let's talk about everything in order.
Open wiring type
To do this, first of all, let's decide on the surfaces on which installation will be carried out. These can be combustible, non-combustible and non-combustible surfaces. Regular wood can be classified as combustible. Fire-resistant wood is wood that has special fire-retardant impregnations. Fireproof surfaces include concrete, brick and other materials with similar properties.
Open wiring in special boxes
- Wires are also divided into combustible, non-combustible and non-combustible. You can determine this parameter by the wire marking.
- Another parameter that affects the installation method is the characteristics of the room itself. After all, you must agree that you cannot lay wires in a steam room or shower, just like in an ordinary room. Therefore, there are also such parameters as wet, damp, dusty, outdoor and dry rooms.
- As a result, it turns out that the laying method depends on what kind of wire and on what surface it is laid. In our article we will consider only the most common options. You can see how the house wiring should be done in each individual case in the table. 2.1.2 and 2.1.3 PUE.
Open wiring in a room made of fireproof materials
If we have an ordinary apartment with walls made of concrete or brick, then there are several options for open wiring. Unprotected wires can be laid on insulators, rollers or strings. Can be laid in combustible boxes and trays with opening lids. Can be mounted in special shells made of fire-resistant or combustible materials directly on the surface of the walls of the ceiling or floor. In this case, we are usually talking about the use of plastic corrugation.
Open wiring in rooms made of combustible materials
- If wiring is installed for a private house made of wood, then everything is a little more complicated. In this case, if you use rollers, insulators or strings, then a fireproof material must be placed between the wire and the wall.
- If a box or pipe is used, it must be made of fireproof material. Usually it is metal. If this is not the case, then you will also need a lining of fireproof materials.
Hidden wiring type
Hidden wiring is a conductor laid inside construction channels, or under a layer of plaster in special grooves - grooves. From an aesthetic point of view, this method seems more attractive, but from a financial point of view, this is not always the case.
Hidden wiring
- As in the case of open wiring, the tables become decisive when making a decision. 2.1.2 and 2.1.3 PUE. Therefore, the factors influencing the choice of wiring remain the same.
- Let's look at a few options. To begin with, as in the first case, let's take a brick or concrete wall. As the instructions say, we can even lay an unprotected wire if it is solidly hidden under a layer of plaster. To increase the maintainability of wiring, you can use installation in combustible pipes - corrugated pipes.
Hidden wiring in a room made of fireproof materials
Hidden wiring in rooms made of combustible materials
But if the installation is carried out using combustible or difficult-to-burn materials, then in this case a lining of non-combustible materials is necessary. The shells themselves must be covered with a layer of plaster or other fireproof material on all sides.
Let there be light
If you are wondering how to make the wheels illuminated, then our instructions will answer it for you. Let's do this job using LEDs, as they are best suited for this purpose. We will not describe installation on all four wheels. Let's look at the whole process using one wheel as an example, and the rest are performed in a similar way:
- To begin, we will need several LED strips, four current stabilizers, corrugated tubes, wires, sealant, glue and wire.
- Then we lift one side of the car and. If desired, the car can be placed on safety stands, since working with a car mounted on a jack is extremely dangerous due to poor stability.
- After removing the wheel, you must thoroughly wash the brake disc casing with gasoline and dry thoroughly.
- After everything has dried, you need to measure the length of the LED strip. This is quite easy to do - just wrap the tape around the casing and cut off the excess. Remember that the tape should only be cut in places specially marked for this purpose. Every three diodes there is a white mark, cut along it (if you cut it in the wrong place, you will simply ruin the tape, since it will no longer work).
- We coat the finished diode strip with glue on the side that will be adjacent to the casing.
- Carefully glue the tape to the casing and let the glue set. After the glue has dried sufficiently, we additionally attach the tape with wire to the brake disc casing.
- The tape is fastened quite tightly. Carefully seal the cut end of the tape using sealant. This is necessary so that moisture does not get into the silicone tape with lamps and ruin all our beauty.
- Wires (plus and minus) are released from the untouched end of our ribbon. We solder the wires to them that will connect to the stabilizer.
- We carefully insulate the soldered wires and place them in a corrugated tube, after which we bring them into the cabin.
- Next, the wires are connected to the stabilizer and lead from it to the headlight wires. If you connect it not to the headlights, but directly to it, then you will have to install an additional switch in the cabin for our lighting. In our case, the illumination of the car wheels will work only when the headlights are on.
Do-it-yourself wheel lighting requires a lot of care and precision on your part. The main components of the backlight are very fragile and can easily fail if mishandled.
Do not forget that when connecting LED strips it is very important to observe the polarity (plus and minus), since if you connect the poles incorrectly, the diodes will not work
If you lower your financial priorities, you can purchase a ready-made kit. Ready-made car wheel lighting has many unique features. For example, sound sensors that respond to musical compositions. As a result, “light music” is produced on wheels. If the lighting kit is multi-colored, then the wheels will play with different colors of the light spectrum. The kits, as a rule, always contain detailed instructions for installing and operating a specific device.
Keep up with auto fashion and let your “steel friend” be the most beautiful, bright and memorable!
One of the easiest and most exciting ways to give your car an unusual look is light tuning. This is a fairly common art that allows you to add zest to any car and make the underbody, radiator grilles and even wheels shine with neon colors. Wheel illumination, as a method of light tuning, always looks very unusual and attracts attention; the contrasting glowing wheels of the car are mesmerizing.
In fact, this effect can be obtained from the primitive installation of LED light equipment in the wheels of a car. For this, an LED strip is used, which should be installed and connected. Next we will look at these processes in more detail.
Varieties
Let's start with the fact that the backlight can be automatic or manually controlled. The last option is objectively not the most convenient, since hardly anyone will want to turn it on and off every time.
You can also divide all lighting options into 2 large categories.
Conventional lamps based on LEDs or LED strips. There are no logos here. Just an additional glow that can turn on during a trip, or when you open the doors
Some people need it purely as a tuning, while others need to see what’s under their feet when getting out of the car. Moreover, these functions combine perfectly; Laser projection lighting
Implementing it yourself is more difficult if you assemble it from scratch. Typically a wired or wireless system is purchased. Aliexpress also has a huge selection for all brands of cars. Displays a logo on the surface of the ground when doors are opened. It looks impressive, and at the same time works just as effectively as additional lighting.
Finding the necessary materials or ready-made kits somewhere in Moscow or Minsk is not a problem at all. The main thing is to decide on the type of system and choose a logo that meets your requirements.
Backlighting is also differentiated by the illuminators used. There are 3 main varieties.
- LED bulbs. Extremely simple, inexpensive, not particularly difficult to implement with your own hands. But you shouldn’t expect any special effects here. Perhaps if you take diodes of different colors or play on the contrast compared to the body color;
- LED strips. There is no need to cut the sheathing to hide the material. But for better protection it is better to do this. Tapes produce more light than LED bulbs. Placed inside a transparent plastic or silicone protection. The downside is the tendency to damage;
- Laser illumination. It looks interesting, unusual, emphasizes the appearance of the car, and allows us to understand what brand we are dealing with. Laser devices are new to the market, so the kits are expensive when compared to conventional LEDs.
Regardless of the chosen option, each of them is easy to install with your own hands. If necessary, you can act at your own discretion, but it is better to rely on the manufacturer’s recommendations.