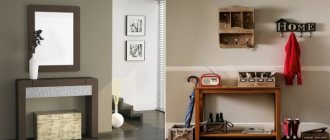
Handmade wooden dressing table
Modern techniques, equipment and materials make it possible to create a unique dressing table with your own hands. By following simple instructions, even people without experience can make a beautiful piece of furniture at minimal cost in a few days. By making a table with his own hands, the master can make furniture of the required size and functionality, color and shape, using materials that are safe for health and choosing a mirror that is convenient in shape.
An elegant dressing table in the bedroom is a necessary and practical piece of furniture
A table of complex design with drawers, mirrors, cabinets, countertops of unusual shapes, shelves and other elements is more difficult to make than a simple neat table on four legs (the mirror is attached to the wall).
Stylish dressing table with separate mirror on the wall
You can create a drawing and calculate the dimensions yourself or use ready-made diagrams from the Internet.
An example of a drawing of a dressing table with dimensions
A dressing table with legs is complemented with drawers at the bottom of the table top, a shelf on the side, built-in and side drawers, folding mirrors, etc. Each additional element complicates the design and its manufacture.
White vanity table in modern style
When considering how to make a dressing table with your own hands, you should separately highlight one of the prerequisites for obtaining a beautiful and functional product - the creation of competent design documentation (a drawing indicating the exact dimensions down to millimeters, a list of necessary materials, accessories). Changes to the model should be made at the design stage.
Model of a handmade dressing table
Materials
I bought the necessary materials at a construction supermarket. The shopping list was:
- confirmations – 30 pcs.;
- metal loops for attaching the table to the wall – 4 pcs.;
- PVA glue – 1 tube;
- wooden dowels – 10 pcs. (were in stock);
- dowels for hanging tables and mirrors – 4 pcs.;
- white MDF sheet – 2 m2;
- edge furniture tape – 12 m;
- telescopic guides for drawers – 2 sets (4 pcs.);
- wooden dowels – 8 pcs.;
- furniture handles – 2 pcs.;
- hanging mirror 890 × 650 mm;
- desk lamp.
I decided to present the entire process of assembling the hanging table in the form of the following instructions.
Expert opinion
Strebizh Viktor Fedorovich, leading construction foreman
Even if you have chosen the most laconic model from the photo, try to grind out every detail with special care so that there are no problems with fitting in the future. If you want to clarify something, please contact me!
Tools
To ensure that all work is completed efficiently, you need to prepare the following tools:
- Drill or screwdriver, attachments.
- A jigsaw for cutting out blanks.
- Drills with a diameter of 5 and 8 mm.
- Construction corner, tape measure, ruler.
- Sandpaper.
- Special screwdriver for confirmations. It has a specific hexagonal shape. Unfortunately, this is not a universal device.
Unfortunately, very often confirmations require their own unique screwdriver. They are usually sold complete with fasteners. Be sure to discuss this issue with the seller when purchasing. You may also need, for example, an LED strip, a mirror, inserts for glass doors, and various panels.
Labor and cost
When I assembled and installed the table, I wrote down the amount of time spent completing the work at each stage. Here's what happened:
- cutting MDF sheet – 4 hours;
- finishing the ends with furniture tape – 2 hours;
- case assembly – 6 hours;
- manufacturing and installation of boxes – 6 hours;
- table installation – 1 hour;
- mirror installation – 30 min.
I summed up the costs of purchasing materials without taking into account the small parts that I had in stock.
- MDF sheet with an area of 2.2 m2 – 880 rub.
- Edge furniture tape (12 m) – 240 rub.
- Confirmations (30 pcs.) – 90 rub.
- PVA glue (1 tube) – 50 rub.
- Telescopic guides for drawers (4 pcs.) – 240 rub.
- Furniture handles (2 pcs.) – 36 rub.
- Hanging mirror – 1500 rub.
- Table lamp – 750 rub.
Do not forget that, in addition to its functional qualities, the table should decorate the interior of a bedroom, dressing room or salon with its appearance. But for a person with experience in assembling furniture, it will not be difficult to make just such a dressing table with your own hands.
Of the parameters, there are only two that are really worth paying attention to. This is the height of the tabletop and its minimum width
The height of the dressing table is determined in much the same way as the height of the desk. In theory, it should be matched to the height of the owner. After all, women spend a lot of time looking in the mirror. At the same time as the height of the table, you need to choose a chair, armchair or banquette - it depends on what you plan to place next to it.
Boudoir table - for a classic style bedroom
A certain standard is the tabletop height of 75 cm, but you need to focus on your height. Next, we determine from the height of the seat. When a woman sits, her legs should be bent at the knees at an angle of 90° or close to this value - this is the most comfortable position. So choosing the height of a chair or armchair is not so difficult.
The dimensions of the dressing table are adjusted depending on the height of the owner and the available space
If the women's table is equipped with a hanging mirror, you also need to know at what height to hang the mirror. This parameter also depends on height. Sitting in front of a mirror, a lady should look approximately at the center of the mirror surface. If desired and the size is sufficient, you can lower the edge by 10-15 cm. The main thing is that the top of the head is visible.
| Tools | Set of screwdrivers, tape measure, square, drill and screwdriver, electric jigsaw, sandpaper for sanding surfaces |
| Accessories | Hinges and handles for bedside tables, decorative elements for shelves |
| Fastenings | Nails, self-tapping screws, Euro bolts, metal corners, drawer guides |
Expert opinion
Strebizh Viktor Fedorovich, leading construction foreman
Tools A set of screwdrivers, a tape measure, a square, a drill and a screwdriver, an electric jigsaw, sandpaper for sanding surfaces Fittings Hinges and handles for a bedside table, decorative elements for shelves Fastenings Nails, self-tapping screws, Euro bolts, metal corners, guides for drawers. If you want to clarify something, please contact me!
Trellis for the bedroom from what is at hand
Making a dressing table with your own hands - is it possible if you are not a professional furniture maker? It turns out that everything is possible if you really want it and make every effort to achieve your goal. Even a novice home craftsman can make such a table on his own. To design the finished product, you can use various decorative options.
Decorating a dressing table with your own hands is also quite simple. It is important to choose the right style and design elements; only in this case will you get something that fits harmoniously into the interior of the room. For example, if you need a “antique” table, it would be appropriate to use artificially aged painting or decoupage technique; for a romantic interior, decoration with rhinestones or beads is suitable.
DIY dressing table, assembly master class with photos
- The first step is to determine the size and location of the product.
- Then make a project, transfer each detail onto special paper used for drawings.
- Take sheets of material, put a drawing on them and use a jigsaw to cut out the parts.
- The ends are treated with sandpaper and primer, but it is better to cover chips with special tape.
- An edging is placed on the tabletop itself, and a melamine film is placed on the ends, which must be fixed with a well-heated iron.
- Drill holes at the designated points and assemble all the individual parts into one structure. Fix with self-tapping screws.
- Assemble the retractable sections, drill individual parts and fasten them with confirmators.
- Make holes on the front panel for the fittings and secure them.
Do it yourself!
The most important condition for obtaining a good result is thorough execution . Parts, especially for a simple model, are easy to make. But fitting and finishing edges and edges requires both precision and patience.
The second condition is following the chosen project . Including a new element in the design, replacing material, and even using other fittings will require some additional actions. And if, with extensive work experience, changing the design does not cause difficulties, then without it, furniture manufacturing turns into an endless process of fitting one part to another.
DIY table with storage drawers
Without a mirror
Before choosing a project, you need to accurately determine the dimensions of the future furniture and the installation location. Create or select a ready-made project and transfer each detail of the product onto paper or cardboard.
- Ready-made templates are applied to chipboard sheets, and the corresponding parts are cut out. Construction stores often offer a service for cutting sheets, which is recommended to be used. Cutting material with an electric jigsaw cannot be compared with the work of professional equipment: in this case the cut will be much cleaner and the workpieces will be more accurate.
- If the design of the selected model does not include elements of complex shape, then the work can be done with your own hands without much experience.
- The ends of all parts are cleaned with sandpaper. In this case, small chips may form: this does not pose a problem, since the damage will be covered with the end tape.
- The ends are primed twice to strengthen the edges - you can use Moment glue. Then a soft edging is placed on the tabletop, and the ends are covered with melamine edge. The latter is glued to the edge and smoothed with a heated iron.
- The table frame is assembled first: table top, side posts or support legs, back wall. For fastening, holes are drilled in the appropriate places, then the parts are fixed with confirmations and the corners are checked using a construction angle. If the structure is assembled correctly, then the confirmations are tightened with a key.
- To ensure reliable fastening of the sidewalls and support legs, they are duplicated with a metal corner.
- The drawers are assembled: the side parts are drilled flat, the back and front parts are drilled into the end. Then the product is assembled for confirmation, checked and tightened with a screwdriver. The plywood bottom is secured with small nails.
- The guide – the drawer part – is secured to the sidewalls with self-tapping screws. To the sides of the cabinet or table - a corresponding counter part. The drawer is inserted into the guides.
- Holes for handles are drilled on the facades and the fittings are secured.
- If the project has a cabinet with doors, then to install overhead hinges you will need a 35 mm Forstner drill. Using a drill, holes are made for hinges with a depth of 12.5 mm, and the hinges are secured with screws. The hinges are fixed to the sash with self-tapping screws.
Scheme for creating a dressing table without a mirror for the bedroom with your own hands
With a mirror
The dressing table is often made without a mirror. In this case, either a tabletop or wall-mounted product is used. The last option is, of course, more effective. But making a model with a mirror yourself is also quite possible.
Two methods are used.
- The back wall is cut out not from fiberboard, but from chipboard, and together with the base for the mirror. The latter can be a functional device, or it can include a decorative frame of complex shape. The purchased mirror is secured to the base with plastic holders or glue. You can use double-sided tape.
- A less aesthetic option is used in cases where there was no mirror in the original project. In this case, the chipboard structure underneath is fixed to wooden guides, and the latter are screwed to the ends of the table. It is advisable to provide a base shape such that it covers the guides.
The following two videos will help you create a dressing table with a mirror with your own hands:
And the last part of the video tutorial:
For girl
The design of a model for a girl is no different from an “adult” one: a table with or without drawers, with or without a cabinet, and so on. The dimensions of the product are, of course, much smaller. As a rule, simple models are made for children's rooms, since what is required here is not an elegant shape, but rather structural stability and ease of use.
The main thing in children's furniture is decoration. But besides painting it in bright shades or decorating surfaces with applied plastic panels, you can do something else: the original design of the mirror.
The most popular ones are the crown and the cat's face. The manufacturing technology here is the same, only the template is different.
- Place a mirror on a sheet of plywood or fiberboard, trace it, then step back from the line outward by 1 cm, and inward by 2–3 cm, depending on how wide the frame you want to get.
- The contours are modified accordingly. For example, they draw ears for a cat's face and whiskers, but in such a way that the internal size of the frame does not change.
- The blank is cut out of plywood and painted in the desired color. If necessary, additional details are cut out of plywood - a bow, an earring, the same mustache.
- The mirror is fixed to a chipboard base with holders or glue. Then the frame and additional parts are glued to liquid nails.
The undoubted advantage of this design is its uniqueness.
DIY dressing table for a girl
Backlight installation
Installing LED lighting for your makeup table is necessary so that you can find something in your nightstand without turning on a bright chandelier. This is especially true if you plan to place furniture in the bedroom. The main thing is to strictly follow the step-by-step work algorithm:
- Make a frame for the makeup mirror according to the shape of the glass. You can buy ready-made.
- Drill holes around the perimeter for cartridges.
- Insert LED lamps.
- Install a push-button switch with a socket at the bottom.
After this, the dressing room mirror is installed in its place: attached to the tabletop or hung separately. If the frame is square, the number of lamps is 10: 4 on the sides and two on the top. For round glass, the illumination depends on the diameter.
Make a frame for a makeup mirror
Drill holes for sockets, insert LED lamps
Install a push-button switch with a socket at the bottom
Set in place
Ready
What to consider?
The most important condition is thoroughness. The better the work you do, the better the table will turn out. As you can imagine, a simple model is not difficult to make, but adjusting and finishing the edges is something that will require patience and accuracy.
The next condition is that you must strictly follow the project that was chosen earlier. Adding a component to a design, using a different type of fittings, or replacing a material is something that will require a partial change of the project. And if you don’t have experience working with furniture, constantly adjusting elements will drive you crazy. The result may be furniture that, frankly speaking, is not very smooth.
Painting the product
First, mix 1 part chalk paint with 2 parts water. Then use light brush strokes to apply the paint to the surface of the nightstand. Try to leave small brush marks so that the wood can be seen in some places.
If you get sharp lines during the painting process, you can smooth them out a little
To do this, take a damp sponge and wipe the entire surface, paying special attention to the places where you need to even out the tone. Repeat the process until you are satisfied with the end result
One hand is clean, the other is dirty: how to avoid getting infected in a public place
Mironov’s words, which became his last in his life (he said them on stage)
The husband figured out how to decorate the veranda and made tall flower pots
After this, the paint should dry completely in the fresh air. This process may take 48 hours before you can move or touch the product.
| Tools | Set of screwdrivers, tape measure, square, drill and screwdriver, electric jigsaw, sandpaper for sanding surfaces |
| Accessories | Hinges and handles for bedside tables, decorative elements for shelves |
| Fastenings | Nails, self-tapping screws, Euro bolts, metal corners, drawer guides |
Expert opinion
Strebizh Viktor Fedorovich, leading construction foreman
You can also make such a table yourself, if you decide in advance on its appearance, create a competent project, and prepare the necessary materials and tools. If you want to clarify something, please contact me!
What fasteners are needed?
Now let’s talk about what you can make a dressing table from. As you can imagine, nails will not help you assemble this piece of furniture.
You will need the following fasteners:
- Universal furniture fasteners – confirmed 5x70 mm. Experts recommend stocking up on such elements, because you may need a large number of them.
- Self-tapping screws for wood measuring 4x25 mm and 4x16 mm.
- To install drawers, roller-type guides are required. If you do not plan to make boxes, the elements will not be needed.
- Furniture metal corners.
- Accessories for doors and drawers.
- Edge for finishing with glue. It’s easy to fix, so it’s best to give preference to it.
- Soft edging for finishing the table top.
DIY dressing table mirror
- Everything that can be removed, you remove and disassemble. Remove old fittings.
- Surfaces must be clean and free of grease. This is easier to achieve with a soft cloth soaked in dishwashing detergent. Then everything is washed off with warm water and a small amount of vinegar. Wipe with a dry cloth.
- Cut out the details. It is better to cut the film 8-10 mm larger. The remains are then cut off with a paper knife.
- Spray the part to be glued with water from a spray bottle. On a wet surface, the film can be moved if something goes wrong. You can even peel it off without damaging it.
- After removing the protective layer from the film, carefully lay it out. Having leveled it, begin to smooth it with a soft cloth from the middle to the edges. Try not to have any bubbles. To do this, you need to move gradually, without jumping from place to place.
- If there is still a bubble, you can pierce it with a thin needle approximately in the middle. Then expel air from the edges of the bubble to the hole and rub the puncture site.
- Having glued the film, take a clean thin cotton cloth, spread it on top and iron it with a warm iron (medium heat).
- We glue the trim and install new handles.
Additional items
Now you know how to make a dressing table with your own hands. But that's not all, all that remains is to complete the manufacturing. Now let’s continue assembling the table:
- Next, if provided, assemble the boxes. Drill the side elements into the plane, and the front and back into the end. After this, you assemble the structure using confirmations, check it and tighten it. The bottom should be made of plywood, which is secured with small nails.
- Attach guides to the sides of the drawers. And attach the counter part to the side posts of the table. Then slide the drawer into the guides.
- Drill holes in the facades to install handles and fix the fittings.
- If you used a project in which there is a bedside table with a door, then you need to purchase a special 35 mm Forstner drill to install the hinges. With its help you need to make holes whose depth is 12.5 mm. The hinges must be secured with screws. The hinges on the sash need to be secured with self-tapping screws.
Labor costs
- manufacturing of wooden parts (table top, walls, bottom, legs) – 4 hours;
- assembling the table body, subframe, installing legs – 3 hours;
- polishing – 2 hours;
- stain treatment, varnish coating without taking into account drying time - 1 hour;
- assembly of the box and mirror frame – 3 hours;
- drilling mounting holes, installing cartridges – 1 hour;
- installation of wires and switch – 1 hour;
- installing dowels in the wall. Inserting a mirror into a frame and hanging the entire structure on the wall takes 1 hour.
In total, the installation of the makeup table with mirror took 16 people/hours.
Materials and tools
The most popular materials used to make a makeup table are wood and MDF. Some craftsmen, continuing the traditions of Soviet times, work with chipboard and laminated chipboard. The drawers and back wall are usually cut from sheets of plywood. What you will need for the work is indicated in the table.
Expert opinion
Strebizh Viktor Fedorovich, leading construction foreman
Tools A set of screwdrivers, a tape measure, a square, a drill and a screwdriver, an electric jigsaw, sandpaper for sanding surfaces Fittings Hinges and handles for a bedside table, decorative elements for shelves Fastenings Nails, self-tapping screws, Euro bolts, metal corners, guides for drawers. If you want to clarify something, please contact me!
Can I do it myself or not?
The design of this piece of furniture is quite simple, there are no difficulties. The simplest option is a table of a certain size. And it doesn’t have to have a mirror on it – it can be mounted on the wall. The more complex the structure, the more boxes and cavities it has. Very often, when making furniture, craftsmen cut out different configurations of cabinets, drawers and shelves. You can make a dressing table yourself, but you need to consider some points.
It is best to develop the project yourself - in this case, you will be able to adjust the table to the place in which it will be installed. But if you have no experience in drawing up drawings, you can turn to ready-made ones. The article provides several design options. You can choose any one you like. This means that we can draw the following conclusion: any home craftsman can make a table on his own.
From an old bedside table to a dressing table
- for cutting MDF sheets;
- perforator; ;
- drill/driver for drilling mounting holes and installing screws;
- a set of bits for fixing in a drill chuck to use it as a screwdriver;
- hammer;
- development on wood;
- square;
- tape measure and metal ruler;
- level;
- knife.
How to treat the surface → Room decoration → How to choose the right paint → Surface treatment technologies → Leveling and finishing the walls → Selecting and applying a primer → Removal from the surface → Stretch ceilings and technologies → Reviews and testimonials
Ordering parts
You will not be able to cut a sheet of laminated chipboard at home in such a way as to maintain the desired geometry and cleanliness of the cut. You will have to order sawing. Most construction markets that sell chipboard offer such a service.
Self-made curved saws (radii, etc.) will have to be sealed with a soft U-shaped edge to cover the inevitable chips on the laminate. Edging and other fittings should be purchased in specialized furniture fittings stores, which are found in every city. Sellers will advise you if any difficulties arise.
Note: To communicate with sellers, learn materiel - they do not understand the words “fit”, “thing” and “insert into such a hole.”
The choice of color and texture of the laminated chipboard is yours, the only technical detail is that details are given here for a thickness of 16 mm. Also pay attention to the edge – melamine, 0.5 mm thick.
We need laminated chipboard parts (all dimensions in millimeters):
- 1000x450 - table top
- 630x300 - sidewall
- 614x350 - 2 pcs., sides of the cabinet
- 350x350 - drawer
- 600x110 - shelf under the mirror
- 80x100 - 2 pcs., sides for a shelf
- 1050x600 - rear panel for mirror
- 350x350 - bottom of the cabinet
- 318x80 - 2 pcs., slats in a cabinet
- 149x343 - 4 pcs., drawer fronts
- 100x300 - 8 pcs., side of drawers
- 100x259 - 8 pcs., front and back of drawers
Fibreboard parts (3.2 mm thick):
- 625x345 - rear wall of the cabinet
- 297x289 - 4 pcs., bottom of drawers
Note: Fiberboard parts can be fastened with self-tapping screws (3x16) or nailed with regular nails (1.5x25). The main thing is to check the clear geometry, the right angle in the resulting parallelepiped.
Finishing
The assembled dressing table can be decorated in various ways. Wooden products are decorated with painting or decoupage techniques .
Also, such furniture can be painted and varnished. This will not only add aesthetics to the product, but will also extend its service life, since paints and varnishes will increase the product’s resistance to increased moisture and sudden temperature changes.
The surface of the dressing table can be made monochromatic or multi-colored. To shade the product, it can be pre-coated with stain before varnishing .
Such a piece of furniture can be decorated with any decorative elements: painting, pebbles, beads. The main thing is to choose the right style, according to the overall interior of the room.
The end result can be a decoration for any bedroom: