Home craftsmen perform a large number of jobs that require cutting boards or sheet materials. Cutting or sawing out various curved shapes is possible only with the help of a special tool - a jigsaw. There are different types of such tools, but they are all based on a single principle - the reciprocating movement of the cutting tool.
To mechanize the work, special hand-held jigsaws or jigsaw machines have been developed. They provide significant assistance to many craftsmen in making their work easier and faster. Purchasing a ready-made machine is expensive and not always advisable - most of the time it will sit idle in vain. However, it is possible to make such a machine yourself. There is an interesting design option for a jigsaw made from a sewing machine. Let's take a closer look at this idea.
Sewing machine as a jigsaw
The heir to a grandparent's estate often gets an old sewing machine.
It has already served its purpose for sewing clothes, since more precise equipment is now being produced. If you don’t have a jigsaw on your household, you don’t have to spend money on buying one. It is made with your own hands from a sewing machine. Procedure:
Remove the thread weaving device. It is usually located at the bottom of the machine and secured with two bolts. Dismantle the cotter pin and the drive shaft, which leads to the thread weaving mechanism. Unscrew the top panel, which serves as protection for the mechanisms. The slot for the needle is expanded to match the parameters of the file
It is important that it passes freely through the hole and that there is still a backlog of 2-3 cases. The file is being modernized. For installation in a needle holder, the length of the file should not exceed the permissible length of the needle intended for installation in the machine
To do this, the upper teeth are ground off, and the lower part is sharpened like a point.
Now the jigsaw for curly cutting on plywood is ready. It will be more difficult to work with a manual drive because your legs will get tired. An additional disadvantage will be vibrations from force on the tool. The electric drive of the machine, converted into a jigsaw, partially solves the problem of vibrations.
An expensive jigsaw can be replaced with a homemade design. It will not be inferior to anything in terms of quality and functionality if you approach the assembly process responsibly
It is important to make high-quality plywood mechanisms that serve as a support table. It is desirable that the table be able to rotate
For the version with a sewing machine, this will not be possible. If desired, markings are applied to the table to make it easier to measure parts during work.
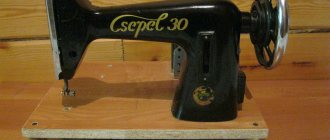
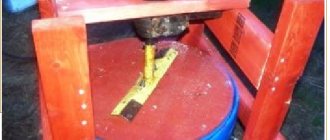
DIY jigsaw from a sewing machine (6 photos)
Those who do figure cutting will probably find a homemade jigsaw from a sewing machine useful. In this case, it is best to use an old sewing machine with a working mechanism. Today on the Internet you can find many diagrams and drawings of similar devices on this topic, they all have practically the same design.
If a sewing machine is taken as the basis for making a jigsaw, then all that is left from it is a flywheel with a groove for transmitting torque and a vertical rod, the one used to attach the needle. Plus, the design is complemented by a small electric motor, on the shaft of which a pulley and a gear belt are installed. A little history about the jigsaw The first mention of the jigsaw dates back to 1946. It was then that the famous Swiss engineer Albert Kaufmann came up with a brilliant idea to replace the needle in a sewing machine with a small file
In that century, this invention received considerable popularity and public attention. Of course, modern jigsaws have a fundamentally different design: they are lightweight, mobile, and also have more power
As for a jigsaw from a sewing machine, this option will be useful only when cutting out shapes from plywood, and not for cutting chipboard and thick boards. How to make a jigsaw from a sewing machine with your own hands The design of a homemade jigsaw from a sewing machine is quite simple, it consists from the following parts: The base on which the sewing machine is installed; An electric motor that transmits torque via a belt drive; Crank mechanism; A movable frame with a file (you can refuse to make it); Springs. The advantage of this kind of homemade work from a sewing machine is that it minimizes rework. For example, the crank mechanism of a sewing machine is already connected to a movable mount, through which the needle is fixed. The mount itself can be easily modified to accommodate the installation of a jigsaw file or any other suitable size. Let's look at a clear example of how you can remake a Soviet sewing machine to suit the needs of figure sawing. To make this homemade product, you will need: Sewing machine; Bolt and nut; A metal plate with a spring to make a tension device (in some cases this may not be necessary); Two metal corners. The above components, if necessary, can be replaced with others, as well as the design of the jigsaw itself. To complete all the work, you will need the following tools: Drill with metal drills; Screwdriver and pliers; Bulgarian; Tap for cutting internal threads First of all, it is recommended to remove all unused parts from the sewing machine, leaving only the crank mechanism with the needle holder in its place. To install a saw tension device on a future jigsaw, you will have to dismantle the shuttle mechanism of the sewing machine
An important note: if an electric motor is already installed in the sewing machine, then you should not get rid of it, since it will be used as the main drive. To install a thin saw on a sewing machine, it will be enough to drill a small hole in the upper mount
To install a wider blade, the hole must be drilled to a suitable diameter. When making the lower fastening, you can use a regular bolt and nut. To make a hole in a nut for a bolt, you should use a tap whose diameter should match the diameter of the bolt. At this point, the modification of the sewing machine is almost complete. In order not to carry out figure cutting manually, an electric motor (45-50 W) should be installed on the side of the sewing machine pulley, on the shaft of which a pulley will also be attached. To transmit torque, you will need to connect the electric motor pulley to the sewing machine pulley using a belt.
Material taken: Here
How to make a machine from a sewing machine?
A sewing machine makes an excellent jigsaw, which is equipped with a saw blade movement regulator. It is not difficult to do if you follow these instructions:
- The thread weaving mechanism is removed from the bottom of the machine. On some models it may be located in a different location.
- To dismantle this unit, you need to remove several bolts, then remove the cotter pin and drive shaft.
- The top protective panel is unscrewed. After this, the groove along which the sewing needle moves must be expanded to suit the parameters of the file.
- The cutting element itself is also slightly modified. It is trimmed according to the length of the sewing needle.
- It is not necessary to make an adapter to install the cutting element. Instead, you can grind down the upper incisors a little and process the lower zone of the blade.
- The file is inserted into the needle holder and work begins.
All presented options for manufacturing jigsaw machines are very successful. The resulting units are distinguished by high labor productivity, and making them is not at all difficult. Depending on their skills, each master will be able to choose the best model of homemade equipment.
Video: Jigsaw from a sewing machine
In the life of a home craftsman, from time to time the need arises to make figured and simply decorative cuts, including inside the workpiece. Gasoline, circular and conventional hand saws cannot cope with this task due to their design features. To solve this problem, use a manual jigsaw, specially designed for performing such operations. This tool undoubtedly copes with its task, but when working with large volumes or dimensional materials, it definitely loses to its more professional brother - a jigsaw.
Purchasing a brand new, shiny, and functional benchtop jigsaw is absolutely effortless. Store shelves are filled with products from various manufacturers aimed at professional and amateur work. At first glance, the stationary jigsaws on sale seem to be very complex in terms of design, the assembly of which is carried out only by selected expert technicians. In fact, these are quite simple devices that you can make yourself, if you have the desire and step-by-step instructions. And if the first point depends only on you, we will definitely help with the second and provide detailed instructions on how to independently assemble a homemade jigsaw machine.
Remaking the place where the needle is attached to the file
Not everyone and not always has the need to carry out only figured cuts. Much more often, a jigsaw is used to produce controlled cuts in straight and round shapes. In such cases, a thin file will be too slow, but a standard jigsaw blade will cope with the task quite quickly. And everything would be fine, but such a saw will not fit into a standard needle holder. This means that you need to reactivate the logical hemisphere and “pump up” your homemade jigsaw from a sewing machine. By the way, this is quite simple to do.
As an example, let's take a product from the following author, although this problem was also solved at the end of the previous manual. The answer lies in the stitching of the seat to tighten the needle. For this purpose, a grinder with a metal disc is used. The shank of the file itself also needs to be sharpened so that it fits into the hole in the fastener element with the bolt. Detailed examples are shown in the photo above, below, and also in the video.
Disadvantages of a manual jigsaw
A manual jigsaw is designed to form even cuts. In this case, as the rollers, rod, and pusher wear out, the saw may wobble, deviate from a straight line, and change the angle of attack. Regardless of the quality of the tool components, the following features are always present:
- When the saw becomes dull, deviation from a straight line is observed when cutting material of uneven density (for example, low-quality chipboard). The saw is capable of leaving the cutting line when it encounters a knot in the wood.
- When trying to make a curved radius cut, you can observe the following picture: the upper cutting line, which the worker follows, follows an exact trajectory, the lower one deviates, goes to the side, the radius becomes larger. The higher the wear of the tool and the lower the sharpness of the saw, the more pronounced this phenomenon is.
- Some materials cannot be worked using a pick-up or bottom feed of the saw. The carpenter is required to move the tool forward extremely evenly, which is impossible to do very accurately; as a result, the saw beats along the entry and exit path.
It is even more difficult to work with thin saws designed for curved cuts. Without practice, it is very difficult to achieve a good result, especially on thick slabs or wood materials. Let's look at how you can make a carpenter's job easier and the result better.
We carry out testing
We take a piece of leather, fold it in half and use a fork and a hammer to make through holes in it. We thread the needle into the first of the holes made.
Pull the edge of the thread to the back side.
We bring the needle to the front side and thread it into the next hole. By slightly pulling the needle towards you, we get a loop near the eye of the needle into which the edge of the thread should be threaded. We tighten the thread that has been threaded in and fix it.
Pull the needle to the front side again and pull the threads from the front and back sides at the same time. Then thread the needle into the next hole and continue sewing. The result is a double-sided seam.
Continued modernization of the sewing machine
After all work on the stem is completed, the metal cover is screwed into place. You can go to the other side of the machine. Here a pulley from a washing machine with a diameter of 20 mm was used, which came from nowhere among the trash in the garage. However, finding such a part for someone who decides to repeat my modification will not be difficult. Many people are getting rid of old washing machines. As a last resort, there are social networks in which people will be happy to get rid of faulty equipment, subject to pickup, even for free.
A plastic pulley was installed in place of a metal wheel, which the seamstress rotated by hand while working. The pulley fits into place very tightly, after which it is screwed on with the original bolt with a very wide head.
To insert the pulley, you will have to tap it a little with a hammer.
Spacer for the car: what and how to make it from
Now it was necessary to make the machine stand higher - after all, the original rod was extended. For this I used a piece of chipboard countertop. It was cut to the shape of the base. The holes were marked using regular paint and drilled.
The spacer is ready, all that remains is to screw it into placeHaving screwed the spacer to the base of the sewing machine, I decided to add a little aesthetics, so it was painted black to match the former tailor's work tool. It turned out pretty good. While the paint was drying, we could work on the bed for our stationary electric jigsaw.
The spacer was painted black to make the resulting unit look more aesthetically pleasing
Homemade sewing machine
Made in 1888 by an eighteen-year-old peasant of the Vyatka province M. Shabalin. A young man once saw an industrial-made household sewing machine in a neighboring village and wanted one.
According to official information, the car was made using a knife, an ax and an awl from shit and sticks. Although the photographs show iron elements that cannot be cut with a knife, it is still cool. Unfortunately, you can’t see how the shuttle works and you can’t see the thread take-up. There was probably no device for advancing the fabric at all, at least I don’t see one.
Think about this when you throw away your screwdriver because of stuck brushes.
No duplicates found
Screws - because of frozen what?
In fact, this is a craft from a much later time. And this is not a working device, but just a toy for children. But the legend story was written in an entertaining way, very similar to the truth. It is impossible not to admit that it was done interestingly, with soul and diligence.

