To keep your desk clutter-free, use convenient organizers. If you work in an office, you will definitely need a desktop organizer made with your own hands from scrap materials. Both children and adults need organizers, and our task is to make an organizer with your own hands from budget materials - tin and metal cans, paper, and cardboard. You can make bright organizers from felt for children.
What you need to make a cardboard box with your own hands
You will need a lot of space to cut out a full-fledged box for storing A4 papers - I freed up the table in the kitchen for this.
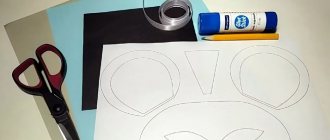
We start with the pattern. We mark the future box using a pencil and ruler.
You can make a solid box and then fold and glue it, but even my huge piece of cardboard was not enough for this, so I still cut out the front wall separately.
Using a ruler and pencil we make a pattern. I used a box I already had as a basis. The dimensions turned out to be:
2) Sidewall: height – 30 cm, depth 27 cm
3) Front wall: 10x15 (10 cm corresponds to the width of the bottom, and the height can be varied as you like).
Cut it out. You can cut it with scissors, but thick cardboard is much more convenient to cut with a stationery knife. We also use a sharp blade of scissors to draw out the fold lines of the future box.
Cut out the front wall.
Fold the box along the fold lines.
All that remains is to glue it together. I didn’t know how to glue cardboard well (I had PVA, a glue stick and superglue), so I used superglue for reliability - it holds tightly.
For the second box, I made the front wall a little lower. And I cut this box out of double corrugated cardboard - I suffered wildly. Such thick cardboard is not needed for storing papers, but cutting it out is oh so hard
All that remains is to cover the box with napkins.
Iron the folds of the napkins.
To cover the outside of one box, you will need 3 napkins 30x30 cm - one for each side, and from the thirds we cut out three strips (for the back wall, bottom and front wall).
Before gluing the napkins, I taped the corners and folds with masking tape to make them less sharp, but you don’t have to do this.
Now we glue the napkins using a glue stick.
Source
Wall Mounted Magazine Organizer
If you like to read not only books, but also newspapers or magazines, then a wall organizer for them is what you need.
To make it you will need:
- textile
- thick rope
- wooden pole
- scissors of any size
- sewing machine with thread
- a decorative element on which you can hang an organizer.
First, we make three pieces of fabric of the same size. We fold each of them in half along the long side. We use a machine to stitch them. The result is a kind of tube-shaped cover.
Turn each one inside out to smooth it out.
Fold one of the covers in half lengthwise.
Lay out the second cover on a flat surface. On top of it we place the workpiece, folded in half. It is important that there is 10 cm of cover left at the bottom.
Turn over and fold the third cover in half. Remember that the seams should not be visible.
We place the third cover on top of the two sewn ones. Pin the top edge of the bottom layer to the top fabric and sew.
Fold the last sleeve in half so that the front edge is 6 cm higher than the back.
We install a wooden pole and wrap a cover around it. Fix with pins and sew.
We tie a thick rope to the pole.
We fix a decorative element to hang the organizer.
Paper holder as a place to store boards
I have long known that it is much more convenient to store many things not in stacks, but vertically - then it is easy to get the desired item and you do not have to turn everything upside down. But I don’t have dividers, but I want to improve my life. Therefore, I came up with the idea of using simple plastic stands for papers and magazines - there are many of these in any stationery department.
I use these stands a lot. In the kitchen - for storing lids and cutting boards, and in the toilet - for storing supplies of baking paper, foil and cling film (there is a small utility cabinet for all household items). Comfortable!
Hooks for storing mugs and pans
Larger items can also be conveniently stored vertically. For example, few housewives can boast that they have several frying pans lying freely on the shelves. Surely everyone has to stack pots and pans on top of each other. But storing them vertically is much more convenient. The salvation will be hooks that can be screwed into the shelf and hang anything by the handles - even a frying pan.
These hooks are sold in hardware stores. Some require drilling holes, but there are options with a sharp end, like self-tapping screws. My mom screwed these hooks into a shelf in our house and hung the mugs from the bottom of the shelf. They even became interior decoration. It was easy to do: first you make a small hole with a screwdriver - enough mm, literally, to drill through the film on the chipboard, and then the hook itself is screwed into the sawdust very gently.
Storing lids on cabinet doors: 2 ways
Another pain in the kitchen is where to put the lids? I used a paper tray for this, but I have also seen more interesting ways. Maybe someone will find these ideas useful.
Hang on the railing
. If you have lids with a voluminous handle, as can now be done on frying pans, then another option will do. You can screw a rail onto the door into which you can place the lids, and the handle will secure them. I think this method looks very nice if the lids are approximately the same.
Manufacturing instructions
All the necessary materials and tools to make a newspaper rack with your own hands have been collected, all that remains is to complete the process itself.
All dowels must be level.
These holes are necessary to fix round bars in them.
Process small sticks on the machine so that they are smooth and round.
Move the bars apart like scissors as far as the rings allow. Insert round blocks into the holes and give the bars a single structure.
The rings will be the main fastening for the bars.
File the boards so that they stand slightly askew, but are all even in size.
The ends of the strap need to be sewn in the form of a loop into which a round block will need to be threaded.
After this, the opposite ends of the strap need to be put on opposite bars, and the straps should be distributed evenly along the entire length of the newspaper rack.
Once the leather straps are stitched on the sides, insert them one at a time into thin sticks.
At this point, the production of the newspaper rack is completed.
Ready. Now you can put magazines in it, and you will always be able to find them.
At the end, you can varnish the bars or decorate them as desired. The master can also show ingenuity and decorate the structure with various decorative elements at his discretion.
You can make the base for a newspaper rack with your own hands and then decorate it with a beautiful design using the decoupage technique.
Spice jars on the bottom wall of the cabinet
I saw somewhere a jar that came with runners that can be attached to the bottom of the cabinet, and then simply insert the jar into the grooves. Then the can will slide out like a closet door. I can’t remember where I saw such a miracle, but it gave birth to an idea in my head: it may not be so easy to make a sliding mechanism, but using the bottom wall of the cabinet is quite easy. You just need to screw the lids on the jars, and voila - you can screw the jars themselves into them and store spices that way. I Googled it, and it turned out that such a cool idea was not only in my head.
Varnishing crafts
If desired, you can transform our craft by covering it with Wood Varnish, preferably colorless. Read how best to varnish a craft. Try to choose a quality varnish. Varnishing is carried out using a special brush “For glue”. Take your time. Try not to leave visible marks or scratches on the craft.
Bathroom rail becomes storage space
Another idea will help you tidy up under your sink. Usually everyone has a trash can and sponges there. But you can also store detergents and household chemicals there. And you don't need separate containers for this. If you have spray bottles, you can insert a bathroom extendable rod between the cabinet walls and hang all the bottles on it. Such thin rods are sold quite inexpensively at Fix Price.


