Share on social media networks:
Today there are many different mattresses on sale, ranging from quite expensive water or air mattresses to more budget options in which furniture foam rubber or cotton wool plays the role of filler. An incorrectly selected mattress can cause many problems with the musculoskeletal system, therefore, when choosing this product, it is necessary to take into account all the nuances.
By making your own mattress, you will get great benefits. The materials needed for these purposes are definitely cheaper than a purchased factory product, and there will be no additional costs. The only caveat is that you will have to spend this time, but the result is worth it. The experience gained will provide an opportunity not only to quickly understand the features of making a mattress for a bed, but also to share the experience with your friends in the future.
How to find a hole in a mattress
The first step to solving the problem of a torn mattress is to look for punctures. They may be too small to be detected by normal deflation. To do this, there are several proven methods that help save the situation in time.
Note!
A special pump for inflating the mattress is always supplied with each inflatable product.
It will be useful when searching for a hole, so if the pump is missing, you need to purchase it.
If, when constantly sleeping on the product, it seems to the owner that the mattress is leaking air, but no obvious holes are visible, it is worth checking the valve of the model.
Perhaps this element does not completely cover the air outlet hole or a tear has occurred. If there are no problems with the valve, you should find the hole.
Let's look at several methods to determine a puncture:
| Valve Inspection | The element is considered a frequent source of leaks. To check it, you need to place the product in a free space and ensure that you can approach it from any side. It must be completely inserted into the valve hole. If the problem is here, the mattress must be taken in for repair. |
| Dishwashing liquid | A good method to check a mattress if there is a hole in it. The method involves using a spray bottle or a sponge soaked in a gel solution. It is necessary to treat each section of the product, starting with the area around the valve. If there are punctures, bubbles will appear in their places. Check the seams of the mattress, as well as its surface and bottom. Detected punctures should be marked with a special marker that does not wash away in water. As soon as it has been discovered where the mattress is torn, it needs to be dried and sealed. |
| Standard inspection | A fully inflated product will help you find out where the mattress burst. Start running your hand along the top plane of the product, pressing lightly on it. To hear where the air is coming from, the room must be quiet. Temporarily place a piece of tape on the discovered cut so that you can patch it properly later. |
| Water | Before immersing the product in water, check whether the instructions say that this should not be done. If there are no restrictions, partially inflate the product. Run a bath and submerge the mattress in the water. Carefully go through each area of the product, press it and check for the presence of bubbles |
It is worth noting that a high-quality branded mattress is less susceptible to punctures than its affordable Chinese counterpart. Therefore, when purchasing, consider the service life of the product.
Advantages of frameless furniture
A bean bag chair serves as an optimal piece of furniture, combining practicality and ease of use. Contrary to popular belief that they are "dust collectors", ottomans are much easier to clean as the removable covers are easily machine washed. Ease of maintenance and safety make the product popular and relevant. Over time, filler can be added to the required volume of the chair.
Among the most significant advantages of frameless furniture are:
- Mobility. Frameless furniture is lighter compared to armchairs and sofas with a wooden frame.
- Environmental compatibility. Natural fabrics and hypoallergenic fillers make this furniture environmentally friendly.
- Safety. The elements do not have corners, which makes it possible to secure the space for children.
- Ease of maintenance. The product provides quick cleaning.
- Duration. High-quality putty does not absorb moisture, dust, and retains its shape.
- Convenience, convenience. Frameless furniture adapts to the curves of the body and spine, creating comfortable conditions for relaxation.
This product will help you relax after a hard day at work and is perfect as children's furniture.
What can I use to seal the hole?
If the product does not include a special repair kit, the rubber mattress can be sealed with other materials.
Main replacement options:
- PVC glue
. The classic moment is suitable as it; after drying, it forms a film similar to rubber. - Rubber
. For this, use the patches from the bicycle tire repair kit. In addition, you can use a piece of ordinary thin rubber, taking the dimensions of the patch with a margin.After repair, you need to check whether the mattress deflates by pumping it up.
An important problem is the repair of internal partitions of the product.
With such damage, a bump forms on the surface, making it difficult to sleep comfortably.
Useful video
- Related Posts
Inflate the mattress, remove all sources of noise and listen carefully. Damage in the mattress can be indicated by a slight whistling sound. To be sure, the noisy part can be immersed in water: small bubbles will indicate the location of the puncture.
If the previous method did not help, it’s time to feel like a real barber. In a container, whisk water with detergent and apply thick soap suds to the surface of the mattress with a brush. Foam will begin to bubble at the puncture sites.
Once you have found the damage, trace it with a pen or chalk so you don't lose it.
Do not burn foam or synthetic fiber mattresses
There is no need to burn the old product, because it contains foam rubber, synthetic fibers or polyurethane foam.
In order to completely destroy these substances, a high temperature is required, therefore, most likely the product will not burn completely, but it can cause the spread of fire and a fire. When burned, some of its components release dangerous toxic substances that cause poisoning and suffocation.
You can burn mattresses if their filling is natural - feather, cotton wool, coconut fiber. It is better to do this away from home and carefully monitor the combustion process. If an unpleasant odor appears, it is better to put out the fire. The remaining metal springs are sold for scrap.
How to seal an air mattress
How to seal a hole in a mattress? Suitable glue for PVC, universal “Moment” or polyurethane shoe glue.
How to do it? We already have a mattress ready for repair and a grease-free patch cut to size. Now apply an even layer of glue to the mattress and patch, wait 5 minutes for the glue to set a little, and align them. For greater effect, you can put a load on the gluing site for a day.
What to do if you need to seal a mattress along the seams
If the mattress is torn at the seam, a patch placed on the outside may not help. In this case, it makes sense to seal the mattress from the inside. To do this, use your hands or a ruler to pull the damaged area through the valve hole. Then glue the patch (following the instructions from the previous paragraph) to the inside of the mattress. You can turn the mattress out and use it as usual within 24 hours after the glue has completely dried.
The final stage is decoration
The inner cover does not require finishing, as it serves as the base. But the outer one can be decorated with something. It could have originally been made from some kind of printed or altered fabric. You can make beautiful applique or embroidery on a simple plain material. You can also cover the chair with an additional bright cape: it will hide the seams and combine the appearance of the chair with the overall interior.
A drop of motley fabric
How to avoid new damage
To ensure that your repaired air mattress makes you happy for as long as possible, follow these simple rules.
- Before placing the mattress on the floor, grass or sand, inspect the surface for sharp objects.
- Do not play on the mattress with pets: they may puncture it with their claws or teeth.
- Do not drag the mattress across the floor if people are lying on it: the seams may come apart.
An air mattress is a comfortable thing, but fragile. One morning you or your guests risk waking up on the floor - the mattress has been punctured and deflated. Of course, it is better to contact specialists. But the prices for their services are steep. Maybe it’s easier to just buy a new one? Or will we still try to fix it ourselves? It is not difficult to seal it, but you need to know how to find and how to seal an air mattress at home, what glue is suitable for these purposes and what to make a patch from.
It would seem that such a device has a lot of advantages: there is somewhere to put guests, it will allow you to sleep in comfort while on a hike, and swimming on it is a pleasure. And most importantly, when deflated it takes up very little space. But it is also easy to damage it without even noticing it. It is enough to inflate the mattress too much, place it in the sun or on the ground in the forest where dry grass sticks out. And if a pet takes a fancy to it, a puncture is definitely inevitable. Is the anti-decubitus mattress deflating? How to find a hole? How to seal a hole in an air mattress quickly, efficiently and without extra costs?
A quick DIY history lesson
The DIY (do-it-yourself) movement has been around since time immemorial, but only became a recognized movement in the 20th century. Long before this, in the 18th and 19th centuries, manuals were published that taught how to do everything from woodworking to preparing antidotes for poison.
Joseph Moxon, the British lexicographer and hydrographer of Charles II, wrote what is considered to be the first English How to Order for Tradesmen and for Making Things Yourself, he stated: "...many gentlemen in this country of good rank and quality are familiar with the business handicrafts. How pleasant and healthy this entertainment is, their minds and bodies [sic] find.
Today, you can Google almost anything you want. Not to mention the millions of tutorials and how-to videos on YouTube and even TikTok (Dalgona Coffee anyone?). And of course, we still have our books (both old and new) and guides, with countless new ones being published every day.
But why DIY?
Of course, the desire to make/build/create something yourself can be driven by more practical reasons, but there's no denying that there's something about making something with your own hands that makes it even more fun. . Making your own mattress will benefit you not only physically, but also mentally. As they say, if nothing seems to meet your standards, it's always better to create your own.
How to look for a hole
How to find a hole in an air bed or mattress? First you need to find the hole in the air mattress. It is difficult to do this with the naked eye. Especially when it's in a deflated state. Inflate the product until it rings and check the most common areas of damage.
- Bottom. Here, any hard object on the surface where we place the mattress can make a hole: a stone, dry grass, a nail head on the floor.
- Upper side. Here we can pierce the mattress with clothing accessories, a hair clip or an earring. Pet claws are also a common cause.
- Seams. Mattresses tear at the seams because they are inflated too much, from sudden landings or children's games with jumping.
- Valve. Dust, hair and other debris may get into the mechanism. The tightness is broken and the valve begins to leak air.
- Connections with partitions. The reason why they tear is an increase in pressure inside the mattress and an uneven load on the surface. And this happens again when the product is heavily inflated or suddenly flopped with all its weight. This “sore” is especially common in models with partition-cup holders.
- Folds. When a mattress is stored folded for a long time, it is at the bend that the material loses its elasticity and a hole may subsequently appear.
Carefully inspect every millimeter of the surface. If there are relatively large damages, you will easily detect them. To find small punctures, there are the following methods.
Aurally
- Inflate the mattress tightly.
- Make it as quiet as possible.
- Bring your ear close to the surface and listen. A slight hiss will indicate the puncture site.
- Examine the entire area of the mattress in this way.
- Listen to the valve separately; it can also “poison” air.
You can “feel” the device not only by hearing. Bring your cheek or lips to the mattress and feel a stream of air from the hole, if there is one. Or you can wet your hand up to the elbow and move it close to the surface.
Using water
- Inflate the mattress.
- Place it under water. Air bubbles will come out of the cut.
- Inspect the product from all sides.
In the absence of open water, you can try to lower the product into a regular bath. But practice shows that even a single mattress does not fit completely into it. And if you immerse it in parts, the middle will still remain untested.
Soapy solution
- Inflate the product.
- Lather the solution with a sponge.
- Apply foam to the area to be examined. If there is a hole, bubbles will blow out of it.
- Treat the entire surface this way.
For the foam solution, you can use shampoo, liquid soap or dishwashing detergent. But not washing powder - coarse particles will scratch the surface and cause new holes to appear.
Shaving foam
- Inflate the mattress tightly.
- Pour shaving foam under the valve.
- Bubbles will appear in areas of damage.
Starch
- Inflate the mattress tightly.
- Sprinkle the surface with starch. A “cloud” will appear at the puncture site.
- Treat the entire area in this manner.
- Vacuum the mattress.
This method allows you to find a puncture without water, which reduces repair time, because the mattress does not need to be dried. Instead of starch, you can powder the product with flour, baby powder or any other “flying” powder.
Cling film
- Inflate the mattress.
- Moisten the surface with a spray bottle.
- Cover the area with cling film.
- At puncture sites, air will accumulate under the film.
Keep in mind that there can be many holes. And in order not to lose the puncture site, immediately mark it with a pen, pencil or felt-tip pen.
Disposal options
We bought a new mattress and need to throw out the old one. How to do this correctly?
Why you can't throw your mattress in the trash
A garbage dump or a landfill are the first options for getting rid of an old mattress that you think about, but they are completely wrong. Thick cotton products can catch fire and the fire can spread further. When burned, toxic substances are formed that pollute the atmosphere.
Important! The product does not naturally decompose for a long time and releases dirt into the environment.
In a container for bulky waste
All garbage is thrown into a container; it seems that this can be done with a mattress, but it simply does not fit there due to its dimensions. Mattresses are classified as bulky waste, for which there are special large containers in designated areas. If you still leave the mattress near a regular container, you can get a fine for it.
Take it for recycling yourself or with the help of recycling specialists
There are companies that process large items. They process them and remove them for a fee. You can find out the price by calling the organization. They will tell you what form the mattress should be in.
They may not accept heavy and dusty, torn and gutted items, in which case you need to look for another disposal option.
Wet and dirty products are not accepted - they need to be dried and cleaned. You need to find out in advance how the company disposes of the product. Sometimes unscrupulous organizations take them and leave them at the nearest site.
If the mattress is rolled up, it can be taken in a passenger car and recycled. A spring mattress will not fit there, so it is better to call specialists with a machine.
Agreement with RO on removal for an additional fee
An inspection of neighboring houses showed that there was no container nearby for collecting bulky waste. What to do?
It is not possible to remove it; no companies involved in recycling have been found, so you need to negotiate with a regional waste removal operator.
You will have to pay for this, but you will be assured that the mattress will be collected and disposed of correctly. The regional operator has the necessary licenses for this.
As a gift with pickup
If replacing the mattress is not related to its poor condition, then there will be people who want to take it away. Such advertisements can be found in newspapers and on the Internet. People are ready to receive the things they need as gifts and take them away.
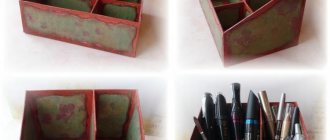
An old mattress may be of interest to creative people who will use its components to create original things: organizers, flower stands, interior items, toys, pillows for pets and more.
Transfer to human assistance centers
Organizations that help the homeless and people in difficult situations create temporary places of stay or overnight shelter for them. Usually there is not enough money, so they will take products of proper quality.
What you will need
It’s good if you still have the “original” repair kit that comes with the mattress. No? You'll have to use improvised means. To properly repair an air mattress, you need to choose the right glue and patch material.
Glue
It is better to use one of the polyurethane adhesives, they are specially designed for PVC surfaces:
- "Moment Crystal";
- "Uran" for rubber boats;
- shoe glue, for example, Desmokol;
- any glue for rubber;
- glue from Intex (a company that produces inflatable pools, boats, mattresses and furniture).
If you use an air mattress for swimming, then it is better to seal it with “original” glue or a compound for rubber boats.
Patch material
What material is better to seal an air mattress with? Suitable:
- rubber from a tire repair kit;
- old tire;
- inflatable toy;
- rubber swimming cap;
- unusable air mattress.
Cut the patch in a round shape, that is, without sharp corners. The size should be such that the edges of the patch extend beyond the damage by 2-3 cm on each side. The larger it is, the stronger it will hold.
Why can't you just throw it in a landfill?
An old mattress is bulky waste. You can’t just throw it in the trash - for this purpose, a special container or bunker must be equipped in the yard for construction waste, household appliances and furniture.
Important!
It is illegal to leave waste containers near them; the resident may be fined up to 2,000 rubles. Recently, companies have been offering a service for the removal of large furniture for recycling. This method is environmentally friendly and saves a lot of time and effort. Stores offer a service for recycling the old model, subject to the purchase of a new one.
How to prepare surfaces
Before starting work, you need to deflate and thoroughly dry the product if you used water when searching for punctures. Then you need to properly prepare the damage site and the patch. The type of surface matters here.
To seal an air mattress on the smooth side, you need to degrease the rubber surface and patch with acetone, gasoline, white spirit or alcohol. Nail polish remover will also work. Then you need to clean the parts with fine-grained sandpaper, preferably zero sandpaper. This is done to make the grip as strong as possible.
To properly seal the velor side of an air mattress, you need to remove the fleecy covering. This is easy to do: wipe the area with a cotton pad soaked in acetone or alcohol, and after drying, remove the lint with the blunt side of a knife or, for example, a screwdriver. But you need to act carefully so as not to make new holes. Then the surfaces to be glued are degreased and sanded with zero sandpaper.
Ways to seal an air mattress with a repair kit...
Typically, mattresses are supplied with a repair kit from the manufacturer. It includes special glue, vinyl for patches and brief instructions for use. On average, there is enough material for two or three holes. If the patch is finished, but the glue remains, do not throw it away, because it can be stored for about two years and will probably still be useful.
And the instructions for use require four steps.
- A thin layer of glue should be applied to the previously prepared surfaces of the mattress and patches.
- Combine the details.
- Press firmly. 20-30 seconds is enough.
- Keep under pressure for at least four to five hours.
Necessary materials
To make a frame model you will need the following materials:
- chipboard;
- Fiberboard;
- Wooden blocks;
- Plywood;
- Foam rubber;
- Self-tapping screws;
- Loops;
- PVA glue;
- Sandpaper;
- Upholstery fabric.
We will make a simple but convenient thing in everyday life that will be strong and reliable to withstand any unexpected guest.
Other materials can also be used to create the structure. For upholstery, it is better to choose a special fabric that is dense and easy to clean.
For frameless furniture the following are used:
- Material for covers;
- Foam rubber;
- Strong threads.
For upholstery you will need high-quality foam rubber.
...and other means
And you can do without a repair kit. Once you have identified the hole, found the appropriate glue and patch, and prepared the surfaces, you can begin the repair.
On the tube of any glue it is written how to use it correctly. If you do not have the opportunity to read the instructions, for example, the tube is very wrinkled or the paint has worn off in places, then the following table will help you figure it out.
Table - Instructions for using different types of glue
| Name | How to use it correctly |
| "Moment Crystal" | — Spread a thin layer on the prepared surfaces; - let dry for 10 minutes; - combine the details; - squeeze tightly for about 10-20 seconds; - can be used within a day |
| "Uranus" | - Spread thinly on both surfaces; - dry the glue for 1-2 minutes; - press the parts tightly; - apply the press for 5-6 hours; — the mattress can be inflated after 24 hours |
| — Apply glue thinly to the parts; - let dry for no more than 2 minutes; — warm the surfaces with a hairdryer for 3 minutes; - press firmly on the parts to be glued for 1 minute; — the product can be used after 4 hours | |
| "Desmokol" | — Apply a thin layer on both surfaces; - dry the glue for 10 minutes; - reapply glue; - dry for another 25-45 minutes; — warm up the parts with a hairdryer for 2-3 minutes; - press firmly for 20 seconds; — the product can be inflated after 2 days |
| "Rubber" | — Spread the glue evenly on the surface; - stand for 15 minutes; - combine the details; - squeeze hard for 20 seconds; - place under a press for a day |
Be careful: any polyurethane adhesive contains aggressive substances. Work in a well-ventilated area and wear rubber gloves.
If the seam comes apart
Peculiarities. A patch placed at the junction of the top of the mattress and the bottom may turn out to be unreliable even if all gluing rules are followed. Here you will have to get smart and pull the puncture site out through the valve.
What you will need:
- PVC glue;
- patch.
Your actions
- Unscrew the valve.
- Draw the damaged area into the valve hole using, for example, a thick marker or a plastic ruler.
- Degrease and clean both surfaces.
- Then proceed according to the instructions for using the glue.
The advantage of this method is that the patch is additionally pressed from the inside with air, which greatly increases the reliability of gluing.
Method without glue
Peculiarities. If you don't have the right materials on hand, there is a way to repair a mattress without glue or patches at all.
What you will need:
- iron;
- paper;
- smooth wooden surface.
Your actions
- Pull out the damaged area through the valve hole.
- Clean from dirt and dust.
- Align the edges of the tear and place on a wooden backing.
- Cover the soldering area with paper.
- Iron with a heated iron.
- Wait until the paper and the gluing area have cooled down.
- Carefully remove the paper.
- Screw on the valve.
This method allows you to deal with a tear in literally five minutes, but here it is important to use the iron carefully, without touching entire areas. Otherwise, you can burn the mattress in new places.
Superglue method
Peculiarities. This method is the simplest and fastest of those proposed. But you need to understand that superglue results in a fragile connection, like thin glass. This composition is non-waterproof and inelastic. That is, it can burst at any moment. But as an emergency measure, for example, on a hike, it is quite suitable.
What you will need:
- Super glue;
- paper tape.
Your actions
- Inflate the mattress.
- Dry.
- Clean and degrease the damaged surface.
- Apply a small amount of superglue.
- Apply a patch of electrical tape of the required size.
- Quickly rub the edges and press the patch firmly.
- Let the glue dry.
- The product is ready for use.
If there is no electrical tape, then you can do without it. In this case, you need to deflate the mattress and drop one or two drops of superglue onto the puncture (but no more) and let the composition dry. This method is suitable for minor damage such as pet claw marks or dry grass.
Method with “Liquid Patch”
Peculiarities. There is another method to quickly and easily fix an air mattress without a patch. For it you will need a composition called “Liquid Patch”. The glue comes in many colors, there is even a shade called Intex. That is, designed specifically for inflatable products of this manufacturer. Holes up to 3 cm do not require additional fastening methods. And cuts above this size will need to be sewn with regular thread.
What you need:
- tube of Liquid Latka.
Your actions
- Spread the damaged area on a flat surface.
- Clean from dust and dirt.
- Thoroughly degrease the surface with alcohol or solvent.
- Shake the tube of glue vigorously.
- Apply to the damage, extending 2-3 cm beyond the edges.
- Leave for seven to ten minutes.
- Apply a second layer of Liquid Patch.
- The product can be inflated within a day.
Liquid Patch bonding is as strong as an undamaged surface. Once you spend on this product, you will provide your mattress with many years of life.
If the valve leaks
Peculiarities. The culprit of a “leak” is not always a rubber sheet or a torn seam. Pressure may drop due to a leaky valve. But this trouble can also be eliminated with your own hands.
What you will need:
- fine-grained sandpaper;
- lubricant
Your actions
- Unscrew the valve.
- Clean the grooves from dust and debris.
- Remove the rubber gasket.
- Clean the valve end and gasket with sandpaper.
- Lubricate the valve.
- Screw the structure into place.
- Inflate the mattress.
- Apply soap solution to the valve.
- If no bubbles appear, the mattress is ready for use.
If after all the manipulations the valve continues to let air through, it means that the failure is more extensive and the part needs to be replaced completely. Contact a specialist store for a new valve.
Description of work
You should start with measurements. If there is a specific room where the chair will be placed, we can determine the width of the product, its length when assembled and unfolded. The decision is individual, so the length can be adjusted to the height of a specific person. In addition, the height of the back and armrests is important.
The minimum bed width is 60 cm; narrower designs are inconvenient to use.
Knowing the dimensions of the chair-bed, it is easy to calculate the consumption of materials. For clarity, you need to make drawings of the chair-bed with your own hands and indicate all dimensions.
He drew
Materials and tools
We decide what materials are needed to make the frame; only durable ones are suitable:
- 10 mm plywood for the folding part;
- Chipboard (chipboard) for side walls with a thickness of 18-20 mm;
- Fiberboard or hardboard on the bottom;
- strips under the folding part.
Many people prefer chipboard - an inexpensive, low-toxic, easy-to-process material that will last at least 10 years. The comfort of using the chair depends on the quality of the internal padding. It is better to cover the frame with foam rubber. Use only solid sheets of foam rubber, then the seat will not sag and will retain its shape and appearance longer.
You will need a set of tools:
- stapler with staples;
- screwdriver;
- hacksaw (jigsaw);
- scissors.
To mark the parts you will need a large metal or wooden ruler, tape measure, and a sharp pencil. To assemble the frame parts, you will need screws and glue.
For upholstery you will need high-quality foam rubber
Tools
Chipboard
Case manufacturing
According to the diagram, we cut out the body parts of the chair and the folding part, taking the dimensions of all parts from the drawing. Cut out 4 squares from plywood. 3 pieces will go to the sleeping part, one will go to the back. The cut can be made with a hacksaw or jigsaw.
Cutting bars:
- 6 pieces for the longitudinal part of the bed;
- 7 pieces for crossbars;
- 4 pcs for folding legs.
Mark the joints of the parts and drill holes with a drill. We cut out armrests from chipboard, which are screwed to the main part of the structure. All parts are fastened with furniture screws into pre-prepared holes of smaller diameter. Foam rubber is glued to the sides, back, and parts of the bed.
Cut off the excess along the marked lines
We connect all the parts with self-tapping screws and glue them well
Sheathing
There are many types of materials for upholstery of upholstered furniture. This is a practical and easy-to-care flock, as well as velor, which is not inferior in strength and color fastness. Tapestry and jacquard upholstery will look good in the interior. Nowadays chenille is a popular type of jacquard.
We cut the fabric taking into account the thickness of the foam rubber and the dimensions of the structural parts. We disassemble the chair, fasten each element with a piece of fabric, and fix it with a stapler. The body is made to start using the chair-bed, all that remains is to connect the parts.
Installation of the mechanism
Operating conditions and the size of the room dictate the choice of transformation mechanism, there are several of them:
- Eurobook;
- deployment system;
- dolphin;
- click-clack.
The deployment mechanism is the best solution for a novice teacher. In operation, this mechanism is the most reliable. To organize a sleeping place, you need to push two sections forward and lower the backrest to a horizontal position. To connect parts, you should use piano hinges and screw connections. Using this transformation mechanism, you get a linen drawer located at the bottom of the drawer.
The disadvantages include the fact that the assembled model with a deployment mechanism looks bulky, but its reliability and the presence of a linen drawer justify the choice.
Connect the frames with long loops
The main thing is how to make a chair-bed with your own hands, so that the bent parts form a beautiful and even square
How to avoid new damage
After successfully repairing a mattress, it is important to take into account past mistakes and prevent new punctures and cuts from appearing. And to do this you need to follow simple operating rules.
- Watch where you put the mattress. Remove all debris, sharp objects, and stones. If necessary, place a thick cloth, blanket or blanket under the mattress.
- Do not inflate the mattress too tightly. In the “ready” state it should remain soft and pliable.
- Keep pets away from the product. Even by simply jumping onto the mattress, animals can puncture the surface with their claws.
- Do not move the inflated mattress. Especially if someone is already lying on it. This is how partitions and seams are torn.
- Do not sit up suddenly or jump on the mattress. These actions can also lead to rupture of seams and joints of partitions.
- Lower the product slowly. Allow the mattress to deflate on its own; excessive pressure can tear the partitions.
- Wash the product with a mild soap solution. The less aggressive “chemistry” you use, the longer the mattress material will retain its elasticity.
- Before folding the device, dry it. Remaining moisture contributes to the growth of mold and cracking of the product material.
So, is your air mattress or circle deflating? Conclusion: it is quite possible to repair an air mattress or circle with your own hands. But if the above methods did not help or the damage exceeds 3-5 cm in size, it is better to contact a specialist: service centers may be located in stores specializing in the sale of goods for the home and leisure. Perhaps they can even help in a shoe workshop.
We think you are familiar with the situation when you stayed overnight with friends on an air mattress, and by the morning you discovered that you were lying practically on the floor. Despite all the convenience, efficiency and functionality of such beds, you will have to wonder more than once about how to seal an air mattress: no matter how rarely and carefully you use it, over time it will no longer hold air as well as at first after the purchase. Find out how you can identify the culprit of the leak and exactly how to resolve such a problematic situation.
Bean bag chair made from old jeans
You can also make a bean bag chair from old jeans. The principle will be almost the same, so we will not dwell in detail on constructing the pattern, but will only tell you the main points of creating such a pouf.
Step 1: First, accumulate a lot of old jeans and cut them into pieces of fabric.
Cuts of denim
Step 2. Cut all pieces of denim into rectangular pieces of the same size.
Fabric cut into rectangular pieces
Step 3. Combining different shades of scraps, sew strips from them, which, in turn, combine into a single fabric.
Strips are sewn from scraps
Strips are sewn from scraps Strips are joined into a fabric
Step 4: Cut out the bean bag chair pieces from this denim quilt and sew the bean bag together. Make an inner cover too.
Next you need to sew the bag
Step 5: Partially fill the inner case with filler.
Filling the inner case
Step 6: Insert the cover into the outer bag and add some more filling.
Case in outer bag
Step 7. Fasten all the zippers - the bag is ready.
Bean bag chair made from old jeans
This is how you can easily and simply make a bean bag chair yourself. Believe me, this way you will spend much less money than if you decide to buy a pouf in a store. And yes, it will be much more reliable and durable than the one made in production, because you will make it conscientiously, for yourself.
Rule out valve malfunction
Before scolding your children or your cat for making holes, make sure that the mattress is deflating for no other reason, and this could very well be a malfunction of the valve. Perhaps it is not necessary to seal the mattress and you can limit yourself to repairing this part.
Lie down on an air bed, put your hand to the valve and listen: if you feel or hear air escaping in this place, then restoring the valve's tightness will help you solve the problem of waking up on the floor. First, try removing the valve, cleaning it from dust and putting it back: debris accumulated in the grooves may well be the cause of the problem. But this method will only work if the valve is not damaged and does not have cracks in the pump hole. In this case, it will not be possible to repair the part at home: you will have to buy and replace the valve with a new one. Also, the cause of the leak may be an incorrectly installed or simply loosely latched valve, and since these options are easiest to determine by eye, try to eliminate them first.
To ensure that the valve remains in its original form for a long time, do not screw the pump too tightly when inflating the mattress.
Sealing seams
Even with the most careful and careful handling, the seams of the mattress may come apart. It is extremely difficult to eliminate such an air leak. Most often, the junction of two layers of material has an uneven structure. Minor microdefects may remain under the patch , which violate the tightness of the mattress. Before sealing the damaged seam, this area must be treated with alcohol, and then all actions must comply with the instructions indicated on the glue package. Experts note that such gaps need to be repaired exclusively from the inside. Only in this case can a good result be achieved.
Finding the source of the leak
Is everything okay with the valve, and it became obvious that there are still holes in the material? Well, it’s quite possible to seal them at home, but first you need to determine where exactly the gap is, and doing this without using household tricks is oh so difficult. By the way, in such a situation there is no need to look for someone to blame: very often holes appear on air mattresses simply during operation without any external mechanical damage.
- A great way to identify holes is to use a foam solution, which is best made with bubble bath or dish detergent. Apply the solution to a mattress completely filled with air, section by section, using a sponge, cloth or spray bottle, and you will see that in some places large bubbles, like soap bubbles, will begin to form. It is in this place that you need to look for a hole.
- First of all, holes should be looked for at the boundaries of the adhesion of the outer fabric with the internal elements, and this is the entire length of the relief pattern. This is the most vulnerable area, although small tears along the seam or on the main fabric cannot be ruled out.
- Having found a hole, circle it with a pen or marker so as not to forget its location, because you can seal the mattress only when it is dry, and by that time the tears can be lost from sight.
Also, don't get complacent when you find one hole: often, especially on older mattresses, you'll be dealing with multiple tears at once, so it's best to inspect the mattress thoroughly and completely.
When inflating your mattress, remember that overfilling it with air over time can cause small or even large tears in the surface.
Features of the chair
The frameless chair has a soft structure and is distinguished by the absence of a metal or wooden base. The standard shape is round or pear-shaped, filled with small granules.
The design of the bean bag “Pear” includes:
- removable cover;
- internal base;
- filler granules;
- decoration elements (stitching, inserts, handles).
Models for adults, a children's bean bag in the form of toys, a bean bag, etc. have been developed. Products are produced in the shape of a circle, rectangle, square, polyhedron. They produce transformable models that convert into a bed or a small sofa.
Products differ:
- ease of use;
- safety (the chair has no sharp corners);
- environmental materials;
- convenient transportation;
- easy cleaning (removable covers can be easily washed);
- compactness, ease of storage, etc.
Seal holes and tears in an air mattress
The same store where you bought the bed probably sells branded repair kits to fix the problem, but you most likely want to know how to seal an air mattress at home without spending money on expensive kits. You can properly and efficiently repair an inflatable bed yourself using improvised means if you follow a certain algorithm.
- Proceed with sealing only after the mattress is completely dry after taking a soap bath.
- Buy PVC glue: the classic “Moment” is quite suitable, since after drying it becomes like rubber. But its transparent variations, although they will make the patch more neat, can negatively affect its quality, since such compositions “glass” after drying and can crack when bent. For the same reason, superglue is not suitable. In addition, it can ruin the PVC material, as it is an aggressive adhesive.
- As a patch, you can use a piece of thin rubber or, for example, patches from a tire repair kit if you are a motorist and you have them lying around idle. In this case, the patch should cover the hole by at least 1 cm on each side. So, for a simple, barely noticeable hole, you need to cut a circle with a diameter of 2-3 cm.
- Both the area with the tear and the patch itself must be thoroughly degreased using acetone or another product if you want the adhesion to be really strong. If your mattress has a flocked surface, then the pile must first be removed with acetone or fine sandpaper: it will not be possible to properly glue a patch to it.
Due to the specifics of working with Moment glue, the mattress can only be sealed in a deflated form, otherwise it will not be possible to press the surfaces tightly together, since the mattress will spring. Apply glue to the damaged area of the mattress and to the patch, wait 5 minutes, press the surfaces firmly together and secure the patch in place with a weight for the next 24 hours.
If the mattress begins to deflate while on a hike or at a tent camp and there is no way to repair it, good electrical tape will completely cope with the problem before you arrive home, although this method does not work well on a velor surface.
It’s possible to repair an air mattress with your own hands, without going to a workshop or buying special repair kits, if you set aside a little time for it and follow the listed recommendations!
Sewing a cover
After creating the cutting for both covers, their sewing begins. To do this, it is important to decide in advance what the dimensions of the chair bag will be. The process is performed in the following sequence of actions:
- two flat blanks are created. To do this, all elements are fastened to each other with pins, after which the side seams should be basted on the wedges;
- the formed side seams are connected with a sewing machine or by hand, after which they are smoothed, for which it is advisable to use an iron equipped with a steam mode;
Before you start stitching the parts, fasten them with needles
- the side seams are sewn on the front side of the outer cover;
- On both workpieces, the outer wedges are folded, after which they are basted. When working with an outer cover, the remaining side seams are sewn from the bottom and top, and it is important to leave approximately 40 cm on either side, and this distance is necessary for sewing in the zipper. The same steps are performed for the inner cover, but no more than 35 cm is left for the zipper. All seams obtained are ironed;
All seams must be overlocked
- For the remaining unstitched sections, zippers are pinned or basted. Their middle should be in the center of the pressed seam. After adjustment, the zippers are sewn in;
- as a result of the actions performed, the seams of the bag will have a tube-like irregular shape, which taper slightly at the top;
How to sew a zipper correctly
How to sew a zipper correctly After the wedges are sewn together, you will get this base
- The handle of the future chair is made, for which the prepared part is folded, and only inside out. It is stitched in a place where there is a long edge. Then it is turned inside out and ironed;
- The existing blanks of both covers are turned inside out. A top is sewn to the outer cover, which is basted to the outer pipe, after which the handle is inserted;
For ease of use, zippers should be sewn into the bags.
- The bottom of both covers is ground off, and the resulting circles are attached. After the work is completed, the covers are turned right side out.
External chair cover
After creating the covers, it is important to decide what will fill the inner element. The selected filler is loaded into the product in such a way as to completely fill it. To do this, the inner cover is inserted into the outer one, and then stuffed with the selected material. After creating a beanbag chair, a pillow or other similar elements are often made that ensure the comfort of using the product.