Sanding may require an old table that you want to re-varnish, or a freshly plastered wall on which unnecessary particles of mortar remain, or a thousand other situations.
For each of them you should select a suitable tool. The article shows all the options for manual grinding and their purpose. Sandpaper Sanding mesh Grinders with handle Construction graters Sanding Technical brushes Non-woven sanding fiber (Scotch-Brite) Files
Sandpaper
An abrasive material is applied to a flexible base, which is used for grinding. An abrasive is a material that, due to its grain size, allows surface grinding.
Sandpaper sheet
Types of abrasive:
- The most durable, and therefore the most expensive, diamond abrasive. Well suited for wet grinding of stone and polishing of hard alloys. Diamond coating is difficult to work with soft materials.
- Also, silicon carbide stands out for its strength. Sandpaper with this abrasive is convenient for working with plastic, painted parts, metal and processing cast iron, glass and marble.
- Aluminum oxide is a less durable material, although this property increases its service life. When abrasive particles are destroyed by friction, new sharp edges are formed. As a result, the material does not lose its production qualities for a long time. Of all the abrasives listed, this is the best abrasive for wood processing.
The base of the sandpaper can be paper or fabric. The latter is more durable and waterproof. According to these characteristics, paper sandpaper is inferior to fabric sandpaper, but it is more economical. Sandpaper is used to process wood and metal, remove excess plaster and putty, and protect the surface from old paint and varnish coatings.
To the list
Features of using grinding attachments
The drill is often used when performing construction and repair work. Having different attachments for the drill, it can not only drill, but also grind, polish and clean surfaces.
Grinding attachments are used in different cases:
- For polishing metal and wood, can be used on painted or varnished surfaces;
- Grinding small metal products or those located in difficult places;
- Treatment of primed surfaces;
- Cleaning from rust, old varnish or paint;
- Cleaning hard-to-reach places from defects;
- Polishing glass and grinding its edges.
Different attachments are used for each purpose, but in general, purchasing them will cost less than purchasing an additional grinder.
“Plate” Source instrument-club.ru
Using sanding attachments on a drill has its pros and cons. The first include:
- Possibility not to buy additional equipment. If you only need to clean the surface once during repairs, it is better to use an existing drill rather than buying a device that will be useless in the future.
- Low price of the nozzles themselves. You can buy many types to work with different materials.
- A large selection of attachments makes it easy to choose the right one for a specific job. Diversity allows you to replace several tools at once.
There is only one drawback: in comparison with professional tools, a drill with an attachment has low speed and productivity. It will not cope with a huge amount of work, but will perform well during repairs or construction in a private house or garage.
“Bowl” Source mozmarket.ru
See also: Catalog of companies that specialize in finishing materials and related work
Sanding mesh
Sanding mesh is an evolution of sandpaper. It is used in the same way as sandpaper, but the mesh has its own undeniable advantages.
Sanding mesh
Since the mesh is made from fiberglass, it is more durable and is not afraid of water. The abrasive is applied to both sides, which increases the service life of the material. True, sanding with a mesh without gloves will be very inconvenient. But the cells prevent the mesh from becoming clogged with dust. When working, it is sometimes enough to knock the dust off the mesh to continue sanding.
Sanding mesh and paper can be purchased in rolls or cut sheets. The sheets are often made to fit specific sanders, both manual and mechanical.
To the list
Types of nozzles
Attachments for drills for grinding are made according to the same principle as replaceable blocks for polishing machines. They differ in the type of fastening: in special machines a thread is used, on a drill the fastening is made using a pin.
There are several types. The choice of a specific one depends on the material and the required operation.
Plate
Round nozzle with sandpaper. The latter varies in graininess and hardness. When working, the drill must go strictly at right angles to the surface. When tilted, defects and damage will appear on the tree. For convenience, some “plates” adjust the angle themselves.
“Disk” Source: vashinstrument.com
Cup
The cup attachment for a sanding drill looks like a brush with long metal bristles. The shape resembles an inverted cup made of plastic or metal. There are also “bowls” with soft filling.
It performed well when working with wood. Metallic fibers release the fibers of the material, which well emphasizes the wood structure. The result is a natural look.
Sanders with handle
Sanders themselves do not clean the surface. Sandpaper or sanding mesh is attached to them. This is the main convenience of this tool: grip by the handle or block. As a result, the speed of work increases.
Grinder with handle
Sanders with dust extraction are easy to use. The pipe of a construction vacuum cleaner is connected to it, which is turned on during sanding. The work becomes cleaner. Another option for dealing with dust is to buy a sander with a dust collector. A sanding mesh is put on this one, and in the body on the side of the working surface there are special holes through which dust enters a special box.
Sanders with a handle may have a foam pad. With such tools, the sandpaper fits more tightly to the base, resulting in a more even working surface.
To the list
Wood rasp - what are the similarities and differences with a file? + video
A wood rasp is a file-like tool with a large notch on it. Sometimes it is called a “carpenter’s file,” but still there are differences between the tools; we will study them in this article.
Wood rasp - etymology of the word
Let's start with the most intriguing! The main difference between a rasp and a file is in the notches, which are made separately in the form of teeth or protrusions.
Rasps are made by stamping, that is, holes are pressed into steel sheets with sharp protruding edges. In appearance, a rasp resembles a metal plate with triangular teeth, and in some ways they are similar to the teeth of a grater.
This tool is necessary for processing wood, plasterboard, plastic, rubber, leather and other materials.
often use it when a simple file cannot cope because it becomes clogged with shavings, and cutting is no longer possible . The name “rasp” came into use from the German dictionary.
There is a word “raspel”, which is translated into Russian as “grater”. And even in past centuries in Rus', such a tool was called “derun”, that is, a device for scraping and wiping various materials.
Everyone is still familiar with the potato dish - derun (when potatoes are grated).
The word “rasp” itself is a verb that denotes the process of processing materials with this device. There is a connection between this name and the English dictionary.
The British call this instrument “rasp”, which means “rasp”.
Many believe that this is nothing more than a type of file, and if you delve further into the English dictionary, you can find “rasp file”, and its translation is just file.
What should a rasp set consist of?
A decent craftsman always has a whole set of rasps; we’ll look at what it should consist of just below. Basically, there are these types of rasps: flat (not only blunt-nosed, but also pointed), semicircular and round.
Rasps also differ in the number of notches - 1st and 2nd class. These classes do not differ in length, but the number of cloves in each number is excellent. In the first one, the distance between the cloves is somewhat larger, and the rows are smaller.
There are more notches on the rasps of the second number.
For the manufacture of rasps, durable steel grades U7, U7A are used; steel U8, U10 and others are rarely used. The harder and sharper the teeth of the tool, the better the adhesion to the materials being processed.
The above types of rasps are produced in our country, but abroad there is a slightly smaller variety: regular (with handles) and grooved.
In our country, grooved ones are often called grooved tools; these are two-ended tools with flat metal parts in the center; it is this part that is held during operation.
The size of the grooves is small, and the teeth are of the usual standard size. We briefly took a look at the classification, but now it’s time to learn a little more about each species.
Brief characteristics of rasps
The flat rasp allows processing of concave surfaces. It is especially good for deburring and trimming various workpieces made of wood or non-ferrous metals. Modern flat rasps have comfortable two-component handles with holes for hanging. The main working part is made of durable tool steel.
The round rasps are also equipped with ergonomic two-component handles. This creates additional conditions for comfortable and convenient work. The round shape allows you to process various holes and uneven surfaces made of non-solid materials. These tools are often used to perform many plumbing jobs.
But the semicircular shape of the tool allows them to be used for sawing and cleaning not only concave, but also flat surfaces. Large diameter holes are also processed with such rasps. To make it more convenient to work, a two-component handle is made.
Construction graters
Construction floats, like hand-held grinding tools, are used to level plaster, putty or leveling agents. The composition applied to the surface should be processed until it hardens completely, while the solution is still wet.
Construction grater
5 main types of construction floats:
- The wooden grater is the first grater in its genre. It is durable, but after some time of use, the wood absorbs moisture. This makes the grater heavier, which makes the work more complicated and delayed.
- Foam and plastic graters are the least durable. They are advantageous to use for short or one-time jobs.
- Sponge floats – used for finishing leveling and sanding.
- Rubber floats, like sponge floats, are used for finishing leveling. In this case, a rubber-coated float can be used to remove excess grout when finishing tile joints.
- The polyurethane grater occupies a leading position among all of these. It is durable and easy to use. Its working resource is on average 1000 sq.m.
It is worth paying attention to the handle of the construction float. A monolithic grater is more durable, and the handle attached to the base will come off over time.
To the list
Sanding sponges
An abrasive material is applied to a dense foam base. That is why many craftsmen choose this version of the grinding tool - it is convenient to hold in their hands. This makes it convenient to sand hard-to-reach places. To do this, the sponges are given angular or rounded shapes.
Sanding sponge
Sanding sponges can be single-, double- or four-sided. Several sides with abrasive material allow you to process the internal corners of products. At the same time, hard sponges are suitable for smooth surfaces, and only soft ones for uneven shapes.
One of the conveniences of modern sanding sponges is that abrasives of different grain sizes can be applied to different faces. This allows you to grind and polish the surface with one tool.
When the abrasive material becomes clogged with dust and small particles of the surface being treated, the sponge simply needs to be washed and can be used further.
To the list
Video description
How to sand a wooden surface is shown in the video:
When working, it is important to correctly hold the sanding attachment on a wood drill relative to the surface. For example, if the plate attachment is not positioned at a right angle, its edges will easily damage the surface. To understand the principle of operation, it is worth practicing holding the tool correctly in advance.
There are 2 options for grinding with a drill:
- The worker holds a drill in his hands and works like an ordinary tool. This is a simpler and more familiar method, but it has disadvantages. Holding a drill for a long time can be tiring. In addition, it is important to monitor its position and not tilt it. Large surfaces are sanded in this way: walls, floors, ceilings, large furniture, cars.
- The drill is fixed motionless on the table, and the object is brought to it. This method can achieve high quality grinding, but it can only be used on small objects that can be held in your hands.
Technical brushes
Technical brushes, like sanding tools, are used to remove rust or oil stains. They are a handle to which bristles made of metal or nylon are attached. Hard metal rods will remove everything unnecessary from the surface; nylon brushes are designed for a softer treatment. Of course, there can be no mention of any finishing touches. Working with a technical brush is an intermediate or preparatory stage of work.
Wire brush
In everyday life, at work, or on the Internet, you can come across other names for technical brushes: brush brush, cord brush, brush brush or metal brush.
To the list
Material used
Sanding attachments are made from different materials. You need to select them depending on the surface being treated and the work being carried out. For example, to remove rust and paint you will need a hard attachment, for polishing - a soft one.
3 types of materials are used:
- Soft. They remove primer and putty, traces of rust, and are used for polishing and removing dirt. Thanks to the soft action, the metal does not heat up or deteriorate during operation, which improves the quality of grinding.
Soft Source ebayimg.com
- Emery cloth. The most popular drill attachment for sanding wood. It varies in grain size and roughness, which allows it to be used for different types of work - from rough surface cleaning to finishing details.
- Grinding stones. These are special abrasive stones that are harder and more durable. With their help you can eliminate defects from the surface. They are usually used for preparing and leveling concrete, glass, and ceramics.
When choosing, it is important to focus not only on the material, but also on its hardness and grain size. For example, felt can be used to polish a car.
Non-woven sanding fiber (Scotch-Brite)
Material for the most gentle sanding. Scotch-Brite is created by weaving synthetic threads onto which an abrasive material is applied. The structure is similar to felt, but in essence it is the same as abrasive sponges for washing dishes
Description for the picture
Scotch-Brite is actively used in car repair. And this is not surprising, because the abrasive fiber does an excellent job of removing metal chips and finishing polishing. Non-woven sanding cloth is available in sheets, wheels and rolls. Differences in grain size are reflected by the color of the material. Green Scotch-Brite - the coarsest material, treatment for applying putty, P180-240; red – finer-grained, P240-P360, treatment for applying primer; gray – used for matting before applying paint, grain size from P600 to P1000; orange – the finest grain, from P1500.
To the list
Grinding accessories
The vast majority of grinding operations in everyday life are carried out manually or using a drill. This is understandable. Buying expensive specialized equipment for use at home, where grinding operations, as a rule, vary greatly in type, is not always advisable. There are various devices for manual and mechanized grinding. All of them can be divided into two main types.
- Tools that directly perform the processing of the part are hand-held devices, which include sanding blocks (pads, whetstones) and grinding attachments for a drill or grinder, which are all kinds of support plates and drums.
- Devices that ensure the required position of the grinding tool relative to the part - guides, supporting surfaces, etc.
A separate type includes devices for dust removal, which, due to the abundance and harmfulness of grinding dust, should also not be neglected.
Hand sanding tools
When working manually, to ensure the necessary processing parameters, a variety of grinding devices are used.
The simplest hand-held devices include sanding pads, which may be called sanding blocks, sanding bars, etc. Depending on their shape, they can be used to process both flat and shaped surfaces.
The sanding block consists of three main elements - a body with a working surface on which the sandpaper is stretched, a clamping mechanism that secures the sandpaper to the sandpaper, and a handle to which force is applied when sanding. The latter may be absent as an independent element; in this case, its role is played by the body. The clamping mechanism can also be replaced with other elements that perform its function, for example, Velcro.
Sanding block
There are many types of branded pads available, differing from each other in shape and method of attaching the sandpaper. The body is most often made of plastic, the working surface of which is covered with a soft material that helps smooth out irregularities.
Grinding accessories
The simplest pads for grinding are easy to make yourself. Wood is best suited for this. It is advisable to paste over or cover the working surface with a soft material, such as felt.
The simplest design of a block consists of two pieces of board or chipboard, tightened together with screws - so that the skin covers the bottom piece, and its ends are clamped between the parts.
Homemade sanding block
If you put in a little more effort, you can make a more functional block in which the skin will be clamped with a wing nut, which is much faster and more convenient than using screws for this.
For processing large surfaces, if for some reason a power tool is not suitable, it is best to make your own grinding “plane”. Its possible design is shown in the figure below. It is so simple that it does not need explanation. The dimensions of the device are determined by specific working conditions - the parameters of the plane being processed and the physical data of the worker.
Sanding plane
For grinding edges located at an angle of strictly 90° to the adjacent surface, a device that allows you to ensure the required right angle will be useful. It is shown schematically; the specific implementation can be anything.
Device for sanding edges (end view): 1 - base, 2 - handle, 3 - side stop, 4 - stiffener, 5 - sanding paper, 6 - strip of felt.
One of the main tasks when making homemade bars is to securely attach the skin to them. In addition to mechanical clamps (using screws, nuts, etc.), you can use other methods of attaching sandpaper to homemade sanding blocks.
You can simply nail it at the ends with small nails. The method is easy to implement, but inconvenient if you have to change the skin frequently.
An acceptable way to secure sandpaper is by gluing it. Glues are suitable for this, making it relatively easy to separate the skin from the base when replacing it.
Sometimes they use wedges to secure the skins. Cuts are made in the block, into which the edges of the skin are tucked and wooden wedges are driven. Cuts and wedges can be of different sizes.
Sanding block with wedge groove
Accessories for drills and grinders
Manual grinding requires a lot of effort and time. For significant volumes of grinding work, it is advisable to use a power tool - a drill or grinder, in particular. To turn the latter into a grinding tool, they must be equipped with a suitable grinding attachment - a support plate or drum.
Attachments for drill and grinder for grinding
Sanding pads
. These attachments are a disk made of plastic or rubber to which a circle of sandpaper is attached. Plastic plates have a soft or not very soft layer between the base and Velcro, for better adhesion of the skin to the surface being treated. Drill plates have a shank in the form of a rod; for angle grinders, they have a thread for screwing them onto the output shaft of the angle grinder. The grinding attachment for an angle grinder can be converted into a drill attachment by screwing an adapter with a shank into it.
Sanding attachment and drill adapter
But due to the rigidity of the grinder attachment, a strictly vertical position of the drill relative to the plane when grinding is practically impossible. When using a rigid plate (it’s easier to work with a flexible one), any slight tilt leads to the edge of the plate biting into the workpiece and the drill trying to escape from your hands, which leads to an increase in tilt and a deeper bite into the edge of the circle. This leads to clearly visible depressions on the treated surface. Therefore, only grinding attachments that can compensate for the tilt of the drill are suitable for the drill: either rubber, or with a thick soft layer between the plastic base and Velcro, or with a movable pin attachment.
Rubber Sanding Attachment for Drill
Hard plates are only suitable for use with a fixed drill, such as the one shown below.
Drill grinding tool
If you can’t find a suitable drill attachment for grinding on sale, and you have a hard attachment, then you can make a thick soft layer between the plastic base and the Velcro with your own hands.
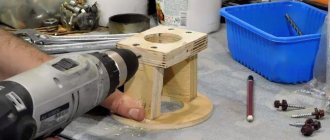
Homemade drill attachment for grinding
Homemade drill attachment for grinding
The Velcro is carefully cut off with a stationery (construction) knife, and a large round sponge for washing the body is glued as a soft layer. When the sponge is compressed during the grinding process, the symmetry may be broken (the Velcro with the sandpaper moves in one direction), but at drill speeds (3000 rpm) this is not critical; it will not work with an angle grinder.
Combined attachments for grinding on a drill are produced, in which the shank can be in two positions relative to the working surface - be rigidly locked with it or have a degree of freedom (unlocked). In the latter case, the working surface of the tool has the ability to adapt to the inclination of the drill, resulting in processing without the formation of indentations. But the price of such devices is close to the price of orbital sanders.
Grinding attachment for drill with movable shank
To make the shank movable, a cone nut is twisted (in the photo below with a similar device, it is twisted to the chuck).
Drill attachment for grinding with movable shank
Drill attachment for grinding with movable shank
The skin is attached to the plates using Velcro. This method of fastening requires special sandpaper, on which a reciprocal layer of Velcro is applied.
Attaching the sandpaper to the sanding attachments
Sanding drums
. Sanding drums for a drill are a cylinder with a shank; sanding paper in the form of an endless belt (a strip of sandpaper glued together at the ends) or a strip of sandpaper with free ends is attached to the cylinder. Unlike the support plate, in which the working surface is located perpendicular to the axis of rotation, in drums it is located parallel to it.
To ensure that the skin sits tightly on the drums, the latter have different tension mechanisms. According to the principle of operation, there are two of them - increasing the outer diameter of the drum (used for an endless belt) and tensioning the abrasive belt using a special mechanism (used for open belts). Increasing the diameter of drums is realized in different ways - by pumping them up (for pneumatic models), by compressing them in the axial direction (for drums with rubber elements). The tension of an open tape can be done in different ways. This is most often done by using a rotating screw that tightens the ends of the sandpaper. Below are several options for drums with different types of skin tension.
Sanding attachment with open sandpaper attachment
Sanding attachment with endless belt inflating attachment
Sanding attachment with attachment of an endless belt by compressing and flattening the rubber
A drum for endless sanding belts can be made by placing rubber pads between wooden discs. When the axle bolt is tightened, the rubber is crushed, expanding in the radial direction and securely fixing the sanding paper placed on the drum.
Homemade attachment for attaching endless tape
Grinding attachments using a drill
. Grinding parts with a plate or drum while holding a drill in your hands is not as easy as it might seem to someone who has never done it himself. In many cases, a better surface quality can be achieved by holding the tool stationary. Especially when processing small parts that are easy to manipulate by holding them in your hands. There are grinding attachments that allow you to secure a power tool, making it completely or partially stationary.
You can use branded drill guides, which are designed primarily for drilling, but can also be successfully used for grinding - mainly with a drum. You can work with them in two ways. By fixing the drill in the guide motionless and moving the workpiece relative to the tool (photo A below), or by moving the guides together with the drill relative to the workpiece, pressing the supporting surface of the guides against the latter (photo B below). In both cases, the tilt of the drum is eliminated, which ensures surface treatment at the desired angle.
Using drill guides when sanding
You can independently make a simple sanding device from two boards, which allows you to ensure that the angle of the sanded edge in relation to the main surface is exactly 90°.
Homemade edge sanding device
Removing dust
. When sanding wood, a lot of dust is generated, which not only creates inconvenience, but is also harmful to health if inhaled. Dust must be dealt with. The easiest way to do this is to suck it out with a vacuum cleaner, placing the hose closer to the sanding area.
When using the content of this site, you need to put active links to this site, visible to users and search robots.
Literature
