In this master class we will make a rose that can be used to create a brooch, hairband or other decoration. The same leather can be used for different types of colors. The main thing is its thickness. In order to make a flower from leather, you will need a pattern of sepals and petals. You can do it yourself or search on the Internet. An example for self-printing will be given below. It is best not to redraw or photograph the diagrams, but to scan them so that the proportions are not distorted. Then the flower will turn out uneven.
How to choose leather for creating flowers?
We begin our master class “DIY Leather Flower” with how to choose the appropriate material for the job. It can be any shade, but red roses are considered classic. Some artists prefer to work only with light leathers for flowers. It is important to consider that, like fabric, this material has transverse and longitudinal fibers. Therefore, somewhere it will stretch more, and somewhere less. Therefore, before work, you need to determine the directions of the fibers and find a place with an oblique guide. It is along this line that flower masters cut out details from leather.
It is important to consider the location of the fibers so that the petals do not become distorted at the end of the work. But, if this is not possible, and, for example, the piece of leather is very small, we cut out the details as best we can. The leather is suitable for haberdashery or clothing. The main guideline when purchasing material for creating leather flowers with your own hands is the thickness of the material. It should be 0.5-0.8 mm. There are cases when thick skin becomes thinner during processing, and a flower can be made from it, but this is an exceptional case.
Toning of plastic suede parts
A varied palette of shades helps you choose the right shade. However, in living nature, petals can contain several shades of colors. That is why tinting is used to create realistic details.
For this use:
Oil paints. This type of coloring composition is considered the most reliable. Tinted parts will delight you for a long time. The only drawback of this method is that it takes a long time to dry after application.
Acrylic sets. These paints are very easy to use. They dry quickly after application. An art brush is used to create subtle drawings. The disadvantage of acrylic paint is its ability to crack after some time.
Note!
Crochet rose - diagrams and descriptions of how to crochet a rose with your own hands. Crochet technology + interesting craft ideas
DIY edible bouquets - TOP 130 photos with instructions for creating a bouquet with your own hands. Creative ideas with simple diagrams and photos of finished works
Craft primroses - simple instructions for creating crafts from scrap materials. Schemes of beautiful DIY products + photo reviews
Pastel. These paints are available in chalk form. They are applied using a damp cloth. To create a rich shade, tinting is carried out several times.
Decorative cosmetics. For work, use eye shadow, decorative lip pencils or lipstick. Only an experienced professional can work with such paints.
Tools for working with leather
We continue our master class on leather colors. Let's consider the features of workplace preparation. The surface on which the buds will be created must be smooth and hard; it is advisable to use a special mat. To soak the moistened petals, prepare a wide lid from a plastic container or other device to make it convenient to remove the product from it. The pattern of leather flowers, including leaves, can be absolutely anything.
In our case, it is not necessary to use a template specifically for a rose. Usually the blanks are cut the same, but it is permissible to change the size or shape. The templates do not have wavy edges or jagged edges as it is very difficult to cut such patterns into leather. There is no need to transfer the drawing onto the material. The pattern is made like this: a template is pressed to the skin, and a section is cut out from it. Only after this can you begin to cut out additional ornaments and add wavy edges. The same goes for the leaves - after you make the blanks, you can change their shape and make a jagged edge.
Preparatory work
When a flower model has been chosen, templates have been prepared and all the necessary tools have been purchased, you can begin preparatory work with natural leather. It’s worth noting right away that when stretching old shoes or bags for future workpieces, you should not use leatherette. The main recommendations for preliminary preparation are as follows:
- The piece of leather must be carefully straightened. Crumpled pieces will have to be straightened with an iron.
- When using a heating device, you must carefully monitor the temperature. You need to put a thick piece of gauze on the material, which can be pre-moistened with water.
- There is no universal temperature, because it all depends on the type of material and its density. The only way is to use trial and error. An insufficiently heated device will not be able to smooth out creases, and too high a temperature will dry out and damage the skin.
- It is important to perform smoothing correctly. It is strictly forbidden to drive a heated device over an area of skin, as the material may stretch. Instead, you need to move the iron from place to place, applying it firmly for a few seconds.
- If there are glue residues on the material, then you should not get rid of such pieces. The glue can be easily removed using sandpaper. A similar method is suitable for thinning the edges of future petals.
Blanks for roses made of leather
Let's start creating leather flowers with our own hands. We take the material, cut out a leaf, a sepal and two types of petals. For one flower you will need 5 small and 5 large petals, 1 sepal and 2 leaves. The number of petals can be increased to 6 to make the flower more magnificent, and, if desired, it can be made from leather of different colors. It all depends on your imagination and ideas. Then we give the edges of some parts a waviness by cutting out small areas of the skin with scissors. There is no need to try to make all the petals the same, then the rose will look more natural.
What is required to make these flowers?
- Fantasy and patience.
- Leather of different textures, colors and thicknesses.
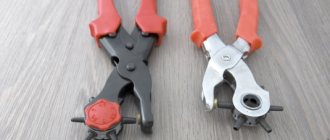
- Scissors (preferably special ones for leather, since ordinary scissors cannot always cut leather and become dull from interacting with it).
- Super glue.
- Cardboard or paper for stencils.
- A simple pencil and eraser.
- Pins.
- Wire.
- A candle (at least matches or a lighter).
- Beads, rhinestones, other decorative elements.
- Stapler.
- Tweezers.
How to treat petals with a solution?
Turn all the petals inside out. Sometimes the skin on this side looks unsightly, it is uneven and lumpy. In the process of work, we will correct these shortcomings using painting and treatment with PVA glue. We take all the petals and coat them with the solution one by one. There is no need to completely immerse the workpieces in the solution, otherwise they will take a long time to dry. We lay out the processed ones on a previously prepared surface and wait until the surface is well saturated with moisture. Usually it is enough to coat them with glue once, but this largely depends on the skin.
Some types of material absorb water for a very long time. The second time you need to soak such petals with the solution after drying them a little. Do not allow the parts to get too wet and the glue to come out on the front side. On some types of leather, bleed-through glue leaves stains.
Professional tips for creating flower arrangements
When working with plastic suede, you need to follow several recommendations that will allow you to create realistic products.
In the process of creating flower preparations, you need to know a few basic secrets:
- Different batches and brands of foamiran may vary slightly in shade. That is why it is important to correctly lay out the templates, taking into account the color shade;
- To create an even punch, it is necessary to place paper under a sheet of foamiran;
- Hot glue from a hot glue gun can burn through a part. When working with a glue gun, it is important to be especially careful;
- Do not heat already formed parts. Repeated heat treatment negatively affects the structure of plastic suede;
- Products made from foamiran quickly fade in the sun.
Foliage for a flower
Having finished with the petals, we coat two leaves for the rose. If desired, the amount of foliage can also be increased. Much in this case depends on the product itself. Brooches and headbands need a backing, so a larger number of details will look more attractive in the composition. But sometimes extra leaves only get in the way, so you should focus on what you want to get as a result of your work.
How to care for compositions?
Proper storage and care of a flower arrangement helps prolong its decorative qualities. To do this, you need to follow a few tips:
Products must not be stored on sunny windows;
To remove excess, you can use a special brush;
You can get rid of contamination by using a soap solution;
The flower arrangement must be dried for 5 hours.
Forming petals using the blind man's buff technique
Now we check how well the parts are saturated and proceed to forming the petals. Each workpiece is processed manually. For work we will use the well-known “blind man’s buff” technique. Almost all leather flowers are made using this method. The exception is products that are created by firing over a candle flame or frying in a frying pan. The “blind man’s buff” technique involves folding folds on a workpiece.
We take the petal in our hands and begin to drape it, collecting it with our fingers from one side to the other. The softer and thinner the leather used, the smaller the folds will be on the workpiece and the more graceful the flower will be. Having collected the folds, we begin to twist the petal in the same way as we wring out the laundry. Repeat on all other parts. Another option is to lay the petal flat on a flat surface and start draping it using only your nails. This method is suitable for those with long nails. The result will be approximately the same, but in the second case the folds can be made smaller and neater.
Wall panel
A decorative panel of leather flowers looks very stylish and attractive.
This product will complement and refresh any interior and can easily replace a picture on the wall. You will need:
- A piece of leather measuring 30 by 50 centimeters for the base.
- Multi-colored leather scraps.
- Durable glue.
- Scissors.
- Thick paper for creating a pattern.
- Decorative elements - beads, beads, rhinestones and so on.
- Cardboard.
The first step is to prepare the base. To do this, we took a piece of leather 30 by 50 centimeters. If desired, the base can be made in the form of a circle, square, oval, and so on. To ensure that the finished product holds its shape well, it is recommended to glue cardboard to the base.
Next we make flowers for the panel. We will collect them from multi-colored leather petals. So that all the petals are the same in shape and size, we will prepare a pattern from a sheet of thick paper by cutting out an oval from it.
Then, using a pattern and scissors, we cut out flower petals from the leather. Since the flowers on the base will be arranged in any order, there can be any number of flowers.
So, the petals are cut out. We arm ourselves with glue and glue our blanks together, forming a flower.
In the same way we cut out the leaves for our buds.
Once the flowers and leaves are ready, you can begin the main part of the work: placing them on the base. You can glue flowers to the base in any random order, creating a beautiful flower arrangement. You can add any decorative elements to the finished panel. Show your imagination and pieces of leather will turn into an amazing element for interior decoration.
How to make perfect folds?
It is advisable to protect your hands with thin gloves while working, but experienced needlewomen prefer to feel the process and say that this allows them to better feel exactly how to assemble the product. To prevent folds from appearing across the petal, mentally imagine the center line of the part as if it were divided into two equal parts - this will help not to displace them during assembly. Ideal folds should diverge radially to the sides.
Another way: immediately lay the central fold, and then follow it and align the edges of the product, pulling it towards the center: first on the left, then on the right. This will help you not to lose your bearings and make even folds diverging from the center. If you do not follow the radius, the folds will turn out ugly, and the petal will skew to the side. This can also happen from an incorrect pattern or carelessness.
Master class on leather panels
For the panel with your own hands, you need to prepare the following items:
- Basic material, i.e. leather for making panels.
- A frame for your masterpiece.
- Burlap, which will be the background.
- A twig that will be a vine.
- Glue gun.
- Paraffin candle.
- Blanks (templates) of grape leaves, as well as berries.
- Oilcloth/polyethylene.
- Scissors, pencil, tweezers.
It is important to remember basic safety rules when you begin work. Make sure there is sufficient lighting in the workplace
You also need to use the glue gun carefully. When you need to apply a candle, use tweezers. The room needs to be ventilated after the procedure with a candle.
How to thin the material?
When the skin is thin, there is no need to stretch the edge of the workpiece to make it wavy. But if the material is dense, it needs to be thinned. This should be done after you have wet the petal from the wrong side and it has become a little saturated. It is enough to wait about 3-5 minutes and walk along the edge of the petal with your fingers, stretching it a little and bending it in different directions. Sip it carefully, trying not to tear it. After this treatment, the flower will turn out more graceful, and the petals will be easier to fold. When processing a leaf, the same principle is used, but try to lay out folds so that they imitate the direction of the lines in a real living leaf. The workpiece can also be twisted to increase the number of folds.
Advantages of plastic suede
There are several positive qualities of this material. These include:
- Plastic;
- Rich palette;
- Does not absorb moisture;
- Excellent mechanical impact;
- Does not lose its qualities during heat treatment;
- Easy to tint;
- Glued with rubber glue.
Professionals and even novice craftsmen will be able to work with it. Foamiran is non-toxic and absolutely safe for humans. It is recommended for making children's crafts. After unpacking the decorative sheets, an unpleasant odor may be emitted, but after a while it will completely evaporate.
Note!
- DIY fruit bouquets - TOP-200 photos with instructions for creating a bouquet of fruits with your own hands. Unconventional ideas with simple diagrams and work overviews
Crocheted flowers: TOP-160 photos and step-by-step knitting pattern, review of finished products with your own hands. Crochet master class for beginners
Paper lily - TOP 100 photos of the best product options. Master class with step-by-step diagrams and drawings for creating an origami lily with your own hands
What to do if the workpiece is dry?
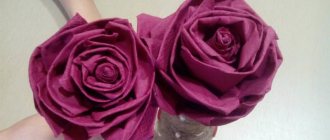
If you feel that the petal has dried out too much, wet the brush in the solution and lightly rub it along the underside. After completely processing all the workpieces, leave them for 5-10 minutes. During this time, you can cut additional teeth on the sepals. Then we begin to carefully open the petals. In this master class “Do it yourself leather flowers”, we will not use special tools, so we create indentations on the bottom of the petal by hand. We press our finger to curve it, and then change the shape of the edge, making it more curved. We often bend the lower petal forward. The photo shows leather flowers created in this way. They look neat and natural, like real ones.
What is foamiran?
Today, specialized departments for creativity offer a large selection of decorative elements for handicrafts. What is foamiran? This material is made from foam, ethynyl and vinyl acetate. These components provide it with plasticity.
By heating and mechanical action, each part can be given the desired shape and volume. The use of special molds helps to display the texture on the surface of the flower petal.
Center for the flower
We put the leather parts aside and begin to create the core of the flower. For this we will need beads and seed beads. There are several ways to make a neat and beautiful center:
- Use a metal strainer and sew beads through its holes.
- Cut a small circle from a plastic bottle and burn it with a lighter to create a curved shape. Using a large needle, you need to make many holes in the plastic and string beads through them.
- Make a ball of wool and sew beads on it.
Another simple option to make the middle:
- Take a button, cotton wool, thread, wire and a small piece of fabric.
- Thread the wire through the holes in the button and make a leg.
- Then wrap the cotton wool around the button and pull the fabric over it.
- Sew the material at the bottom. You should end up with a shape that resembles a mushroom cap.
- Embroider the blank with beads.
Having finished creating the middle, we begin to assemble the leather flower.
Making chamomile from Thomas
To work you will need the following tools and materials. This list includes:
- Two sheets of white foamiran;
- Pattern of chamomile, heartwood;
- Floral tape;
- Scissors;
- Simple pencil;
- Iron to add volume;
- Yellow pastel.
We transfer the flower templates onto a white sheet of plastic suede. To create a chamomile you will need 5 blanks. Turn on the iron and process each petal. When the base of the workpiece warms up a little, give it the desired shape.
We make the core from yellow fom. To do this, cut out a strip 1 cm wide and 8 cm long. Use scissors to make a fringe in the upper part. Glue it to the metal wire and gradually twist it.
Now we fix the white blank onto a metal wire with a core. Carefully form the flower. We will mount the stem from wire. We wrap the metal surface with floral tape.
Assembling a leather product
Before we start gluing the flower, we attach the parts to the center to understand what the final result will look like. Then we twist the petals again to make them more curved. See for yourself how best to change the shape to make the bud look more natural.
Let's start assembling - for this we will use instant glue. We start assembling with small petals. Apply a small amount to the inside of the stem and apply it to the underside of the core. Moving in a circle, we glue the blanks, forming a flower bowl. Place the fifth petal under the first. Press the edges with your fingers so that the glue adheres better. In order to press the petals to the center, you will need a cap from a regular one and a half liter bottle or a small glass, depending on the diameter of the central part. We turn the petals away from the core, coat the lower part with glue and place the flower in the container for a few minutes.
Glue the second row of petals in the same way as the first, avoiding spiral movement. The movement should be in a circle. We compare the petals in height so that they are all at the same level. When the flower dries, take the leaves and sepals and try them on. If you need to adjust the size of the parts, cut off the excess and curl the edges. We glue the leaves first, focusing on our taste.
Templates for creating flower arrangements
Color templates make the process of creating decorative items much easier. A variety of shapes and petals are developed by designers. This allows you to create the most natural products.
These stencils can be downloaded from the Internet or purchased in specialized departments for creativity. After this, the drawn parts are carefully cut out and applied to the surface of the foamiran.
To give texture and volume to the workpieces, molds are used. These structures are made of dense silicone. When exposed to elevated temperatures, the material becomes more plastic and pliable.
Note!
- Crafting tulips from paper - TOP-100 photos of interesting ideas for creating tulips from paper + simple instructions for beginners
Mimosa craft: TOP-160 photos of simple and complex crafts. Master class for children and adults on making mimosa with your own hands
- DIY napkin flowers - a detailed master class with simple diagrams. Non-standard solutions for creating flowers + photos of finished crafts
Making a brooch with a leather flower
If you plan to use the flower as a brooch, prepare a pin or a special blank to attach it to the bud. We begin to coat the sepals with glue from the middle. We apply it to the flower and press it. Then we begin to attach the pin, placing it under one of the sepals. You need to keep in mind that the center of gravity of the flower is above the center, so you can’t attach the clamp in the middle. Unscrew the petal and apply a thin strip of glue to the sepal. Press down to secure the pin in place.
You should not use a glue gun to glue leather parts; it will make the product heavier and may leave an unsightly mark on the petals. The product is ready. We made a flower out of leather with our own hands, and the master class is over.
Varieties of foamiran for creativity
Today, in the departments for creativity and handicrafts, there is a huge selection of foamiran. There are several types of this decorative material. In turn, they differ from each other in their density. These include:
Iranian. The fabric is pleasant to the touch with a velvety texture. Parts made from it are durable and easily amenable to mechanical stress. The thickness of this sheet can be from 0.5 to 2 mm.
Turkish. It is fine-grained and elastic. Products made from it are of high quality and durable. After thermal exposure, the elements hold their shape perfectly.
Chinese. Foamiran of this type has a smooth surface and a large palette of colors. The thickness of each sheet does not exceed 2 mm.
After thermal exposure, the foam becomes too elastic. After carrying out this manipulation, it is necessary to quickly give it the desired shape.
Korean. The material is dense and velvety to the touch. The palette of color shades is very diverse. The thickness of the sheets ranges from 0.5 to 1.5 mm. It is used to create thin petals and small details.
The simple magic of wildflowers
Wildflowers, with all their simplicity, can become part of a very sophisticated composition, fresh and delicate. They look good if you choose a variety of flowers of different colors and shapes.
In a field bouquet, daisies, poppies and cornflowers, yellow buttercups look gorgeous
Find out how to make some of your favorite flowers in our instructions.
How to make a chamomile flower - instructions for beginners
Chamomile is just a seemingly simple flower. It is not so easy to make it from Thomas - it will require patience and many miniature parts.
| Illustration | Description of action |
| Using the miniature template, draw and cut out 30 small petals from white foam foam. | |
| Make a fringe from a strip of yellow fom. Carefully cut the material with scissors at a minimum distance. | |
| Give relief to the chamomile petals using tweezers. Just heat up the workpieces and run tweezers over the hot material. | |
| Bend the stem wire at the tip to form a hook. Insert the tip of the fringe into it. | |
| Rotate the stem while gluing the fringe to create the center of the flower. | |
| Heat the finished core over a candle. The fom will become thinner and the core will look very natural. | |
| Hot glue the first row of petals. | |
| Attach the second row so that the lower petals fit between the upper ones. | |
| Cover the reverse side of the flower with a curly detail. You can then attach a hairpin or brooch pin to it. |
Poppy flower from foamiran: pattern and video instructions
Another favorite wildflower is the bright poppy. It looks great both in company with daisies and on its own in hairpins and brooches.
Poppy flower pattern
The peculiarity of this flower is its middle. How to make it correctly from plastic suede is described in the video instructions:
Embossing on leather
Paintings made from a single piece of leather look impressive if patterns or objects are embossed on them. To work you will need wire, a bowl of warm water, and any desired item. It could be scissors or a gun, a toy bug or a simple fork.
First, the material must be well soaked by holding it in a bowl. Then lay it out on the table surface on a selected three-dimensional object and press down forcefully so that the skin “hugs” it from all sides. It's okay if small wrinkles appear around. Perform stroking movements with your fingers and the whole hand. To maintain its shape, use a hair dryer. If you do not have this opportunity, then press the object tightly by placing a bag of sand on top. It is better to do this work at night. In 12 hours the leather will dry out and the embossing will remain for a long time. The photo in the article shows how beautifully the big beetle turned out. After drying, the leather needs to be painted, highlighting the embossing in a different color.
Hydrangea from foamiran - video instructions for making
Lilac or hydrangea - these inflorescences of small flowers look gorgeous in bouquets. The work of making them is long and painstaking.
You will need many small parts measuring 1-1.5 cm, which are assembled into an overall composition
To make small flowers, it is better to stock up on a figured hole punch; it will greatly simplify the task. The process of creating a hydrangea flower in this detailed video:
Spring freshness of a tulip: very simple
To make tulips, use silk foamiran - it is best suited for these delicate flowers.
| Illustration | Description of action |
| Green fom for leaves and pink or red, orange, yellow for petals. | |
| Tint the base of the petal with oil pastels. | |
| Give the petals a rounded shape and relief. | |
| On the tinted leaves, draw a longitudinal relief using tweezers. | |
| Wrap the wire with foamiran to create a stem. | |
| Secure the stamens as shown in the photo. | |
| Use a strip of fom to form a flower head to secure the petals. | |
| Wrap the sticky green tape around the workpiece and the stem of the flower. | |
| Glue the petals using second glue. | |
| Pin the tulip petals together. | |
| Glue the leaves to the stem and the flower is ready. |