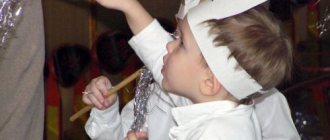
From the article you will learn how to make a plague doctor mask in different ways, what it is and what it was used for in the Middle Ages. Today, such masks are intended primarily for youth costume parties and masquerade balls, but in the past they protected healers from the bubonic plague, or “Black Death.” Making a plague doctor mask with your own hands is not difficult; all the master classes described below are extremely simple and involve the use of available materials.
How to make a plague doctor mask
Mask with beak – symbol of plague
In the Middle Ages, when the plague (or Black Death) raged throughout the world, people tried in every way to stop it.
The line of defense was held, as in all times during epidemics, by natural scientists and doctors. They tried to treat infected people, they had contact with them, and they buried the corpses of the dead in public burial grounds. These doctors were called plague doctors .
The plague doctor costume dates back to 1619, when French physician Charles de Lorme proposed a full set of protective clothing for doctors dealing with plague patients.
The beaked mask, which gave the doctor the appearance of the ancient Egyptian god Thoth (with the head of an ibis), was believed to ward off disease . But the beak also had a functional function: it protected the doctor from the “pathogenic odor”, that is, it was a prototype of modern respirators.
What did plague doctors carry in their beaks?
It is believed that medieval plague healers wore masks with a bird's beak to ward off the disease with such a frightening appearance. Is it true? By the way, the real plague doctor mask looked like this.
The real plague doctor mask looked like this
Let's start with the fact that there is no reliable information regarding what kind of protective equipment the doctors of the Middle Ages used. The canonical costume of the plague doctor developed already in modern times, and its author was the French court physician Charles de Lorme. His costume with a beak mask was introduced in 1619. But we note that in the museum of the city of Ingolstadt (Germany) there is an anti-plague mask dating back to the 16th century.
You can make such a mask with your own hands
Such costumes were used mainly in Catholic countries and had practical functions. Thanks to leather gloves, a raincoat and pants, contact with infected people was excluded. The suits were also soaked in camphor in order to “precipitate harmful miasmas.” Over time, scientists refuted the miasma theory, but camphor was still useful: it repelled fleas that carried the bubonic plague.
Plague Doctor Outfit
Important! Aromatic herbs were placed in the bird's beak to stop the miasma. In fact, the beak was a kind of respirator. There is a version that he did not allow doctors to approach the sick, but it is controversial. Indeed, in some costumes the beak looked more like a soft leather “proboscis”.
Modern version of the mask
To ensure distance, another attribute was used - a wooden rod 1-1.5 m long. Doctors used it to move the clothes of the patients and even feel the pulse. Sometimes a smoldering tinder was attached to the tip of the wand in order to cauterize the buboes from a distance.
You can even knit a plague doctor mask
→ TOP 5 ways to make topiary from coffee beans
How plague doctors are commonly portrayed in modern culture
In popular culture, the plague doctor costume is almost universally used as an example of the stupidity and superstition of people from the Middle Ages . He has been ridiculed for a very long time - since the beginning of the twentieth century and maybe even earlier.
For example, this poster from the UK Ministry of Labor and National Service, produced between 1939 and 1945, shows a cartoon version of a plague doctor mask and references the silly superstitions of the Middle Ages.
_
“A medieval charlatan wore this headdress to ward off infection. Today we prefer science to spells, and prevention to cure. So GET FIRST AID for any injuries."
The poster was clearly created to tell people - you are smarter than your ancestors. While the message about first aid is certainly noteworthy, all the other information about the plague doctor costume on this poster is completely wrong.
A reenactor from Kaliningrad goes out into the city dressed as a doctor for fun. He is sure that plague doctors were something between priests, charlatans and janitors.
An indelible mark on human history
The first mention of the plague pandemic dates back to 551-580 and is called the “Plague of Justinian.” Egypt became the epicenter of its occurrence, after which the disease spread to almost the entire civilized world of that time. Approximately 100 million people became victims.
However, when people talk about the plague, they most often mean a terrible epidemic in the 14th century. The Black Death, brought from China, wiped out a third of the population of Europe.
During this period, such a profession as a plague doctor appeared. This is a doctor whose duty was to treat patients infected with the plague. To avoid infection, doctors put on a special protective suit, the image of which is probably familiar to many.
First of all, this costume is known for its mask with a “beak”, which, by the way, subsequently played a significant role in European culture. They began to copy it in Italian comedies of the Renaissance and it became the prototype of the Venetian mask.
Costume
The plague doctor costume in its final form appeared in 1619, and was invented by a physician of French origin, Charles da Lom. The robe was made of leather and resembled armor . It included:
- mask with a “beak”;
- long, ankle-length, raincoat;
- tight pants;
- gloves;
- boots;
- hat.
There was a special technology to ensure that the plague doctor’s mask performed its full function. Creating such a mask with your own hands was an unlikely task; this was done by specially trained people.
Beak-shaped mask
The beak-shaped mask is the most famous attribute of the plague doctor. Many people ask the question: “ Why was a beak-shaped mask used in an anti-plague suit in the Middle Ages?” »
- Firstly, it is connected with symbolism - it was believed that birds carried the plague;
- Secondly, it is worth paying tribute to the doctors of those times - they filled the beak of the mask with various spices, aromatic substances and medicinal plants, due to which the cadaverous smell that so often haunted medical workers during epidemics was not so strongly felt, and the inhaled air was disinfected. Red glass lenses were also embedded in the mask, which, according to the beliefs of those centuries, protected doctors from infection.
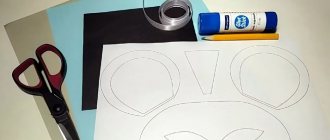
Paper mask
For example, a do-it-yourself plague doctor mask from paper is very easy to make. Just take A3 paper or 2 A4 sheets. Next, we cut out two halves of the mask with a long beak, the frontal part is on the side. We glue it all together with tape.
We glue a thin elastic band so that the mask can be put on. If desired, paint it black or some other color.
Making a plague doctor mask from papier-mâché
A plague doctor mask made with your own hands from papier-mâché will be much denser and more realistic than just one made from paper.
For this you will need:
- sharp knife;
- polystyrene foam;
- previous paper version of the mask;
- glue;
- toilet paper;
- newspaper.
So, we take two blocks of polystyrene foam, each approximately 7 centimeters wide. First we need a proper layout. Let's give the blocks some kind of mask. To do this, simply trace the paper version onto polystyrene foam. Next, using a knife, we process each block, giving them the appearance of halves of a mask.
Glue the two halves together with glue. We wait a few minutes until the mask dries. And then we level the surface so that it becomes relatively smooth.
Now take PVA glue and dilute it with water in a ratio of 4:1. Mix well with a brush. Wrap the layout tightly with foil. It's okay if it gets wrinkled. Next, take a piece of toilet paper, apply it to the foil and coat it with a glue solution. In this way we cover the entire mask.
Next, we need an old unnecessary newspaper that can be torn into small pieces. We glue the mask with these pieces. We make 5-6 layers of newspaper. We leave this structure for a day to dry.
The next day you need to detach the mask from the layout. To do this, you can slightly pry it with a stationery knife. Once the mask is detached, remove the foil.
Now you need to cut out the holes for the eyes; later they can be decorated with a round frame for glasses. For beauty, paint the mask with gouache. Just use a minimum of water so as not to soak the structure. Glue the rubber band.
The plague doctor mask, created with your own hands, is ready.
EVA Foam drawing
Comfortable and modern cosplay material is used.
In the original version, the masks were leather, but we suggest using EVA Foam (ethylene vinyl acetate, eva foam, eva) - a convenient and inexpensive material for creating cosplays. If you wish, you can take papier-mâché, leather or even linoleum, but more on that later.
Step 1. So, first, print out the pattern attached below on two A4 sheets. Without margins, full sheet. After that, cut out the parts.
Pattern of a plague doctor mask
Step 2. Transfer the parts onto EVA Foam and carefully cut them out.
Ready cut parts
Step 3. Glue the parts together as shown in the photo. As a result, you should get a beak like this.
The parts are glued together
Step 4: Select your lens material. You can take a historical approach and make the lenses red (they were believed to better protect against the plague). You can also take transparent plastic - for example, from a bottle. In our example, the lenses are made to protrude, for which several layers of EVA were used.
Make these holders for lenses
Step 5. Glue the lenses to the mask. Level out all the “jambs”; if necessary, sand and putty. Make fastenings (there are eyelets for them on the top and sides of the mask).
Don't forget to make eyelets for fastenings
Step 6. Take care of ventilation so that you can breathe freely in the mask. You can attach replacement filters here from the inside if you want.
Ventilation holes
Step 7. Start painting. Additionally, you can make another hat like this (also from EVA Foam).
You can complement your mask with such a stylish hat
Actually, that's all . The plague doctor mask is ready, you can go shopping!
Now you can go shopping
Option #2. Stylish mask made of corrugated cardboard and leather
A simple option involving the use of corrugated cardboard.
Before you get started, download and print the patterns below. And print according to the page size so that the details do not turn out too small.
| Beak (lion).pdf |
| Beak (right).pdf |
| Eyecups.pdf |
| Front part.pdf |
| Hat.pdf |
Step 1 . Now prepare everything you need. Materials you will need:
- cardboard (corrugated);
- paper;
- plastic for lenses (you can take a CD box);
- hot glue;
- scotch;
- permanent marker;
- felt or leather;
- sandpaper with grit from 160 to 220;
- fabric to match the paint color;
- dye;
- sealant.
Tools and materials for work
In addition, prepare:
- glue gun;
- scissors;
- a tool for cutting plastic (in the example, small wire cutters are used, but they are not the best option).
Step 2 . Print the files and cut out the parts, tape them together and check if everything is fine. Adjust if necessary.
Mask details cut out
This is roughly what it should look like
Step 3 . Apply glue to the paper pieces, then turn them over and glue them to the corrugated cardboard.
Parts are glued to corrugated cardboard
Details after trimming
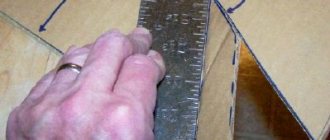
Step 4 . Cut out the pieces from cardboard using a cutting mat. Remove paper and glue. Connect the cardboard beak pieces. We advise you to then sand the beak so that there are no sharp edges or corners.
After removing the paper itself
Beak parts glued together
Step 5 . Cut and glue the main part of the mask (see photo below). Remove the paper.
Make a triangle cut
Preparing the main part of the mask
Keep the edges together until the glue dries
Step 6 . Cut out the cardboard rings, remove the paper and sand the edges. Cut 2 strips of cardboard to wrap around the glasses. Glue the strips. That's it, the basic elements of the plague doctor mask are ready!
Cut out cardboard rings
Also cut out strips
Wrap the strips around your glasses
Step 7 . Make plastic lenses. In the example, CD boxes are used, but it is better not to use them - the material is very fragile and generally poor.
In the process of preparing lenses
Step 8 . Light leather is used here, so the author painted it in several layers.
Painting the leather (third layer)
Step 9 . To cut out leather pieces, print and cut out pieces of paper again and glue them to the material you want to wrap the pieces with. Trim the paper, but be sure to cut about 1 inch from the edge. After this, cut off part of the mask in the center (use paper for this). Remove the paper.
Leather parts
Repeat the step with the cut out triangle
Step 10 . Cut a triangular notch in the beak the same shape as the mask. After that, glue the beak to the mask where you want it. Use a marker to mark the edges of the beak. Be sure to cut it a little smaller than what is indicated on the mark.
Cutout in the beak
Use a marker to mark the edges of the beak
Beak attached to mask
Step 11 . Cover the beak with pieces of leather using a heat gun. Cover the mask itself in the same way. Then remove the excess and glue the beak to the base.
The beak is covered with skin
Don't forget to leave some skin here
Cut out the hole for the beak
Glue the beak
Step 12 . Cover the glasses with pre-cut pieces of leather. You can cut the glasses at an angle of about 45°, as in the photo below. Then glue the lenses.
Glasses covered with leather
Cut them at a 45 degree angle
Step 13 . Try on the paper circles you used earlier and cut out holes for the eyes. Make the holes slightly smaller than necessary. Glue the lenses, making sure to make them symmetrical.
Use paper circles
Cut out holes for the eyes
Glue the lenses
Step 14 . Glue the strap (you can make it from a piece of fabric).
Strap glued
On a note! To complete the image of a plague doctor, you can make a cylinder in the same way. Although this is not necessary.
The mask can be complemented with a stylish top hat
Video - DIY plague doctor mask
Leather
A paper and cardboard template looks like this:
If we want to make a plague doctor mask from hard fabric or leather, then we need to transfer the pattern.
If the leather is thick, it is better to use an awl and a hammer to make holes.
You can use regular threads for sewing, but shoe threads will go faster. We connect two side parts: from the long nose to its tip. If things are going very slowly, we use pliers.
Let's sew the bottom part.
Now the part that will be on the forehead.
We need dark glasses. Suitable for glasses.
Let's cut out 4 circles: 2 should be smaller in size than the glass (this is inside), 2 should be larger than the glass (on top of the glass).
Sew along the front and side parts.
Let's make the fastenings. Let's cut out several strips of leather, make holes and sew them on.
This is what the finished product looks like.
Materials:
- Leather;
- Durable threads (those that contrast with skin color look cool);
- Awl (if the leather is rough, you can first make holes with an awl and then sew on them);
- Large needle;
- Accessories (buckles, rivets);
- Patterns (taken from the Internet).
Another option with a diagram
This year my friends and I agreed to celebrate Halloween and celebrate it in costumes. Reasonable questions arose: where to find a suit, and what kind of suit to look for. I started my choice with a pirate, and ended up with a plague doctor costume, which I will make myself. Below the cut is a short description of the process of preparing this costume.
This is how the finished suit turned out
The article does not contain any new fundamental tricks, rules or guidelines, but perhaps it will help someone in sculpting according to the principle “from what comes to hand.”
I don’t think a story about sewing a cape would be appropriate here—I’m omitting that part. I'll move on to the mask. A short googling brought me to a video on YouTube on how to make a beaked mask out of cardboard. I cut out the pattern, glued it together, and it became clear that it was not right.
The next step was to glue the top with paper soaked in water and glue, like papier-mâché, but the result was also not satisfactory. The cardboard mask also began to sag a little due to the wet paper, but I was too lazy to redo it, and I didn’t want to waste so much work on papier-mâché.
Mask covered with paper with a sewn strap
In the picture above, next to the mask you can see welding glasses, I bought them to insert the eyepieces into the mask, by the way, the glasses are a cool craft, even without alteration they could be used in some kind of suit, although there is a big minus: the glasses are for welding, so the glass is in they are very dark, nothing is visible in them.
I mercilessly shredded the glasses, cut the frame into a metal ring, cut it into petals around the perimeter with metal scissors, inserted it into the hole in the mask, and glued it. To avoid scratching my eyes, I also glued a cardboard washer on top. Having re-arranged the welding glasses strap a little so that it could be adjusted, I simply sewed it to the cardboard.
Diagram of what the petals look like under the cardboard washer. This is what the eyepieces from the welder’s glasses look like on the finished mask
Googling materials to make a mask gave me the idea that I would use auto putty. The general plan is this: I put the putty on top of the cardboard form, rubbed it with a spatula, rubbed it with sandpaper and it’s done.
Everything turned out almost exactly the same, except that I used primary putty with fiberglass. And here’s what they write about it: “used for large body work, large dents or through holes. This putty is coarser and must be covered with finer putties. It is also much stronger than regular putty and more difficult to process. Some craftsmen even begin processing without waiting for this putty to completely dry, because... then it is very difficult to process.” And I must say, it’s not in vain that they write, after several unsuccessful attempts to process the dried putty with sandpaper, I picked up a file, and things were clearly more fun.
Mask after filing
Small observations
Somewhere I came across some advice, something like: don’t skimp on the putty, you can clean off the excess, but if you apply too little, you won’t be able to fix it - the advice doesn’t work for car putty, apply a normal, even layer right away so you don’t have to sand the craft for hours.
The putty is mixed on a spatula (and not in a jar, because it dries quickly), i.e. Not very large portions are mixed. It is better to use one portion not on a simple and flat surface, but on complex curved areas, because... By the time you mix the next batch, the previous one will already be pretty dry, and joining different portions in curved areas is more difficult.
Also, at the junction, the layer becomes thicker, and it is easier to process it on a flat surface.
Mask with highlighted defects at the junction of two portions of putty
One of the portions has already dried, I didn’t put the second one in properly - there are voids left. When processing dried putty, be sure to use a respirator and goggles, there is a lot of dust.
The next steps are the simplest: I bought primer and paint in cans, covered the parts that do not need to be painted with masking tape, primed, and painted. I dried it on the balcony on hooks hung on a clothesline or stepladder, laying newspapers underneath and opening the window.
Photos of painted eyepieces
To avoid getting dirty, I use disposable gloves and a raincoat.
After the paint had dried, it turned out that it was very uncomfortable to breathe in the mask, and that it smelled quite strongly of paint - I drilled holes from the bottom, it became easier to breathe (I used a tile drill - it drills without problems).
As I mentioned earlier, the lenses in the glasses are very dark, I wanted to replace them, but the glass and mirror cutters refused me. An attempt to drill holes in the black cardboard to get something like perforated glasses also failed, so I just took out the glasses; the eyes are not very visible under the shadow of the hood.
Breathing holes Mask after painting
From an old monitor
“Plague IT guy mask” that looks cool and scary!
An extremely unusual version of the mask will be useful for those who do not have any materials at hand except an old non-working monitor. Yes, you understood everything correctly - we are talking about a PC monitor.
Unusual plague doctor mask from an old monitor
To make the same mask, find a pattern on the Internet and transfer it to the mesh part of the monitor, then follow the instructions.
Step 1. Cut out the parts using a utility knife and a hair dryer. A hairdryer will also help give the elements a curved shape.
Cut out details of the future mask
Step 2. In the example, the author used “tails” from old computer mice to sew the parts together. You can do the same.
Another detail of the future mask
The parts are sewn together with the “tails of old mice”
On a note! As you can see, the upper part of the mask turned out to be branded!
Step 3. Having sewn 3 parts of the mask, start cutting out the bottom part.
Bottom of mask cut out
Step 4. Fold the edges, file with sandpaper and connect with the rest.
The edges of the lower part are curved The lower part is connected to the rest
Step 5. For the “eyes” you can use washers that press the disks in the hard drive.
Next you need to make the “eyes”
Step 6. This is what you will get in the end. Quite good, you'll agree.
Ready-made mask from an old monitor
The result is worth it, agree
This is how our mask will look on a person.
“The mask of the plague IT guy” in all its glory
Medicine in the medieval world
Of course, in Medieval Europe, medicine was in a very deplorable state and did not have any adequate methods for treating even the simplest diseases, which is why the mortality rate was very high and the life expectancy was extremely short. All the achievements of the doctors of the Roman Empire were forgotten, and the world again began to drown in epidemics and pandemics.
Due to questionable treatment methods and their ineffectiveness, people's attitude towards doctors was ambiguous. However, with the advent of the plague, there was little choice.
Steampunk style
Steampunk version of the famous protective mask of the medieval Plague Doctor.
What is required to make such a stylish mask? Here is a list of required materials:
- black genuine leather;
- wax cream for her;
- acrylic glass;
- A4 sheet for creating a template;
- brass rivets;
- thin skin (needed for spectacles);
- eyelets;
- silk threads (waxed, red and black);
- brass buckles.
You will also need some tools, namely: a guitar string, a pencil, a fishing leash, an awl, a punch (for seams), scissors, a shoe knife and a marker.
Step 1. Start creating a plague doctor mask by making a template from a sheet of A4 paper.
Paper mask template Now the template can be tried on
Step 2. You can make several samples and choose the best one. Then start cutting according to the template.
Forehead part Side part No. 2 Side part No. 1
Bottom part
Step 3. On the resulting workpieces, first make holes for the seams using a special tool - a punch.
Stepper punches for leather
Step 4: Mark out the seam steps with this tool.
Marking tool for working with leather
On a note! It will also be easier for you to work according to this preliminary drawing.
Step 5. Sew all the patterns prepared earlier into a single whole.
The patterns are sewn together into a single whole. The lower part of the beak. The mask parts are sewn together. More photos of the process. Holes for the eyes.
All parts of the mask are sewn. Front view
Step 6. In our example, acrylic was used to make lenses.
Acrylic lenses for masks
Step 7. To attach the lenses, cut a couple of circles from leather with holes in the center (as in the photo below).
Leather rings for fastening
Step 8. The point is this: you will put the lenses on the eye sockets, and cover them with these rings on top and sew them.
The rings are placed on top of the lenses
Step 9. To make everything look more aesthetically pleasing, you can additionally make such inserts from thin leather.
Thin leather inserts This is what happened in the end
Step 10. Insert the eyepieces into the plague doctor mask.
Eyepieces inserted
Let's take a closer look Both eyepieces
More photos Turned out great Everything is almost ready
Steampunk mask
Step 11. Find and select the necessary buckles and fasteners for the mask straps.
Selection of fasteners and buckles
Step 12. You can make the straps from the same leather. For marking, use this tool.
Marking tool
Step 13: Secure the straps by riveting a brass rivet.
Fastening the belts It turns out very stylish. Brass rivets are used.
Only 2 rivets on top Result of work
Step 14. Additionally, you can add waxed red thread to the seam - for more “entourage”.
Red thread added to the seam
Red color will add “ambiance”
Step 15. The steampunk plague doctor mask is ready, now you can try it on!
Steampunk plague doctor mask
Everything is ready, you can try on the mask