origami paper dragon
Mythical dragons are one of the most popular origami models. Here you will learn how to make a paper dragon , both using the origami technique and as crafts. There are many different types of paper dragons, ranging from simple designs suitable for beginners to complex designs that require hundreds of different steps.
There are many instructions on the Internet on how to make a paper dragon . You and your kids can make simple paper dragon crafts , such as paper plates or cardboard toilet paper rolls. And if you are into origami, you will find several good examples of how to make an origami dragon with step-by-step photos and diagrams.
The article presents:
- Origami paper dragons
- Chinese paper dragon
- Paper dragon head
- Dragon applique
- Paper crafts dragon
- Paper plate dragons
- Origami dragon diagrams
Basic principles of origami
For a beginner who decides to make an origami craft for the first time, difficulties arise in performing the actions correctly. To avoid them and not be disappointed in the final result, you need to learn the basic rules of working with the origami technique:
- You need to choose the right sheet. It must be the correct size and the required density. For a beginner, it is better to practice a little first.
- All operations with paper should be performed on a flat surface. Not a single experienced master in this matter will assemble a figure without proper support.
- To make the figure beautiful, you need to carefully smooth out all the folds with your fingernail, this will help give the product a beautiful shape.
- All parts, especially small ones, must fit perfectly together.
It is better for beginners to choose simpler models at the initial stage, so as not to discourage them from further creativity using the origami method.
Adviсe
Dragons using the origami technique are considered one of the most complex crafts that not everyone can handle. The work requires a person to be careful and attentive.
If you're trying your hand at it for the first time, you might find these tips useful:
- First, learn how to perform basic figures. Practice with simpler diagrams.
- The Chinese dragon is ideal for the first product. It is not as labor intensive as other options.
- For beginners, it is better to use a heat gun to secure the paws to the body. This way the structure will be stable, and the result of the work will please the owner for a long time.
Types of origami
There are several ways to create a paper dragon, for example, simple, modular or schematic. You can immediately find different types of origami dragon and get acquainted with each one separately.
Schematic origami will not differ much from simple origami, since it is a more child-friendly option for creating work. The final figure will be sketchy, vaguely reminiscent of the desired mythical dragon.
Modular paper dragons will represent detailed characters; using this method, you can easily copy a cartoon or movie character.
The main task is to manufacture small modules in the amount of 700-1000 pieces or more, then to draw up a scheme for attaching them to each other.
Formation of the “base”
In order to create a simple dragon without frills or other additional add-ons, you need a sheet of paper 19x19 centimeters. The square must be bent several times. In this way, curves are created on the paper, along which you can subsequently continue working.
When the bends have appeared, you can already bend the scrap into four right triangles.
Which paper is better to choose?
The choice of material for crafts must be taken seriously. After all, the entire assembly process, and ultimately the type of product, depends on what paper is chosen. There are several types of paper suitable for working in origami style:
- colored;
- corrugated;
- white printer paper.
To work using the torsion method, corrugated paper is usually used. With its help, you can make a small dragon; to do this, you should twist the paper into a rope and be sure to do this with wet hands.
With this style of crepe paper origami, the dragon is perfect for beginners. This “snake” will only take ten minutes to complete.
The classic version of origami is that it uses specialized paper that is sold in craft stores. If it is not possible to purchase one, then you can use regular paper, which is used for printing on a printer.
When choosing paper for a dragon, you need to consider some nuances:
- If your work will use colored paper, then it is best to opt for double-sided or metallized paper. It will help make the dragon's skin much more natural.
- If you prefer regular office paper, you can first print a pattern in the form of scales on it. This trick will help make it look more like a mythical creature.
An origami dragon craft made from white paper can be painted in the desired color.
This process will appeal to children, as they really love to do it. After all, in the process of creativity you can realize your deepest desires.
There are several types of paper that can be used:
- colored;
- dense, intended for printing on a printer;
- corrugated.
Corrugated paper is sometimes used in the twisting technique. You can make a small paper dragon out of it by twisting it into a flagellum with wet hands.
However, this version of the craft will look more like a snake. Anyone can cope with this task in about ten minutes.
For classic origami, special paper is used, which can be purchased in craft stores. You can also use office or colored paper products. To make the craft more interesting, you should listen to some tips:
- When choosing colored paper, it is better to give preference to double-sided or metallized paper. This way you can achieve a greater resemblance to the skin of an animal.
- If you take office paper, you can first print a pattern on it that looks like dragon scales. This way the dragon will look more natural and will look like a real mythical creature.
If the craft is made from plain white paper, then after it is ready, it can be painted. Children love this activity very much. They can make all their fantasies come true.
Translation of the drawing
For me, drawing translation has always been the main process in my work. I will tell you a couple of rules, as well as tips for high-quality translation of a drawing. Many people transfer the drawing onto plywood not only using a pencil and copying, but also using “Black Tape”, glue the drawing to the plywood, then wash off the drawing with water and the markings of the drawing remain on the plywood. In general, there are many ways, but I will tell you about the most common method. To transfer the drawing onto prepared plywood, you must use a copy, a ruler, a sharp pencil and a non-writing pen. Fasten the drawing in plywood using buttons or simply hold it with your left hand. Check if the drawing fits the dimensions. Arrange the clock drawing so that you can use a sheet of plywood as economically as possible. Translate the drawing using a non-writing pen and ruler. There is no need to rush, because your future craft depends on the drawing.
Source
How to fold origami?
The following is a step-by-step process of folding a dragon with your own hands using the simple origami technique:
Make a square from an A4 sheet. First fold it along its two diagonals, then straighten it so that the folds are preserved;
Next you need to bend the square in half twice, bend it back, so that 8 fold lines are formed on the square. Holding opposite corners, make a diamond shape along the marked lines. This will take a little practice. Turn the diamond with the folds facing up.
On both sides, bend the edges of the diamond towards the middle. The shape of the figure will be similar to a child's kite. The upper part of the triangle is completely bent in one direction. It must be carefully smoothed out. The rhombus straightens out and a triangle should appear in the inner part.
When you bend the top layer of the diamond, moving from bottom to top, if everything is done correctly, you get a boat. On the reverse side of the diamond, the action occurs in a similar way. The workpiece is straightened and, as a result, an elongated rhombus with pointed corners is ready.
The upper corners of the workpiece are bent from both sides from bottom to top so that a child’s kite is again formed. The upper part of the figure is bent straight to the fold line; this operation is carried out in different directions alternately.
Next, you will need to stretch the figure by grabbing the sharp corners; if the previous steps are performed correctly, the figure will become voluminous and a pyramid will form on its upper part.
Gently bend the top of the pyramid inside the resulting structure with your finger. Press the figure from different sides to the central part, fold it more compactly and a children's kite will form again.
The corners of each side are folded. On both sides, the lower corners are bent upward. The figure needs to be flipped over in order to turn it inside out.
In the direction from bottom to top, the corners are bent and a triangle is obtained. Flip the shape again, but so that it still remains a triangle. You get 2 triangles with sharp corners, which will make dragon wings. They will be placed on different sides; they need to be bent perpendicularly.
In the middle there are triangles and small legs on a trapezoid-shaped fold. These parts will serve to create the head and tail of the future dragon. It is better to first take the triangle, which is located on the near side.
Turn this part out again so that the middle fold is opposite the figure. Make sure that another pointed triangle is placed parallel, turning it inside out.
The small triangles that remain there need to be bent up one by one. Next, you need to form a paw and use the remaining three triangles in the same way.
Make the paws unidirectional so that the figure becomes stable. The dragon's paws and head should point in the same direction, and its neck should be turned slightly upward.
You need to bend your head at the neck. Bend the pointed part back to form a horn.
Bend the wings at an angle back. You can separately add realism to the wings by creating dragon folds on them. In general, an origami dragon with wings looks more detailed and interesting than without them.
Create a relief with three folds in the tail, then straighten the tail, but so that the relief is preserved. We straighten the figure a little, which noticeably gains volume.
The time spent on creating this craft is approximately 30-60 minutes. The finished work looks attractive and will be an excellent decoration in the home.
It is necessary to take into account that a small child will not always be able to completely cope with all stages of the work on his own and, of course, he will need the help of an adult to complete what he started.
If you have a lot of questions during the manufacturing process, you should refer to the instructions on how to make a dragon and find answers to your questions.
Stretching
When everything is already bent and placed on the shoulder blades, it is necessary to smooth the resulting result a little so that it does not straighten back out later. It is better to move small figures to the side. For now.
After smoothing, one of the internal parts of the craft is revealed. The opening is done by opening a small figure, which is located in the center of the piece. Turning the figurine over reveals the inside of the craft.
Having opened it, with the help of your fingers it stretches to the sides. But it stretches a little. If you overdo it, the paper may tear.
Dragon Creation Techniques
For the craft you will need several things that are best prepared in advance. First of all, this is a sheet of paper (it is better to take colored double-sided paper). If you take white, you can then color it with paints or pencils. You will also need scissors, a ruler and a simple pencil. You can make an origami dragon using the following steps:
- The prepared sheet of paper should be folded in half diagonally. It should be a square. The excess can be trimmed off.
- The corners of the resulting quadrilateral must be folded inward towards its center so as to form a rhombus. It must have equal sides.
- You need to turn the figure over and mentally divide the part of the rhombus from the top right into 5 parts. Then mark a point from the corner at the top so that it is located approximately 15 cm from the top of the figure.
- At approximately the same level, a point should be marked from the same vertex to the center.
- Next, from the corners on the right and left, you need to draw lines to the resulting point.
- Along the lines formed, you need to bend the side towards yourself. This will be a dragon's beak. You need to press it a little on top.
- Then the top half of the figure needs to be folded along the central diagonal. The two corners on the sides of the triangle should be tucked inward. All vertices of the rhombus must converge at one point.
- The two elements at the front must be bent inside the part located on top. Bend the rear elements inside the rear.
- At this point the overall figure should look a bit like a kite.
- The parts at the front and back need to be unfolded. At the same time, you need to bend the front part and you will get a figure that will look like a square.
- Along the lines that have already been bent in front and behind, you need to bend the “ears” and again you should get an impromptu rhombus.
- Then the right element of the front part must be turned to the left. In this case, the left side of the rear element must be aligned with the right side. The result is a part that looks like a bird.
- After this, the part on the right needs to be bent along the line in the form of a lightning bolt. This will become the tail of the future figure. The side on the left is designed in a similar way and will be the neck. The wings are folded in the same way.
- There is a protrusion in the back that needs to be bent inward, and the head bent slightly forward.
- Then carefully bend the top.
- The protrusions from below need to be bent a little - these will be the paws.
All that remains is to give the wings and tail a curved shape. Here the dragon is ready.
Modular version
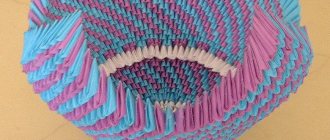
A paper dragon assembled from modules also belongs to the origami technique. These are quite complex designs, so assembling such a dragon is only possible for those craftsmen who have been interested in this art for a long time. It will be quite difficult for a beginner to cope with the task. Using this technique, you can recreate a copy of the popular Ender, Toothless or any dragon. The work is quite painstaking, so you can involve the whole family in this activity, and even the smallest family members can be trusted to fold individual modules.
Adding modules is a fairly easy process. To do this you need:
- fold a small rectangular sheet in half so that the fold line is horizontal;
- then you need to mark a line in the center, fold the sheet vertically and straighten it;
- the corner must be connected in such a way that the parts of the quadrilateral slightly extend beyond the edges of the workpiece;
- Next, the part must be turned over and the part that protrudes is tucked in;
- All that remains is to tuck the corners inward; you should get an even triangle; the module must be bent in the center.
The modules are very easy to assemble. However, a large number of them may be required.
For different figures you may need from seven hundred to a thousand individual elements. The modules need to be inserted into each other and rows should be obtained. There is no need to glue them together. The author himself must come up with a scheme for assembly according to his taste and preferences.
To prepare the diagram, you need to take a sheet of paper in a cage. It will be necessary to mark the location of the elements with squares. You can make separate diagrams of the paws, tail, head, and torso. In this case, you should take into account where the attachment points are needed.
For beginners in this business, it would be useful to listen to some advice. For example:
- You can take the work of another master as a basis. First you need to look at several ready-made versions of the figures, count how many rows there are. Using examples you can choose color combinations. It will become clearer what number of modules should be prepared, and you will be able to draw up the diagram correctly.
- At first, for a beginner, it is better to use a glue gun to attach the paws and wings to the body. This will help make the figure more stable, and it will be easier for the master to make it.
- The neck should be massive in the first works. When you still have little folding experience, your head may not be able to hold up on a thin neck. Good for beginners Chinese dragon. It doesn't require too many modules because it looks like a snake and has small legs and wings. You'll just have to put more effort into your head.
At first it is better to practice on the simplest figures possible. Only then can you move on to more complex ones.
To make the dragon beautiful, it is better to have several sheets of foil or metallized paper on hand. It makes good things, such as eyes, spines on the body, horns or whiskers, and is also suitable for making dragon claws out of paper.
You can entrust older children with assembling the structure. Or you can do it yourself. It will be difficult for children under seven years of age to cope with such a task, so they can be entrusted with assembling individual modules.
The simplest option
Young children also love to make various crafts, so parents are often interested in how to make a dragon out of paper, just a light one. For this craft you will need the following materials:
- disposable paper plate;
- double-sided colored paper;
- a felt-tip pen to draw eyes (or you can take special eyes for crafts - self-adhesive);
- fastenings for mobility of joints (can be purchased at craft stores).
Then you can engage in the creative process. From colored paper, cut out all the parts that will be attached to the dragon’s body: neck, head, tail, wings, paws. The plate should be folded in half and the cut out parts should be attached to it using fasteners. If there are no fastenings, you can glue it with glue, but then the figure will be motionless. All that remains is to glue the eyes or just draw them. That's all, the dragon with movable wings is ready to fly and delight the kids.
The dragon figure is quite complex, so only adults and teenagers can cope with it.
Making modular or classic origami requires great care and concentration. Making an origami figure for the first time is always difficult. However, after a while this activity will become easier and easier. Then you can move from assembling simple figures to more complex ones.
Assembling a 3D dragon from modules
For any three-dimensional model it is necessary to prepare a large number of modules. How to make them from a narrow strip of paper (5x7.5 cm), see the picture:
The classic Chinese dragon resembles a snake and is the easiest to make. To do this, just connect the elements into a long ribbon, and then attach the paws and head to it, securing it with glue for reliability.
Before starting the master class on assembling modular origami, prepare yellow (264 pcs.) and blue (251 pcs.) modules.
Step-by-step description with photos:
- Assembling the head: put 3 blanks in a row, put 4 modules on them. In rows 3, 4, 5, 3, 4, 5 elements are put on, respectively, row 6 - 4. In row 7, yellow eyes are made. In rows 8 and 9 there are 6 and 5 modules. From the 10th row, ears are made: 6 parts are put on, then 2 and 1 on each side. The ears end in 2 modules.
- Body assembly: 3 modules in a row - blue, yellow, blue. Add 2 yellow ones on top, then 1 yellow and 2 blue ones. Alternating the modules in this way, make 88 rows.
- Attaching the head to the body: from the back of the head, insert 2 blanks next to the yellow eyes (as in the photo) and attach them to the body. Bend your body like a wave - arch your neck, back, tail.
- Paws: connect 1 element to 2, put 1 more piece on top on both sides. Repeat for the remaining 3 legs. Insert the finished legs into the body slots.
There are an endless number of ideas for assembling a dragon. It can be with webbed wings, a cartoon dragon, the Serpent Gorynych, a character from the cartoon “How to Train Your Dragon” and other models. To make an original craft with your own hands, it is recommended to use a template or picture depicting a fire-breathing lizard. The drawing will clearly show what multi-colored parts and shapes need to be made.
Video: Assembling modular origami dragons
Dragon craft for kindergarten
This simple master class is also suitable for beginners.
- Using a template, cut out the dragon's body and paws from green paper (you can fold the paper in half and cut out two or four elements at a time).
- Then draw lines on half an A4 sheet (yellow), like the sides of a trapezoid, stepping back six centimeters from the edges. You will end up with triangles that will need to be cut off.
- Fold the remaining yellow part, shaped like a trapezoid, into eight parts so that it becomes an accordion. Bend this accordion in half and wings will come out.
- From the second part of the yellow sheet, make the same blank, only fold it not into eight, but into sixteen parts - this will be the breast of our dragon. Fold the paper and apply it to the reptile’s body, bending it slightly along the line of the tummy.
- Take another half of a yellow A4 sheet. Attach the body blank to it and trace along the back, drawing teeth or a wavy line. Cut them out, leaving a little space for gluing.
- Glue this ridge between the two halves of the dragon's body. Then glue in the breast as well.
- Make a tongue for the dragon out of red paper and glue it, plus attach plastic eyes or draw them.
- Then glue the legs, make slits for the wings and insert them. That's all - the paper dragon is ready and you can give it a name.
Sculpting the head
Now it’s the turn to sculpt the dragon’s head. For these purposes, you can use a special air-hardening compound KERA Plast, plastic or a similar modeling material. If the modeling masses are really tight, then the dragon’s head can be made from papier-mâché or salt dough.
First you need to give the general shape of the head, make indentations for the eyes with your fingers, form a beak (which will also be the nose), make holes with a toothpick and give it the desired shape. Place a flat cake on top of your head and press everything well, smooth out the joints, and shape your eyebrows.
Place a pre-prepared wire (curved to the shape of the head and horns) on top of the head. Make sausages under the wire and on top and then align everything. Having given the head the desired shape on top, immediately apply a design with a toothpick. We apply modeling paste to the wire and shape it into a horn, then we make a sausage from below and spread it around where the horn grows. It should look like in the photo. While the paste is still wet, use a toothpick or a needle to scratch the horn and adjacent parts of the head to give the dragon a realistic look.
We make a notch on the head, where we will then place the middle horns.
Cute little dragon
This paper dragon is much nicer and cuter. In order to make it, just take a sheet of colored paper, fold it several times to make a long ribbon and fold it into a regular “accordion”. To make the body widen slightly towards the head and completely narrow towards the tip of the tail, roll the sheet slightly into a cone. You can simply cut out one strip, but then the craft will not have the necessary rigidity.
The character of Drakosha depends on the expression of his “face”. Try to draw him beautiful eyes with long eyelashes and a smiling mouth.
An essential part of an origami dragon is its wings. We also draw them and glue them on top. At the bottom we attach two legs cut from yellow or white paper. This mischievous little dragon definitely carries “Yang” and kindness.
Getting ready for work
Before you start making the dragon, you need to prepare the consumables. The main tool in working with paper sheets is the hands of a master. In addition to them, we will need:
- White or colored office paper. Having sufficient density, it holds its shape well. For small masterpieces, rectangular sticky notes are suitable. Professionals buy special paper sheets for origami - “kami”.
- Ruler, scissors or stationery knife.
- Pencil with lead hardness 2B. It is important that the writing medium does not leave noticeable marks on the workpiece.
Chinese paper dragon
Everyone loves colorful Chinese holidays with their paper dragons. Making a real dragon out of paper ten meters long, which is carried along the festive streets, of course, is expensive. Well, making a simple craft is not at all difficult. To make a paper dragon craft, you will need a cardboard egg carton and three toilet paper rolls. First cut the egg carton to make the spikes. Then glue the egg carton pieces onto the toilet paper rolls, attached the two jaws along with the clasps, and glue them onto the eyes. After this, glue the head and body parts onto a long piece of tape. Attach the stick to one of the sleeves. Then cut another stick in half, push it through the lower jaw and secure with tape. Now you have your own dragon. Move the sticks up and down to create a dragon dance, just like at a carnival!
Fire-breathing dragon made from a toilet paper roll
Want to learn how to make a fire-breathing dragon using a cardboard toilet paper roll? This charming handmade toy will be fun for children to play with and is perfect for a children's party to celebrate the Chinese New Year. Children from three years old can easily cope with this craft. It's really very simple. Take a toilet paper roll, glue two pompoms with plastic eyes, these will be the eyes of the dragon. Two more small pompoms, this will be the nose. Then you glue paper strips into the middle of the cardboard tube; this will be a “fire” that violently bursts out of the mouth when you blow into the tube.
Paper dragon head
Paper crafts are fun and inexpensive, but paper dragons are the best! If you want to make a dragon's head out of paper, then this instruction is what you need.
Dragon sitting
A more complex option is a dragon in a sitting position, with its wings and tail raised up. Having no experience in origami, it is better to practice on a rough piece of paper in performing the outer reverse fold and other complex elements in the back of the figure. For advanced masters of the technique, the basic form of a bird transforming into a mythical dragon is recognizable. Finally, you can finish drawing the dragon’s eyes and scales.
Water dragon
In its final form it is very reminiscent of the famous Loch Ness monster, except that the dragon has long wings, rather than short fins relative to the body. Even a child can handle such a figure, since this master class uses the simplest folds. The finished craft turns out voluminous and will look even more impressive if you use paper in blue and green shades for production.
Method No. 1
Even kids can handle a simple dragon applique. For this craft you will need: colored paper, a glue stick and scissors.
You need to draw or print and cut out these parts of the body of the future dragon yourself.
If desired, you can complement these figures by making the wings more pointed, adding claws on the paws, flames escaping from the mouth or smoke from the nostrils.
Then all that remains is to trace the template on colored paper, cut it out, and then paste it onto the background. Finally, you can decorate the dragon to your taste and be sure to add plastic eyes to it or make it yourself from white and black paper.
