The building level is a spirit level, a necessary tool when determining the relationship of building planes to the horizon. Recently, this instrument has been replaced by laser ones, and even earlier, optical instruments such as theodolite and level began to be used. However, professional tools are rarely used in home construction. They are expensive, in addition, with the help of an ordinary spirit level, measurements were taken during the construction of real masterpieces of architecture, long before the invention of sophisticated instruments. Let's remember how to make a water level with your own hands, especially since it is very simple.
Spirit levels come in two varieties.
- A spirit level in the form of a bar of varying lengths with an oblong glass cone in the middle with a cone sealed in it. When the bar is positioned horizontally, the bubble appears exactly in the middle of the cone.
- A level operating on the principle of communicating vessels. It consists of a primitive design of a tube with glass funnels at the ends. A tube filled with water to the middle of the funnels and placed strictly horizontally shows the same level of liquid in both funnels. The working principle is shown in the figure below.
Despite the fact that the level is a primitive tool, it is widely used in construction due to its advantages over other devices, namely:
- ease of measurement combined with high measurement accuracy;
- easy to make from scrap materials;
- the device can be used to determine the ratio of planes to the horizon having a length from one to ten or more meters.
The only drawback of the water level is that it cannot be used in the cold season. However, if water is replaced with non-freezing liquid, then this drawback can be overcome.
A water level can be purchased at construction equipment stores, or you can make it yourself. It is inexpensive, however, why spend extra money if you can make the device yourself. It is especially instructive to make a level together with a child and teach him basic construction skills. The ability to determine the level is fundamental knowledge for a builder of any level of training; it will be useful even when building a birdhouse.
Return to content
Material for making a water level with your own hands
- Transparent hose with an internal diameter of approximately 7 mm. Such hoses can be purchased at a hardware store, are sometimes used in aquarium hobby and can therefore be purchased at a pet store. The average length of the hose is 10 meters;
- Disposable syringe 20 ml with a wide cannula;
- Sealant in the form of plasticine;
- Rubber or cork stoppers to fit the diameter of the syringe. Instead of plugs, you can use pistons from a syringe cut in half;
- Tap water or non-freezing liquid used for washing car windows in rainy weather;
- Buckets for water.
Return to content
How is the hydraulic level used?
It is more convenient to carry out the markings together, but if necessary, one person can handle this task. You will have to make several points on one plane. How can one performer use a water level? The process is performed in this order:
- You need to find the starting point on the plane of the wall using a metal ruler, tape measure or other method. Make the appropriate mark.
- Secure the flask or the end of the hose in this place using tape, a hook, or any fastener.
- Then move another flask a certain distance and wait until the liquid in it calms down.
- After this, you need to use smooth movements up and down to find a point that is equal in height to the starting point. Place a mark on the surface corresponding to the level of the first flask.
Similarly, work with the construction hydraulic level continues along the entire plane or perimeter. All high-altitude points are marked, between which a line of a given horizontal line must be drawn. When moving the device from place to place, you must clamp the edges of the hoses to prevent air from getting inside and water from splashing.
Water level assembly sequence
Let's start making a water level with our own hands. The process consists of the following steps:
- We string syringe cannulas onto the ends of the transparent hose. For reliable fixation, seal the ends with pre-kneaded sealant. It must be done carefully. A properly selected sealant will securely secure the connections between the syringe and the hose.
- Place a bucket of water or liquid on an elevated surface. We lower one end of the hose together with the syringe with the piston removed into the bucket, and lower the second end with the syringe and the piston in the lowest position into the bucket as low as possible below the first bucket.
- Using a syringe at the lower end of the hose, suck the liquid into the hose. Until the plunger comes out of the syringe. Next, the liquid will flow by gravity into the lower bucket. Thus, we fill the entire system with liquid without bubbles.
- We level the liquid level so that the syringes are half filled.
- We close the syringes with stoppers or a piston from a syringe with the rod cut in half.
The video shows the process of filling the water level. The main thing is that there is not a single air bubble left in the tube.
Return to content
Bubble option
You can make a bubble level using a syringe and a wooden block. Water is drawn in with a syringe so that there is minimal room for air. Use chewing gum to plug the hole for the syringe. Having secured the syringe with tape, you can begin the process. If the surface of the product is smooth, the bubble will be located directly in the center.
If you take two ampoules, you can work with vertical surfaces. One can determine the evenness of horizontal planes.
Application of a water level
We take measurements of the surface level in relation to the horizon.
- We do the work together. We mark a mark approximately half a meter from the floor. We attach the end of the hose with the markings on the syringe to it and fix it to this end on the mark.
- On the other hand, we place the opposite end of the tube at approximately the same level as the opposite end. Next, moving the end of the tube up or down, we ensure that the liquid level matches at the same marks. We make a mark at the found point.
- Do the same on the other walls of the room and also make marks with a pencil. Using a tape measure, measure the smallest distance to the base; all other points above the indicated one must be raised to the zero mark on the horizon line.
As you can see, using a water level is quite simple, and the measurement result is accurate and acceptable for home construction. So, we looked at how easy it is to make a water level with your own hands and how to use it. Now, even when there are no construction stores nearby, you can make a level yourself.
Return to content
Manufacturing
The choice of source materials should be approached responsibly, so that later you do not have to redo or buy other components.
- You need to prepare two vessels, preferably cylindrical with divisions. It is convenient to use flasks from large-volume syringes.
- The hose must exactly fit the diameter of the vessel fitting. A hose for a construction hydraulic level is considered suitable if it has sufficient elasticity and does not deform or crack when bent. The most acceptable diameter is considered to be from 10 to 15 mm. It all depends on the amount of work being performed. Large sleeves are also quite suitable.
- The connection points between the hose and the flasks must be treated with sealant to prevent liquid leakage and air ingress.
- If there is no ready-made scale on the flasks, then the marks are applied independently with a marker. This is necessary for ease of use.
You can make a simple hydraulic level with your own hands, without using vessels, but with only a hose. You should cut a piece of the sleeve of the required size, fill it with water, leaving a little free space, and solder the ends.
What is better to fill in the hydraulic level?
The purpose of using this device is to achieve the same water level in both flasks. Then the required line will turn out smooth. First of all, you need to fill the device with liquid. Usually water at room temperature is used, which can be slightly tinted. This makes it more convenient to observe the condition of the liquid inside the device and the presence of air bubbles.
Filling the device with water should be done in such a way that the possibility of creating air pockets inside the hose is completely excluded. If this happens, then the air must be expelled, otherwise the markings will not be accurate. You can simply check that the filling is correct by raising both flasks side by side to the same height. If the liquid in them is at the same level, then everything is in order. Otherwise, air still got into the sleeve and must be removed.
Other reasons for the “movement” of the SMA along the plane
If the adjustment is made correctly, and the jumping and shaking do not disappear, the cause may be the close proximity of large stationary objects - cabinets, walls. With slight vibration, which is natural, the SMA can hit an object and move from its established boundaries. Therefore, a gap of 5-10 cm is left between the wall and the device.
A smooth floor can also cause the washer to “move” around the kitchen or bathroom. In this case, it is worth purchasing a rubber mat 1-2 cm thick and placing it under the device.
If the above reasons are eliminated, but jumps and movements during washing remain, there may be a malfunction inside the machine. You can fix the problem yourself if you have certain knowledge and skills in this matter.
But it’s better not to take risks and entrust the solution to the problem to professionals. The experienced technicians of our specialized service center, located in Rostov-on-Don, will help you properly install or repair your washing machine.
How to check the accuracy of the bubble level readings
When purchasing or before starting to work with a tape measure or a construction ruler with a water level, you must check them. To do this, just place the instrument on a horizontal surface, remember the position of the air bubble relative to the marks and then turn the tape measure 1800. The bubble should take the same position relative to the marks on the cone as before turning.
As you can see in the photo, this tape measure does not show the level accurately; after turning it 180°, the left edge of the bubble went under the mark, but did not reach it before the turn. It is unacceptable to use such a tool for level measurement.
Soap bubbles from laundry soap
To make the bubbles stronger and shine better, the solution will have to be slightly boiled. To do this, rub a whole glass of laundry soap as finely as possible and pour it into the pan. Pour 10 cups of boiling water, stir the mixture and heat it on the stove as it cools. It is important to maintain a stable temperature while you continue stirring. Do not stop until the liquid becomes completely homogeneous, but most importantly, do not let it boil. In the process, add 2 more tablespoons of glycerin for strength and beautiful shine.
How to use a hydraulic level for a foundation?
Many craftsmen advise using a hydraulic level when constructing foundations in the following way: attach a metal or wooden strip of the same length to both edges of the spirit level using tape, and it is on them that we will make marks.
So, all the familiar preliminary work to prepare the system has been completed: water is poured in, air bubbles are released. We install rail No. 1 at the place where the formwork will be installed in the trench to fill the ground part of the foundation strip, for example, at the corner of the future structure. We notice the liquid level and from it we build a mark where we want to see the formwork, securing it, of course. We fix this calculated size; it will need to be repeated the required number of times.
Having installed rail No. 2 at some distance along the trench, we repeat everything done with the second edge of the spirit level. We mark the calculated size from the water level on the lath and fix the formwork again. Leaving rack No. 2 in place, move rack No. 1 to a new place and repeat the operation. When everything is done to install the formwork, you can start pouring the foundation.
Experts advise to approach so responsibly not only when pouring foundations for residential buildings, but also when constructing foundations for outbuildings, regardless of their size, and when constructing even small-height foundations for corrugated board fences enclosing your plots
Work done according to all the rules will, firstly, ensure the durability of the structure, and secondly, it will look aesthetically better, which is also important
Photo - how to use a hydraulic level for a foundation,
Photo of the hydraulic level for the foundation,
Photo - how to make a hydraulic level,
Photo - how the hydraulic level works,
Photo of the water level,
What is measured by a water level
A water level (spirit level), hydraulic level or laser level is a measuring tool that allows you to ensure the horizon line when performing construction and installation work.
Types and principle of operation of levels
Based on the principle of operation, there are liquid and laser levels (spirit levels). There are two types of liquid ones: bubble ones, which are installed in tape measures or construction rulers and hydraulic levels. The prefix hydro comes from the Greek word hydor - water.
Bubble liquid level
The bubble level is a sealed flask made of transparent material, partially filled with tinted alcohol so that it does not freeze in frosts.
When the flask is in a horizontal position, the air bubble, due to the smooth increase in the internal diameter in the center of the flask marked with marks, will occupy a position strictly between them.
Bubble levels are installed in construction rulers, as in the photo. They are equipped with optical measuring instruments, for example, laser levels, levels, theodolites, scales. They are found in all devices and instruments, the accuracy of the readings of which depends on their position relative to the horizon line.
Water level
Using a bubble level built into a building ruler, you can ensure horizontality at a distance of the length of the ruler, which is no more than three meters.
In order to make markings on one horizon line over a long distance, for example, when wallpapering, installing a suspended ceiling, laying tiles, building a house, pool or fence, a theodolite, laser or hydraulic level is used. A laser level, and even more so a theodolite, is not affordable for every home craftsman.
Therefore, many people buy or make their own hydraulic level, which is shown in the photographs.
The operation of the hydraulic level is based on Pascal's law of communicating vessels. The law states that the level of a homogeneous liquid in communicating vessels, regardless of their shape, is established on the same horizontal line.
Thus, to make a hydraulic level, it is enough to connect two narrow transparent vessels with pipes at the bottom with a flexible tube of the required length. After filling the system with water, the hydraulic level will be ready for use.
Pros and cons of working with a hydraulic level
When making repairs in an apartment or house, you will definitely need this simple tool; it is important to know its advantages:
- low price for an industrial design and the ability to produce it yourself;
- ease of marking;
- the ability to work in the most difficult to reach places;
- work can be carried out in different rooms with high accuracy marking a line running at the same level along all walls of the building, despite partitions;
- ensuring the same height position when laying large distances of tiles on the sidewalk;
- A fairly unpretentious tool that does not require special conditions for storage and transportation.
Negative features include the following disadvantages:
- You will need to hire an assistant to take measurements, but this is a very controversial drawback. Of course, when working with a laser level, one person may be able to mark and there will be no need to involve assistants, but the price of such a device is very high;
- It is often difficult to fill a construction hydraulic level with water if the hose is long;
- when building a foundation in winter, you will need to use another tool or add antifreeze;
- when working using a hydraulic level, it is constantly required to replace the water;
- the device operates reliably at a distance of more than 2 m from heating devices; at a closer distance, it will be necessary to protect the tube from exposure to high temperatures;
- readings can only be taken in a horizontal position
It is important to know the answers to theoretical questions, but it is more important to know how to use a hydraulic level correctly.
Basic materials
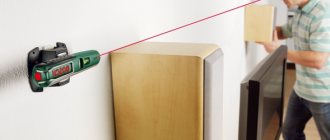
The simplest design can be made from unused items with your own hands. It’s not difficult to make a level with a laser pointer; you just need to prepare the necessary material and follow the instructions. Do not neglect the instructions and do it your own way; before implementing the change, you need to study the design, because The output parameters may become incorrect. For the simplest installation you will need:
- a regular laser pointer, sold in office supplies or children's toy stores;
- porous rubber of sufficient thickness, but small in size;
- a small, simple type bubble level, which is checked for accuracy before use;
- a wooden block, the size of a matchbox, pre-polished;
- support in the role of a level stick;
- plywood sheet 10×10;
- a metal clamp or thick plastic clamp corresponding to the diameter of the pointer;
- screws.
After preparing the entire list of materials, you can begin the process of assembling the required product with your own hands.
Tubular design
The pipe version is a type of bubble building level. To make it, you need to take several small tubes and a square element from the profile.
Place the cord on the tubes using perforated tape. Markings are applied to the profile. By applying it to any surface, you can make sure that the object, walls, door and window openings are even.
Step-by-step instructions for marking
First of all, before starting work, you need to prepare a small set of tools:
- hydraulic level;
- funnel for pouring liquid;
- a small bucket for pouring water;
- marker or pencils;
- you should prepare a tape measure;
- for better visibility, water can be given color using various dyes;
- Don't forget to call someone to help you take measurements.
Having prepared, you can begin to learn and understand how to work with the hydraulic level. We fill the hose with soapy water, pouring it through a watering can. Then we begin to fill the working part of the instrument with the colored liquid. To do this, work can be done in two ways.
In the first case, carefully straighten the tube along its entire length. We take a saucepan and place it as high as possible. Now, we lower one end of the hose down, and put a watering can in the second and fill it with water. It is important to pour water evenly, without sudden increases in water pressure.
This feature prevents the formation of air bubbles. It is recommended to fill the hose with tap water. In this case, a large number of air jams form, but if you adjust the water pressure a little, you can fill the hose with water.
Fill until the water reaches the flasks on both sides. Then we lift 2 flasks, connect them together and put marks on the liquid level. Our device is ready for use. I use them in this order. The whole process is based on the use of the principle of communicating vessels in the device.
By placing the flasks so that the colored liquid reaches the mark in 2 flasks, we get a line that is at the same height from the ground. An assistant takes the other end of the hose and moves to the marking site. Having brought the level to the marking on both, use a pencil or marker to place a mark.
Thus, all walls or milestones for the foundation are marked. It should be taken into account that one of the workers constantly holds the flask on the marking. To mark the third point, the person standing at the first point crosses. Further work proceeds according to this principle. Then, using a ruler, draw a horizontal line connecting all the points.
We lower the perpendicular to the required distance and get marks of a flat lower position. Using the same principle, you can set up a large machine, or you can mark the basement of a house. The size can also be measured upwards, for the even position of all objects or machines.
Important! All experts working on this device advise that the hydraulic level used will show real indicators if all adjustments of the flasks are carried out only in a vertical position.
When using a hydraulic level, how to use it if you could not find a second person. In this case, you can attach a hook or bar to one of the ends and fasten it clearly at the risk to the wall or on a pole. But the productivity of this method is negligible. How many marks can be made, losing time each time a vessel is secured at risk, the answer is simple - very few.
It is better to measure distances at perpendiculars with one tape measure. Chinese products can give a discrepancy of up to 10 mm. Finally, it should be noted. A method that gives good accuracy for mounting various equipment. Can be used in places where a pile foundation and installation of a free-standing pile or pillar are used.
Making a simple level from a laser pointer
Of the entire list of elements of such a level, you only need to buy a pointer. It is quite possible to make the remaining auxiliary parts yourself. The goal of the presented process is to build a reliable fastener that will allow the device to rotate around an imaginary axis completely unhindered. The tool consists of the following parts:
- laser pointer;
- wooden beams (length - 0.5 meters, width and thickness - 25x25 mm, respectively);
- cord intended for construction work;
- drill for drilling holes;
- support (an ordinary stick will do).
To assemble the equipment, just follow the simple steps described below.
- The block is drilled on both sides. As a result, neat holes are formed, which must be parallel to each other. One of the holes made will be used to securely fasten the pointer, and the other will fit the construction cord.
- The pointer is securely fixed in the hole and a rope is secured, making it possible to install the device above the floor surface. The hole drilled specifically for the cord must be of the optimal diameter so that the cord can pass through it freely.
- A rope is threaded into the hole that was prepared in advance and secured as securely as possible.
The support should be fixed. Otherwise, it will not be possible to adjust the level correctly. The pointer must be of high power so that the beam can be clearly displayed on any surface. If the presented parameter is insufficient, the equipment will only be comfortable to use in a darkened room.
What are the advantages and disadvantages of the device?
A relative of the hydraulic level is the bubble level, which is designed to identify deviations in any plane. A hydraulic level is also called a pipe level, characterized by ease of use, and most importantly, it allows you to level objects on two parallel and perpendicular surfaces with sufficient accuracy.
Before we find out the operating principle of the device, as well as the features of its use, let’s look at the advantages and disadvantages. The disadvantages of the meter include the following factors:
- It is difficult for one person to use - one of the main big disadvantages of the tool, which can be solved by using tape or fastening materials
- Difficulty filling a long hose with water
- After using the device, the water must be drained and refilled when used again.
- The meter must not be used near heating devices that may affect the integrity of the connecting hose.
- The tool is intended exclusively for measuring the horizontal plane
A large number of disadvantages does not mean that this measuring instrument is unsuitable for use. Before drawing conclusions, let's consider its advantages:
- Work can be carried out in the most inaccessible places
- The price of the device is so low that purchasing the tool is not difficult
- If it is not possible to purchase a tool, it can be made from improvised materials
- High accuracy of the results obtained
- The possibility of its use not only for leveling the ceiling, screed, pillars, etc., but also for monitoring the work performed
It follows from this that the device is suitable for use by everyone who does not have the opportunity to purchase a laser level. If the work of pouring a foundation or installing pillars is carried out in a one-time quantity, then it simply does not make sense to purchase expensive laser equipment.
