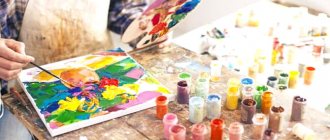
For the comprehensive development of the child, his creative abilities and skills, parents can do more than just spend free time with them. It is important to plunge into the world of fantasy and wonder together with the kids and make simple crafts that will remain as a memory of a great time.
For the creative process, a variety of materials are selected, from which it is easy to make various decorations for a room, home or garden.
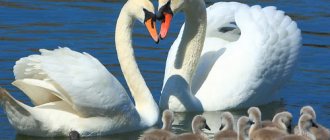
A self-made paper swan craft will help you decorate a nursery, this amazing bird made from old tires will decorate a flower bed, and a flowerpot will become a practical flower gardener.
Paper applique
Take one sheet of black and one white paper. Separately, draw and cut out a stylized swan template. Cut the blanks along it so that they look at each other. Glue them onto a base sheet of neutral color. Place the application in a frame.
A paper swan craft made in this style can become a wonderful decorative element in your home.
Care
Flowers need the same care as growing crops in a regular flower bed. However, the capacity of the flowerpot is limited. The land here is quickly drying out and becoming depleted. It is important to water and feed more often.
Flowers in a flowerpot are watered and fed more often
The swan itself also requires care. If it is made of plastic, try to slightly organize the shading. Wooden birds are annually treated with an antiseptic and painted to extend their service life. For the winter, a light flower bed or a decorative figure of a bird is brought into the barn. If the flowerpot is too heavy to lift, it is covered with non-woven fabric and film.
Made from plasticine
Divide the plasticine into two parts. From one of the smaller ones, form a neck, head, beak. Roll the second one into a barrel shape. Attach the neck to it.
For the wings, take several small rectangular pieces of paper. Cut each into thin strips, not all the way through, but so that they stick together. The cut strips of paper can be twisted a little (wound around a pencil or pen).
Using a sharp stick, make a shallow groove on the side of the swan, place the paper in it with the uncut side, and carefully secure it. Place several blanks on each side. These are wings.
Weaving materials
Lake reeds, reeds, and cattails are suitable for reed weaving for beginners. These plants are similar, but each has its own characteristics:
- Lake reed is a plant of the sedge family. Grows along the banks of small bodies of water. Tall grass of bright green color. You can recognize such a reed by the panicles at the ends of the stems. Good material for weaving. Does not require slicing, as it has smooth, thin stems.
- Common reed belongs to the cereal family. Tall flexible stems are crowned with a dense panicle. To make cane, the lower part of the stem and leaves are used. Depending on the idea and type of product, the leaves are cut into strips. You can find ordinary reeds along the banks of rivers, canals, and ponds.
- Cattail is often confused with reeds. After all, it is cattails that have dense brown seed heads at the ends of the stems, not reeds. Cattails have both stems and narrow and long leaves that are suitable for work.
In this video you will learn how to make a rug from reeds:
From the cones
Pine cones will make amazing children's swans on a pond crafts. Prepare the base. Cut out an uneven oval from cardboard - a lake. Immediately paint it blue and leave to dry. Dip two open pine cones into white pearlescent paint. Let it dry too.
Return to the "lake". Place dried blades of grass and small twigs along the edges of the workpiece.
Cut out the neck and head of a swan, 2 pieces, from thin polystyrene foam. Use a marker to draw eyes and color the beak. Attach the blanks to the cones on the wide side. Place the figures on the “lake”.
Master class on testoplasty “Yablonka” (based on the fairy tale “Geese and Swans”)
Inessa Lopatina
Master class on testoplasty “Yablonka” (based on the fairy tale “Geese and Swans”)
I bring to your attention a master class on testoplasty for children of the younger group, which will show you how to make an apple tree from the Russian folk tale “ Geese and Swans ”
.
In my work, I often use this technique with children, since they are very interested in working with dough , making something interesting out of it, and then seeing the results of their activity, for example, in a theatrical game.
For those who are unfamiliar or have not used testoplasty , I want to remind you of the recipe for salted dough : 200 g flour, 200 g salt, 125 ml water. For my work you will also need gouache, brushes, napkins, a tray, stacks and a sketch of an apple tree .
Knead the stiff dough .
The result was a delicious bun.
The dough then wrapped in plastic for two hours. Test preparation .
This is what a sketch of the work looks like.
The dough is divided into lumps for each child. Children form them into koloboks.
After this, children pinch off small pieces from them, give them the shape of leaves and apples , and press them into the sketch according to the shape.
When the dough is dry , the children begin painting the details.
This is what the finished work looks like.
The remaining dough can be wrapped in plastic and put in a cool place, and then used in other works.
A mathematical journey through the fairy tale “Geese and Swans” Objectives: Educational area “Cognition”: to form knowledge about the composition of numbers, about geometric figures, about composing problems, through.
Summary of an open lesson for parents on the fairy tale “Geese and Swans” Usually, parent meetings are held in the same way; we held a consultation, but we decided to do it a little differently and hold an open lesson. Master class “Geese-Swans” The sky was already breathing in autumn, The sun was shining less often, The day was getting shorter, The mysterious canopy of the forest was revealing itself with a sad noise, It was going to bed.
Summary of GCD for FEMP based on the fairy tale “Geese-Swans” “Mathematical journey through the fairy tale Geese-Swans” Program content: Consolidate knowledge about the composition of the numbers 6 and 9 from two small numbers.
Design for the fairy tale “Geese and Swans” In mid-November, the children of the senior and preparatory groups of our kindergarten are preparing to show the musical fairy tale “Geese and Swans” for their parents.
Technological map of GCD based on the fairy tale “Geese and Swans” Technological map Lesson on the fairy tale “Geese and Swans” (senior group) Purpose: Educational: continue to develop the skill.
Lesson “Journey through the fairy tale “Geese-Swans” with elements of dramatization Goal: To develop the ability to experience the emotions of fear and joy of the heroes of the fairy tale “Geese-Swans”. Objectives: 1. Educational: a) Clarify with children.
Source
From fabric
It's better to take felt. It looks more impressive. A photo of a swan craft can be found on any resource related to needlework. Get the patterns from there. But this is optional. You can handle it yourself. Draw a question mark on the fabric with chalk - neck and head. Oval – body.
Carefully cut out the parts, there should be two of them. Sew. Stuff it. Sew up the hole. Connect both parts to make a swan. Attach cut out wings made of white starched lace to the body. Make eyes. Sew on two beads.
A loop of silk cord can be sewn onto the top of the head. The result is a stylish swan pendant.
Making large wings for a photo shoot
The option for a photo shoot requires a reliable frame. You can use the technique of making a product from natural feathers, isolon, fabric, paper.
Attention! Fastenings should be considered, since the weight of the structure is quite large.
Making angel wings with your own hands is quite simple, but it needs to be done with high quality. The invested efforts will ensure excellent results - the image will look colorful.
Swan in origami style
The origami swan craft can be made in two ways: classic or modular assembly. In the latter version, the figure looks more beautiful. The only materials are paper.
Origami swan craft:
- Prepare 16 equal-sized sheets.
- Bend each one, evenly along and across. Fold the edges towards the center and turn the workpiece over.
- Fold the bottom edges and raise the corners.
- The first module is ready.
- Repeat the algorithm for all sheets
- The case is assembled in this way: the modules are inserted one into the other.
To fully understand the technique, it’s worth watching the video once – a story with a step-by-step demonstration of assembly.
A ready-made modular swan craft will decorate a child’s bedroom or playroom. Looks beautiful on the windowsill among indoor greenery.
Feather wings of an angel
Working with such material is quite painstaking, but the final version is worth it.
Required materials and tools:
- bird feathers;
- natural or artificial white fluff;
- cardboard;
- paper napkins;
- scissors;
- glue gun;
- decorative elements.
Feather option
- The template can be made from thick cardboard - make two wings of a symmetrical shape. The base must be solid with a jumper.
- An elastic band is attached to the base, now the design can be tried on.
- The longest and most beautiful feathers are attached to the bottom edge using a glue gun.
- Next, using the principle of fish scales, the remaining feathers are attached to small drops of glue.
- If desired, the wings can be decorated with ribbons, lace, and rhinestones. The final version will help to embody the image of a fairy or doll.
Made from feathers and foam
You will need foam balls and several (according to the number of balls) blanks of a swan's head and neck. They are cut from a thin sheet of polystyrene foam.
Glue both parts together. Attach swan fluff to the body with glue. You should act very carefully so as not to stain the feather, otherwise the feathers will stick together and lose their attractiveness.
From below, through the base of the head to the top of the head, pull a string with a thick needle. Secure the tip at the bottom with a knot. Leave the top long. You will get a pendant.
Fabric swan princess
Prepare a plain T-shirt. Cut out the silhouette of a swan from white or pink satin. Finish the edges with an overlock stitch. Carefully transfer the applique to the T-shirt. Be sure to add interlining.
Cut a crown from a blue piece of fabric and glue it onto the swan’s head. Sew pearls and silver braid onto the fabric around the applique. The Swan Princess craft on a T-shirt is perfect for little princesses.
How to make wings for an angel yourself
Angel is a popular character at costume parties. The nature of the image may depend on the theme and age. The range is very wide - from a cute angel at a children's party to a fallen angel at Halloween or wings from the game Terraria. Angel wings remain an invariable attribute. Despite the unusual appearance and apparent complexity of the design, many people can make such a craft.
Angel wings for party
From the tire
The work requires serious physical effort. The executor must be a man. The rest can take part in painting.
Bury one tire halfway into the ground. Tamp down well. Cut the second one lengthwise into three parts, but not all the way. Leave 30-40 cm. This is the base.
Turn out the cut-off side parts from the inside so as to form something like a wing on the sides. Cut off the middle part from the base on one side. Raise it high and provide stability with a wire frame.
Place the figure on top of the second tire. Paint it.
How is everything done?
You need to understand that the work is very painstaking. It can take up to a month for two birds. It needs to be decorated with high quality. To make it easier for you to understand everything, just use the master class below.
As you can see, you really need to try. But the result is worth it. Good luck!
Swan Lake dish
Idea for a wonderful delicious decoration for a children's holiday table. Prepare milk jelly colored blue with food paint. Pour the jelly into a large flat dish in advance.
Knead any sweet dough, at the discretion of the hostess. Form the dough into thin sausages with a bend at one edge. This is the head and neck. Round small cakes - the body. Place on a baking sheet and place in the oven. Bake until done.
Prepare a thick butter or white custard cream.
Remove cookies from oven and cool. Place a mound of cream on the flatbread and stick the swan’s “neck” into it.
Place the resulting figures on the jelly surface. Bon appetit!
Idea No. 6. 3D stars
Pushkin often turns to the stars in fairy tales. Either they are in the night sky, or even one is burning on the forehead. In addition, stars look great in a New Year's interior, so we suggest you make a trendy option.
- Cut out two squares from colored paper.
- Fold the sheet in half and diagonally.
- We make cuts at the edges and fold them into the corners.
- We glue the corners only in the center - this way we will achieve volume.
- We repeat the same with another square and glue the resulting figures together.
The resulting star can be placed on the top of the tree, made into a Christmas tree decoration, hung from the ceiling, or simply placed on the table.