Potatoes are not only a tasty vegetable. It is also a real weapon in the right hands. Piterstory met with Ural design engineer Andrei Pavlov and found out how to turn potatoes into “bullets” and launch them 300 meters.
Andrey Design Engineer
We put together a potato cannon about two weeks ago with a friend. Actually, this was the idea of my friend Nikita. At first I didn’t have a very positive attitude towards it, but it turned out to be very interesting to shoot from such a gun. After a shot, for example, a powerful bang is heard, which you wouldn’t expect from this design. At the same time, the cannon has very strange ballistics - it is completely impossible to predict in which direction the potatoes will fly, so we were unable to shoot accurately at targets.
I don’t know if there are any clubs for potato cannon shooting in St. Petersburg, but I have come across sites of similar communities in the USA more than once. American enthusiasts are “upgrading” their guns. For example, they install automatic supply of shells on them.
How to assemble a potato cannon?
Andrey Design Engineer
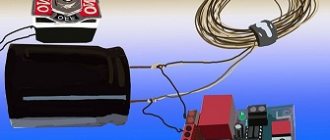
Almost anyone can assemble a potato cannon—no special knowledge is needed for this task. In addition, there are enough manuals on the Internet for assembling and operating the gun. For example, my friend and I assembled this one in an hour and a half, and spent about 500 rubles on materials. To assemble the gun you will need several plastic pipes from any plumbing store, self-tapping screws, construction tape and a piezoelectric element from any lighter.
How to launch potatoes 300 meters?
- The potato (or other suitable vegetable) is pushed into the barrel of the cannon with an improvised cleaning rod.
- A small amount of flammable material (for example, flammable aerosol or propane) is supplied to the combustion chamber, and the combustion chamber lid is closed.
- The shooter ignites a flammable mixture of aerosol and air inside the combustion chamber using a piezoelectric element from a conventional lighter.
- Inside the combustion chamber, the combustion process begins, the gas mixture expands in volume and pushes the vegetable projectile out of the gun barrel.
Andrey Design Engineer
The projectile can fly either five or three hundred meters, depending on how it is loaded. In addition, my friend and I came to the conclusion that after each salvo the combustion chamber must be ventilated from combustion materials, otherwise they mix with the combustible mixture and an explosion does not occur. By the way, it will not be possible to increase the flight range or the power of the shot by increasing the aerosol concentration in the combustion chamber - due to the lack of air, an explosion simply will not occur
Andrey Design Engineer
Naturally, we did not fire the cannon at either people or animals. But we must remember that a cannon, even a potato one, is still a cannon. For example, when shot at a wall from five meters, the potato will literally break soft-boiled. Therefore, when handling this “weapon” it is imperative to observe safety measures.
- When assembling the gun, I do not recommend using tape, glue or other similar materials, since the gun can simply tear apart during firing. We used self-tapping screws as a fastening element, and used adhesive tape only to ensure relative tightness;
- Before firing, it is advisable to once again check how well the moving parts, for example, the combustion chamber cover, are secured. We had a case where the lid was blown out by an explosion;
- It is better to shoot in a deserted area, since a shot at a wall from five meters will tear the potatoes into small pieces. For example, Andrey and his friend are starting a potato plant in the Gulf of Finland.
Not just for fun
Oddly enough, the system of launching vegetables into the air can bring practical benefits. For example, similar mechanisms are used at football matches to launch T-shirts into the stands of the stadium. In addition, potato weapons can be used to scare away birds, which is used by some farms, and to simulate the effect of a shock wave in laboratory experiments. An analogue of the potato cannon is even used in the aviation industry - with its help, testers test aircraft engines for bird strikes. True, in this case the gun will be called a chicken or duck gun.
How to make a potato cannon or Apple Gun with your own hands. It so happened that in the year of construction, apples were more affordable than potatoes. Building a gas gun is an interesting project, but first a warning. You build a gas gun at your own peril and risk and take ALL responsibility for the construction, use, consequences of using this device, as well as for any damage caused. The authors used the device only to scare away crows and birds that destroy crops in their summer cottage. Since prices for the essential product potato went through the roof this summer in the country, apples that fell from trees were used to test the gun, which did not change the properties of the device in any way, although it gave it the name Apple Gun. When building the Apple Gun structure, the experience of building potato guns accumulated on the Internet was summarized. The simplest and most budgetary scheme (less than 1000 rubles) for building a gas gun with your own hands was chosen. During the testing process, weaknesses were identified and some improvements were made. Purchasing the cannon parts will take longer than building it.
How to make an Apple Gun with your own hands
Parts and tools.
We buy the following parts in the plumbing department of a hardware store:
— drain pipe diameter 50mm length 1 meter;
- adapter 50 - 100 mm;
— connector 100-100 mm;
- revision 100 mm, you only need to buy an expensive revision for external use in brown color, but it will be more than half the cost of the parts, but the gun will be safer (details in the text);
— a 100 mm plug, it is also better to buy a brown one for reliability.
Check that all rubber seals must be in place; they are included in the kit. The details should not be
no mechanical damage or traces of impacts. Handle parts with care after purchase.
You also need to prepare sealant, self-tapping screws for gypsum board with a wide head at least 30 mm long, reinforced tape, a kitchen piezo lighter, two pieces of well-insulated copper wire, and electrical tape.
The tool you will need is a screwdriver, or better yet, a screwdriver. Drill with a drill bit with a diameter of 1.5 mm. Hot glue gun. Wire cutters.
Revision 100 mm
Parts and tools
Apple Gun Parts Kit
Required accessories
So, what should you buy? When going to the store, write the following list on a piece of paper:
- Plastic pipe with a diameter of 10 cm, bent at a right angle - 1 pc.
- Plastic pipe with a diameter of 5 cm (1.2 meters) – 1 pc.
- Adapter from 10 to 5 cm – 1 pc.
- Pipe cap with thread – 1 pc.
- Piezo element – 1 pc.
- Sealant – 1-2 packs.
- Aerosol can with butane - 2-3 bottles.
- Potatoes – 1 bag.
Apple Gun Assembly Procedure
The assembly procedure is slightly different from that shown in the photo and video, but experience comes in the process of work. But first, it’s better to practice assembling parts without sealant to evaluate your strength and gain assembly skills.
1. Lubricate the inside of the connector 100 - 100 mm behind the rubber seal with sealant as shown in the photo. We connect the part with the revision with our own hands. We push the connector inward until it stops.
2. Lubricate the second side of the connector with sealant and insert the 100-50 mm adapter. Decide on the location of the barrel. The adapter must rest against the revision - this is mandatory.
3. Lubricate the inspection flange with sealant and insert the plug.
4. In the same way, insert the 50 mm barrel pipe into the adapter until it stops. Immediately remove the rubber ring of the seal from the expanding part of the pipe.
5. Leave the structure alone until the sealant sets.
Applying sealant
Compound
6. Be sure to connect parts with self-tapping screws!
To connect with self-tapping screws, we drill holes at the fastening points with a thin drill and screw the self-tapping screws into these holes.
You must tighten it carefully so as not to turn the self-tapping screw in the plastic during final tightening. The installation locations of the screws are shown in the photo. The barrel is screwed on with two self-tapping screws, the connector with the adapter and revision is connected with 6 self-tapping screws. Pay special attention to the plug. Due to the short walls, it has to be secured through a rubber seal. When fastening with four self-tapping screws, the fastening was noticed to be undermined. The plug is secured with eight self-tapping screws.
I recommend wrapping the extended part of the Apple Gun and the barrel mount with reinforced tape; the cap must be screwed with tape!
The barrel is secured with self-tapping screws
Securing the connector
The plug is secured
The procedure for modifying a piezo lighter
We don’t bother with any electronic ignition. We will not use electronics or batteries. The device should be simple and reliable, and it is - a piezo lighter. The device works and does not misfire; the whole world uses it. You just need to have experience and the desire to bring this spark inside the volume. The cheapest kitchen lighter (37 rubles) is used as a basis. Believe me, the piezo unit on this or a gold lighter with diamonds is the same.
1. Disassemble the lighter.
2. Remove the piezoelectric unit and carefully handle the extension wire coming out of the piezoelectric unit.
3. We prepare two extension wires; it’s good if at least one wire is high-voltage (cut off from the line transformer of a broken TV).
4. We connect the extension conductors to the piezoelectric element and insulate it. There should absolutely be no twists between each other or loops on the conductors. These are additional inductances and capacitances that will weaken the spark.
5. Assemble the piezo lighter, strip the ends of the conductors at a length of ~5 mm and place them at a distance of 5 mm from each other. Click the lighter and a juicy spark should appear. If not, it means that something was assembled incorrectly somewhere.
Piezo lighter disassembled
Installing an ignition system on an Apple Gun
Ignition system
The main mistake when building potato cannons is supplying voltage inside through metal elements. As a rule, after several shots, such a gun becomes silent for a long time due to loss of spark. This design does not have this drawback. At a distance of 40 mm from the end of the plug, we drill two holes and insert conductors there to a length of 40-50 mm. We fix the wires in the holes with hot glue. After the glue has set, we form a spark gap and check the spark. The iska will skip with a characteristic sound. To be on the safe side, the place where the conductors enter is secured with reinforced tape in two layers.
Insert a piezoelectric element
The piezoelectric element is a necessary thing; without it, the potato cannon will not work.
Instructions on how to insert it are given below. We wrap the piezoelectric element with wire. There should be a small gap between its end and the spark generator.
Now we insert our “spark” into the hole that we drilled in the pipe. We seal the hole with sealant so that there are no gaps left and air cannot penetrate inside.
We screw a self-tapping screw into the chamber to a depth of 1.5 cm. We wind a wire from the piezoelectric element to it from the outside of the chamber. When working, you should use a blue tape to avoid electric shock.
Now let's press the button. If a small spark runs along the wire from the piezoelectric element to the screw, then everything is done correctly.
Apple Gun Tests
The most important stage of checking a mini gun. The following bottle of air freshener was found on the shelf as fuel. The design is budget-friendly and the use of another type of fuel was not envisaged.
Basic Rules
Work only outdoors, away from people, buildings and flammable objects. Work only in protective equipment, especially for eyes. Do not point the device towards people, animals or structures. Do not look into the barrel when the inspection cover is screwed on. An apple released from the device may cause damage (break glass) or injury. If there is a misfire, immediately unscrew the cap. Always remember that the device is made of plastic and can be destroyed; the orientation of the cover and plug is especially dangerous. After each shot, inspect the device for damage or movement of parts. If there is even a suspicion of damage, stop testing.
1. Checking the ignition system. The shot occurs from the explosive combustion of a mixture of air and gas in the chamber. It is important to maintain the proportion - a small amount of gas will only produce a bang, a large amount can destroy the gun or not work at all. The required amount of gas can only be determined experimentally.
2. Place the gun on the flyer or support with the direction up. Sprinkle a small amount of air freshener into the chamber and, without tightening the lid, give a spark; a flame should burst out of the neck.
3. Let's blow out the gun or wait for the gases to be removed. We warn the immediate surroundings about the loud sound. Add gas and screw the cap tightly until it stops.
!
We check the safe direction of the shot. Spark. Happened? If yes, check the design. If not. Open the lid and give a spark without looking inside. If it lights up, it means that more gas was added than necessary or the gun was not purged. If it doesn't catch fire, blow out the cannon. Let's give a spark. We check for the presence of a spark and maintaining the spark gap of 5 mm. Attention!
The gray screw caps are already flying off well on dry shots. During testing, the gray cover flew 15 meters away, was found 3 days later, the rubber seal has not yet been found. A blank shot at night is effective.
Our readers love weapons very much. Among them are many people who are familiar with various types of weapons first-hand: designers, testers, military personnel, as well as those for whom sport shooting, hunting or studying weapons history has become a favorite hobby. However, among those who want to read and talk about weapons, there are also those who have never in their lives held in their hands anything worse than a water pistol. This is, of course, a mess. We decided to arm all loyal PM fans to the teeth. Every month we will tell you how to use available materials with your own hands to create something that shoots far, flies high, burns well and delights those around you with a deafening roar and festive fireworks, having first tested each recipe from your own experience. We decided to start with an artillery weapon that has long become a classic in America and is rapidly gaining popularity all over the world - the potato cannon.
Safety regulations
Shooting from a potato cannon is quite fun, but do not forget about the safety rules:
- Never point the gun at people or animals. The most suitable place for shooting is considered to be an empty open field.
- The potato cannon is a weapon! It can cause serious injury. It must be used with extreme caution.
- Familiarize yourself with current laws. If such a weapon is illegal, you will face penalties for using it.
- Do not glue gun tubes together. Otherwise, it may explode with a powerful shot.
- There is no need to load the gun unless you intend to fire a shot.
- At very high or low air temperatures, you cannot shoot potatoes. The fact is that plastic pipes can become fragile, which poses a danger both to the shooter himself and to those around him.
Pressure deficit
The first and, perhaps, the most serious obstacle for us on the path to our own potato cannon was the total lack of pressure water pipes made of polyvinyl chloride, the main building material for homemade artillery, in the stores and construction markets of the capital. The only PVC products that are widely available everywhere are sewer pipes and fittings of any diameter, configuration and even color. You cannot shoot from them - these pipes and their connections are not strong enough to work under pressure. The nature of the general concern of sellers with sewerage problems while completely ignoring the water supply system remains a mystery to us.
You can find some materials for a potato cannon right in your kitchen. Don't neglect your protective equipment. 1. PVC pressure water pipe 63X1000 mm. 2. PVC pressure water pipe 90X400 mm. 3. Fittings. 4. Piezoelectric lighter. 5. Wires. 6. M4X40 mm screws with nuts (electrodes). 7. Travel cylinder with a propane-butane mixture. 8. Potatoes. 9. Glasses. 10. Gloves. 11. Headphones or earplugs. 12. Respirator. 13. Paint. 14. Purge pump. 15. Carriage of arbitrary design.
In our area, water supply is often laid from metal-plastic or polypropylene pipes. In terms of their properties, they are not inferior to PVC, the only difference is that polypropylene pipes and fittings cannot be glued together; to connect them, you need an expensive welding machine with a whole arsenal of special attachments. Do not fall for the persuasion of sellers who claim that polypropylene can be welded with a lighter. We have seen from our own experience that, even with a powerful gas burner, it is impossible to reliably and evenly connect such pipes, therefore they are not suitable for building a cannon. For the sake of experiment, we made a carriage from polypropylene pipes.
A week-long search led us to a specialized store, where we were able to purchase two three-meter sections of PVC pressure pipes, designed for pressure up to 10 atmospheres, as well as all the necessary fittings. Let’s immediately make a reservation that building a potato cannon requires creative flexibility: the lack of necessary materials on sale can dictate serious design deviations from the original project. In particular, based on the available parts, we equipped our gun with a removable barrel, and made the breech part non-removable. This design has an advantage over the traditional one, with a threaded plug at the rear of a non-separable gun: the gun can be loaded from the breech, rather than pushing a projectile through the entire barrel. On the other hand, screwing a heavy barrel into place is more difficult than a small plug. To prevent gas from escaping from the breech during assembly, you need to act very quickly.
Finally, obeying the will of circumstances, our gun turned into a howitzer. Guided by the availability of strictly defined fittings for sale, we purchased pipes with a diameter of 63 and 90 mm (internal diameters 55 and 80 mm, respectively). At the same time, the barrel length turned out to be equal to 18 calibers, which allows us to classify our gun as a howitzer.
Laughing Gas
The air-fuel mixture is a capricious thing. Learning to feed just the right amount of gas into the combustion chamber is the main skill of a potato shooter. A mixture that is too lean will not ignite, and a mixture that is too rich will not ignite either. I would like to urge all experimenters to be careful, admitting, as an example, their own sloppiness. While practicing firing blanks, we significantly over-enriched the mixture. Desperate to set it on fire, we left the gun with the bolt closed. Returning a little later, we tried to flick the lighter again. During this time, the excess gas has evaporated, and the mixture in the combustion chamber is well mixed. As a result, the gun slammed so hard that half the employees on the floor had their ears ringing for half a day. So we learned, not without joy, that our gun was capable of firing with much greater force than we thought, and also that we should never fire indoors, even with blanks. And now we always use headphones or earplugs on the street.
Working with light
Along with the pipes, we purchased a special glue for PVC, as well as a solvent necessary for degreasing the surfaces to be glued. To say that these liquids smell bad is an understatement. When working with toxic drugs, you should never neglect a respirator, goggles and gloves: PVC glue causes irritation to the mucous membrane of the eyes and respiratory tract, and can damage the skin if in direct contact. It is better to glue in a well-ventilated area. Otherwise, assembling the potato cannon is very simple. When sawing off the required sections of pipes, you must try to ensure that the cutting angle is as close to straight as possible - then the joints inside the gun will be smooth, which promotes uniform combustion of the mixture.
The ignition system of our gun is based on an ordinary kitchen piezoelectric lighter. This is the most accessible, but also the most capricious type of ignition. Its analogues are mechanical lighters from kerosene lamps, which we have not found on sale, and stun guns, which in themselves are weapons that are dangerous to use. A piezo lighter produces a very weak spark, which is not always enough even to ignite the gas mixture. The reliability of the gun's operation depends entirely on the location and condition of the ignition electrodes.
The second critical factor in the performance of a gun is fuel. First of all, we tried the hairspray recommended in one of the recipes. The heads of the screws screwed into the plug of the breech of the gun acted as electrodes. The tests were carried out in a barbaric way - by vertically installing the breech in the middle of the editorial office and trying to set fire to the gas injected there. The first portion of varnish flew into the air in the form of a large fireball, making a long howling sound. The audience was impressed, and the cannon fired varnish a second time for an encore. But the third time did not happen: after the combustion of the propane-butane base, the unburned part of the strong-hold hairspray covered the inner surface of the combustion chamber and the electrodes with a thick layer. The ignition stopped working, the varnish demonstrated its complete failure as a fuel.
Tests of the deodorant also did not give the desired result. Finally, in a sports store we came across the ideal fuel - a pure propane-butane mixture in cans for a camping burner. Such fuel burns completely without contaminating the electrodes. We were able to achieve truly stable operation of the gun only by sharpening the electrodes for better spark formation and moving them to the center of the combustion chamber. For a weak piezoelectric lighter, sharpening the electrodes and finely adjusting the optimal distance between them is not just desirable, but a vital procedure.
Assembling the combustion chamber
When you have purchased everything you need, you are concerned about the question of how to make a potato cannon. Well, let's start in order and make the combustion chamber.
First of all, screw the cap onto the end of the curved pipe, having previously coated the thread with sealant.
Next, connect the adapter to the other end of the pipe. We also treat it with glue. An adapter is needed to connect a pipe with a diameter of 10 cm to a pipe with a diameter of 5 cm.
We insert a narrow pipe into the adapter. It will play the role of the barrel of our gun. The structure must be straight and have a strong connection.
A small hole should be drilled in the side of the resulting “shoulder”. So we assembled the combustion chamber. The main thing in this work is to choose the optimal size. If it is very short, then the potato will fly out quickly, and if it is long, then the speed of the projectile will slow down.
Goodbye potatoes!
Finally, the day came for the first field tests of the potato howitzer. We established a firing position in a vacant lot, about a hundred meters from the metal fence, to which we hoped to throw a potato. We disassembled the cannon, tightly installed a potato into the barrel, cut with a special caliber - a piece of pipe identical to the barrel with sharpened edges (by the way, if you make the cannon non-removable, you can sharpen the barrel itself), generously injected gas into the breech, wrapped the barrel, optimistically plugged your ears and pressed on the lighter button. “Zilch,” the gun whispered plaintively and sluggishly moved the projectile half a meter down the barrel.
Pink camouflage
An artillery gun is a complex engineering structure designed to decide the destinies of people. Of course, it should not look like an extra part from the sewer system. Decorating a cannon, giving it a look that inspires fear and awe, is a mandatory stage of construction, similar in emotional intensity to painting a hot rod. Remembering the spring holiday, we dedicate our creation to beautiful ladies. Meet "Barbie from Hell", the most formidable weapon of emancipation in the spring/summer 2008 season! A lacquered pink cannon on a gold carriage will make you stunning, both figuratively and literally!
It was all about the quality of the mixture. The combustion of gas requires oxygen, which is contained in the air. Only a flammable mixture with the optimal gas to air ratio can ignite. The situation was complicated by cold weather (it was -50C outside), during which gases mix less well. Our personal experience has shown that for a good shot, pressing the button for a second is enough. After each salvo, the combustion chamber of the gun must be purged to remove combustion products and refill the chamber with air. For purging, we specially took with us a pump with a long hose.
It is impossible to quote in the printed edition the comments with which we saw off the potatoes flying across the sky far beyond the fence, into the unknown. According to our estimates, the shell flew at least 200-250 m. Judging by the lack of response comments, nothing vital was happening behind the fence, and we did not deny ourselves the pleasure of firing a few more volleys. Therefore, we consider the above scheme to be fully operational and confidently recommend it to readers! We ourselves sit down to design an advanced gun with metered fuel injection, multi-point ignition, forced ventilation of the combustion chamber, a quick reload system and a muffler, in order to talk about it in one of the future issues of the magazine.
Potato cannon, in English. — Potato cannon or Potato gun is the favorite pastime of those who love both tinkering and hooliganism, and at the same time want to remain within the law. Probably, the harsh Russian cops will react poorly to such a hobby, but, having successfully originated in America, the potato gun also successfully spread throughout the world, only in a few countries it was banned.
For such a gun you will need:
PVC pipes, which are used in plumbing. Namely - a cover, a coupling, an adapter, a pipe with a diameter of 50 and a tee with a diameter of 110. You also need to have on hand: a hacksaw, a knife, liquid nails, and tape.
Begin
slowly
assemble
this unit. On the 110 tee from the end side we attach the roof, first spreading it with glue. On the opposite side, also on the glue, we place the coupling. Having secured the coupling, let the glue dry a little and insert the adapter from 110 to 50 pipe into it. The lid will screw on the side; it does not need to be glued by inertia.
Next we will make the barrel for the potato cannon. Take 2 meters of plastic tube with a diameter of 50 and cut it in half. Cut the second half lengthwise with a knife. Then we put the cut pipe on the whole one. In this way we strengthened the thin pipe of our trunk. Next, we reinforce this trunk with tape. After you have wound 2-3 layers of tape, glue the barrel into the combustion chamber (the part we made first) and go through it with tape again.
After all the plastic parts are assembled, let's start filling. After drilling the holes, screw a screw into the combustion chamber. A spark will jump between it and the wire. A cheap piezo lighter for gas stoves was chosen as a spark source. There are two wires coming from the piezoelectric element, we screw one to the screw, the second at a distance of 5mm from it. We screw the lighter itself to the gun body with tape, leaving the spark button free.
Operating principle and first tests of a potato cannon
We take potatoes slightly larger than the diameter of the trunk and press them into it with force.
Next you need to push it further with something. For this purpose, you can make a cleaning rod from a ski pole. We push the potatoes to the end of the barrel, but not into the combustion chamber itself. To do this, you can make a notch on the ramrod so that you can see where to push the projectile. Then we take an aerosol can with acetone, unscrew the cap, spray a little into the combustion chamber and close it back. We press the button of the piezo lighter, the explosion of the projectile is pushed out by burning acetone vapors.
How to load a gun and fire a shot
That's it, the gun is ready for battle. If you decide to shoot with a small gun, it is recommended to place a rag in the barrel. It will prevent the projectile from flying out prematurely, and its flight range will be long.
Now you need to choose a target. You can only aim the gun at a target that is not near people or animals.
Well, are you ready to shoot? Then unscrew the cap and spray the aerosol into the chamber for 5 seconds. Everything needs to be done very quickly. Screw on the cap and press the ignition button. The potatoes flew.
Before the next shot, the gun must be cleaned and the above steps repeated.