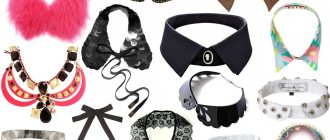
A person's life is boring and uninteresting without hobbies. Some people rush from work to their favorite dance classes, others can’t imagine a free moment without a book in their hands. Some surprise their relatives with wonderful products made of thread, wood, plastic or metal, others sing wonderfully not only in their souls, others are delighted to immerse themselves in the world of history. These activities distract you from everyday hustle and bustle, relieve tension and stress, give you peace of mind and restore strength. It is believed that the more hobbies a person has, the more developed he is, and the more successful he is. However, you shouldn’t spread yourself too thin. There are people whose affections strive to embrace the immensity. Their entire life outside of work is concentrated in one world - fictional, but interesting and addictive. His name is steampunk. Science fiction writers created it with their own hands, thoughts and labors. What are its features and history?
Goggles "Optimistic/Pessimistic Life". Making notes.
They contacted me in a personal request to explain some aspects of making the “Optimistic Live” and “Pessimistic Live” goggles.
At first I started writing a lengthy message there, but then I thought that it might be interesting not only to my interlocutor, but also to other people just starting to work with leather. Therefore, in agreement with the author of the question, I am putting this opus out for public viewing. This is not a full-fledged worklog, but rather notes on working with patterns. And it’s not a fact that the photographs below will be from these works - in some places just explanatory images are needed.
1) First we decide on the shape of the eyepiece. In fact, it has been described many times how best to do this - glue a cylinder or cone of the required size from paper, cut it to the shape of the face and thereby get a development.
As in the photo, the eyepiece of the Optimistic/Pessimistic Life goggles is essentially a cylinder with a smooth protrusion,
so the scan will look something like this (red is the eyepiece, orange is the strap):
You shouldn’t be tied to the size of the photograph; everything depends on the size of the eyepiece and a lot depends on the thickness of the skin. I’ll describe what to do with the sizes below.
2) We make patterns of parts for a type-setting eyepiece. First, we first cut the pattern drawing into the required number of parts. I make all the drawings in Korel.
Now it would be more clear to explain... The first, main part covers areas 1 and 2, the second - 2+3; third - 3+4; fourth - 4+5.
With marked holes -
Now you can play with the shape of the parts - round them where necessary, or add protrusions.
It would seem that it’s ready... But there is one “but”. The leather has a certain thickness, and if each piece is bent, the holes will not line up. Not much, but still. You can, of course, first rivet them and then bend them, but this will only work normally with soft and not too thick (2-2.5 mm) leather. This was the case in Optimistic Life.
Therefore, in order for the bend to hold normally, it is necessary to increase the distances between the upper holes of each (except the red) part by several millimeters. In this case, you will have to adjust the shape.
2) Dimensions of the main leather part of the eyepiece. Now we smoothly move on to manufacturing the main part, namely the red part. Here you need to accurately determine the dimensions of the original strip of leather so that the glued part fits onto the metal eyepiece, but does not dangle. It would seem that you measure the diameter, multiply by Pi - and that’s it. In principle, this is the right approach. But the skin, especially thick and dense, bends quite whimsically and an eyepiece glued according to the above formula may well not stick to the metal part even when soaked.
gloomy steam
From English, the first part of the name is translated as “steam”, the second – “gloomy”. Well, the style lives up to its name. Steampunk appeared in the eighties of the last century. His father was Kevin Jeter, a writer inspired, however, by other works. But the honorary grandfathers of steampunk are considered to be Herbert Wells and Jules Verne. What is steampunk? An alternative version of the development of civilization created with my own hands. This is a world where steam engines have won, and electricity is at a fairly low level of development. The actions of any works take place in the atmosphere of Victorian England. Aeroflot airships, the noise of boilers in mysterious and frightening rooms, giants of thought in industrial design, smog from factories and factories, newspapermen and shops, workers and mad scientists - all this is really exciting and takes us back to childhood to our favorite science fiction novels, although steampunk - it is a synthesis of retro and reckless futurism. What about mechanical monsters and all kinds of computers, the filling of which is artificial intelligence made of... steam. Clockwork insects made of gears, men with top hats, in tails and with a cane, women in corsets and crinolines - what could be more romantic? Brass, copper and steam – that’s all steampunk requires. With their own hands (for beginners this is also possible if you have the “right” hands), many fans of this genre create amazing things. The style has found application not only in literature, but also in music, photography, painting, clothing, room and furniture design. Steampunk devices are also popular.
Goggles "UK4G-TPNV-02"
Greetings, Pikabu, subscribers and sympathizers!
There's a bit of a process. In general, it is not much different from what is in the link. It may be of some interest to make a seamless flange from leather. I'll stop there.
Notepad steam
Materials: notebook/notepad on rings, polymer clay fimo +Cernit, acrylic paints, pastel, varnish
Needlework
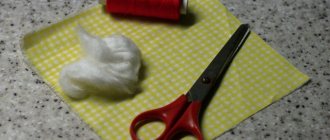
Take polymer clay. Roll out and seal (our mug).
Adding details and priming.
Temper in the oven and paint
Good gifts to everyone and Happy New Year.
What materials does steampunk style use?
You can make many eye-pleasing objects with your own hands. The main association with mechanisms for many of us is gears. So, these details of various sizes and shapes have found wide application in style. They can be used to decorate small items or make stylish accessories. The rest of the spare parts will also come in handy - right down to the dial, from which the artists make wings for chimera dragonflies. Small light bulbs look very, very good as a body for spiders. Wire is a universal connecting link. Experiment with leather too. Remember that color is also important - so stock up on cans of gold or copper glitter paint, a stiff cloth, napkins or sandpaper to give your pieces an aged effect.
Goggles "Classic Mini 01"
Greetings, Pikabu, subscribers and sympathizers
!
It’s not that I’ve been posting more frequently, it’s just that it coincided that I’ve developed new protective goggle glasses. They are smaller than usual, because... For the eyepiece I used a 32x2 tube rather than a 50x1.5. By the way, I’ve been wanting to make something like this for a long time, and I approached it responsibly, even building a 3D model and development.
In addition, with the help of one colleague, I continue to master the wisdom of painting. Hence the shine - I used the so-called. “finishing agent” is a finishing agent after painting. In reality it turned out not as shiny as in the photographs.
Please don’t ask about sales, I don’t sell here. Yes, I don’t have them anymore.
All. We kick, we ask.
What if you aim for something more?
If you adapt leather gloves with lacing and leave one khalange of fingers, adding metal elements or something in the spirit of steampunk like a watch, you can get a good accessory. Hang models of airships in your office, and choose a lamp in the steampunk style: metal, soldering and fancy shapes. Intersperse serious scientific works with models of various mechanisms. Decorate your walls with steampunk urban views or a portrait of scientists. Drawings of strange mechanisms will also work.
Steampunk is an amazing world that we ourselves can bring into reality.
Goggles "UK4G-TPNV". Part 2. Completion of the manufacturing process
Hello again, dear Pikabutians and subscribers!
We continue without pause.
19. I will cut out parts of the hinges from such a U-shaped brass profile.
20. For precise positioning during soldering, I made 2 mm holes in the support pads, and holes with M2 threads in the hinges.
21. I didn’t photograph the actual bridge of the nose, but I think everything is clear.
22. Finished bridge of the nose. But she looks pretty skinny, so I decided to cover her with leather.
23. I shape the skin under it, holding a fragment of a file between two wet strips.
25. From a brass pipe 32x2 I grind an eyepiece for 30 mm glass.
26. I make a groove for the retaining ring.
27. Eyepieces with glued markings for drilling.
30. Finishing on a fluoroplastic blank clamped in a drill. And this is done with manicure files.
31. I cut out glass. I once bought a dozen multi-colored plexiglass sheets from Ali and used it. Not quite canonical, but safe.
32. I process the edge, adjusting the diameter along the way. This is a homemade belt sanding machine for a 533 mm ring belt.
33. Cut blanks of belts with templates.
34. Cut out belts. I didn’t take it off with what I cut the ends with. And these are just stationery blades bent around suitable round timbers. I still can’t get around to buying cuttings.
What can you make from steampunk style with your own hands?
This is a fairly popular style in the design of not only part of the personal space, but also the entire home. As a rule, before getting excited about the idea of creating something steampunk with their own hands, people re-read exciting books and admire the art of the same amateurs. There are also a lot of fan fictions - in general, fans are not dissatisfied. In the end, every devotee will want to have at least a nice little trinket a la steampunk. To disassemble, solder, assemble and tinker with really delicate work with your own hands - not everyone has the patience and dexterity. There are specialized stores, mainly operating in the Internet environment. There they will advise you on a product to suit your taste: from dishes to mobile phones. In addition, you can often consult with fellow amateurs like you. And if the desire to make something exclusive is too strong, then the answer to the question: “How to make steampunk with your own hands?” - you will find it on blogs, forums and in our article. Or you can come up with a design yourself. The most popular items are goggle glasses, as well as small trinkets made from various mechanical parts.
Goggles "UK4G-TPNV". Part 1. Finished and beginning of the manufacturing process
Hello, dear Pikabutians and subscribers!
I have been looking for a 32x brass pipe for a long time (at least for some time). It was there, but it was expensive, like a cast iron bridge. And one day he spat and crushed the toad. But we need to make something out of it. And did.
These are the goggles called “UK4G-TPNV”. Can anyone guess what it means?
And this is fixing the glass with a retaining ring.
Let's go through the process.
01. I'm making a plasticine model. The desired shape and markings of the front part are glued to the top.
02. I cover the model with paper.
03. I get the approximate shape of the pattern.
04. I vectorize the pattern. After several iterations of “printing-gluing-adjusting-editing” I get a paper model of... what? I will call it the body.
05. Making a matrix for molding leather.
06. Ready set of forms. The punches were sharpened on a lathe.
07. Wet molding. As a result, the matrix had to be redone - I wanted to mold a flange 7 mm wide, but the skin did not want to stretch that much. Made 4 mm. Vegetable tanned leather, Rybinsk tannery.
08. Preliminary result.
09. The final result of molding. The front part of the body with seats for eyepieces.
10. Patterns for the side of the body.
11. I trim the edge of the side of the case by 45 degrees. I do the same with the front part.
12. Glued side part of the body.
13. I paint using the dipping method. Kenda Farben Toledo Super paint. As a master I know (he has a second degree as a skin technologist) explained to me, this paint somehow cleverly interacts with the collagens of the skin and does not damage it.
16. I begin to make the bridge of my nose. Support platforms.
18. Soldered (L-AG20 solder with flux, torch soldering) bridge of the nose. However, I immediately wanted to make it mobile.