- Making roses from polymer clay
- Assembling a heart from roses
Modeling from polymer clay is a painstaking but fascinating task, and flowers made from polymer clay are no less pleasing to the eye than real ones!
In this master class I will show you how to make a heart from roses. Usually flowers are sculpted from deco clay (hearty soft, decoclay) or from “cold porcelain” clay (modena, thai clay, luna clay, etc., there are many of them).
It is also possible to make cold porcelain at home, but keep in mind that samovar porcelain is quite capricious and often cracks when drying.
MASTER CLASS ON THE TOPIC
Cold porcelain: recipe and method of preparation at home
To sculpt the roses, I used decoclay clay: it is light, very flexible, easy to roll out and almost does not stick to your hands. Working with her is easy and pleasant.
For this bouquet we need roses of two sizes (larger and smaller) and leaves. The heart base is about 15 cm wide, no more, so the flowers should not be very large either (the diameter of the central roses is 6–7 centimeters).
So, let's go.
Ceramic floristry
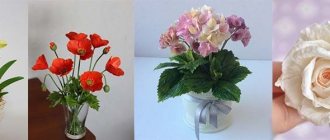
This direction of applied art is becoming increasingly popular; clay products are in good demand. Plastic roses can be used in different ways: in flower arrangements or handmade decorations, but in any case they will look beautiful. Moreover, there are no two identical flowers made of clay. They may be very similar in appearance, but not a single craftswoman can achieve absolute identity. Yes, there is no need for this - after all, handmade flowers created from plastic, as well as bouquets made from them, delight connoisseurs of this type of art.
Clay flowers are used to effectively decorate various interior objects:
- vases;
- panel;
- wall clock;
- furniture and other items.
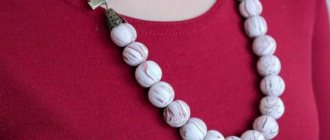
In addition to interior objects, plastic roses can be used to decorate gift wrapping, women's jewelry and accessories, jewelry boxes, and even wedding bouquets. By the way, the design of wedding events is now quite a popular area, so the profession of a ceramic floristry master has become popular.
However, different types of clay are used for different purposes. Thus, clay, which requires firing, is used in the manufacture of beads, hairpins and headbands, handbags and brooches. And the one that has the ability to harden on its own is used to create flower arrangements where the petals have a given shape.
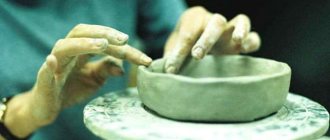
Modeling with children
Sculpting with clay is not only interesting, but also useful, because this activity can be one of the great ways to spend time together with children. Moreover, their age is not so important - even a very small child can knead and roll out clay. And even little fidgets will enjoy squeezing plastic out of the extruder. They will watch, as if enchanted, how the parts they create turn into a beautiful flower. It is worth noting that compositions made from such flowers “live” for quite a long time and can be perfectly preserved for many years.
So, we have already found out that even a beginner can try to make flowers from plastic without much difficulty. Master classes for beginners are easiest to find on the Internet; there are also video lessons and step-by-step training. One viewing is enough to create the simplest flower.
Learning to sculpt
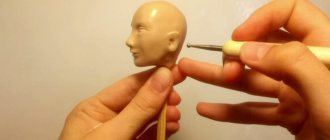
In the process of sculpting, you will need not only hands, desire and material, but also a comfortable workplace, as well as tools . Let's look at them in a little more detail:
- a construction/stationery knife with replaceable blades for conveniently cutting pieces of plastic and cutting out individual elements;
- working surface. It can be plexiglass, tiles or a plastic modeling board;
- molds of different sizes (cutters) for cutting flat shapes from a rolled sheet of clay;
- stacks. Needed for making drawings on clay blanks, as well as for sculpting small parts;
- acrylic rolling pin. It is transparent and is good for rolling out clay;
- extruder or syringe with nozzles. With its help, you can squeeze out sausages of various shapes and thicknesses, forming compositions or some flower elements from them;
- stamps and texture leaves. They are needed to create a realistic pattern on the surface of leaves and petals, so that the resulting flower is practically indistinguishable from a living one.
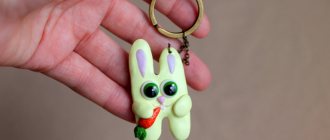
Chandani and her brand ChaNoJa
She lives in Switzerland, works for a transport company, and makes jewelry in her free time. Chandani also loves to travel.
She has traveled to Southeast Asia, the Middle East, the United States, Canada, Ghana and Costa Rica, exploring different cultures and customs that have broadened her worldview.
The brand “ChaNoJa” is named after three masters - Chandani - Norbert - Yael. Chandani's enthusiasm was so infectious that her friends joined her.
❝My life was exciting and adventurous in many ways, but something was missing: creative expression! In 2013, I learned about polymer clay, was inspired by the works of artists and decided to try it myself. I realized that creating clay jewelry is my calling... My art is created from my soul and my heart, not from my head. Beauty lies in “imperfections that are perfect,” as in nature. I feel like my talent is a gift from the Universe!❞
DIY clay
It is not always possible to purchase clay for modeling in a store, and even more so, the desired shade may not always be available. Therefore, there are ways to create plastic surgery at home. To do this, you will need 5-6 drops of baby oil and one teaspoon each of flour, cornstarch and all-purpose white glue. Oil is added to the ingredients mixed to the consistency of clay to eliminate excess stickiness. Acrylic paint can be given the desired shade by dropping it onto a piece of plastic mass and mixing it in your hand.
Stages of creating a peony
- Add a little red clay to the white clay and mix together using stretching movements.
- Divide the resulting mass into 12 pieces of 1.5 cm and 20 pieces of approximately 1 cm.
- Form teardrop-shaped elements from the resulting pieces. Pinch the thickened tip and smear it over your palm, and then, using a stroking motion, make a concave petal with a small stem.
- Glue the petals in pairs - large with large, small with small, moving one of the two to the side.
- Fan together the smaller pieces so that the concave side is on the inside.
- Form the center of the peony by twisting the resulting fan in a spiral.
- Glue the remaining large petals around the central part with the convex side inward.
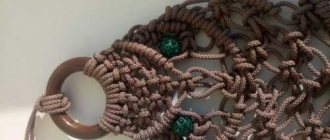
Creating leaves
- Mix green and white clay. Once you have a light green color, add a little more green, but do not mix them together completely. This will give you a veined texture.
- Make a drop, press it to the surface of a special acrylic mold to obtain a sheet.
Making buds
- The pink clay remaining when creating the flowers is mixed with red, but not mixed completely. Roll the resulting plastic into a ball with a diameter of approximately 2 cm.
- Three or four small cakes are made from green plastic that was not used for leaves, and then they are glued over the bud so that they look like sepals.
Each piece is glued to floral wire and left to dry completely for 24 hours.
Assembling the boutonniere
- Wrap the wire elements with tape. To make it fit better, stretch it before use. Using regular tape, connect the pieces together. There is no need to make the stem too long. Leave no more than eight centimeters, cut off the excess with pliers.
- Tape is also used for wrapping the base under the boutonniere. Wrap the ribbon around the stems and secure the end with a pin. The final touch will be a bow made from ribbon.
Forming a bouquet
If you are creating a full-fledged flower arrangement, there is no need to use tape. The wire in the bouquet will be almost invisible.
- To get a beautiful bouquet, connect several flowers using tape. Once it is formed, add leaves to the composition.
- Mark how tall the bouquet should be, cut off the excess stem into pieces. Reliability of fixation can be achieved with pins, which are used to pin each turn made.
- The resulting luxurious bouquet of peonies is decorated with a bow.
Modeling for beginners
For beginners, polymer clay flowers are the first step into the world of ceramic floristry. One of the first flowers that beginners learn to make is usually a rose from polymer clay. The master class on its creation includes several stages.
Preparation of tools and materials
To create a rose you will need:
- red and green acrylic;
- polymer self-hardening clay;
- floral wire from No. 9 and above;
- stack;
- base for the bud;
- rose petal and leaf mold;
- nail scissors;
- leaf, petal and sepal cutters;
- latex glue or PVA.
As a blank, you can use ready-made foam balls from a craft store, or cut them yourself from polyurethane foam. The second option allows you to use mass for modeling more economically. So, it's time to learn how to make a rose from polymer clay.
Beginning of work
Add a little red paint to the white plastic and mix until the color becomes uniform. Then take a small piece of plastic and roll it into a ball, which must be flattened with your fingers. The clay should be kneaded until it is as thin as possible. Spread the lower edge of the petal with glue and glue it to the workpiece, forming a closed bud.
Formation of a flower
On top of the resulting bud, screw another 4-5 petals with larger and longer edges that could hide the workpiece. The edges of the petals need to be curled outward. When forming large petals, it is better to make veins on them using silicone molds. To do this, a piece of mass for the petal is clamped and squeezed between the molds. Using glue, large petals are glued, starting from the bottom of the foam base. During the process, the petals can and even need to be placed on top of each other - this is how the round flower head is formed. It is important not to forget to curl the edges of all the petals outward in a stack after they are glued.
Final stage
For the final stage it is necessary to complete the sepals and stem. Using the method already described, you should paint a small piece of plastic green. Form the mixture into a droplet with a sharp edge. Using nail scissors, the resulting drop should be cut into about 5 parts to the middle. Using a stack, each “tendril” needs to be flattened as thin as possible and additional cuts of different lengths should be made on each of them. Make imprints on the resulting leaves using a relief mold.
The leaves are attached in the same way
Now you need to cover each wire with green floral tape. After this, all the blanks are combined into a bouquet and wrapped in green ribbon, this way we will get stems, and most importantly, this design will be more stable.
How to decorate windows for the New Year - useful tips and creative photo ideasHow to decorate the walls in an apartment for the New Year: 8 best ideas with photos on how to decorate a wall for the New Year with your own hands
DIY New Year's wreath. 12 master classes on making wreaths at home
The finished bouquet of roses can be placed in a beautiful vase, pre-decorated with bright ribbons or bows. The bouquet can also be placed in a glass bottle, which can be previously decorated using the “decoupage” method.
Those who already have some experience working with polymer clay can try to create more interesting samples of roses using more complex technology that will require certain skills from you.
In order to make a more complex version of the rose, you need to roll out the clay of the desired color into a thin cake, thoroughly coating the work surface with Vaseline in advance. Then, using a mold, you need to cut out the petal blanks.
Next you need to roll out the petals thinly with a small roller. At the next stage, you need to coat the middle of each petal with glue and bend them in the center and overlap them. It is important to take into account that the core of the flower should be denser. After this, the next layer of the flower is fixed in a similar way. The leaves are made using a larger diameter mold.
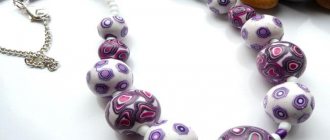
Roses made of polymer clay
Originally posted 2018-08-29 11:02:47.