How to make a clay mug with your own hands step by step
Materials: clay, brush, water, spatula.
1. Using both hands, form the finished clay into a ball the size of an orange.
2. Press the center of the ball with your thumb, pinch it, and rotate the material around your finger with your other hand.
3. Start sculpting the cup from the bottom up.
4. The spatula will smooth out the edges and inside of the product.
5. You need to rotate the cup to smooth its bottom (it is convenient to do this on a sturdy cake stand). Smoothing is done with wet hands.
The following video shows how to make a clay mug with your own hands step by step:
What you need for work
A good craftsman can be seen even before he begins to work; by his instruments. They are carefully and wisely selected, laid out so that they are convenient to use. To sculpt clay vases, the list of things needed is as follows:
- Potter's wheel;
- container with water;
- sponge to collect excess liquid;
- special stack;
- fishing line or strong thread for cutting the finished product from the potter's wheel.
By the way, there will also be a dry towel or rag.
How to make a clay plate with your own hands, step-by-step instructions
And now step by step about how pottery is made.
To make your own plate, you need: kneaded clay, a rolling pin, a cup of water, a wooden spatula, a sheet of paper and a flat surface. Knead the clay until it does not stick to your hands: it should be elastic and pliable.
The plate is made like this:
1. Roll a ball with a diameter of 8 cm. Make a depression in its center.
2. Gently press the indentation with your fingers: the ball rotates clockwise. Each movement stretches and enlarges the ball. Place the workpiece on a sheet of paper: this makes it convenient to rotate it. You will end up with something like a bowl, which can be given the desired shape.
3. Use a wooden spatula to form smooth edges (if you don’t have a spatula, just wet your fingers with water). Rotate the sheet in a circle, and a spatula or fingers applied perpendicularly will work for alignment.
4. Wet your fingers with water and smooth the inside of the product.
The plate is molded! The first test may be far from ideal, but only with experience the plates will become smoother and more pleasing to the eye.
11) Draw this chain using a model.
Model of the production chain “How woolen items are made” for grade 2
12) Tell us what else people get from animals.
People get leather from animals, from which they can sew shoes and outerwear. Clothes are also made from animal skins.
Perfumes and perfumes are obtained from the ambergris of sperm whales.
But the main product that people get from animals is meat and milk.
List of required materials and tools
Before starting the work process, you need to prepare the following materials and tools:
- tools for working with clay parts;
- relief grip tool;
- knife;
- extruder for clay;
- clay;
- water;
- sponge;
- paints;
- brushes
Since my friend makes clay products, I was lucky that his workshop had a clay extruder. With the help of it I was able to make simply amazing pipes. If you do not have this machine, then you will need to struggle a little to make a similar shape. This is not so easy to do, but it is possible if you have a great desire to learn something new. You need to roll out the clay into a thick “dough” and roll it into tubes. The more interesting the shape, the more beautiful the design looks. Beauty can even lie in irregularities and careless curves.
New Year's shares
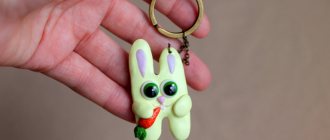
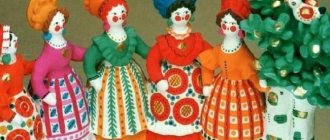
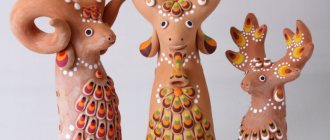
Sign of the year. Animal figures can be made in the form of figurines, magnets, and Christmas tree decorations. You can decorate mugs, spoons, keychains with funny animals:
- Christmas trees, snowmen, snowflakes, mittens and socks for gifts, etc. Everything that is associated with winter and the New Year can be made from clay. The functionality and size of crafts may vary.
- Decorations: snowflake earrings and icicle pendants, beads and bracelets for fashionistas. Imagine!
Several centuries ago, working with clay was a daily necessity, but even then people saw how calming this material was. Now there is no need to sculpt household items, but the desire to see and create something with your own hands has increased.
Working with clay, a person becomes a real creator. From the origin of an idea to its implementation is a magical process in which talents are revealed and dreams are born.
What will motivate you to experience making your first piece? A desire for creativity or an opportunity to relax and redirect attention? This is not important. The main thing is that you will plunge into a mind-blowing world that will reveal you in a new way.
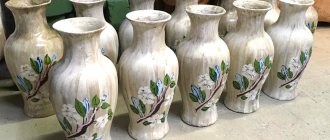
How to make a vase from clay
There are several main stages along this path:
The working raw material must be thoroughly kneaded so that it is homogeneous, without air bubbles inside. If necessary, add water if the clay is too dry. Working with the material at this stage is reminiscent of kneading dough. The end result should be neat and dense.
Important! For tall shapes, including a vase, use denser clay. When preparing working raw materials, do not add a lot of water so that it does not turn out to be too liquid.
- Centering clay on potter's wheel
Place the resulting clay ball in the center on the potter's wheel and start the mechanism at maximum speed. Then wet the workpiece, your hands and start leveling the mass.
To do this, position your right hand so that the palm, perpendicular to the potter's wheel, touches the clay. Using your left fingers, first press the workpiece from above to flatten it. Then, applying pressure to the bottom of the clay piece, lift it up.
It is necessary to flatten and raise the working mass again until it is exactly in the center of the disk. A novice potter will need about 5 minutes to do this; a master, of course, will do it faster.
Usually, for the first time, until this stage, it is not completely clear how you can make a vase from this clay. Many people think that they won’t succeed - it’s hard to imagine how to create a finished product from the lump of blank lying in front of you.
Making a vase from clay
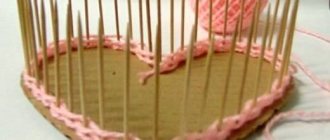
Before you begin creating the main structure, you need to form a base. To do this, you will need to take a small piece of clay and knead it thoroughly until the formation has the same density. Then the resulting mass rises and drops onto the prepared piece of fabric. In this way it is possible to achieve a uniform and homogeneous thickness. After this, you need to cover the layer with a cloth and start rolling it out using a rolling pin.
After rolling, you need to inflate the balloon to the approximate size of the desired vase. The ball is placed exactly in the middle of the resulting layer. Modeling a vase from clay is a fascinating and inventive activity that requires the use of imagination. Therefore, it is necessary to imagine that the ball is the filling of a candy, which is wrapped in a clay wrapper. It is with these turning movements that the ball is gradually covered with a clay layer. Then the wall of the future vessel is carefully smoothed with your hands. If necessary, joints are formed, cracks and irregularities are corrected.
In this simple way it is possible to form the desired shape. Then you need to start creating the top part or neck. At this stage, you can begin to show your fantasies or preferences. Using a stack, you can make a triangular cutout that looks like a jug. Those who want their own clay vase to show off on the table along with flowers can form a perfectly even neck using manual smoothing. However, it is important to distribute the material evenly to maintain the same wall thickness.
The shape of the future vessel is ready. All that remains is to decorate it with patterns, appliques and any other decorations at your discretion. Can add:
- Butterflies;
- Flowers;
- Leaves;
- Letters and whole words;
- Various geometric shapes and much more.
To ensure that the vase becomes stable and does not fall after drying, it is better to place it in a plastic bowl that has a similar shape. Using a stack, you can decorate the vessel with additional patterns and add realism to the applied designs. If we are making a clay vase as a gift, we can add memorable phrases, names or wishes to it.
Forms
Due to the incredible variety of floor vases and planters, it is difficult to evenly divide them into specific groups. However, they can be divided into general types based on geometric shape.
Round
Round floor flowerpots are suitable for more elegant styles, such as classic, oriental or Provence style. Also, a round vase can be successfully combined with tall items.
Cylinder
In the correct understanding, the cylinder has the correct shape; in the designer's understanding, the vessel may differ from the ideal image. A floor-standing cylindrical vase will decorate a modern interior. A glass flowerpot with long fresh flowers will make the interior soft and summery; plaster or ceramic products will be more noticeable.
The photo shows an unused corner of the apartment, decorated with a tall glass vase with branches and candles.
Square and rectangular
A square floor vase will harmoniously complement a modern interior. Straight lines and sharp corners will emphasize the severity of hi-tech and minimalism.
Unusual shape
In addition to the forms we are familiar with, a floor vase can represent a completely unusual decorative item, for example in the shape of a human silhouette, a spherical shape with a hollow hole, or in the form of a curved geometric figure.
Baking
Use extra baking pans, wire and aluminum foil to hold the joined pieces of clay on the baking sheet. See the polymer clay packaging for baking time. Be sure to check during the process because the piece may shift in the oven and will need to be repositioned immediately or the clay will set in a crooked position.
Once the clay has cooled, you can fill a glass with water and select one or more flowers to place in a new vase. Be sure to water the flower with fresh water every day to extend its lifespan. Ready!
Found a violation? Report content
Doll box
You will need: 1.5 liter plastic bottle, Barbie doll, scissors, stationery knife, glue gun, crepe satin fabric, satin ribbons, lace, thread with a needle, narrow polystyrene foam, iron jar lid.
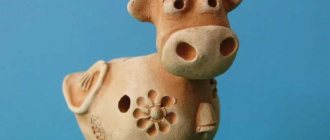
Cockerel
This is the kind of Christmas gingerbread rooster you can make with a child over 7 years old. Such an item will be a good gift or source of income. Because extra income won't hurt anyone.
- snow-white and dark brown polymer clay ;
- breadboard knife;
- Toothbrush;
- liquid polymer clay ;
- knitting needle or stack;
- cardboard cockerel template;
- cylindrical object for rolling;
- tea spoon.
Mash the brown plastic and roll it into a layer 4 mm thick. Attach the cockerel template and cut it out with a sharp knife. Smooth the cut slightly with your finger. To make the surface slightly rough, tap it with a toothbrush.
Decorating the product
To decorate means to decorate, with color or relief, glaze or painting.
There are a lot of decoration options:
- relief;
- painting;
- glazing;
- inlay;
- embossing;
- seal;
- reservation;
- openwork;
- silk screen printing, etc.
Ceramic paints can be applied to the product by hand painting. The drawing can be drawn as an outline for decoration, or you can work impromptu, which is more difficult, of course.
Vase made of self-hardening clay
Self-hardening clay is very easy to use. It resembles dough, is easy to mold, does not stick to your hands or get dirty, and has almost no smell. It contains water, which evaporates within a day.
Some types of clay become hard in 10 minutes in the microwave. After this, the product can be drilled, sanded, painted and varnished.
This material is easier to work with than baked polymer clay, so it is ideal for sculpting with children.
In our master class we will show you how to quickly and easily make a vase using a glass or similar container.
Required materials and tools
- Self-hardening clay FIMOair light
- Texture sheet FIMO "Baroque"
- Roller for rolling out clay
- Acrylic paints blue and gold
- Brush and sponge
- Dummy knife or blade
- Sandpaper if necessary
Features of different types of clay
The first part of the job is choosing the right material. That is, one of the varieties of pottery clay for modeling. Variations of this raw material in the store differ from each other in color, firing temperature, fraction size, and the presence of additives.
You can often see in the description such an item as “clamotte content”. Chamotte is clay that is fired and then finely ground. Added to pottery raw materials, it serves to increase its strength characteristics. That is, a vase made from fireclay clay will be more reliable and durable.
 Draw this chain using a model.
Model of making a book “How a book is born” for 2nd grade
9) What other materials do people get from plants? What are these materials made of?
People get building materials from plants - boards, timber, fiberboard and many others. They are used to build houses, carry out finishing work, and make furniture.
Pencils and some other office supplies, such as rulers, are made from plants.
The final stage
After the shape has been formed and all decorative elements have been applied, you need to place the resulting masterpiece in a room at room temperature and wait 12 hours. During this period, the clay should finally get stronger. After waiting for this time to end, it is important to immediately burst and take out the balloon. If you leave it inside, then as it dries, the clay walls will begin to shrink and explode the ball. As a result, the vessel may be damaged or even burst.
The final touch is painting the masterpiece you created with your own hands. For this you can use ordinary acrylic paints. There are no restrictions on colors, so you can safely decorate the vessel in any shade.
Knowing how to make a clay vase, you can not only create a memorable and touching gift, but also decorate your home with an amazing thing. The process of creating it helps you relax, take your mind off bad thoughts and completely immerse yourself in sculpting. The result will definitely please not only you, but your loved ones!
If you are interested in the article, we invite you to visit the Kolokol pottery school
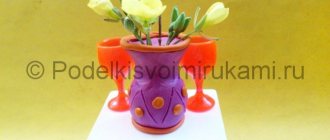
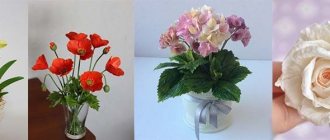
Other decoration methods
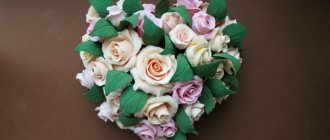
If the interior of the room is made in a classic or romantic style, then you can use a vase decorated with flowers to decorate it. To do this, you can use ordinary artificial flowers, which are glued to the glass using liquid nails or any other suitable glue. If, when decorating a vase, you want to show your talent as an artist, then painting on glass with contour, acrylic or stained glass paints would be very suitable. Drawings complemented with sparkles also look very impressive.
Vase decor with eggshells
Vase decor with glass