Surely you are familiar with this situation: you put on your headphones, anticipating the enjoyment of your favorite melodies - and that’s it, we’ve arrived: you can’t hear anything. Or only one earphone works, which is even more annoying - the music seems to be playing, but you can’t listen to it properly.
If such problems occur, in most cases you can slightly tug the cable at the plug or set it in a certain position, gently squeezing the base until sound comes from both channels. This may help for a short time, but it gets pretty boring if you do it all the time.
The easiest way in this case is to give up and buy new headphones. The option, of course, is not bad, but what if it’s not just any ordinary headphones that are broken, but expensive and high-quality ones, and in general the most beloved and wonderful ones? The most annoying thing is that such symptoms, as a rule, do not indicate a breakdown of the headphones themselves, but damage to some contact, cable or plug-connector.
Replacing a plug is not particularly difficult or expensive. If you contact a master, they will ask for 300-500 rubles, depending on the fineness of the work. But if you are careful enough and your hands don’t shake too much, you can do everything yourself at home. But some preparations for repairs will have to be done, and even some components will have to be purchased. Standard contact plugs are sold in electronics stores for around a hundred rubles. The new plug almost always needs to be soldered to the wire. There are, of course, models that screw and clamp, but for headphones that are used with mobile devices, we do not recommend them.
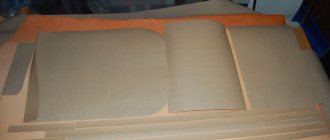
So, for repairs we will need: a soldering iron, solder and skills to work with them. For greater effect, we recommend finding a piece of heat-shrinkable tubing to insulate live parts. The tube should tightly enclose the cable, additionally providing mechanical protection. In principle, heat-shrink tubing is the same as electrical tape, but it is much more convenient and more reliable.
Looking for the cause of the damage
Admit it, how often have you seen a headphone cable break right in the middle? The cause of the breakdown is almost always the plug, which, with regular use, is subjected to mechanical stress much more often than other elements of the headphones. Simply squeeze and tug the wire around the plug.
If the sound appears after this, it means that there really is a problem. We simply cut off the old plug - we won’t need it anymore. Although, if the distance between the break and the flexible part of the plug is about cm, there is a chance to use it if it is not possible to buy a spare plug.
In addition, to more accurately determine the location of the break, you can use the tester in resistance measurement mode (Ohm). Touch one end of the plug to any of the plug contacts (the left or right headphone output is the two outermost contacts), and attach a simple needle to the other probe with electrical tape and carefully insert it into the wire a little further from the intended break point. If the tester shows a value of 0 or slightly more than zero instead of 1 (a value with hundredths or tenths), then there is a break in this wire.
How to extend the cable
If you need to assemble a headset, you should extend the cable with a section with a control unit and a microphone (pre-cut). To do this, the wire is cut in half just below the place where it bifurcates into the speakers. The braiding of the conductors is stripped, the same actions are performed at the ends of the wires sticking out of the box with the microphone. A heat-shrinkable tube is put on the cores, after which they are soldered according to the colors of the insulation. Then the heat shrink is stretched over the exposed contacts and subjected to heating so that it tightly covers the cores.
On a note! Extended cable looks ugly. To make the headphones more aesthetically pleasing, you need to cut the box with the microphone along the glue line. Next, unnecessary pieces of wire should be unsoldered from the board, and headphone wires should be soldered in their place. Then the headset must be checked for functionality and the box must be glued together.
We check for quality
Upon completion of the operation, we need to check the functionality of the repaired headphones. We connect them to any player, smartphone or stereo system and turn on the music. Now, accidental touches to the cable should not cause any audible consequences, so we can only rejoice at the result.
How does a contact plug work?
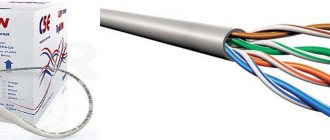
Before you start soldering, it is useful to study the design of the stereo headphone plug. Below we offer a schematic representation of it. A headphone cable contains three wires: the right channel (usually red), the left channel (green, white or yellow) and ground (in our case copper-colored).
There is no separation between right and left channels on the mono headphone plugs. Depending on the plug, the contacts for soldering will be of different sizes. During soldering, try not to create electrical connections between the contacts, especially to ground, otherwise when you connect the headphones to the device, a short circuit will occur and they may fail. Therefore, in no case should you expose the ends of the cables (see point 2) more than is necessary for soldering.
How to create wireless headphones
If a user wants to make wireless headphones for a PC at home, they will need to additionally purchase a Bluetooth modem for wireless communication and a battery.
Assembly:
- You need to disassemble the headphones and integrate the model and battery into them.
- The mod needs to be connected to the speakers, as well as the battery charging socket and the power button on the headphone body.
- After soldering and assembly, you need to insert the transmitting device into the computer socket, turn on the headphones, and wait for the Bluetooth connection.
Plug failure
If your headphones break, the first thing you should pay attention to is the connection between the plug and the cable. Often the cause of the breakdown lies precisely in this place. Due to frequent bending, the cable cores break, so the signal does not pass into one “ear” of the gadget or into both at once . The microphone may also not work.
The breakdown is quite easy to detect. When the gadget is turned on, you need to try bending the cable at the site of the supposed breakdown in different directions. If a sound appears or a crackling noise is heard, this means that one of the wire strands is broken. What to do if a problem spot is found on the cable?
To repair headphones, do the following.
- Cut the plug from the cable.
- To repair the plug, the inside of the old one will be used with a slight modification. To remove this part, you need to cut the plastic shell using a utility knife, as shown in the picture below.
- After cutting the plastic, remove the insides of the plug. You will see contacts to which several thin wires of different colors are soldered. In the same way, you can disassemble iPhone headphones.
- Remember or sketch on paper which contact and color the wire was connected to. The figures below show standard cable wiring diagrams. The color of the conductors may differ in different models, in this case, green is the left channel, red is the right, and copper (without insulation) is common.
- If you need to repair headphones with a microphone, which are connected with one plug (usually there are 2 plugs on the cable), then the wiring diagram will be as in the figure below.
- Next, you need to free the internal cable cores from the external (general) insulation.
- Headphones cannot be repaired without a soldering iron. This is explained by the fact that it is necessary to connect common wires and tin the tips of all conductors using flux and solder. Since the conductors are covered with insulation (varnish), the tinning process will be a little difficult. To make it easier, it is recommended to lightly heat the ends of the wires using a lighter. You can also clean the ends from the varnish layer using a regular knife.
- To continue repairing headphones with your own hands, for example, Defender headphones, you need to find a ballpoint pen, from which you only need one part, namely the bottom. It will serve as a housing for the plug.
- Prepare a small piece of heat shrink tubing to protect the wire from sharp bends.
- At the next stage, you will need to put the tip of the handle and heat shrink on the cable, and then solder the tinned ends of the wires to the plug part.
- We solder the contacts, strictly following the wiring diagram (using our sketch).
- After you have soldered all the conductors, you need to check whether the headphones are working or not. To do this, you can use a multimeter and call all contacts. If there is no device, then simply plug the plug into the phone socket and turn on music playback on it. Make sure that both channels of the headset work separately by turning the balance control in the equalizer.
- If the test result is positive, place the heat-shrink tube over the soldering area and use a lighter or hair dryer to ensure a tight fit to the plug.
- To proceed, prepare a small amount of epoxy resin.
- Add a few drops of resin to the tip of the pen and slide it onto the soldered plug. At this point, the headset repair is considered complete.
The procedure for replacing the plug is the same for all types of headsets, for example, such as: Beats By Dr headphones, Sennheiser HD 215, Razer Kraken Pro, as well as for Steelseries Siberia v2 headphones, Audio-technica ATH-ES7 and headphones Defender.
Adapters and additional accessories for gadgets
Not only from the example of the iPhone, one can assume that the problem with the release of new smartphones is becoming urgent: users of modern technology are puzzled by how to make wireless headphones so that they can use old accessories with new flagship models.
Why did Apple abandon the 3.5 mm jack and why didn’t they release a set of accessories with AirPods wirelessly?
Many hope that there will be companies that can come up with a way out of this situation. In the meantime, we will try the alternatives available here and now. We are talking about a Lightning adapter equipped with a 3.5 mm output for use with any iPhone model. The adapter allows you to connect old headphones to the new port, but you can forget about convenience for now. But this is a simple solution that is an alternative to buying new headphones for $150 or more.
On the one hand, the adapter has a standard iPhone input, just like the charger. On the other hand, there is an input for a 3.5 mm cable. In this case, the cord remains the main router for supplying sound.
How long should the cable be?
The standard length of the headphone cable is 80–120 cm. In this case, a good range is also ensured - the sound source is rarely located far from the headphone body, and the influence of the cable on the sound quality is vanishingly small. If you make the cable longer, signal loss is quite possible, leading to distortion, interference and squeaking in the headphones. A shorter cable will simply be inconvenient.
Is a cable needed at all? Is it possible to make wireless headphones with your own hands? Well, this is, of course, possible, but it is better to do this if the old headphones were wireless - in this case, you can use a working transmitter by inserting it into the case with working speakers. Adding a wireless interface to previously wired headphones is difficult for an inexperienced user - you will need to create a control chip and program it.
Checking parts
Headphone failure can occur for various reasons. The first thing you need to do before disassembling for parts is to make sure they are not working. There are often cases when the problem was hidden in the main device, but the owner, without understanding the situation, threw away completely serviceable headphones.
If you are sure that this is the reason, then before assembling new headphones, decide which parts can be used. Typical problems with such devices include faulty plug contacts, broken wires, or faulty sound emitters. How to make headphones in this case? Assemble working parts from three different pairs.
Volume control problems
How to fix headphones if you have problems with the volume control in the form of loss of sound or crackling? In this case, you can use graphite lubricant to apply it to the resistive layer to restore contact. After this, the headset should function without problems.
If after lubrication the headset continues to work poorly, then the regulator needs to be replaced with a new one.
Thus, in most cases, before you run out and buy a new headset, you can repair it yourself. To do this, you will need a soldering iron with a thin tip and skills in handling it.