– and this year it confidently remains at the top, and not only among Tumblr girls. But you still have to go shopping for a long time to buy it!
But why do this? You can make a choker with your own hands! Think for yourself!
The decoration has a simple structure! It's easy to make!
Simple materials are used.
Handmade is now (as before) appreciated!
The Essential Role of Eco-Organisms
There are real challenges associated with the recovery of raw materials, especially in our cities, which are considered "urban mines." Mines that contain precious or economically strategic materials because they are rare in their natural state and essential to industry.
Tools to find solutions for the clean disposal of our waste. Other problems relate to processing. The industry must develop its processes to handle new types of equipment, as well as to increase the value of certain materials and reduce the share of final waste at the end of the chain.
You can make different jewelry to suit a variety of looks and outfits.
Leave expensive jewelry for older ladies. Young people choose simplicity!
- We told you in detail. We presented a clear implementation scheme. A choker is made similarly from elastic thread (spandex).
- We painted it step by step, which suits the dresses very well.
- We published photo instructions and a video on how to make it.
- They published a choker that looks incredible.
- We selected successful photos on the topic ““.
At the request of readers, we have prepared tips and step-by-step instructions for making a choker from headphones.
Apart from the challenges of collection and processing, the sector's actors also have an educational mission for the general public and industrialists. Moreover, the goal is to promote eco-design among industrialists, encouraging them to produce cleaner products, as well as to invest in the circular economy, using, for example, raw materials obtained from recycling. Issues in which conflicting interests are sometimes mixed, but which must be met if we are to reconcile mass consumption and environmental conservation.
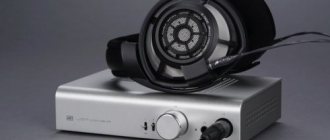
Whether listening to music occasionally or sound in the evening, connecting your mobile phone to your stereo, home theater or other speakers has many benefits. There are several possibilities for this. Advantage: nothing to buy or connect. Optimal sound quality.
Devices began to age faster
If you add up the forecasts for smartphones, headphones, fitness trackers and game consoles, then this year more than 2 billion devices will be released.
Each of them has its own life cycle, at the end of which it becomes obsolete. On average, Russians change smartphones every two years, and Americans every three. The shorter the lifespan of a device, the more often you will have to buy new ones and the more devices will become obsolete every year. The term end of life is used for products - this is the date after which the manufacturer will no longer repair devices or release updates for them. After this, the care of technology finally passes into our hands. It seems that something needs to be done with outdated and broken devices, but so far there are few options.
— Send them to recycling, where people risk their lives to tear the batteries from the case.
— Send them to the compactor, where they might accidentally explode.
- Throw them away, knowing that the plastic case will take another 400 years to decompose.
It would be great if we had one beautiful answer to the question “What to do with old devices?”, but until we have that answer, we should pay attention to how we treat technology right now
Latch locks
Some people do not find magnetic clasps suitable or simply do not use them for various reasons. In this case, latch locks are an excellent alternative. By the way, they really are more reliable.
One of the features of this type of fittings is that when fastened, the bracelet takes on the shape of a drop. The mechanism of its fastening is no different from magnetic rectangles. It is very easy to attach, and you can decorate such a lock by attaching a large flower or butterfly made of fabric to it.
How to make sound on headphones?
Let's return to the question of how to make headphones. First, let's determine what kind of headphones they are, wired or wireless, as well as the degree of their damage, are they connected correctly? So, how to make sound on headphones? Everything is simple here. Click on the volume control, which is located at the bottom near the clock. Move the volume control up. If that doesn't help, then look at your headphones and find the volume control on them. It is usually shaped like a small wheel between the plug and the headphones, try turning it. Make sure the headphones are inserted into the correct green jack. You have turned on the sound and the next question is how to make the headphones louder? Let's discuss a few options. One of them is to adjust the sound in the system through the maximizer program. Another way is to use a special audio player, for example, VLC, in which you can set the volume to 200%. You can also look for new drivers for your sound card. Or you can buy an inexpensive headphone amplifier, it fits almost all models. In general, we will advise you to use headphones from the manufacturer monsterbeats, and you will no longer have to think about how to make the headphones work. And the very last thing we can tell you is how to make headphones with your own hands.
This key also brings the face shield closer to your face and gives you a better view of the action, or can be replaced after a break. It also features a headphone jack to accommodate regular stereo headphones or the headphones that came with the device. The remote control has been designed to be easy to use even while wearing a headset.
The result will be similar to the image presented on the social screen. The resulting video stream will be similar to what users see on the social screen. The stream will be identical to the presentation of the social screen mentioned above. If small glossy surfaces are not usually a problem, make sure they do not cause detection problems.
Features of weaving cord bracelets for beginners
Baubles from this material are made in plain and colored ones. Materials can be purchased at stores selling haberdashery, accessories and fabrics. There are leather, velvet, satin, nylon and twisted waxed threads. The founder of this type of needlework is the macrame weaving technique.
For those who have never created such bracelets, we advise you to start with the simplest models. They are no less attractive than complex weaving. Even a child can cope with them. Simple nodes are used in the work. Such as flat square or “Turkish head”. The work will take a minimum of time when using the most ordinary base, but the result will exceed expectations.
You can start learning from hand-twisted floss threads, and then purchase more practical materials.
Progress
Necessary materials:
- Old headphones
- Clamp
- Hardcover book
- Accessories
To make it easier for you to understand the weaving process, we took cords in two colors.
You need to use a clip to attach the headphones to the book.
Take the pink wire and place it under the white one.
Let's pass the end of the pink wire under it in the same way as shown in the photo.
Sale is good, give it even better
A few years ago, we mainly saw websites specializing in buying phones and tablets flourishing on the Internet, so much so that they now have a special comparator. Some associations may also have access to collection points at waste disposal centers or large distribution companies. If this is not the case, they are redirected to a recycling scheme. Eco-organisms are the official channel for our used products when they cannot be reused.
Electronically controlled electronic waste
Responsibility of waste producers
Of the remaining 20%, 8% is recovered through energy production and 12% is ultimately incinerated or disposed of in landfills as non-recoverable waste. E-waste left on sidewalks is dismantled and looted by metal scavengers, making disposal and recycling difficult. Let's tighten the knot. Adjust the tightness of the knot yourself, depending on how openwork and airy you want the choker to be.
Now we do the same actions with the white wire. Let's carry it out first under the pink one, and then under its own base.
Renewal Commitment: 1 for 1 is not always well respected?
However, we guarantee that pure online players are no more or less virtuous than physical stores. It's hard to test without doing a great comparative study. However, the law stipulates that it must be presented: “systematically, visible and easily accessible.” In addition to 1 to 1 there is also 1 to 0 in the case of small appliances. They are required to collect your small used equipment even if you don't buy anything. Specifically, this is materialized in the form of a collection and sorting of furniture created by eco-organisms.
And tighten the second knot.
We weave the tattoo choker in this way to the length we need. We tie a knot as shown in the diagram above and fasten the fittings.
As it turns out, making a tattoo choker with your own hands is very simple.
The length of the headphones is enough for a bracelet, and the charging wires are enough for a necklace.
You can also weave beads and pendants into the choker, this will give the jewelry a more finished look.
If you like original jewelry, you can spray paint your choker with any bright or metallic paint. Such decoration will not go unnoticed.
What you need for work
One of the most significant stages of any lesson is preparation. It depends on it how simple the current process will be and what the final result will be. To weave a bracelet you need the following.
- A comfortable workplace with good lighting, equipped with an anvil.
- Tool set : pliers, round nose pliers, hammer, grinding material and so on.
- Wire with different cross-sectional diameters. Thicker for forged elements and thinner for openwork weaving.
- Decorative materials : beads, beads, small wooden figures.
Advice! In order to accurately calculate the amount of material, it is advisable to create a rough sketch of the future product on paper.
This is especially true for openwork patterns. This sketch will also be useful during the work process. By applying a workpiece to it, you reduce the likelihood of an error occurring.
Weaving options
There are several possible options for making jewelry from broken headphones: weaving from stripped wires, weaving with knots and weaving in the macrame style.
Making bracelets from wires without braiding requires additional tools: for example, a soldering iron. Knotted headphone bracelets are the simplest jewelry. This technique is accessible even to primary school students. But the appearance of such decoration is far from neat.
We should also highlight the bracelet around the neck - a choker, which is very popular among girls. If the purchased decoration is made only in black, then using cords you can create a variety of color combinations.
Macrame
A great way to make a beautiful earphone bracelet is to use a flat macramé knot on a pencil.
Bracelet making technique:
- Two loops (two sets are required) from the headphones are attached to the pencil so that 4 cords of the same length are formed. It’s easier to call them numbers from 1 to 4 from left to right, so as not to get confused.
- Take the far right wire of number 4 and throw it over numbers 2 and 3, the far left goes over the fourth, goes under the second and third and goes into the loop of the fourth. Now the first number becomes the fourth and the same manipulations are performed with it. The resulting knot is tightened.
- Now the process is repeated on the other side in a mirror image. This way the entire bracelet is made to the desired length.
You can see how to make a bracelet from headphones using the macrame technique in the following video:
Knots
This bracelet requires two headphones with a round cord or one pair with a flat double cord that can be broken by pulling the ends. Initially, you need to cut the headphones themselves and attach the two ends with tape to the edge of the table, fixing them securely. If the cord is double, then simply do not cut off the plug, but attach it to the table, this will make it easier to work.
Weaving begins by tying the first knot, which is pulled to the end of the secured edges. Then a second knot is tied and pulled to the first. You need to pull the knots one to another tightly and evenly to make the bracelet neat.
You can see how a knot bracelet is made from headphones in the following video:
A variation is the knotted weave, in which the earpieces serve as a clasp. To do this, a knot is tied on the wires a couple of centimeters from the headphones. Next, the nodes are adjusted to one another, forming a rigid bracelet. Once the bracelet of the required length is ready, a loop is formed at its end into which the clasp earphones are pulled.
Made of copper wires without braid
You need to remove the braid from the wire without cutting the plug. This will prevent the wires from falling apart.
We braid four wires along the entire length of the cord. We divide the resulting braid into segments that correspond to the size of the wrist circumference. We use a soldering iron to solder these segments into one at both ends to get many braids in the bracelet. Metal tubes from lock fittings, sold in any handicraft store, are put on the ends.
The disadvantage of such jewelry is not only the need for soldering skills, but also the fact that the bracelet can stain the skin.
Choker
The choker has a peculiar weave that allows the bracelet to stretch to fit the head and shrink to fit the neck, without squeezing it. Decoration woven in this style looks impressive and is very easy to make.
Making a choker bracelet - in the following video:
The prepared wires are fastened with a paper clip. The right wire goes around the left one in front and is pulled back over the formed loop. The same is done with the left wire - it is passed in front around the right one and pulled out over the girth. In this way, both wires are alternately woven to a chain of the required length.
In the first case, securely tie the cords in knots and cut them as close to the knot as possible. In the second case, you will have to remove the braid from the cord and twist the wires together. It is ideal if you fill them with hot glue so as not to prick the skin of the neck. For the third option, you will need to open the microphone box, remove the wires from there and insert the ends of the choker in their place. Then snap the box shut.
With wire
If you want something completely original, then an option is possible when a strong wire of the required length is inserted into the headphone cord. Then the wire is formed into a spring of several curls. A bracelet painted with gold or silver acrylic looks impressive. To prevent the headphones themselves from dangling on your wrist, they can be fixed in the desired position with hot glue.
Macrame style bracelet
If you have weaving skills, for example, macrame, then they will also be greatly needed in our business. This wrist bracelet, knitted using flat knots, is more reminiscent of a factory item. Especially if you have little experience and a beautiful, catchy braid. Take two wires, bend them in half, and tie them to a fixed stick. You get 4 “cords”: from left to right – 1, 2, 3, 4. Now take No. 4 and through No. 2 and 3 place it on No. 1. In turn, the 1st wire is placed on the fourth, tucking under 2 and 3, into a loop. The resulting knot must be tightened. The next step begins with wire No. 1 and the actions are mirrored. We repeat the process until the end - until we get a bracelet of suitable length. When finishing the work, secure the loose ends (cut off the excess). You connect both edges with a clasp - that’s it, admire it and decorate yourself with a new thing!
How to make a choker from headphones: instructions and diagram
There is a standard choker weaving pattern, which is the most common. This is exactly what the most popular “collar” looks like. Before weaving a choker from headphones, read the step-by-step instructions. The execution scheme is similar.
To find out more, go here. But copies will be available at participating dealers on launch day, October 13th. Click here for more information. They also bring an incredible sense of immersion into the virtual world. This method takes the last image displayed at 60 Hz and creates a new image at 120 Hz based on the last head movements performed by the user.
This list will be updated regularly. It will be updated regularly. Its range of games spans a wide range of genres, including shooting, puzzle, racing, horror and more. The players enter a salon where several characters are drinking. . We hope, however, that publishers will offer a wide range of prizes and experiences.
To make the diagram clearer, the cords on it are highlighted in different colors.
Here's a short step-by-step instruction. If you have any questions, please come back.
- We cut off all unnecessary parts from the headphones.
- 2. Carefully, so as not to cut the cords, remove the latch at the point of their connection. We separate the cords along the entire length.
3. Use a stationery clip to secure two cords side by side. Wrap the right cord around the left loop.
The true resolution of a cinematic screen depends on the screen size and the resolution of the content being displayed. The current cinematic mode is a virtual screen floating in a black space, such as when you are in a movie theater that is pitched in darkness. It can be worn for a long time.
However, as with any display device, we recommend taking a 15-minute break every hour. Is there a risk of myopia with long-term use? These are the optimal viewing conditions required to watch a 60-inch TV. You can bring lenses closer and further away from your face for maximum comfort.
Nikolai
Now we will talk about how to make headphones and what to make from old headphones, as well as much more. Has your Favorite device, which has accompanied you everywhere for many years, finally broken down? Do you somehow not want to throw away your old headphones or do you just feel sorry? Take your time, there are several ideas that will extend the life of your headphones. The most common of them is to weave a bracelet from your headphones, the use of which you can come up with yourself. Also, some craftsmen make small speakers from old headphones by making holes the size of the speakers in the bottom of a plastic cup. Using the Internet, you will find many other options.
However, particularly large or unusual glasses may not be suitable. Q: My head is larger than average. However, if you have any doubts, the best thing to do is go and try it for yourself! It is recommended to turn off surround mode or use standard stereo headphones with a cable that does not support surround sound.
A button located on the back of the helmet allows you to unlock the arch mechanism to open the helmet above your head. Once placed on your head, two knobs located above and below this button allow you to adjust and stretch the headband to ensure the helmet stays in place and securely in place. The most important element of the helmet is the visor. There's a key on the bottom right edge of the screen that, when pressed, allows the visor to move forward or backward to adjust the vision. Press this button to extend the visor screen and leave room for glasses or pause to see your surroundings.
What can you make from old headphones?
Homemade speakers.
Using old finger-type headphones, a coffee glass made of thick cardboard, medium or large, adhesive tape and electrical tape, it is possible to make an excellent external speaker system that has a very good sound. In the bottom of the coffee glass, a hole is made to fit the size of the earphone, where the sound-reproducing element is installed. Fixation is carried out using adhesive tape and tape.
Thus, a good virtual reality system consists of several elements: a screen, a set of sensors to know the direction of your gaze, another set to follow the movements of your head, joysticks for natural interaction with your hands in the eye, a virtual universe and finally a source that creates and sends images.
The screen is the central element of the helmet. It is located just a few centimeters from the large loops. Therefore, its pixels are significantly enlarged, and this creates a problem: if the resolution is not enough, the user sees an image consisting of small squares, for example, a mosaic of colors. Therefore, the screen should have the highest possible resolution.
Microphone.
If your microphone is broken, don’t despair; to communicate in programs like Skype, a microphone from any headphones will do, which needs to be built into your webcam or other device whose microphone has broken down. Using tape, the microphone is fixed in the case, and the wires are carefully wound to the cable of a web camera or other gadget that is equipped with a microphone.
In practice, if anything, the image quality is too close for this criterion to be sufficient for your decision. On mobile headsets, it all depends on the smartphone you are using. On paper, this is the cheapest helmet that offers the best definition.
In all these cases the resolution remains essentially too low. The type of screen is also critical. The last point that greatly affects the quality of the sensations created on the player: the width of the field of view. The wider and closer to the natural human field of vision, the less the user will perceive the presence of their helmet.
Magnets.
From old headphones you can remove neat round magnets that can act as a clamp on any metal surface.
Bracelet.
You can weave a cute bracelet from damaged headphones. Carefully cut the ends of the wires and connect them together using a soldering iron, and put metal rings on the connection points.
Another very important point for an optimal experience is the ergonomics of the helmet, because the user must be able to fine-tune the position of the lenses in front of the eyes in order to see a clear image, and then because the helmet must minimize the penetration of external light. Finally, because it is unlikely that you can envisage a long playing session with a helmet that is too heavy or poorly balanced.
It follows your gaze and more
Its two-piece design makes it much easier to wear and more comfortable to wear. It is better balanced and can be used without problems with glasses. Important because the screen is not the only essential element for creating virtual reality. It is also necessary that the displayed scene is displayed in the viewing direction. To do this, helmets must detect head movements. You might think that a couple of accelerometers would be enough, but the problem is a little more complex. The rotation and tilt of the head must be controlled as quickly as possible so that the brain does not perceive any discrepancy between its actual movements and the virtual image captured by the eyes.
How to make a bracelet from headphones in the form of a spring
To do this, you will need wiring from one of the headphones and a piece of flexible thin wire. Calculate approximately how long you want to make a bracelet from non-working headphones.
Now cut the required length of wire and separate the connected double headphone wires to make one wire. You don't have to remove the earphone; it will serve as an additional decoration.
Carefully push the separated wire from the earphone into the middle of the wire cavity, after which you wrap the bracelet around your hand, but not tightly, so that there is no swelling. Ready! Now you can show off the new decoration you made with your own hands!
Ready! Now you can show off the new decoration you made with your own hands!
Making jewelry
Even the simplest weaving technique allows you to make an unusual product with your own hands. It is possible to make keychains, crowns, models from intricate patterns and figures. Jewelry is usually created from wire-braided beads. It looks original and is suitable for various events. Simple patterns for beginners will allow you to weave your first product. It is recommended to start with something easy. Rings and pendants are quite easy to create.
The work does not take much time, so it can easily be completed in one go.
It is with such products that it is recommended to begin mastering this type of needlework. To create a ring, you should prepare the following materials and tools:
- copper wire;
- large bead;
- pliers and tools with curved edges;
- cylindrical object.
The latter must correspond to the diameter of the finger. It is on this basis that weaving will be made. Now let's see what a step-by-step master class looks like.
- Take a piece of copper cord measuring 15-20 cm.
- Place a bead or other decoration in the middle of the piece.
- Wind the wire onto the cylinder. There should be three turns. It is important that the ends of the wire stick out in different directions.
- Take the tail and pull the copper cord tightly. Make three entwinements around the bead. Each next turn should be lower than the previous one.
- Make turns on each side of the ring. The wire must be pulled as tightly as possible.
- Flatten the tip of the copper material using pliers and press it against the ring. It is important to place the end on the outside. Otherwise, the wire may injure your finger.
- Press the loops as tightly as possible to each other.
The product is created using the Wire Wrap technique. It is easy to learn, so it is suitable for professionals without experience. The following materials and tools should be prepared:
- copper wire with a cross section of 2 mm - 30 cm;
- the same wire, but with a cross-section of 0.7 mm - 60 cm;
- small beads – 12 pcs.;
- pliers;
- hammer;
- ruler;
- round nose pliers.
The work doesn't take much time. You must proceed according to the following instructions.
- Take the thick wire by the end with round pliers.
- Wind the copper into a spiral in increments of 2-3 mm. The last turn should be 5 mm wide.
- Bend the end of the cord into a loop.
- Flatten the spiral. To do this, tap it with a hammer. It is important not to damage the coating on the material.
- Attach a thin wire to the loop.
- Make turns with beads in the center on the last row of the flattened spiral.
- Nibble off the remaining cord and flatten the tip using pliers. Press firmly onto the pendant from the outside.
Glass bead pendant
Using glass balls, you can create simple but original jewelry, including pendants in the form of a bracelet for your hand. To do this, first place the balls in an oven preheated to 260 degrees for 20 minutes, and then immediately place them in water with ice. The result will be workpieces with internal cracks, but a smooth surface.
To make a fastening for such a bead, you will need a cap and a pin, the hook of which is inserted with the loop up, and another loop is formed from the remaining end for the chain.
All that remains is to smear the inside of the cap with a sufficient amount of glue and fix the bead. Based on the length of the chain or cord, you can turn the product into a pendant or bracelet.
Hook lock
Jewelry with this clasp option also has a teardrop shape. Products with such fastening are easy to put on and take off. As an advantage, it is worth noting the huge number of variations in the implementation of such a lock. It comes in any shape, made of plastic, wood or metal. The negative point is that it is unreliable and the decoration is easy to lose.
How to make a clasp on a bracelet with a hook? To do this, each part of the lock has holes for gluing a cord, as well as small loops to which a chain or textile, or a clamping part, clings. When connecting, you can add a cord with decorative elements - large beads, key chains or plant figurines. The ends of the bracelet are inserted into the hole in the lock and then clamped using a special device.
How to make a choker from headphones: instructions and diagram
There is a standard choker weaving pattern, which is the most common. This is exactly what the most popular “collar” looks like. Before weaving a choker from headphones, read the step-by-step instructions for creating jewelry from fishing line. The execution scheme is similar.
To make the diagram clearer, the cords on it are highlighted in different colors.
Here's a short step-by-step instruction. If you have any questions, please refer back to the previous post.
- We cut off all unnecessary parts from the headphones.
- 2. Carefully, so as not to cut the cords, remove the latch at the point of their connection. We separate the cords along the entire length.
3. Use a stationery clip to secure two cords side by side. Wrap the right cord around the left loop.
4. We carry out the same action with the left cord.
5. Next we make similar loops, alternating the cords.
6. Continue weaving according to the pattern.
The headphone choker is ready! It turned out pretty cute! The loops of the decoration stretch, making it easy to put on over your head. At the neck they take a regular shape, easily adapting to any size.
Of course, on this basis you can come up with your own model, which may be even more original.
Do you want to know what to wear with a choker? Check out our tips - original sets in tumblr style!
Wire weaving patterns and methods
The first and second pictures show various methods of weaving from two, three or more pieces of wire. Weaving in the form of a braid (Figure 1, I a, b, c, d, e). Take a piece of wire, bend it, and fasten the second wire to the first at the bend. For convenience, the upper part is secured with a nail to the board and woven as shown in the figure. You can make a rope out of two wires. Having connected two pieces, twist them to the right or to the left. Two “ropes” twisted in different directions and placed together form a Christmas tree.
Wicker “path” (Figure 1, II a, b). Taking a wire 1.5 mm thick, bend one end of it, and weave it with thinner wires at the bend until the width required for your path is formed. Having completed the first row, the end of the first piece of wire is bent, passing it between the ends of the entire braid, like the movement of a shuttle in a loom, and weaving of the second row begins. Having finished the second row, the end of the first piece is folded again and passed between the ends of the braid, but from the opposite side. In this order, weave the path to the desired size.
Braided round belt (Figure 1, III a, b, c, d, e, f, g, i, j). The figure shows in sequential order the weaving of a belt from four ends of wire.
When weaving, you need to remember that each row ends by threading the last end into the loop formed by bending the initial one. A new row can be started from any end, but the last one must be threaded into the loop of the first, thus completing the weaving of the row.
The belt is woven from any number of wires. Figure 2 shows the weaving of two belts around the rod (front view and side view). The rod is made up of several wires placed in a row close to each other.
The first end of the wire is threaded behind the rod and forms a loop on the side of the rod, and the second end of this wire, encircling the rod from the front side, is threaded into the resulting loop and wound behind the rod. Then the first end of the wire is encircled around the rod from the front side and threaded into the loop of the second end, and so, doing row after row, you can get a belt of any length.
The second exercise is slightly different from the first; the sequence of its implementation is shown in the figure.
Making wireless headphones from wired ones! (13 photos + 1 video)
To begin with, I bought these same wired headphones - not the original ones, of course, but just well-made Chinese ones (folding, durable)
and the cheapest Bluetooth speaker-keychain for 130 rubles
Naturally, the column cannot be built in entirely; it was immediately disassembled. The Chinese speaker is easy to disassemble - it fell apart on its own. All that is needed from it is the internals and then only the control board and the battery.
The speaker has one speaker, but we don’t really need it, we cut it off too. Having disassembled the headphones (only one ear needs to be disassembled, since in the other there is just a speaker and a wire to the second ear we need, where the control board will be attached), I soldered the headphone speakers to the board and checked the entire structure for robotic functionality
Then I tried on how the board would fit in the new case
Marked and made holes for turning on and charging in the headphone case
I wanted to use the button from the column as a power button, but it was already lost during the hectic activity and I just put a bolt, making it a power button. First I hooked the board up to the power cable - this way it would be better to center it along the holes in the case (you won’t miss it) and glued everything with hot glue.
Then all that remains is to put everything back together and test it!
The headphones turned out very well. If I hadn't lost the button, it would have been fire! Charges for about 2 hours and plays for about 3 hours. I recommend this device! And yes, my case was chosen to be very flat, so the battery did not fit in and I secured it inside the darling. If you like the idea, you can watch the creation video here.
Selection of schemes
Below is a selection of patterns for weaving bracelets from laces.
1) The most common knot in woven bracelets is the double flat knot.
2) The next weaving option is “Tatting” knots with “picot” air loops along the weaving. Tatting knots are also called left and right loop knots.
Here the tatting knots are woven not on one knotted cord, but on two.
3) The Josephine knot (another name for the bow knot) is another way to weave a lovely bracelet.
Related article: DIY candle holder from a glass jar: ideas for Halloween
4) The Turkish knot or also called the “Turkish head” knot is very popular among lovers of bracelets with interesting patterns.
5) Weaving a variety of braids from 3, 4, 5 and 6 laces does not cause difficulties for beginning craftswomen.
6) A Celtic knot (“Heart” knot) can be woven for the entire bracelet and simply tied at the ends of the laces.
Spring bracelet
First, let's create a bracelet from headphones in the shape of a snake. What you will need: elastic narrow wire and one of the wires. Estimate the approximate length of the future item. Cut a suitable piece of wire. You can throw one of the speakers for decoration. Now carefully push the wire into the braid of the former earphone. Try to implant it so that it gets between the wires inside - then it will be easier for you to push through, and the braid will not get holes and deteriorate. When everything is ready, wrap the headphone bracelet around your wrist in the form of a spiral snake. Secure the free end to the “button” of the speaker. And flaunt an elegant piece! A similar product will not look very simple if the braid is not standard black, but gold or silver. Naturally, such a design will be more exciting. Although the idea of making a bracelet out of headphones is already extraordinary!
What kind of wire to weave from?
Homemade things are always original. Wire weaving requires some patience, but a fun decoration can add to your own jewelry box or become an excellent gift for loved ones. Weaving is usually made from soft wire. Products made from copper and its colored variations look beautiful.
Skilled needlewomen can make jewelry from silver and even gold wire. Then the product already belongs to the category of jewelry and is valued much higher. However, connoisseurs of beauty can easily create something unusual from simple wire.
For needlework, it is better to use copper, brass, or aluminum wire.
Galvanized iron material is also suitable. The easiest way to work is with copper; it is recommended for beginning craftsmen without experience. This metal does not oxidize, so the jewelry or decorative item will last for many years.
Rough wire can be combined with various beads and stones. This allows you to make the appearance of the finished product more elegant and interesting.
It is worth noting that not only jewelry can be woven from wire. Handmade objects made from this material will decorate the interior of any home.
Bloody necklace is a Halloween trend
Every year at the end of October the Day of the Dead is celebrated. “Nothing American is alien to us,” our compatriots paraphrased the classic and began to prepare appropriate outfits, apply frightening makeup to their faces, and paint their nails black. Jewelry on this day takes on an ominous hue: rings with skulls, earrings with devils and bats, a necklace in the form of a web with a spider. It will take very little time to make a bloody tattoo choker.
The patience spent will be rewarded with a peculiar neck decoration, which from a distance resembles streaks of blood.
This is a silicone choker, but you can make a beaded jewelry similar to it
In the arsenal of means for producing the bloody “strangler”, the main materials are:
- fishing line;
- red beads;
- 15 beads to match the beads.
We cut the fishing line as follows: 8 pieces of 2 cm each, 7 pieces of 3.5 cm each and 1 more - according to the volume of the neck (taking into account the ties). Make a knot at the end of each of the 15 short pieces. First we thread one bead at a time, and fill the rest of the segment with beads. We tie the free ends to the long part of the fishing line. We alternate the resulting “pendants”, starting with a short segment. The approximate gap between the hanging threads is 1.5 cm.
Don’t forget to string the beads onto a long fishing line, the ends of which are tied in knots when finished. The finished tattoo choker can be completed with a clasp or simply tied the ends together.
What can be used for a pendant?
to make jewelry of this kind .
The following types of accessories will be needed:
- beads and beads;
- chains;
- ribbons with rhinestones;
- bead huggers;
- holders for pendants or pendants;
- separators;
- connectors for making multi-tiered jewelry;
- clips for ribbons and laces;
- metal clasps (carabiners, magnetic or twist-on);
- connecting rings;
- metal pins and nails for connecting decoration elements.
Unique DIY silver bracelet
Greetings, Samodelkins!
In this article, the author of the YouTube channel “Bonn Factory” will show the detailed process of making a silver bracelet with your own hands. By following the instructions below, you can repeat this project if you wish.
It was decided to print the links of the bracelet on a 3D printer, since the author does not yet have rollers or other hand-held jewelry tools.
Next, according to the logical parts we have learned, we will get 3 silicone molds. All this is necessary so that we can more conveniently and quickly copy the necessary elements in the quantity we need.
In the near future, the author plans to switch to a vulcanizer, as this is a more modern and professional method of creating forms, but for now we will use plastic formwork, a glue gun and two-component liquid silicone the old fashioned way.
Our Christmas tree is completely assembled, of course it’s not the smoothest yet, but still already like a real one.
Also, the master is not used to making parts with a reserve because he still strives for qualitative indicators, and not for quantitative ones. Well, except that one additional link was made from the calculated value, since it is difficult to estimate the required length of the bracelet, because he had never had to deal with them before. Next comes the process of forming and calcination. Here everything goes according to the standard technical process for this operation. First you need to dilute the mixture in the following proportion: per 100 grams of gypsum 38 ml of pure distilled water. And in order not to miss the moment of setting of the gypsum, it is necessary to do all this with the stopwatch on and perform the molding within seven minutes from the moment water enters the dry mixture.
Next is the assembly. The author began to assemble the product without thinking about the direction of the asymmetrical links with faces, and naturally made a mistake, but noticed it in a timely manner and successfully corrected it all.
Author's video:
Source
Become the author of the site, publish your own articles, descriptions of homemade products and pay for the text. Read more here.
How to weave copper wire
Many craftswomen use copper for their work, because it is quite soft and flexible, and also has a beautiful matte shade without a strong shine. For beginners, we will tell you what techniques and techniques are used in their work.
Weaving
This method uses various versions of the braid from several stripes. After manufacturing, the workpiece needs to be slightly flattened, giving it a flat appearance.
Braid
In this case, a thicker strip (or several) is wrapped in a certain order with thin fibers.
Attention! In the same way, individual parts of the structure are connected to each other.
Bending and forging
For openwork patterns the following action is often used. A thick strip is bent according to the pattern and slightly flattened on an anvil with light blows of a hammer.
Decoration
To decorate, craftswomen use various inserts. For example, beads, beads that are strung on a thin wire and screwed to the main part.
Headphones - a “second” life
Every music lover who listens to music through headphones has repeatedly encountered the problem of their sudden breakdown. And every such amateur will confirm that most breakdowns occur as a result of the headphone wire breaking near the plug. How to solve this problem? Throw away your headphones and buy new ones? Don’t rush to throw away your headphones, because in just half an hour you can breathe a “second” life into them. And now we will discuss how to do this.
Let's get started
In order to understand the principle of making crafts and feel how metal behaves in your hands, we recommend trying something simple first. Three-dimensional figures require a lot of skill and preparation, as well as high material consumption.
Tattoo choker: its features and varieties
The similarity in the name of such jewelry and tattoos was due to their visual identity. The neckpiece is so thin and elegant, it fits so intimately to the body that at first glance it will seem like a drawing by a skilled craftsman. Only upon closer inspection can you discover that a well-executed accessory has been mistaken for body art.
Tattoo Choker features a variety of weaving materials. In art and hardware stores you can buy colored fishing line, craft wire or knitting threads. All this will serve as an excellent material for weaving openwork “collars”.
Today, in addition to styling their necks, young divas decorate their wrists, ankles and even fingers in the form of rings with choker bracelets. This design is minimalistic and not pretentious, it is not bulky or protruding, and, therefore, is suitable for those girls who like discreet accessories.
A tattoo choker is suitable for everyday style and will also complement other jewelry.
In addition to ordinary, single-layer tattoo chokers, there are also double ones, but they, probably due to the inconvenience of wearing, are not particularly popular. Tattoo bracelets and tattoo “collars” made of beads are a special chic for teenagers.
Magnetic mount with hook
This type of lock is very popular among bracelets of various models due to its ease of use and originality. A magnetic lock with a hook can be deliberately long or, on the contrary, miniature, made in brass, gold, bronze and silver. Its use in the stylistic design of a product can significantly improve the appearance and give it a unique charm. This is a very simple solution, so it’s worth decorating it with some addition in the form of a lush flower, a few strings of beads or beads.
Leather bracelet
To make this popular, stylish bracelet at home, you don't need any special sewing or leather working skills. Decorating here is also not difficult, so even a child or a beginner can master making a leather bracelet!
Prepare a piece of leather measuring 25x5cm. The length may be different: measure your wrist and add another 2-3 cm for the rivet. Round off the cut at the edges, giving the desired shape with scissors, as in our template.
The main highlight of this decoration is the bow. This is what we need to form now. Carefully fold the piece of leather so that neat folds form in the center.
Now you need to secure the folds: to do this, wrap the middle with strong threads in several turns (it is better to use a polyester spool).
Cut a piece of leather measuring 4x1 cm.
Wrap it around the center, masking the thread ring, and sew it on the back side into a ring.
The final touch is to attach a snap to both edges of the bow to turn it into a full leather bracelet.
Thanks to the variety of shades of the material, such a decoration will be appropriate both in a classic toilet and in a trendy look for a friend.
Sketch
Once you have decided, we proceed to the idea itself and the sketch of the model.
The sketch does not require drawing skills. Its task is to help you see what you have planned and, if necessary, change the arrangement of parts on paper, and not to redo the decoration itself in search of a better option.
Therefore, take several sheets of paper and sketch out your vision. Three different options are enough. Next, choose one and perfect it. All!
Here is one of my realized ideas
This model is universal and fits both with jeans and with a dress, blouse and skirt. It will lengthen your image, add tenderness and lightness to it.
Some advantages. I have prepared a detailed master class and everything is there step by step.
You will learn:
- how to fasten chains and attach parts to it so that it is unnoticeable;
- how to work with genuine leather;
- form flowers from it;
- work with jewelry tools.
Yes, the most important thing! I will always be in touch with you and will help you at every step. I will support and answer all questions. More details
Share how you come up with ideas?
Save the pin to your ideas box
Bookmark the article and share it with like-minded people.
All the best to you!
Yours
Contact | Pinterest
Consultations | Master classes
The history of the decoration
The history of this decoration goes back to the distant past, when ancient Indian tribes wore wicker collars, either to protect a vulnerable part of the body during battles, or as a talisman against evil spirits. Only that neck “armor” was made from natural materials - bones and teeth of killed prey.
In medieval Europe, wearing chokers made of silver and with pointed spikes served as a way to protect oneself from “dark” forces and from criminals.
The history of this decoration goes back to the distant past, when ancient Indian tribes wore wicker collars, either to protect a vulnerable part of the body during battles, or as a talisman against evil spirits
In medieval Europe, wearing chokers made of silver and with pointed spikes served as a way to protect oneself from “dark” forces and from criminals
The Renaissance and Classicism made the choker a real work of art
The Renaissance and Classicism made the choker a real work of art. Necklaces that fitted the neck were made of precious stones, the basis of which was gold and silver threads.
Modern subcultures, wanting to shock the public, have introduced leather chokers, inlaid with metal rivets, spikes and elements of dark symbolism, as part of their image. In the 90s of the last century, buying this accessory was not difficult. The era of today allows you to make a choker with your own hands.
Modern subcultures, wanting to shock the public, have added leather chokers inlaid with metal studs, spikes and elements of dark symbolism as part of their image.
https://youtube.com/watch?v=ukxt6NbHbZE
Cord Knots
Today there is a wide variety of bracelet weaving techniques. Craftswomen use different types of knots to create original and spectacular products.
Classic types of braiding include: four-cord braid, single and double puzzle, maiden braid and circular braid.
Even new weaving techniques are based on classic knots. Each needlewoman chooses a type of weaving that is convenient for her.
The bracelet made using the Turkish head knot looks impressive. It is woven around a cylinder that must fit the size of your wrist.
To complete the bracelet, you need to make a strong knot.
There are several types:
- Surgical - first you need to make one so-called “half-knot”. To create it, you should hold one end of the cord with one hand, and draw the other end around the first. Then create another half-knot. To secure, the lace is wrapped twice in the first half-knot, and once in the second. After this, the ends of the cord should be cut, leaving no more than one and a half centimeters.
- The usual way is to insert one end of the lace into the loop on the other side, then move the knot away from the loop and tie the ends together. But this option is impractical.
- Sliding is one of the most difficult options because it requires time and patience. It can be used to secure cotton cord.
To tie a lace, you need to leave a margin of 14 cm on each side. You need to create a loop from the right lace, and the tip should be on the outside edge. Take the left lace and circle the loop with it several times, then you need to create three more turns. After this, the two ends need to be pulled into a loop and tightened.
Next, we perform the procedure again to form another node, which will be passive. Then you need to make a loop at the second end of the lace - circle the free end five times and tighten it into a knot. You need to insert the remaining end into the resulting loop. The node is ready.
Wire pendant with stone
This DIY pendant is made from gold, copper wire and stone. It is better to take the last element with a hole to make it easier to attach it to the decoration.
For the braid, 2 equal pieces of copper wire, one millimeter thick, are taken as the base. It will have to be wrapped with gold wire, which is twice as thin as the base.
The copper pieces are folded parallel to each other. After this, they begin to connect them with gold wire in a spiral according to the principle: 4 turns around one base, 2 turns around both bases.
Having made the decorative braid of the required length, you need to thread one of the free ends into the hole in the stone. After this, place the wire around the perimeter of the center of the decoration. After this, the remaining ends of the copper wire are masked under a decorative curl at the top of the pendant.
A loop is formed from the other end through which the chain will pass, and after making a spiral, the ends are fixed in the center on the inside of the product. In a similar way, you can make other models of stone pendants with your own hands.
Christmas tree
To create this decoration, which can serve as a unique gift, you will need very little effort. Make a base from copper wire by twisting it in a spiral. To prevent it from “walking” in different directions, help yourself with pliers, starting from the outer radius and moving towards the center. The more turns you make, the more stable your structure will be.
Next, make a trunk extending from the center two centimeters in height and begin to make volumetric turns, reducing their radius towards the top. The New Year tree can be decorated with tinsel and other decorations, giving it a festive look.
Plug for headphone jack
The plug is made for derivative sound. Screw on the protective cap and close the hole. Do it yourself.
The most common color =”en-us”>
- earth (common) – yellow (gold)
- left - blue (green)
- right - red
Like any rule, this one also has exceptions, especially when it comes to headsets. For example, it happens that the right one is green, the left one is blue, and the red one is a microphone. Sometimes the wires are not completely the same color, but have stripes of color combined with yellow.
But pure YELLOW is always EARTH. Mixtures of colors with yellow, in most cases also earth, but you need to check.
Therefore, the first thing we do is twist the yellow wires of the headphones and the AUX cable together.
Now we alternately twist the headphone wires with the AUX cable wires. The bottom line is that the red wire of the AUX cable connector needs to be twisted with the red wire of the headphones and then the right earphone will start singing.
Have you determined? Great! Now the wiring that remains unclaimed can simply be cut off.
So, the wires are twisted, the headphones are singing - there’s a smile on your face)
We isolate the wiring=”en-us”>
We removed the varnish from the wires, which means now they have no insulation.
If you close the twists together, you will either make yourself a mono or cut off one channel. Therefore, they need to be isolated to prevent short circuits between themselves.
First, we isolate each twist separately. In addition to the insulation itself, this will also strengthen the connections. For some reason I did this with masking tape, it was probably closer
It doesn't matter
Now let's wrap everything together with wide tape, 3-4 or 5 layers - a matter of taste)
It is better to space the twisting points further away from each other in order to eliminate any short circuit as much as possible.
Types of cords
The materials used to create unique bracelets are ordinary laces, which can be purchased at any shoe, fabric or hardware store.
Needlewomen mainly use the following cords:
- Waxed lace is available in a variety of colors, so every craftswoman can choose the perfect color for herself. Such cords are quite durable due to cotton weaving, which is additionally coated with wax. Bracelets woven from waxed cords are practical and dense.
- The suede cord has a beautiful velvet surface. But, despite the elegant texture, such decorations are durable. Suede is also available in a wide color palette, among which you can find both classic colors and bright acidic shades. The only disadvantage of this material is that it rubs off quite quickly, forming bald areas, and the decoration loses its attractive appearance.
- Nylon cords are more often used to create beautiful knots for bracelets. The fact is that the ends of such laces can be easily singed, which means you can use absolutely any pattern and pattern without fear that the weave will unravel.
There are many patterns for weaving laces. Handmade bracelets will be a great gift for your best friend or boyfriend.
First, you should learn how to weave simple knots, and then you can start creating original designer jewelry using more complex patterns and techniques.
Three ways to braid headphones for your phone
To complete the work we will need:
- Crochet hook;
- glue;
- floss threads of different shades (you can use “Iris”);
- beads (beads);
- small pendants;
- fishing line
Now let's look at each of the decoration methods in detail.
The braiding of the headphones is carried out using the “boring” technique. Most often, young people use it when braiding hair. You've probably seen boys and girls with threads woven into their hair. Most often they are of different colors and textures, with the addition of various beads and fabric flowers. To perform bore weaving yourself, no special knowledge is required. You just have to start, and everything will be easy and simple.
The most fashionable and beautiful chain jewelry of this year
Chains of different sizes are such a current motif that their elements can be found not only in necklaces and chokers, but also in bracelets, earrings, rings and even watches.
Schemes for weaving bracelets from laces: we analyze male and female options
Woven products, not only bracelets, but also belts for clothes, collars and cuffs, necklaces and headbands, scarves and stoles, bags and clutches, covers for phones and chair seats and much more, consist of knots, the tying technique of which can be easily found in such needlework as macrame. Macrame has its roots in Ancient Egypt, Greece, Iran, Peru and China. People of those times tied stone axes with similar knots and knitted mats. To this day, macrame is popular among both the female and male half of humanity. You will find patterns for weaving bracelets from laces below in the material.
Men, of course, do not wear jewelry, but they can wear a minimalist stylish bracelet made of knitted or leather cords. Women's jewelry is more varied and a woman has to have a large number of them in her wardrobe, matching them with each of her outfits, but in order not to spend your entire budget on beautiful things, you can weave an original bracelet yourself. For a woven bracelet, various materials are used: threads of different composition, incl. and floss, beads, satin and leather ribbons, fabric, knitted and leather laces, and to make the bracelet more attractive, it is recommended to add beads of different sizes and colors.
Selection of schemes
Below is a selection of patterns for weaving bracelets from laces.
1) The most common knot in woven bracelets is the double flat knot.
2) The next weaving option is “Tatting” knots with “picot” air loops along the weaving. Tatting knots are also called left and right loop knots.
Here the tatting knots are woven not on one knotted cord, but on two.
3) The Josephine knot (another name for the bow knot) is another way to weave a lovely bracelet.
4) The Turkish knot or also called the “Turkish head” knot is very popular among lovers of bracelets with interesting patterns.
5) Weaving a variety of braids from 3, 4, 5 and 6 laces does not cause difficulties for beginning craftswomen.
6) A Celtic knot (“Heart” knot) can be woven for the entire bracelet and simply tied at the ends of the laces.
Bracelet made of laces and beads
In the following example, you can consider step-by-step weaving of a bracelet from laces and beads.
You must first measure the size of your wrist with a centimeter and buy a cord 4 times longer than your wrist size, because... you need a reserve for knots, you will also need 9 large beads of different colors and 2 smaller beads for ties.
The color of the cord does not have to be black, the choice depends on desire.
The knot used to weave this bracelet is called a double flat knot.
First of all, you need to cut the cord into three cords of different lengths: one will be short, equal to the length of the wrist, an increase for the fit and size of the beads and bracelet ties; the other two are long, which will be used to weave knots and braid beads. Next, the cords are secured to the tablet or pillow with a pin, retreating a few (7-8) centimeters to the tie, and weaving begins. The laces should be arranged like this: two long ones along the edges of the short one.
1) The knots come first, you need to make 1 or 2 of them, double flat. You need to tie a knot like this: first the left single flat knot is woven, then the right single flat knot is woven underneath it, so you get a double flat knot, so that the knots look even and neat, you need to regularly tighten the short cord that goes inside the knot, so to speak, the base. The photo shows the sequence of weaving the knot:
2) Next, you need to put one large bead on the central lace, and the two outermost long laces wrap around the bead on the sides and again weave 1.5 double flat knots, one full double flat knot and one left or right single flat knot, depending on where was the beginning of the double knot. And again the bead is put on the central cord, and also tied.
3) Work continues in this way until all the beads are woven or until the desired length of the bracelet (wrist size) is reached.
4) At the ends of the bracelet ties, one small bead is placed on any cord on each side.
In order not to have to worry about tying a bracelet every time, you can weave a braid for ties with the same double flat knots. When putting on the bracelet, the ties move apart inside this braid and then tighten again to the size of the hand.
Paracord survival bracelet - description and how to weave a survival bracelet
Paracord bracelets, also called survival bracelets, are made from strong parachute cord. Paracord consists of numerous intertwined strands of nylon with a core. If you divide it into two parts, you can see that under the outer shell of intertwined threads, inside there is a light cable woven from several single cords, each of which consists of many interwoven fibers.
Why is a bracelet woven from paracord thread called a “survival bracelet”? The thing is that, if you get into an extreme situation, it easily unravels, turning into a strong rope, indispensable for many purposes. In addition, a paracord survival bracelet can be woven into a variety of necessary outdoor gear that can help out at the most necessary moment. Therefore, a paracord bracelet is an indispensable assistant for all tourists and extreme sports enthusiasts, which in everyday life looks like an original decoration.
The bracelet can be unwoven in a few seconds to be used for its intended purpose. There are many purposes for use:
- Medical care: rope and its fibers can be used as a hemostatic tourniquet, a splint for applying to a broken limb, dental floss, and can also be used to stitch wounds and make stretchers.
- Foraging for food. Paracord fibers are used as fishing line, bow string, making traps, hanging food or bait.
- Repair of clothes, tools. Used to sew up clothes, bandage shoes, tie up pants, and replace shoelaces. It is an indispensable thing when repairing equipment, bandaging parts of any structures, making handles for bags and other devices for transporting objects and things.
- Survival. It is used in the manufacture of weapons: rewinding handles, fixing the tip to an arrow or spear, and also as a bowstring in the manufacture of a crossbow for hunting. An indispensable thing when creating and securing parts of a shelter, tying the logs of a raft, making snowshoes, making fire. To start a fire, you can use flammable individual paracord fibers or use it as a bow string when starting fire by friction.
- Other purposes that can be achieved in everyday life: use as a cable for a car, a collar for animals, handcuffs, securing a load to a car, a sled, as well as paracord for drying clothes and as a rope ladder.
It should be taken into account that paracord is not used for dynamic loads, i.e. not suitable for any actions with the weight of a person (descent and ascent of a mountain, mountaineering, etc.).
Bracelet made from high-quality material To make a paracord bracelet with your own hands, you will need from 2 to 5 or more meters of this thread, depending on the width of the wrist circumference. As a rule, there are 1-2 meters of thread per 10 cm bracelet. In addition, you will need: a fastener, a lighter to burn the ends of the thread from unraveling, tweezers and scissors. In addition to a bracelet, paracord can be used to weave a watch strap, keychain, belt, and other accessories.
There are many patterns on how to weave a bracelet. Each of them has its own pros and cons, but the main requirement is one – the rope should easily unravel in a few seconds. With any weaving pattern, the survival bracelet should fit comfortably on the hand and have a flat shape.
How to make your own survival bracelet? You need to follow the instructions:
- The ends of the rope must be burned with fire to prevent unraveling.
- Four loops are made in the slot of the fastener.
- You need to make a loop from the long piece of paracord by pulling it through the first four.
- It extends about 5 cm, and tightens from right to left.
- Four loops need to be slightly loosened, then, using tweezers, pull out three more loops between each of them, leaving the fourth on the side.
- The loops need to be turned so that their left parts are in front.
- The cord is threaded through four loops, as in step 3.
- To complete the first row, you need to tighten the loops from right to left. Do not tighten them too tightly or twist them, this can ruin the appearance.
- Steps 3,4,5 should be repeated until the required bracelet length is reached.
- Once the desired length is reached, you need to pull the running cord through the last row. Its end should be on the right. You need to make gaps between the loops, and three more loops around the back of the fastener.
- You need to finish the weaving by pulling the end of the rope through the loop, then cauterize it or tie it in a knot. The last option is more convenient when untying.
To unravel the bracelet, you need to untie the knot, remove the clasps and pull the end of the paracord out of the outer four loops. If you pull the end, the bracelet will come loose.
Paracord diagram for a cobra bracelet
To weave a bracelet not only for the sake of a lace, you can expand its functionality and weave into it, for example, fishing accessories: fishing line, several hooks, sinkers. Weaving stages:
- The paracord is folded in half and attached to a clasp.
- From one end of the cord you need to remove 3-5 cm of internal fibers.
- The freed space inside the cord is filled with weights, 2-3 pieces are enough.
- The cut ends are joined together with glue, the protruding threads are singed with a lighter.
Another option is possible: attach the sinkers with tape or tape to the cord so as not to violate its integrity. But the appearance of the bracelet will suffer.
Fishhooks are simply glued to electrical tape, then wrapped around the bracelet.
- The required length of paracord is measured and secured with a clasp.
- The fishing line is wound around the paracord of the required length. You can also push it inside the cord if it is not too thick. Usually 6 meters of fishing line is enough.
- Next, around these two threads the main weaving begins, numerous visual examples of which can be found on the Internet.