Worries, work, public transport, crises - all this overcomes modern man. Depression strikes back. And what's the result? As a result, people stopped enjoying little things, although what kind of “rejoice” is simply noticing them. There is “Handmade” therapy that will help you unwind, create comfort in your home or work, and most importantly, bring a sense of celebration into your world. New Year's Eve in the house thanks to your own efforts.
In this article:
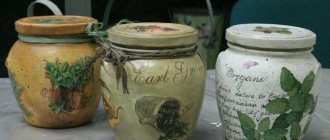
- do not throw away jam jars;
- unusual DIY options;
- ideas for those who have children.
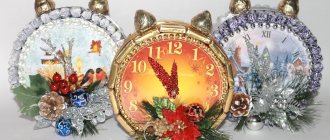
Making a decorative lantern-candlestick from cardboard
Working time: 2 hours
Pattern or template: download
According to the author. Do you want to learn how to make a lantern-candlestick at a minimum cost from cardboard? Today I will tell you how to do this. It is perfect for a New Year's photo shoot or will be an addition to your interior. I always look at all sorts of lanterns in stores, but sometimes the price on them is very steep, and I came up with the idea of making it myself. Moreover, the cost of such a lantern is very small, you just need to spend a little of your time.
You can print it out and make a pattern, but in this case I prefer to cut it myself rather than trace the template. Because there will still be errors, and the details will not be the same, the flashlight may turn out to be crooked. The template tells you how to calculate it. The template also shows the dimensions of the small lantern.
On beer cardboard (you can use binding paper) we draw our details of the lantern and cut them out with a stationery knife.
Cut out four parts.
We cut out 8 strips of 20*1.5 cm from binding cardboard, apply them to our workpiece and mark the cut angle.
Glue the side strips, at this stage I glued a pencil to the glue. Mark the cutting angle at the top and bottom strips.
From watercolor paper we cut out connecting strips: 4 side pieces measuring 18.5*2 cm, 4 bottom pieces 10.3*2 cm, 4 top pieces 6.5*2 cm, crease them in the middle, bend them and cut off the corners at an angle of 45 degrees. .
First we glue the upper and lower connecting strips, now and in the future we glue them with Moment-Crystal glue.
Then glue the side connecting strips. Let them dry a little.
In the meantime, cut out the bottom measuring 10.8*10.8 cm, make legs from four layers of cardboard measuring 2*2 cm. Glue the layers of legs together and glue them to the bottom.
We connect the side parts of the lantern.
Apply glue to the connecting strips and glue the bottom.
We cut out the top of the lantern measuring 7*7 cm and glue it, then cut out three squares measuring 6*6 cm and glue them together. Now we glue it to the top of the lantern.
We cut out four parts for the lantern dome from binding cardboard and connecting strips measuring 9*2 cm, 4*2 cm, 5*2 cm, 4 pieces each.
We glue the connecting strips in the same order as in the lantern. Let the glue dry so that it’s easier to glue later and everything doesn’t fall apart in your hands.
Glue the dome parts together, cut out the bottom measuring 9*9 cm.
Glue the bottom of the dome and cut out the top of the dome measuring 5*5 cm, do not glue it yet. We glue the dome to the lantern.
We cut out strips 20*1 cm long from binding cardboard (I don’t recommend beer paper for strips), for a small lantern strips measuring 15*0.7 cm.
Glue the strips crosswise in the lantern openings.
We make sure that the strips come out strictly from the corner, as in the photo, so that there are no distortions.
You can paint the lantern as you want