A paperclip is one of the most underrated things we use in everyday life. A piece of flexible and not very durable metal can be used in dozens of original ways. In Norway, the paper clip was even able to become a symbol of freedom - this is how it was used by the Norwegians who fought the Nazi regime. In this article we will tell you what can be made from paper clips and teach you dozens of useful and interesting ways to use them. Let's get started?
What can be made from paper clips
Life hacks with paper clips
Office trifles can be useful in a number of other situations.
Want to check it out? Painting eggs . To paint a chicken egg (for example, for a craft), you can make a loop from an unbent paper clip. An egg placed on this loop will be very convenient for painting. Glasses repair . An unbent paperclip can also be used as a screwdriver if you need to securely tighten a screw in the temple of your glasses. Storing posters and wrapping paper . You can use a paper clip to secure a paper roll. Inexpensive and very convenient. Photo stand . An ordinary stationery clip can serve as an original photography stand. Clasp . If you need a fastener, for example, for a chain, you can make it from two paper clips (see photo). Cleaning your comb . Using a paperclip is convenient for removing hair from a comb. Cleaning holes . We are talking about holes in various tubes, pepper shakers and salt shakers. You can clean them with the end of the product. Bread . A paperclip is convenient for closing a bag of loaf or bread. Opening the envelope . You can use the bent end of a paper clip to open letters. Fastening the bracelet . If there is no one nearby and you need to fasten the bracelet, a paperclip will help you do this. Gates . To quickly create folds on clothes, you can use paper clips. Postcards . Also, paper clips are a good option for original decoration of greeting cards. Tea bag . A stationery clip can be used to secure the bag to the edge of the mug. Hairpins . They can serve as small stationery clips in bright colors. Bouquets . Paper clips can be useful when creating various compositions and bouquets.
You will not believe
For residents of harsh Norway, the paperclip became a symbol of resistance to the occupying fascist forces. Residents of this country wore it on their clothes as a sign of protest and unity. This historical fact became the reason that the usual and simple stationery has several monuments, one of which is located in Russia, and even architects could not ignore the paper clip, creating several versions of buildings in the form of a twisted piece of wire.
The benefits of a paper clip, however, are not limited to this. Here are the TOP 5 proofs that you can make completely rational and useful things from paper clips:
- use as a “dog” for a zipper on clothes, shoes or a backpack;
- Using the bent end of a paperclip, you can easily clean a clogged hole of small diameter (in a garlic press, salt shaker, glue tube);
- a paperclip is an excellent stop for the constantly losing edge of the tape;
- men who wear a tie, but often forget to put on the special clips that hold this accessory in place, can use a little assistant from the world of office;
- classics of the genre are bookmarks made from paper clips, and we will devote the next section to them.
Read everything
Agree that losing the right page in a book, diary or even a simple magazine is always an unpleasant and annoying moment. Such a loss is especially infuriating when the necessary information must be found in record time. Bookmarks familiar to many from school desks help to avoid this. It is very easy to make such an accessory from paper clips; the photo shows several options for how the wire can be twisted, giving it an original shape.
A high-quality paperclip is made of fairly dense metal, otherwise it simply will not be able to hold the sheets together, and therefore making such masterpieces by hand will be problematic; handicraftsmen use pliers or round nose pliers for this.
You can avoid twisting and bending of the wire if you decorate the paper clip with something. There are absolutely no restrictions here: flags made of ribbons or paper, buttons, flowers, beads and rhinestones glued to the edge of a paper clip will make it a stylish and exclusive bookmark.
Doll hanger
- Take a paper clip (we took a white one).
How to make a hanger from a paper clip.
- Turn it over to the other side.
- We bend it with our hands (without using forceps) according to the photo below.
- Bend the top part to the side.
- We bring the left end of the paper clip to the center of the second end, simply joining them together.
- We take a screwdriver, bring it to the free end of the paper clip and press it with our fingers to its base. The wire will, as it were, “hug” the circumference of the screwdriver, forming the very necessary hook.
- All that remains is to connect the left end to the base near the hook and admire the result!
Master Class. Original frame made from paper clips
This unusual craft is suitable for a small drawing or photograph. The frame will be an excellent interior decoration and will make it brighter.
For production you will need:
What you need to create a frame
Step 1 . Even paper clips of the correct shape (without defects) and different colors are counted. It is advisable to select them so that no particular color predominates.
Selection of paper clips of different colors
Step 2 . Paper clips are glued together in pairs (preferably from different colors) to speed up the process.
Let's start gluing paper clips. Paper clips are glued in pairs.
Step 3 . After the glue has dried and the paper clips have been fixed, the pairs are connected to each other (4 pieces each).
Couples connect
Step 4 . Next, the paper clips are glued together in such a way that the result is 4 rows of 16 pieces. in everyone.
Staple row 4 rows of 16 staples
Step 5 . The rows are connected to each other using Moment glue. The evenness of the sides is checked.
Moment glue is used for fixation. The rows are glued together
Step 6 . That's it, the staple frame is ready! Additionally, it can be varnished so that it does not bend too much.
Finished frame made from paper clips
Step 7 . A drawing or photograph is inserted (for fixation, curved fastenings of paper clips on the back side are used).
A drawing is inserted into the frame. A thread is used for fastening.
Step 9 . The threads are tightened.
The threads are tightening
Step 10 . A loop is pulled through the opposite side.
The loop is pulled through the other side
Step 11 . After this you need to return to the middle.
Next you need to go back to the middle
Step 12 . The edges of the thread are re-threaded through the paper clips, a knot is tied and the excess is trimmed off.
Nodule formation
The end result is such a creative and colorful frame.
Creative frame on the wall
Original frame made from paper clips
Looks really nice
Office love
Another holiday that can be decorated with a paper clip is Valentine's Day. A real find for this would be a heart made from a paper clip. Making it couldn’t be easier, you just need to bend the longer oval up, making the point of the heart in the center. Crafts made from braided wire will look most impressive; it is best to take as a basis the colors traditional for this romantic holiday - pink, red or lilac.
After transformation, such a paperclip can be used for its intended purpose - to connect a stack of sheets; also, a heart made from a paperclip will decorate a very tiny Valentine card or a large postcard; it can be used to attach a note to a gift or a bouquet of flowers.
Making a garland
Using paper clips, you can make a very attractive garland with your own hands, which will certainly decorate the room for any occasion. To make such beauty, you will not need many available materials: scissors, bright sheets of paper, magazines and any thick printed materials, glue and paper clips will do.
Now you can make a garland:
By the way, if desired, the decoration can be made in several rows. And using paper clips of different sizes, you can create a very interesting garland.
It is worth noting that diligent women make curtains using this principle, and children make funny bracelets for themselves and friends.
Phone stand
Perhaps the simplest and most effective life hack:
- Take one or two regular paper clips.
- Bend the large “ear” 90 degrees.
- We bend the tail of the small ear and unfold it so that it stands parallel to the bent large “ear”.
A large paperclip will hold the phone alone; it’s better to take two small ones. Convenient to shoot life hacks or watch videos.
Master Class. Repairing a zipper on a jacket
To repair a zipper you need to prepare:
What you need to fix a zipper
Step 1 . First, the paperclip is inserted into the fastener slider.
The paperclip is inserted into the fastener slider
Step 2 . The paperclip is then twisted using pliers.
The paperclip is twisted
Step 3 . Excess parts are cut off.
Excess parts are cut off
Step 4 . The paper clip is wrapped in plasticine-rubber. After some time, when the plasticine dries, it will become as strong as rubber.
The paper clip is wrapped in plasticine-rubber
DIY stationery organizer made from iron cans
To find a pen, some people need to search the entire house and turn everything upside down. But if you have a stationery organizer, you won't have to go far to find pencils and pens.
You will need:
- cardboard;
- pencil;
- tourniquet;
- 6 cans;
- paper;
- scissors;
- glue;
- spray paint;
- ruler.
Progress:
- Coat the jars with glue and cover them with paper.
- Make a handle as in the photo and wrap it with a tourniquet.
- Then paint the jars and set them to dry.
- Arrange the jars in pairs, insert a handle in the middle, and wrap everything with a tourniquet.
Master Class. Twisted bracelet made from paper clips
To create such an original bracelet you need:
What you need for a bracelet made from paper clips
Step 1 . The paper clips are straightened with pliers - you should get equally straight wires.
The paper clips need to be straightened
Step 2 . Each wire is twisted into a spiral (pliers are used). First, a small loop is wound at one end, then the wire is shifted so that the loop is clamped in the pliers in a plane parallel to the table (see photo).
A spiral is twisted from the wire. The loop is parallel to the table surface.
Step 3 . The paperclip is wrapped around the loop, but not too tightly, and remains in the clamp all the time. About halfway through the paper clip (about 3 turns) you can finish.
In the middle of the paperclip you can finish
Step 4 . Similar actions are performed with the second end of the wire, but you need to twist it in the opposite direction. It turns out like this “figure eight”, on each of the curls of which there are 3 layers.
The second end is twisted The resulting part
Step 5 . This must be done with all paper clips. If they were the same size, then the parts would be the same.
All parts are the same
Step 6 . A pair of straightened rings is taken, they are inserted into the center of one curl, after which they are passed through the center of another part and clamped with pliers.
Connection of parts.jpg
Step 7 . The required number of parts are connected. Only one ring needs to be attached to the outermost free curls.
Links are added
Step 8 . Next (using the same pliers) the lock is attached. The connecting rings are securely clamped.
Fastening the lock Ready-made twisted bracelet made from paper clips
The bracelet is ready! Using the same technology, you can make a necklace, you just need to get a sufficient number of paper clips.
Ideas
Mediator . Guitar lovers know very well how elusive the pick sometimes becomes at the most “appropriate” moments. But it can easily be replaced with a paper clip! You just need to attach tape to it to make it easier to hold.
You can make a pick from a paper clip
Pendant . Light clothes and other bulky (but not heavy) items can be hung on an improvised hook made from several paper clips.
Improvised hook made from paper clips
Zipper pull . We don't know how to explain the fact that in the 21st century, constantly breaking zippers are still used. But we know how to solve the problem of a damaged tongue. First, it is removed (pliers may be required), then the end of the paperclip is inserted into the hole in the slider body. The paper clip is wrapped with vinyl tape.
Paperclip as a zipper pull
Cleaning the keyboard . If a lot of dust, hair and other debris has accumulated in the keyboard, then a paperclip can solve the problem - its size is ideal for getting under the keys and cleaning various inputs. The product is bent in a straight line, after which one end is wrapped with a piece of cloth soaked in a disinfectant.
Cleaning the keyboard with a paper clip
Key ring . You might argue that such a ring costs a penny, but if you don’t want to go to the store to buy it, you can use our method. The paperclip is pulled into a straight line using pliers and then wrapped around a rounded pen or marker. The result will be a tight ring.
Key ring in a few seconds
Staple robot . You can find several options for making miniature robots on the Internet. Here, for example, is a robotic cockroach working on a paper clip.
Homemade robot made from paper clips
Another option is a cute spider robot.
Paperclip robot spider
Master Class. Dragonfly pendant made from paper clip
To make such a simple pendant, you should take:
Tools and materials
Step 1 . The paperclip is unbent with pliers, the result should be a straight wire.
The paperclip needs to be bent
Step 2 . Our dragonfly will consist of 2 pairs of wings, a body and a head. To create the head, the wire is laid in the middle on the pliers and wrapped around their upper part (an open loop is twisted).
Take the pliers The wire is wrapped around the top The resulting loop Work continues Another photo of the process
Step 3 . The remaining wire is bent from the loop so that slightly rounded edges are obtained.
What happened in the end
Step 4 . Wings are forming. The wire on the sides of the head is bent upward, then along one side you need to step back 10-15 mm and use pliers to make an elongated long loop. After this, the wire is bent upward (almost at an angle of 90°) and the same loop is formed, but smaller. Then the wire is bent again at an angle of 90°, the remainder is taken down.
Let's start creating wings Stages of wing formation
One pair of wings is ready (small and large). The wings on the second side are created in a similar way.
Step 5 . There are 2 ends of wire left at the bottom (their length will depend on the size of the paperclip). From these ends the body of the dragonfly is formed.
All wings are ready
Step 6 . Both ends must be equalized in length - cut off the excess wire with wire cutters.
The ends are aligned along the length
Step 7 . Both wires are soldered using a soldering iron, solder and paste. Then they are processed with a file.
You can start soldering Soldered wires
Step 8 . Using fine-grained sandpaper, the body is brought smooth.
All that remains is to polish the pendant Polished dragonfly
Step 9. A connecting ring is attached to the head with pliers, and a chain is threaded into it. By the way, if the chain is small, you can simply pass it through the dragonfly’s head.
Ready-made dragonfly pendant made from paper clips
Step 10 . This is what the finished dragonfly pendant looks like.
Earrings
Such decoration will not be of the status of an adult lady, but a five-year-old girl will come in very handy. First you need to do all the preparatory work from the point on how to make a heart out of a paper clip. And then the creative process begins. If you don’t have any materials at hand other than office supplies, it doesn’t matter .
We fasten a rubber band for money on one side of the heart, and without pulling too much, we wind it to the other side. After three such manipulations, the elastic band should run out. But this is a standardized parameter. Everything will depend on the size of the heart and the length of the elastic band. For a good result, you need to wrap two to three rubber bands on one heart. If you have a spool of thread at hand, you can use it. It will turn out especially beautiful if the mesh is shiny. The final stage is to put on the earrings. That's it, the earrings are ready.
A little bit of hooliganism
Most likely, if the readers of this publication are men, they are a little offended that the vast majority of tips and ways to transform a paper clip are ideas for girls. It's true that it's much easier to make a necklace out of a paper clip or some other cute trinket, but especially for young (and maybe quite mature) hooligans, we found a way to create fun entertainment from stationery.
This mini slingshot will undoubtedly brighten up a boring lesson at school or a dull day at the office. To make it you will need one paperclip (it’s better to take a large one), a thin money cutter and shells. As shooting material, you can use small strips of paper folded in half in the middle.
Make a space shuttle from office supplies
will make a great craft. First, you will need to find two buttons from the old keyboard (or remove them from the current one). You need to make two holes in the corner of each key. This can be done with an awl heated with matches or a lighter. Through the holes you need to pass paper clips that are curved in the form of an earring mount. Your DIY compliment is ready. Believe me, your efforts will definitely be appreciated.
Surely, at work you sometimes celebrate various events: birthdays, vacations or promotions.
Champagne is one of the constant attributes of such events. The remaining metal fasteners from the corks can serve as good material for developing your own creative abilities. A beautiful chair made from a champagne cork holder.
Now you know what you can do in your free time, which you sometimes get at work. Making crafts from office supplies will develop your creativity right in the workplace.
Do you like to do needlework and do various crafts? Let's find out what you can make from paper clips with your own hands.
To work, you will need paper clips, which are usually used to fasten documents.
List of paperclip crafts
1. Hearts made from paper clips. This craft can be made for your girlfriend, on a love note or on a Valentine's card.
2. Beautiful paper clips. Cut out a heart, circle or square from cardboard (with a patterned background). Make a fabric flower on the cut out piece and glue the whole thing to the top of the paperclip with glue.
3. Decoration made from paper clips. Connect the paper clips together and wrap them in colorful paper. This way you can make a bracelet for your hand, a necklace for your neck and much more.
4. Bookmarks made from paper clips. To make your bookmarks look better, use a set of multi-colored paper clips. You need to glue fabric with a bright background to the paper clips. You can use old clothes as fabric.
If it’s raining outside and it’s completely impossible to go out for a walk, then you should look for entertainment at home. But what to do if the apartment is in perfect order, dinner is ready, and you’re tired of TV? Perhaps you should get creative and make some crafts. By the way, you can involve the whole family in this interesting activity and have fun.
You can make crafts from anything, for example, try making crafts from paper clips, and if you don’t know how, then read the article, it will contain some interesting ideas.
School supplies decor: how to decorate school paper clips and paper clips
To decorate your school paper clips and clips, you can use bright, decorative adhesive tape. In addition, for such decoration of school supplies you will need very little material, and this school little thing will please the eye for a long time.
Decorative adhesive tape can be tied to a paper clip or attached to it in the form of a flag. Such beautiful paper clips can even be used as...
Will look cute as a decoration for school supplies, especially paper clips. These will lift your spirits with bright colors and decorate your school office in an original way.
Master Class. Heart bookmark made from paper clip
A very simple but useful craft that requires only colored paper clips.
Step 1 . The simplest option is to bend the curves in different directions. Then you will get a small souvenir, which, alas, cannot be used as a bookmark. But we need a bookmark to securely fix the pages, so let's go a different way. First, take a paper clip of any color. Step 2 . The paper clip is placed horizontally. Approximately in the middle, its upper part is neatly bent. It is important not to overdo it, otherwise the paperclip may break. Step 3 . The photo shows that the length of the lower end is slightly longer, and it is on the outside. Now the end is carefully tucked inside (behind the front wall). Step 4 . The paper clip bends further. The narrow part is tucked in so that it comes out diagonally. In this case, you need to squeeze the paperclip with the fingers of both hands - for symmetry. Step 5 . The heart is ready, but it will not hold on yet. One edge is slightly bent, and the tip is straightened. Step 6 . The heart bookmark is tried on and fixed on the pages. Step 7 . If you need a simple heart (not a bookmark), you can use the simple diagram below.
Organizer made of cardboard and paper
The organizer is made of cardboard. The option is also simple, but you need to be careful and attentive.
You will need:
- cardboard;
- paper;
- scissors;
- glue;
- dye.
How to do:
- Cut all parts according to the drawings.
- Cover with white paper.
- Connect all the elements.
- Paint the finished item in your favorite color.
- You can not just color it in one color, but also make cool inscriptions and drawings.
Master Class. Staple chain
A great toy decoration for a young princess! To create a chain you will need:
Step 1 . Paper clips can be of different colors. They will be combined in blocks - so the chain will turn out to be multi-colored, like a rainbow.
You need to prepare colorful paper clips
Step 2 . The most labor-intensive stage is leveling. Each paper clip straightens out and turns into a wire.
Every paper clip needs to be straightened
Step 3 . This is what happens in the end. As for the number of paper clips, it will depend on the length of the chain.
You get such delays
Step 4 . Each paper clip is cut into several parts. A round nail is prepared for winding.
big nail
Step 5 . The paperclip is applied to the rod. You need to leave a small straightened tip of the wire.
There is a small tip left on top
Step 6 . The wire is twisted around the nail in a spiral to form such a blank.
Blank
Step 7 . The required number of rings is created. Paper clips of different colors are used.
Ring (one turn cut from the blank)
Step 8 . The rings are connected so that the result is a link like this.
Chain assembly
Step 9 . Using this technology, the chain is woven to the required length. At the end you can attach the heart made from a paper clip in the previous master class.
Finished chain of paper clips
Curtain
This type of family leisure has been known since the times of the USSR. But nothing will work if there is not a huge amount of postcards or other cardboard.
Method 1. Flying door:
- We cut many strips from postcards or similar, 2 times the width of a paper clip.
- Rotate it 90 degrees, set aside 1 length of paper clip minus 5 mm from the edge to the left.
- Cut strips of this width.
- Place it wrong side up and fold the edges toward the center.
- Now - in half.
- We insert the paperclip with the large “ear” into one pocket, the small one into the other and move it so that the “clothes” are in the center of the paperclip.
- We hook the new paperclip onto the edge of the old one, like a hook, and thread it into the pockets of the next piece of cardboard.
- We continue until we have enough chains to assemble the flying door.
- You can paint it later to make it more uniform.
Two more options for curtains made from paper clips:
- Use a hole punch to make holes along the edges of the card, preferably reinforced with eyelets. Hook with a paperclip like a hook. Attach the next one to this paperclip, and to it a third one, hook the postcard to the third one like a hook;
- make chains of paper clips.
On the eve of the holiday
Many crafters hardly realized that they could use paper clips to make a wonderful girly hanger toy, which can easily be transformed into a magnificent New Year's decoration. This is an excellent solution for organizing the wardrobe of a child's favorite doll. Also, later on the cute miniature hangers from the Barbie cabinet, just glue paper sweaters and various Christmas paraphernalia and in a simple way make excellent Christmas tree decorations from paper clips.
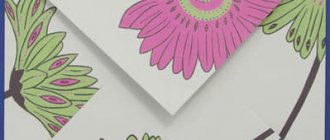
Another way to use office supplies in an original way is to make a postcard from paper clips. To do this, it is best to choose multi-colored paper clips rather than classic steel ones. Colored shells on wire can be of various shades; from such bright ovals it is very easy to lay out figures of different shapes - snowflakes, Christmas trees or flowers.
Source
Everything ingenious is simple
The birth of the classic paperclip, which looks like two ovals twisted from a piece of steel wire 8 cm long, had a rather thorny path. The year of her birth can be considered 1899, when the Norwegian engineer Johan Voler was shown several versions of this stationery item. Then he did not believe that it was possible to make a salable and popular product from paper clips, and refused to engage in this project, but the British successfully developed it. The Gem Manufacturing Company Ltd launched this invention into mass production, making the right decision.
Bookmark with weaving "tie"
Braided bookmarks are very easy to make.
- We take three strips. Using double-sided tape, glue them together as shown in the photo.
- Let's start weaving. We turn the workpiece over: on the right and left we have two strips.
- We braid an ordinary braid.
Advice!
When making bookmarks with weaving, you can use not only paper, but also ropes and threads. And also many people practice various methods of weaving.
- When the braid reaches the desired size, glue the strips together and cut them.
- You can leave it like this, but you can also use a hole punch to make a hole and thread the ribbon through.