Useful tips
Watch the video if you are too lazy to read
Watch the video if you are too lazy to read
Envelope
- This is just a shell or packaging for inserting various objects or papers. Basically, we are used to thinking of an envelope as a “packaging” for letters or documents. But there are also envelopes made of thick fabrics or blankets for newborns.
Today we will learn how to make envelopes for different needs
and let's start, perhaps, with the most common envelope - a paper envelope.
How to make an envelope out of paper?
The simplest envelope
can be made from a square sheet of paper by folding the corners towards the center. To do this, you will need a square sheet of paper of the desired size, a ruler and a pencil.
1) Mark the very center of the sheet
point, measuring the distance to it using a ruler.
2) Fold the left and right sides inward so that the corners touch the center point
.
3) Then fold the bottom side up so that it covers the center and can be glued to the two already folded corners
.
4) Apply glue to the bottom sides of the envelope as shown in the photo. You can also use double sided tape
.
5) Fold the top corner down. The envelope is ready!
This envelope can be made in just a couple of minutes. It is based on the simple principle of adding angles. Here are a few more schemes for making envelopes from sheets of different shapes:
Diamond envelope
Envelope “from the heart”
Envelope with a square
Step-by-step instructions for making a pocket
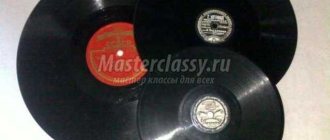
When you are already tired of the usual CD packaging, you can do something interesting and unusual. And we will help you with this.
So, let's get to work:
- find an old factory envelope;
- glue it very carefully - this way you will get a stencil;
- place it on the selected image (it is important that the main component of the composition is in the center of the future pocket);
- trace the stencil with any black pencil;
- cut the envelope along the marked lines;
- glue it together in the same way as the factory product.
Such pockets can become a real decoration for a teenager’s room, and if desired, one or two envelopes will become the first copies of an unusual collection. At the same time, the choice of topic is always yours.
Envelope templates
With this template you can make envelopes from colored cardboard
:
By adding a ribbon, you will get envelopes for different occasions
: For greeting cards, money, invitations, etc.
Long envelope template
:
Envelope template on A4 sheet
:
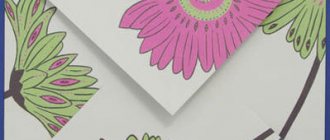
You can decorate envelopes with colored lace or appliqués
:
You can use beads and threads
to close the envelope:
Envelopes are sometimes decorated with various paper details
, made in various techniques: origami, quilling, scrapbooking, etc.
Read more about the quilling technique
you can read here.
More about paper flowers
you can read here.
Master class Gift wrapping Wedding Applique Making a box for MK CD Paper Ribbons
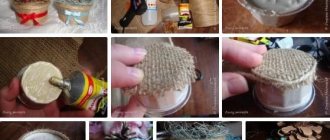
Hello, dear craftswomen! Upon request, I prepared a master class on making a box for a disc, maybe it will be useful for you))
We will need: - watercolor paper - 2 sheets (it is thick, it will be the basis of the box) - a piece of colored paper, in this case - purple - tracing paper with an inscription (but you can do without it) - a box for the disc - a figured hole punch - transparent double-sided tape - ribbons, lace - beads for decoration - curly scissors - well, a ruler, pencil, glue and a stationery knife
Take a piece of watercolor paper, it’s quite thick, or cardboard. We measure 13 cm from the side edge and draw a line along the sheet.
Cut along the line with a stationery knife. Still, the edge turns out smoother than when you cut it with scissors. Just don’t forget to put something like cardboard underneath so as not to scratch the table))
Then we measure 14 cm, 0.5 cm and again 14 cm from the side edge. Draw the lines.
Cut off the excess (on the right side)
Then lightly cut two lines in the middle of the sheet
and bend along the cuts, inward
It turns out like this
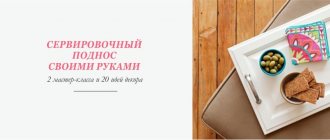
DIY money envelopes
What could be more banal than a gift in the form of money
, but sometimes this is the only thing that comes to mind.
To make your gift unique, you can place it in a handmade envelope
. The envelope can be beautifully decorated and signed like a postcard.
Envelopes for money are usually made of cardboard and have an elongated shape so that the bill can fit completely inside it
. You can draw the templates yourself or use ready-made templates:
Envelopes for money (templates):
Here are some helpful ideas on how to make and decorate money envelopes that make great gifts.
along with their contents.
Money in an envelope: original ideas
The envelope design allows you to place the money inside in different ways.
.
Here are some ideas to help you make original envelopes. For example, you can use a postcard
, inside which you paste a small envelope with money.
You can write wishes on the card, and when you look inside, the recipient will find a cash gift
.
Another option is to make the envelope also in the form of a postcard, and attach satin ribbons inside that will hold the bills
.
Book of envelopes
. This original idea will appeal to those who would like to learn how to save money. You can make some simple envelopes and sign them, indicating the purpose for which the money is stored in them and the time when it can be spent.
Decorative and interior decoration
You need to take two satin ribbons of different colors and unequal widths. The length of the material is equal to the length of the side of the envelope with an addition of 3 cm. A wide tape is initially glued to the scrap paper using double-sided tape, after which a narrow tape is fixed on top of it.
Read this: “Snowflake Ballerina” made from paper: a detailed lesson for creativity
In the middle of the envelope, 2 more small ribbons are harmoniously located, secured with tape and tied in a bow. To make the bow more expressive, you can place several beads on it. The template is located below.
To keep the disc safe, the inside of the envelope will have a pocket made of scrap paper, cut in the shape of a rectangle. One corner of the rectangle is made with scissors in the form of a semicircle, and the remaining 6 mm are folded inward. This will allow you to hold the disc firmly.
Using crushed pencil lead, the rounded edge is tinted. Double-sided tape is glued to the curved edges of the rectangle and fixed to the right side of the envelope. Such an envelope will fully fit another disc. To do this, you need to repeat the previous steps only for the left side.
We glue the square, made with decorative trim, onto the front part of the base. And that's it, the envelope is ready.