Did the bike chain fall off your old bike? Don't throw it away right away, stop for a moment and check out these ideas that will help you put an old bicycle chain to good use and also make something for an art exhibit:
10 – Drink holder made from a bicycle chain
You might not want to put them on a glass table, but they would work great on a wooden coffee table.
9 – Bicycle chain key holder
If you have a lot of keys on your key fob, you can conveniently place them on your bike chain with this awesome idea.
8 – Photo frame made from a bicycle chain
You can display your photo from the annual cycling convention in this awesome frame made from a bicycle chain!
7 – Bicycle chain cufflinks
Are you going to a party at an amateur club? Don't forget to decorate your outfit with these cufflinks. If you have the appropriate skills you can make them yourself!
6 – Bicycle chain opener
This opener may be more difficult to make than it seems, but it's also a great use for an old bicycle chain!
5 – Fruit bowl made from a bicycle chain
Of course, you shouldn’t pour soup into such a bowl, but it’s perfect for beautifully arranging fruit in it!
4 – Bicycle chain bracelet
Surely this bracelet will weigh on your wrist, but if you are a fan of industrial and brutal style of clothing, then this bracelet will suit you perfectly.
3 – Bicycle chain jewelry box
It’s not very easy to make such a box, but it looks just great!
2 – Candle holders for small candles from a bicycle chain
Small but very practical. These little candle holders look amazing and will keep you warm with the glow of the candles they hold.
1 – Bicycle chain Christmas decorations
They're easy to make yourself and can be purchased on ETSY. Christmas can't come anytime soon, but that means we have almost a year to properly prepare for it!
Sooner or later, every avid cyclist experiences a chain failure. Luckily, there's no need to take your bike to an expensive repair shop if you can fix the situation yourself. The following tips will help you resolve the issue as quickly as possible.
Steps
Replacing a broken chain
Assess the breakdown and try to do something.
If the chain breaks while riding, roll the bike to the side of the road and lay it on its side, with the sprockets facing up. Inspect where the chain breaks - most likely the chain is hanging on the sprocket, and you can easily find two broken ends. In a conventional chain, the links are connected to each other by means of a pin (a pin, or cylindrical cup), which holds the plates of the inner link through which the pin passes, and a roller located on top of the cup. Therefore, if you are an experienced cyclist and carry a chain tool and spare parts with you, you can repair the chain and re-tension it yourself (see Method 2). Basically, bicycle chains fall into three categories:
- Chains with special rivets. Special rivets from the manufacturer are supplied with such chains. If you do not have such rivets with you, then to repair the chain, you will have to get to the nearest bicycle parts store.
- Chains with closing links. These chains have a special link with two rivets that connect the ends of the chain. If this connection breaks, then to fix the chain you will have to replace this link.
- Chains with “normal” links. Old, traditional chains consist of standard links, each of which can be replaced with the same (if you have the tool).
Remove the broken chain.
If you realize that replacing the chain will be easier than repairing it, then the first thing you need to do is remove the old chain. If it breaks completely, just spin the pedals and it will fall off the sprocket on its own. If the chain does not fall off when cranking, then it must be disconnected manually. This can be done using a squeeze tool, available at almost any bike shop.
- Connecting chain links using a squeezer: Position the chain pin against the squeezer pin. Then tighten the pin screw, pressing out the pin. If you plan to reuse the chain, do not remove the pin completely, but only enough to separate the chain links.
- After you disconnect the chain, pedal until the chain falls off the cassette. If you want to replace the chain, be sure to count the number of links in the old chain (for bikes with a rear derailleur, take into account the error). Also consider your drivetrain type, as this will determine the type of chain that suits your bike. For example, for a 9-speed transmission, a 9-speed chain is suitable, etc.
- Raise the rear wheel.
The next step is to thread the new chain through the rear derailleur. To do this, you will need to spin the rear wheel, which will be much easier if it is not on the ground. If you have a bike rack, or a peg in the wall that you can hang your bike on, use that. If you don't have such benefits, simply raise the back of the frame by placing something under it, such as a box or cinder block.
Thread the chain through the rear derailleur.
On most modern mountain bikes, the rear derailleur is a spring-loaded mechanism that runs down under the main rear sprocket. Threading the chain through this mechanism requires special attention, since driving safety depends on it. Take the “mother” (the end of the chain without the pin) of the pre-sized chain, and loop it around the lower tension roller, and then around the upper one. If done correctly, the chain will run in an S-shape. If S is uneven, perhaps the chain did not go into all the grooves of the rollers, or got caught on something.
- There may be a small metal tab between the rear derailleur tension rollers. The chain should not touch it.
Some bikes, such as grouse bikes (fixed gear bikes) or bikes with planetary hubs, do not have a rear derailleur. In such cases, simply tighten the chain onto the sprocket and rotate the pedal as advised in the next step.
On mountain bikes, the rear cassette is a set of several sprockets attached to the rear wheel. Once the chain is threaded through the derailleur, slide it onto the smallest sprocket in the cassette. Once you're sure the chain is securely through the derailleur and firmly seated on the sprocket, lightly tighten it.
Thread the chain through the front derailleur.
On most modern mountain bikes, there is a metal mechanism near the front sprocket that moves the chain from one sprocket to the other. Pass the front end of the chain through this switch. If the chain does not reach, push the rear wheel a little further.
- Capercaillie, again, do not have a front derailleur, so simply slide the chain onto the front sprocket as shown in the next step.
Place the chain on the smallest front sprocket. Pull it well and check that it rests on all the teeth of the sprocket, then turn the pedal.
Connect the ends of the chain.
Now that the chain has passed securely through all the elements of the transmission, you can connect the ends and enjoy your ride again. Place the link to be connected (“mother” and “father”) in the squeeze, on the stop that is closer to the fixing screw. When adjusting the position of the chain, move the pin to the clamped pin so that they are coaxial. Tighten the link with the fixing screw. Rotate the handle to press the pin into the link. Constantly monitor the degree of pin immersion. Failure to observe this detail may result in damage.
- One useful tool is a c-clamp (a small, thin piece of metal) that helps hold the two ends of the chain together. This makes the job much easier since you don't have to hold the two ends of the chain yourself. A bent paperclip can serve as such a C-shaped staple.
Replacing a loose chain
- Determine where the chain has come off.
Sometimes the chain does not break, but simply moves out of its normal position. Since in this case it is still on the front and rear derailleurs, no special intervention will be required - all you have to do is install the chain back on the sprocket. If the chain falls off along the way, get off the bike, lay it on its side, with the sprockets facing up, and find the place where it came off. Typically the chain will fall off the front sprocket but remain on both derailleurs.
- Look for places where the chain might get caught. Take appropriate precautions before your next trip.
- Loosening the eccentric in case the chain is jammed.
As mentioned above, sometimes the chain will get stuck between the rear sprocket and the frame. In this case, loosen the rear wheel eccentric and unscrew the eccentric nut so that the chain can be removed.
- The eccentric is opened by releasing a small lever located in the center of the rear wheel. Then unscrew the nut on the opposite side of the lever and release the chain. Don't forget to tighten the cam back before riding. The nut should be reasonably tight, so that the lever is clamped neither too tightly nor too loosely. If the lever is clamped too tightly, unscrew the nut a little and try clamping again. If the lever is clamped too easily, the nut needs to be tightened.
- On bicycles with rear derailleurs, loosen the chain tension and tighten it onto the front sprocket. Most bicycles have a spring in the rear derailleur that provides tension to the chain while riding. Overcoming the resistance of the spring, tension the chain so that it can be put on the smallest front sprocket. Then release the chain and make sure it is tight enough.
- Normally you can now continue driving. At first, the bike may ride chaotically until the chain is in the correct position.
- On non-speed bikes, the chain is tensioned onto the front sprocket by turning the pedal.
As mentioned above, many bicycles, for example, wood grouse, do not have speed switches. In this case, put the chain on the rear sprocket, and, hooking it onto as many teeth as possible from the bottom of the front sprocket, rotate the pedal backwards. The chain should engage and begin to wrap around the sprocket. Once the chain is screwed onto the last top tooth of the sprocket, it can function normally.
- It will be easier to pedal if you lift the rear wheel. To do this, you can put the bike on a rack, or put some material under it. You can also ask someone to hold the rear wheel up, or, in extreme cases, simply turn the bike over.
- Smoothly rotate the pedal until the desired speed is achieved.
Get on the bike and start moving slowly. If you have a fast bike, the chain may jump to the speed at which it was before breaking. Otherwise, set the speed yourself until the chain friction disappears.
- Note that if the chain falls off on fixed speed bikes, it may be a sign that the chain tension is weak. Therefore, adjust the chain tension before your next ride.
- Do a general check.
Before the first trip after repair, set the most comfortable speed. Shift all gears on the front and rear derailleurs to make sure the chain does not bind anywhere.
- It's not unusual for a chain to fall off from time to time, but if it happens too often, it may require professional help.
- If you have the option, purchase a special tool called a chain tensioner. Buy yourself a couple and follow the instructions on the package. Generally, you will need a Phillips screwdriver and a specific size Allen wrench. These tools will help you maintain proper chain tension.
- If your chain is still slack and you can't get professional help, you may need to remove a few chain links to shorten it. But don't take on this if you don't know how to remove the links correctly.
- Every cyclist should have basic knowledge and repair skills. This way you can not only save on service costs, but also not find yourself in a hopeless situation, being away from the bike repair shop.
Choosing a role for the chain in your decoration
Main accent
You can use different weaves, colors and sizes. Intertwine them, place them side by side, etc.
Two equal accents
This variant involves two accents. For example, chains and beads (stones, leather, shells, metal fittings).
As a supplement
Small chain fragments add flexibility and playfulness to the design. But the main role is played by: natural stones, leather, large beads, etc.
This includes examples where the chain acts as a base and all the parts are attached to it.
Cautions
- Braid long hair, tuck in clothes, and zip your fly all the way before repairing your chain.
- It is better to use gloves when doing repairs to avoid getting your hands dirty with grease.
- Do not put your fingers in the chain, otherwise you may injure them or lose them altogether.
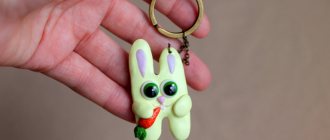
To make such a keychain we will need:
- latex gloves;
- superglue (to hold the chain together in a star shape);
- hammer or pliers;
- mites;
- wire hook (not shown).
Degrease the chains
For this homemade product we will need 4 old chains. Soak the chains in solvent to degrease the source material.
Leave the chain in the solvent for a while so that the lubricant settles to the bottom. When everything has settled, remove the chain. Wipe the chain with a rag.
Divide the chain into pieces of 5 links
Push the pin until the inner part of the chain separates, but so that the pin is retained in the link. It's difficult, but still easier than pushing it out completely and then putting it back in.
Connect the pieces
Now that you have five-link pieces of chain, connect their edges to form small rings. Place the opposite ends on a hard surface and hammer the pin back to close the ring.
Make a template to get the shapes
It is quite difficult to shape a bicycle chain ring into a star shape without guides. You can make a template from scrap lumber and use a few nails. Use five nails (no heads) so that the chain slides between them. To make the template, make a star from one chain.
Glue the chain links
Now that you have your chain in a star shape, you want to keep that shape. Be careful not to glue the chain to the template or nail.
Ready!
Remove the star from the template when the glue is dry and repeat these steps with all the rings you have. The last step is to secure the wire hanger inside the chain and bend it. Silver wire hooks can be found in large supermarkets (in the bead section). If you get creative, you can create alternative forms. By adding one link, you can get a shape similar to the Star of David. By removing one link (receiving four links), you can get the shape of another star.
In fact, absolutely anything can be made from bicycle parts. It's not always appropriate, it's not always practical, and the result doesn't always look great, but if you have the time and materials, anything is truly possible.
Let's look at the main categories of such crafts:
- Art;
- Desire to surprise;
Urgency;
Disposal;
In our article, we looked at various categories, and also wrote an approximate composition of parts that will be required to reproduce this or that idea.
We are sure you can guess which idea belongs to which category.
Necklace with chains
Massive jewelry has long been in fashion. But the chain itself, if it is thin, will definitely not look massive. Therefore, as an option and a very fashionable trend of the season - a small chain wrapped around the neck many times. You can attach a pendant in the shape of a zodiac sign or a beautiful cabochon made of natural stone to the center.
For those who do not know how to make a neck chain with their own hands, you can purchase ready-made ones in specialized online stores. You can also purchase additional accessories there. The necklace will need a clasp. Many people don't know how to make a chain clasp, but it's simple. Using pliers, a purchased clasp in the form of a magnetic clasp or carabiner is attached to the links of the chain, carefully pressing the connecting parts.
Before you make a necklace on a chain, be sure to stock up on all the necessary materials for the job. As a rule, you will need few elements, since the chain is the main accent detail.
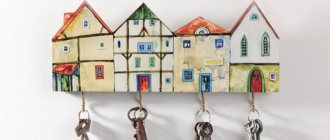
Shelf
What parts will be needed:
We are confident that for such a shelf some defects in the chambers are quite acceptable and will not affect the performance characteristics. The idea looks extremely easy to implement.
What parts will be needed:
- Wood.
Very nice trophies from Andres Schager (his website). The idea is quite simple: from a handlebar, a saddle and a small piece of wood you can make a holder for a bicycle or other items.
The color, type and shape of the steering wheel or saddle plays almost no role.
Decorations
What parts will be needed:
- Chain;
- Wire;
- Rope.
The main thing in jewelry is to maintain balance and not go into excessive brutality.
Chain links are most often used to create jewelry. On sites like Etsy you can easily find many crafters focused on this type of jewelry.
And if you want exactly the ones in the picture, they are sold in our store at a very affordable price.
Watch
What parts will be needed:
- Stars (optional);
Watch stuffing.
As we wrote in one adjacent article, wheels are one of the most important parts of a bicycle. And they can bring a lot of benefits outside of the bicycle: in addition to furniture, mirrors, shelves and much more, they can be used to make very stylish watches.
In fact, almost any round (and not only round) part is suitable for a watch: crafts made from stars and cassettes are very popular.
Backpacks and bags
Not quite handmade, but fits perfectly into our review. Vaho is a Barcelona-based company that produces backpacks and bags from old tires. On their website they tell and show how they came to this and what comes out of it.
Not only bags and backpacks are made from old cameras, but also wallets and toiletries. Another example of competent recycling of materials from Australians.
We hope we managed to inspire you and the next time when buying a gift for a friend or choosing furniture for your home, you will think that you can do this yourself from unnecessary parts of a bicycle.
The main thing in this matter is a little dexterity and a sense of taste: we have already seen enough of swans made from car tires in our yards :)
Ideas
On the neck
Fashionable and looks beautiful in any style. Combines with stones, beads, wood, leather, metal fittings, shells. At all.
On hand
The bracelet can be minimalist or rich in texture.
You can often see a slave bracelet on the fashion catwalks of the world. This is a combination of a bracelet and a ring connected to each other by a chain. This is a great model that will highlight your individuality.
Watch
Chains with the addition of leather details, beads, and natural stones will help add charm to your watch.
Glasses
Fashionable, convenient and necessary accessory. An interesting model with a ring for attaching glasses. You can make it for yourself or as a gift.
For lovers of details
This accessory appeared in the Middle Ages, when the first glasses appeared. They had no souls and they fell. You guessed it - it's pince-nez. It was then that chains for glasses were invented, which were attached to clothes, and pince-nez was kept in the pocket. Here is a short excursion into history.
Rings
The ring in the left picture is a piece of jewelry. You can also take an idea from here)))
Anklets (anchets)
Increasingly, you can find this fashionable accent in fashion catalogs and jewelry stores. Why not make it yourself. It looks very gentle.
Earrings
It's nice when small chains move playfully, decorating you.
If you want to create earrings based on a chain, then in our Workshop there is a master class on “DOMINO Effect” Earrings
Belts and...
To decorate belts, use additions like:
- a scarf that is woven into a large chain;
- leather strips (belt), fragments, for example, tassels, flowers, geometric shapes;
- beads, different sizes;
- natural stones;
- wooden fittings;
- metal fittings;
- shells. Keep in mind, they make noise when they move.
Advice. Place them at a short distance from each other, mix them with leather details, beads and other accessories.
You can make a belt - beads for both the waist and the neck. I have such a belt in the form of monists. I wear it once as a belt, another time instead of beads. Looks original, I'll show you sometime)))