Anyone can create a solar collector for a summer shower with their own hands at the dacha, in country houses, in such conditions - there are many ways and all of them are not too complicated, they use available, available materials. The main thing for a homemade product is to build a system that effectively accumulates solar energy, an adsorber, and a pipeline with minimal heat loss. We will describe the most common methods for self-assembling a summer shower, on the basis of which the user can also build his own modifications.
General concept of solar collectors
For a makeshift solar collector, you can use any pipes, hoses, used or unnecessary radiators with internal cavities, and even sections of heating batteries.
The advantage of a homemade product is that it is extremely weakly susceptible to breakdowns, nothing burns out in it, all the parts can be collected even from landfills.
What is a solar collector
Solar collectors are sections with a system of tubes, sections heated by the sun, accumulating its thermal energy and transferring it to water. Factory devices of this type can be complex - special vacuum tubes or flat vacuum blocks filled with a special liquid - a coolant.
At the top (tips) are copper flasks, heat exchangers, the specified heated substance rises from the cavity of the tubes/sections in them, concentrating heat there. These elements are united by a part (strictly speaking, a collector) into which the water being treated flows, it washes them, and heat is transferred to it. The section can be covered on top with a material (typical of flat models) that helps attract and concentrate sunlight, or the tubes can remain uncovered (the properties of their material are sufficient).
Not only will a solar collector provide a summer shower, it will also be suitable for an everyday, well-warm shower.
Factory products, of course, are more complex, but all such systems are based on a similar principle: circulation of water through a solar absorber or its heat exchanger.
There are simpler designs: water moves in a system of tubes (coil) in a section covered with material that attracts the sun's rays. Black material is usually installed inside; a mirror coating (foil) is often used - the rays will be reflected and once again heat the interior space. Such a block has a certain degree of tightness - in addition to the fact that the tubes heat up, heat is concentrated in the environment itself (like in an oven).
In its most basic form, a solar collector is a horizontal flat spiral of black rubber hose, covered with a dark transparent matte cloth that attracts the sun. Often a small pump and filter are added. There can be many modifications: a system of PVC tubes, small plastic/rubber sections - but the principle is the same.
It is necessary to distinguish between 2 systems: a shower with a solar collector and a solar-powered one. These are different heating equipment. The solar panel is designed to collect heat, which is transferred to special units (inverters, generators) that convert it into electricity, accumulated by the battery and then used for various needs, including heating water with heating elements. Solar collectors are originally intended for heating; they are self-sufficient modules that directly prepare the liquid that flows through their coils, through sections with heat exchangers; they cannot be used for any other purpose.
The principle of operation of a homemade solar collector with a shower
Circulation is based on natural convection: the warmer substance inside the collector coil, expanding, acquiring a lower density, rises and enters the upper part of the storage tank through the outlet pipe. The colder layer at the bottom is displaced, moves through another pipe to the lower segment of the coil, heats up, and rises again.
While the sun is shining, the liquid constantly moves along the described contour, and with each cycle it enters the coil, which is no longer completely cold, thus becoming more and more heated. The tank is raised above the solar absorber, so the circulation of the coolant does not tip over during night cooling - the cold layer simply accumulates at the lowest point of the circuit (the bottom of the collector), and the warm layer remains in the barrel.
On average, collectors produce +50...+60 ° C, especially successful designs - +70, high-quality metal products in the southern regions (a copper absorber is discussed below) can provide a boiling point.
How the pipes are located, the need for a pump
Pipe location:
- the hot pipe from the collector is connected to the top of the tank, the cold discharge into it is at the bottom;
- the supply pipe in case the barrel is filled with a pump, yard or home tap - on the opposite side at the top;
- Inside the tank for supply to the shower head, a vertical section of pipe is installed; the upper end ends at the beginning of the upper third of the tank to collect the incoming hot water, which is on the upper layers. You can replace it with a more efficient flexible hose with a float. Adjust it so that the end is always submerged, but the hose itself is near the surface - this way, when the liquid level drops, it will always take it away.
A small, low-power pump can be added to the system; it is required if the elements are located in such a way that they do not provide natural circulation. If there is a pump, then the barrel and the collector can be placed at any height in relation to each other.
Assembly instructions
First of all, it is necessary to determine the dimensions of the future device. Therefore, it is recommended to carefully calculate the area on which the device will be located. An important factor in the calculation is determining the intensity of solar radiation. In the coldest regions, the solar energy is weakened, in the southern regions of the country it is increased. The location of the house, greenhouse or other sources in which the unit will be located also affects the calculations. Another important fact is the material of the heating circuit. The lower the material index, the lower the temperature of the air or water flow.
It is generally accepted that the larger the solar device in size, the better the performance of the device. But it is worth considering that homemade batteries have very low efficiency.
Build process
Main stages of work:
- Box production;
- Production of a special heat exchanger, as well as a radiator;
- Production of drive and front camera;
- Aggregation;
Commissioning;
Box production
For the box you will need an edged board 30x120 mm ±5 mm. The bottom of the box is made of textolite, equipped with special ribs. Thanks to the foam, good thermal insulation is created. The bottom is covered with galvanized sheet.
It is allowed to replace polystyrene foam with mineral wool.
Heat exchanger production
- You will need metal tubes. The length of the pipes must be at least 1.6 m. Quantity: 15 pieces. It is also necessary to use two inch pipes 0.7 m long.
- In thicker tubes, small holes should be drilled with identical diameters to the smaller tubes. Holes will be needed to install pipes. The drilled holes must be coaxial, located on the same axis. Their maximum step should be no more than 4.5 cm.
- All tubes necessary for operation must be assembled into a whole structure. For reliability, they are welded using a welding machine.
- A heat exchanger is mounted on the galvanized sheet covering the bottom of the box. For reliability, it can be secured with metal clamps or steel clamps.
- For better absorption of rays, the bottom of the structure is painted a dark shade. The external components of the structure are painted in a light shade. A white shade is perfect. It helps reduce heat loss.
- A cover glass is placed near the partitions. The joints are carefully sealed.
- The average distance between structural elements is 11 mm.
Storage drive production
As this device, you can use an impenetrable vessel with a volume of 140-380 liters.
It is allowed to use both a one-piece barrel and various welded structures. The storage tank should be insulated from heat loss. The anterior chamber must be equipped with a swivel valve - a mechanism that supplies liquid. The volume of the anterior chamber should be 36-40 liters.
Aggregation
- First of all, the drive and front camera are installed. The height of the water in the front chamber should be 0.8 m higher than in the storage tank. It is necessary to consider a liquid shut-off device.
- The collector intended for heating is fixed to the frame of the building. A device designed to heat water can be placed on the roof of a greenhouse, conservatory or home. To place the device, choose the south side. The installation should have an inclination to the horizon of 35-40°.
- The distance between the heat exchanger and the storage tank should be no more than 50-70 cm. Otherwise, the loss of solar energy will be greatly noticeable.
- The collector should be located below the drive, and the drive below the anterior chamber.
Commissioning
The finished structure must be connected to the water supply.
For final assembly, you will need special shut-off valves in the form of various adapters, bends or fittings. The high-pressure sections of the solar array are connected with special pipes with a diameter of 0.5 inches. For low-pressure areas, it is recommended to use pipes with a diameter of 1 inch.
- Using the lower drainage hole, the structure is filled with water;
- A front camera is attached to the device;
- The fluid levels are adjusted;
- It is recommended to check the battery for water leaks;
After assembling and checking the design, you can begin operation;
Classic shower design with a barrel and a solar collector with a plastic coil
All the methods of the considered homemade products are simple: in general, this is an insulated housing with tubes (metal, plastic), a barrel on the top of the cabin in direct sunlight and a circulation line. All other methods are modifications of the described design. Under ultraviolet light, plastic loses its strength and cracks, so a metal tank is also good. However, you can use any material, even a wooden barrel, as long as it does not dry out.
It is also not necessary to make a complex design for the water outlet, or to provide for the possibility of mixing it with cold liquid. You can get by with a simple flexible overlapping hose with a shower head. If the barrel is filled with a household pump, manually with buckets from a well, then there is also no need to build a pipeline to the supply tap (our example with it).
Assembly Features:
- Frame for the cabin: metal profiles, strips (even suitable from a landfill), PVC pipes, wood, any material from which you can build a stable structure. You can do without a frame, if there is somewhere to secure the barrel, but the place should be open on all sides, they will do , for example, unshaded roofs of extensions and other structures. As walls, you can use fabric drapery, opaque polyethylene.
- Barrel. The volume and material are chosen by the user at his own discretion, our case is 120 l, plastic.
- Water supply, piping: garden hose, plastic pipes (25 mm) with fittings, quick-release connections.
- Drainage: trench and pit.
Iron frames from old spring beds were used for the cabin. Welding was used. There are jumpers on the frame and a seat for a barrel on top.
Drainage is a hole at a distance from the shower with grooves that gradually deepen away from it. The depressions are filled with coarse crushed stone, gravel and construction waste.
Next, holes were made with a hand drill for the legs of the frame, which were installed in them and concreted (a bucket for each support).
The procedure for constructing a summer shower with illustrations
Preparation of elements: barrel, pipes, shower head, hose, float valve for water supply.
The supply will be carried out through a dedicated channel using a flexible hose (10 m ¾ inch). We also purchased 5 m of a tube thinner than ½ inch to separate the flows - to the shower tap and for filling.
First you need to make a flooring so as not to step on dirt while taking a shower. This element is treated with antiseptic impregnation and painted with yacht varnish.
We mark the barrel to correctly install the supply/fill line. On the east side, to the left of the entrance to the shower, there is a water inlet (for filling from the yard tap). There we will mark the place to drill a hole for a regular float valve from the toilet tank. We drill with a screwdriver and a step drill.
The valve (float) is inserted and secured with a nut. We install the faucet with the hole down, so the hose will not break. We use tow and Unipack sealing lubricant.
Next, we use quick-release connections to connect to the hose. You can also insert a thermometer into the barrel.
We install 2 fittings. First, we designate the filling level, cold water outlet (bottom), hot water inlet (top).
We cut 2 more fittings into the bottom - for the shower and for the drain, just in case. We attach a faucet to the first one. In our case, it has a tee with a valve for adding cold water. You can get by with a simpler design - one tap. We put a plug on the drain pipe. We attach a sinker to the supply hose.
The top of the barrel is covered with a lid, and several small holes are drilled there for “breathing.” The tank is filled with a yard tap through a flexible line. But you can also fill water in buckets, using a pump through the top without a separate line.
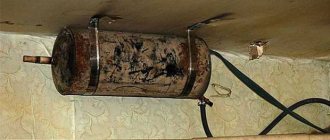
The barrel itself acts as a kind of solar collector, a thermos, heating up in the sun.
solar collector
A grid (coil) is assembled from ordinary plastic pipes (external diameter 20 mm) and fittings. Plugs are welded diagonally at the upper and lower ends. A manifold of 25–20–25 mm tees is welded on top and bottom.
The next stage is the body: a frame made of 50x50 mm timber with sides:
We make thermal insulation so that the captured solar heat is accumulated inside the box. We use extruded foil polystyrene foam 30 mm:
Marking for pipe holders and their installation:
We install the solar collector just below the barrel; a metal frame was built for the structure, but it can also be made simpler: from wood or simply fixed with support on a suitable surface.
Next are the important “little things”: glass, plexiglass or thick film for the box, transparent/translucent plastic, sealing with polyurethane foam. The latter measure is extremely desirable, since even a small hole can lead to critical heat loss. The lid is transparent so that the effect of the rays is enhanced: they get inside and once again heat the pipes by reflecting from the foil coating. The entire line is insulated with penofol.
This system provides heating up to +51° C. Natural circulation: water, heating up inside the collector, periodically splashes out of it into the barrel, is taken from the upper segment to the shower, and the cold layer is simultaneously forced out from below onto the coil.
Flaws
The reason for the relatively weak heating: the thermal conductivity of polypropylene (the coil is made from) is very low, comparable to expanded clay and wood, that is, it is better suited for insulation rather than heat transfer. If you use metal (especially blackened copper), including as the inner lining of the box, then the temperature can be raised to the boiling point in hot climates.
You can also replace polypropylene with corrugated stainless steel tubes, like those from a shower hose. Place duralumin plates inside as reflectors.
Advice: do not use a plastic valve with a float - it will crack, as it is not designed for warm water; use a brass design.
Possible knot variations
The barrel can be insulated with polyethylene and similar materials; if they are black, the efficiency will improve.
Faucet principle: If there is a cold water supply line, it can be used to both fill the tank and dilute the hot shower. That is, there must be power from a yard tap or another tank for cold water connected to a “hot” barrel.
General principles of air heating by ultraviolet solar rays
Solar heating refers to a renewable energy system that collects energy from the sun in the form of heat rather than using it to produce electricity, such as using solar photovoltaics.
Such heating systems are used for local heating of water and air. Heating technologies circulate heated air or fluid in a radiant heating system through ducts in walls or floors so that the heat can naturally warm interior spaces.
There are two types of systems that use the energy of ultraviolet solar rays:
- Active heaters. Here, solar energy is used to drive heat pumps, which, in turn, circulate water or other coolant. Such heaters are structurally more complex, since they require the presence of mechanical moving units;
- Passive heaters. By heating outside air, which is then circulated indoors, these systems heat the rooms of your home using renewable energy. Passive solar heating systems have no mechanical parts.
Passive heaters can have two designs - collectors and plates. The plates generate energy using photo-semiconductor elements, which is used to drive a pump that circulates the coolant. The air solar collector heats the air in the pipes, from where it moves to the heat exchanger and tank due to the difference in volumes. Next, the heated air either naturally or forcedly enters the premises.
Option with two barrels
What is required for the solar collector (in this example, the area is 1 sq. m):
- corrugated “fifteenth” pipe;
- water will flow into a 160 liter tank with 1 cm foam insulation.
The difference between the point of intake and the entrance to the collector is 2 m.
The water discharge point has been moved from the top to the bottom third of the tank. This way the warm and cold layers mix better. Reaches +45... +50° on sunny days, on cloudy days - +35° C.
Two 160 liter barrels are tied with polypropylene pipes - they are easier to work with than metal-plastic ones. The system operates on the thermosiphon principle, convection: hot liquid goes up, cold liquid goes down. No pump, fuel or electricity is required; circulation occurs automatically.
They build a frame from a pipe for the solar collector, tilt 45°, orientation - strictly south. They make stands for barrels.
The hot water barrel can be equipped with a heating element so as not to be left without water on cloudy days. At the bottom of this tank there are 3 outlets: 2 for the line from the solar collector (warm water is pumped into the tank, cold water is returned to it). The third conclusion is for the shower mixer. The pipes, additionally insulated, are connected by American connections, that is, they can be disconnected if necessary, without damaging the elements, by simply unscrewing. It’s also more convenient to assemble the system right on site.
Ordinary garden hoses, insulated with foamed polyethylene, are laid from the tanks to the mixer; they are fixed to the fittings with ordinary clamps. These hoses are combined in front of the mixer: a shunt with a ball valve is installed. This element is for comfort: if you run out of warm water, you can open the valve on the shunt and the liquid level in the tanks is equalized, and when it is supplied, both barrels are filled equally, eliminating the need for separate filling.
The tap is closed after filling the tanks. Then the system functions like this: cold liquid enters the manifold through its lower pipe, expands when heated in it, rises and through the upper pipe goes to the storage tank, and from there to the shower. It is important that the barrels are located 0.5–1.5 m above the collector. It is necessary to organize the intake of water from the warm upper layers, for which a corrugated intake hose (can be taken from a washing machine) is equipped with a foam float.
To monitor the amount of liquid, a transparent tube with a black float is inserted into the warm water tank (heat accumulator). The tanks are insulated with penofol - 2 layers of 5 mm each. The warm container was covered with a 5 cm thick circle of EPS.
The above insulation is not particularly effective, it can be used for the period of preparation of a more thorough finishing, consisting of 100 mm mineral wool, 5 cm polystyrene foam. This element is extremely important: the barrel will work on the principle of a thermos, it will cool down by only a few degrees per day, which will make it possible use warm liquid at night.
How the system works: an example from real experience
The solar collector system with shower described above showed itself to be excellent even in the not particularly warm, compared to the South, climate of the Moscow region. In the evening, the tanks are filled with 120–130 liters. The sun starts heating them and the solar collector at 8:30 or earlier. In our case, until this time the shadow of the house was falling. By 18:00 the rays begin to lie tangentially - the efficiency decreases.
Result: 120 liters, poured from a well with t° +8 at an air t° of +22...+24, by 15:00 they warm up to +45° C. By 17:00 - up to +52° C. On cloudy days at The temperature of the environment is 18–20° C and reaches +35° C. The heating is quite enough for a well-warm shower. It should be taken into account that insulation can be improved. In 5 months savings on your electricity bill reaches RUB 3,500.
Preparatory activities
Having decided to make a solar collector with your own hands, it is necessary to carry out a number of mandatory measures to prepare it:
- make a preliminary calculation using the above method to determine the design and physical dimensions of the device;
- carry out a preliminary design of the collector and water supply system for heat recovery, and on its basis draw up a material statement;
- purchase materials, fasteners and missing tools.
The more carefully this stage is performed, the less you will have to run around later to get what is missing.
A DIY solar water heater can be made from various materials.
From a refrigerator radiator
There is a description on the Internet of a homemade solar collector with a refrigerator radiator. The manufacturing process as a whole is described above; let us briefly recall the main points:
- You can place reflective material (foil) in the inner surface of a tightly closed insulated box, but here it is fixed on a black rubber mat. This is also an effective option, since a dark color attracts rays better and accumulates heat.
- We place the coil inside the body, cover it with glass (you can use screws as stops), and place it so that the rays fall at right angles.
- We connect the PP pipes to the inlet for cold water and the outlet to the shower tank for warm water. And also the liner can be the most basic - from flexible, rubber hoses.
- Shower tank - any suitable container.
Selection of materials
So, having decided on the concept of the future solar water heater, let’s move on to the selection of materials for the heat exchanger. There is plenty to choose from; the heating circuit can be made from:
- copper tube is ideal;
- black polymer pipes;
- sections of flat steel radiators;
- aluminum tubes.
Note. Craftsmen who had long ago brought the idea to life at home used a black rubber garden hose or a heat exchanger from an old refrigerator as a heated circuit.
The most difficult thing is to determine the heat transfer surface of the coil. If you take steel radiators instead, you won’t have to think long. All the same, it will not be possible to install more than 2 panels in one case, otherwise the structure will be too heavy. In other cases, a solar water heater made by yourself must be calculated experimentally. Solar activity in each region is different, and the location of the house and its orientation in space also plays a role. Therefore, it is difficult to give unambiguous recommendations about the length of a coil made of such and such material; it must be determined individually.
To make the heat sink body, you can take wooden boards and a sheet of plywood, and instead of a glass front panel, use a simple material such as polycarbonate. It is transparent and strong enough that even strong hail cannot break it.
So a water heater made of polycarbonate will be no worse than a glass one. As for the storage tank, you can make it from sheet metal or purchase a ready-made plastic or steel container. The easiest way to install connecting pipes is polymer, for example, metal-plastic.
From copper tubes
A collector with a copper coil, lined on the inside with sheets of the same material, is extremely effective. Perhaps the most effective one we found on the Internet. Tubes and strips are soldered with a special autogenous soldering iron at seams and joints, so the copper absorber was the most labor-intensive stage, taking 2 days.
Copper was blackened by placing it in a bath of potassium persulfate:
The case was insulated, and foil was attached to the back wall to reflect heat. All gaps were carefully sealed:
The structure was moved to its place, for this it was wrapped in ordinary cling film, and only after transportation and connection was the glass installed:
Result: in the hot southern climate, under direct rays, the copper became hot, the water heated to a boil, and there were even noticeable traces of melting of the polymer structural elements. It is advisable to add cold liquid to a shower with a solar absorber of this type, for which purpose provide a separate barrel with it or a supply from the tap.
Equipment of systems working with solar collectors with automation
The specific operation of solar installations and constantly changing initial data (season, weather conditions, etc.) do not ensure stability of parameters (temperature, coolant flow, etc.), which requires the inclusion of control systems in the installation diagram.
Electronic devices such as a controller, based on an analysis of the temperature in certain places of the installation circuit, give commands to open/close valves, turn on/off pumping units to select the optimal movement of the coolant along the circuit. So, for example, if the temperature of the water in the coolant storage tank exceeds, the controller will stop its movement along the circuit, stopping heat loss that could be discharged into the environment through the collector.
The simplest options for solar collectors for a summer shower
The elementary nature of the most unassuming options for solar collectors does not mean they are ineffective. Despite the sometimes flimsy, unattractive design, often assembled from rubbish, they perform their functions.
Recommendations:
- It is advisable to place the absorber in a sealed case, at least wrap it in polyethylene;
- the front cover should be transparent, and if it is part of the absorber, then you can use a dark or matte material recommended for other parts;
- the back wall must be treated specially - black material or foil is placed on it to reflect light and retain heat inside;
- the best material for the coil, body, and parts is metal. In the sun, it will not just heat up, but glow.
However, even if you do not adhere to some of the above tips, the collector will perform its functions. Let's look at some striking examples.
Simple rubber hose, polypropylene pipes in a sealed housing:
The last photo above is an excellent solution - the black limited space creates the effect of an oven, the coil is thick, its walls are thin, it heats up quickly.
From PET bottles, carboys
An elementary method is solar collectors made from plastic bottles. Of course, it is highly recommended to paint them black; even a regular can of spray paint will do. In one embodiment, the bottles are used as a casing for the coil pipes.
System diagram with PET bottles:
Here plastic bottles with a black seal act as a casing for the coil:
How does solar energy work in the device?
The sun is a very powerful and, most importantly, endless source of heat energy. No one takes money for its use, and therefore it is worth thinking about how to use such an advantage for your own benefit. Factory taxes on solar water heaters can cost quite a bit of money. If you understand the principle of operation of such a device, you can do something similar with your own hands. Although in reality there are several examples of such a device.
Features of installation and operation of liquid heating manifolds
To place the solar collector, choose a spacious place that is not shaded throughout the day. The mounting bracket or subframe is made of wooden slats or metal so that the tilt of the water heater is adjusted within the range of 45 to 60 degrees from the vertical axis.
To install the solar water heater, a support frame is assembled
Connection to an indirect heating boiler or heat accumulator is made using threaded fittings and copper, metal-plastic or multilayer polypropylene pipes. They are covered with a layer of thermal insulation.
Connection diagram for a solar heater in a system with forced movement of coolant
To reduce heat losses, the storage tank is placed as close as possible to the installation. Depending on the conditions, natural or forced circulation of the coolant is organized. In the latter case, a controller with a temperature sensor embedded in the outlet pipe is used. Pumping of working fluid through the circuit will turn on when its temperature reaches the programmed value.
A seasonally operating system is charged with water, while year-round use of a solar water heater requires the use of an antifreeze fluid. The ideal option is a special antifreeze for solar systems, but to save money, liquids intended for car radiators or household heating systems are also used.
The principle of heating and its effectiveness
- air is pumped from the street into the collector body by force;
- Absorbers are installed inside the block, reflecting heat, raising the temperature inside the box to 70-80°C;
- the air is heated;
- heated air masses are forced into heated rooms.
- gas up to 315 m³;
- firewood up to 3.9 m³.
- in the building, one of the walls is made of accumulating material;
- a glass partition is installed in front of the panel;
- During the day, heat is accumulated and then released into the room at night.
The efficiency of the air collector is significantly affected by the time of year. Thus, in December the efficiency is maintained at 50%, in October and March it increases to 75%.
How to connect the collector to the hot water supply
The best monetary benefit comes from the manufacture and operation of a collector made of aluminum or copper tubes on metal under glass, connecting it to the hot water supply system.
Since the collector and spiral in the boiler are a small-sized heated system, it must be equipped with an expansion tank and a safety valve. Circulation is carried out using a low-power pump. A good collector will provide the house with hot water even in the off-season...