Plasticine is considered an excellent material not only for the embodiment of creative ideas, but also for the development of motor skills of the hands and fingers, which will help children quickly master writing techniques. But not only small children, but also many adults sculpt from plasticine. Softening the plastic mass made from powdered clay, wax, and petroleum jelly with your hands calms the nervous system, and the creative ideas embodied in the works will delight and improve your mood.
A child, working with plasticine, learns orientation in space and learns the shape and components of objects, acquires the necessary knowledge about the properties of the material and its features. For example, if you make “Flowers” from plasticine, children will learn to distinguish them by appearance. They will also remember the shape of the petals, parts of the plant, and understand how many varieties of flowers there are on Earth.
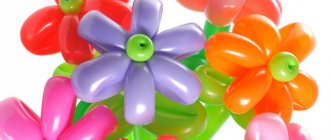
In this article we will look at how to make a flower from plasticine with your own hands: both on cardboard and in volume. After reading the detailed instructions, you can create a beautiful craft yourself for an exhibition at school.
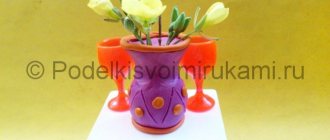
Volumetric flower
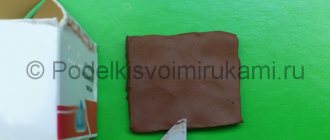
For this work you will need pink and white plasticine. First the petals are molded. As with all modeling work, the material is first softened by kneading in the hand. Then you need to divide the plasticine into several parts, according to the number of future petals. Each piece is transformed into a round and smooth ball by rolling. Then use your hand to flatten it a little into a flat oval.
One side of the resulting workpiece is flattened in half by pressing with fingers on both sides. This is how they work on all elements. When the required number of petals is made, attach them to each other in the middle. To avoid visible joints between the parts, you also need to sculpt the middle of the flower. To do this, roll out a ball from white plasticine and flatten it into a circle with your fingers. Attach it to the center of the craft. You can use the point of a knitting needle or a pencil to make dents or dots.
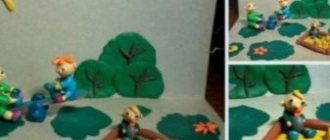
You already know how to make a flower from plasticine. Now let’s imagine what kind of picture on cardboard can be made from these few flowers. One option is to make a bouquet and place it in a vase. Another is to make grass out of green sticks and plant flowers vertically along the width of the leaf. There will be a simple lawn. On top we will add a sun with rays and a bee. The result will be a beautiful landscape.
Features of lightweight plasticine
Airy plasticine is also called marshmallow, light, velvet or hardening mass for modeling. When in contact with air, after some time the plasticine mass hardens.
However, it does not withstand water during play with finished products and during the creation stage. The air mass is very pliable for sculpting any figures that can be used for a long period of time.
The plasticine figurine can be painted with paints or felt-tip pens. If after a while the edges of the product begin to deform, they can be restored. To do this, moisten the deformed element with water and press tightly.
Air plasticine is characterized by many advantages. However, there are some negative qualities that you should be aware of:
| Advantages | Flaws |
|
The craft needs to be made within a short period of time. Otherwise, the material will be damaged. |
Plasticine flowers on cardboard
This sculpting method is significantly different from the previous sample. Here, the outlines of a flower are laid out on cardboard made from thin sticks of plasticine, and then these voids are filled with small balls from plasticine of the required color.
For the petals, you can take several shades of the same color. In your work, you must use only balls of the same size. This plasticine flower looks like a mosaic picture.
How to make a painting from plasticine flowers with your own hands
Having learned to sculpt crafts in the form of flowers from plasticine, you can create them into a whole picture. This composition will be an excellent addition or accent to the interior of your home or apartment. It can also be a wonderful gift for your family and friends.
It is best to use old CDs, records or a glass surface as a base for the painting. On cardboard, the design may be subject to deformation and deterioration. Also, the plasticine mass can leave unsightly spots on the surface of the cardboard, which looks unpresentable.
To create a composition you should prepare the following materials and tools:
- old CD,
- wooden toothpick,
- plasticine of various shades.
After preparing everything you need, start creating the composition. Roll plasticine balls of different colors and shades and flatten them, giving the desired shape to the blanks. These will be the petals, leaves and flower cores in your future painting.
Now roll flagella from green and red plasticine mass. Pressing them into the disk, form stems and rose buds. For roses, flagella must be laid in a spiral direction.
Give the leaves and petals a natural texture using a toothpick. Your painting is ready!
How to make a rose from plasticine?
The photograph in the article shows that this process is, in principle, simple. Depending on the size of the flower, the required number of petals is prepared. A large piece of plasticine is divided into several equal pieces. First, roll each into a ball, then place it on a modeling board and flatten it with your fingers, giving it the shape of a circle. When the blanks are ready, they are laid out overlapping along a horizontal line, as in the photo below.
Then, carefully, holding the lower part of the flower with your fingers, roll the circles into a roll. The upper edges of each petal bend slightly outward. And the lower part is fastened together and smoothed to a smooth surface. Then you can put the flower on a stick and cover it with green plasticine.
Leaves are cut out of green plasticine rolled out with a rolling pin using a stack. It also draws the veins of the leaf.
Chamomile
You can decorate an artificial chamomile without much difficulty, since it is characterized by a simplified structure and consists of a greenish stem with leaves, a yellowish center and white petals.
Flowers from air plasticine - chamomile step by step Flowers from air plasticine - chamomile step by step
Flowers made from airy plasticine - chamomile step by step
Flowers made from airy plasticine - chamomile step by step
The step-by-step design of the craft is shown in the following paragraphs:
- Crush the white material in your hands and, flattening it a little, create a drop-shaped shape from it. Using a ball stack, roll out the ends of the future petal, apply a relief to it using the sharpened edge of the stack. Perform similar actions when creating the remaining 20 petals.
- Roll a ball using yellow plasticine, flatten it a little and make the middle of a daisy. Make a strip from a material of a similar color and cut small petals into a spherical stack. Cover the middle of the flower with the reverse strip.
- Attach the finished petals to the central part of the stem, starting with the smaller ones and bending their ends outward.
- Roll out the green material and stick it around the stem base. Leave the base of the skewer clean for the bud.
- The base of the skewer is supplemented with a receptacle made in the form of a cake from a green composition.
- Place the inflorescence on the receptacle and use a net to give relief to the middle of the flower.
- Attach a leaf made of green material to the stem, in the form of a drop with veins made by the sharp end of the stem.
Big poppy
To make such a large flower from plasticine, we will use a plastic rolling pin, stacks and planks. The required color is selected, for example, red, because poppy is most often found in this color. A piece of plasticine is rolled into an even ball and slightly flattened. The manufacturing option is reminiscent of rolling out dough for dumplings.
Using a plastic rolling pin, make a round thin sheet of plasticine. If you just roll out the mass on a board, then carefully removing it from the surface will be problematic. And if you cover it with a plastic bag or cling film, the product will be much easier to remove.
Then the petals are cut in stacks. In our case - 4 pieces. Each edge of the petal is pressed down by the waves, and the petals themselves are overlapped. A large ball and many small ones around it are attached in the middle. The center of the poppy in nature is black, so we will also use plasticine of this color.
Lily of the valley
Not only adults, but also children can make flowers from airy plasticine if they strictly follow the step-by-step instructions. Initially, you need to form flowers from a white air mass. The more small details there are, the more impressive the overall picture will look.
Flowers made of airy plasticine - lily of the valley step by step
Flowers made of airy plasticine - lily of the valley step by step
The master class on making lily of the valley is based on the following steps:
- Make balls with a diameter of 8 mm from the material. Flatten the blanks, giving each bud volume with the handle of a brush. Some of the buds should remain round.
- From the green light mass, form an oblong sausage, which will be the stem.
- To obtain visual similarity to the original, glue the buds in a checkerboard pattern.
- Green foliage should be large. Make vertical stripes on it to create a texture effect.
- Glue the composition closer to the base and move it to the refrigerator compartment to harden.
Despite the fact that the craft will have depressions with irregularities, it will look more like a real lily of the valley.
Sunflowers
To create such flowers from plasticine, you need to be able to master this material well. Of course, only an adult who is not lacking in the necessary skills and artistic taste can complete this complex craft.
But if you carefully look at the photograph with plasticine flowers, you can, without fear of difficulties, still try to cope with the task. The centers of the flowers are simple brown circles with dents made in a stack. The petals are elongated with stripes drawn along the leaf. The whole originality of the craft lies not in the manufacture of parts that everyone can handle, but in their correct placement, because only due to this the picture seems three-dimensional.
Preparation of materials for MK
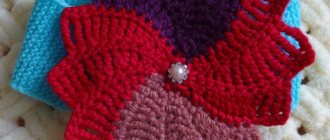
The secret of beauty is in volume and brightness - the hairpin benefits from color. three different shades of pink or other colors in one flower The mass can be mixed in different proportions to obtain additional halftones.
To make a voluminous pink flower you will need:
- light plasticine in three shades;
- stack from set;
- a beautiful half bead, crystal or cabochon, can be replaced with a button or camellia;
- glue;
- a piece of felt or foamiran for fastening.
Buy self-hardening plasticine with a reserve, because we also have a cute LOL doll made from this material. You can also use it to make doll food, children’s jewelry, keychains and voluminous cards.
Interesting ideas
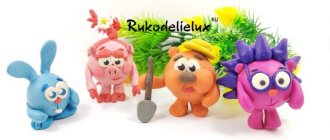
Modern master classes come to the aid of beginning craftsmen. They tell you in detail how to make a craft from airy plasticine. If you do the work step by step, strictly following the advice of experienced craftsmen, everything will work out. This activity captivates not only children, but also adults.
Clothes for dolls
A Barbie outfit can be made from several bags of airy plasticine. The doll must be placed on a stand. For the dress, rectangles are rolled out and applied to Barbie. Excess material is carefully cut off.
The lower part of the outfit and the bodice of the product are designed. It is worth taking care of the armholes of the sleeves, making cutouts on the front of the dress and the back. In order for the outfit to have a finished look, it is necessary to trim the edges. For decoration, small buttons, beads, braid, and beads are used. The finished dress is covered with a layer of sparkles. The little princess will be delighted with such new things for her favorite doll.
Keychain
An original gift suitable for any occasion. You can use any figurine for the keychain. A small fairytale house would be an excellent option. The base is a seashell and plasticine in 8 colors. You will also need a gold pendant, a ring and a pin with an eye.
Painstaking work requires time and patience. Sand-colored plasticine is filled into the shell, making a small depression. The basis of the house will be a white cylinder; a second part of the same shape will be needed for the roof. These elements are glued together.
A rope is made from red material, which is wrapped around the roof of the house.
A pin with an eye is fixed at the top of the craft. The doors will be blue, and gray material will be chosen for the foundation. You can complement the keychain with a tiny lifebuoy, starfish, or corals. All parts are easy to make from plasticine.
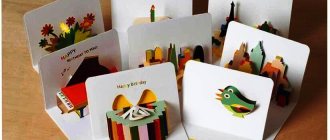
Bright postcard
You can congratulate a person using an original message. Three-dimensional flowers and leaves are made for the postcard. All parts are carefully attached to the base of the selected tone. It is worth thinking about the layout of the composition in advance. Do not forget about congratulations, which can be written in any suitable place on the basis.
If you have no imagination, then you should watch the video. Experienced craftsmen offer many interesting ideas that you immediately want to bring to life.
Modeling is an interesting and useful activity for a child. It develops fine motor skills and gives the baby the opportunity to unleash his creative talents. If something doesn't work out, the mistake is easy to fix. There is no need to start all over again, so the baby will not be afraid of failure. The fidget will definitely enjoy this fun and interesting activity; he will be happy to create his first masterpieces from airy plasticine.
Subtleties of manufacturing
The choice of cage dimensions for songbirds directly depends on their size. For miniature birds, a small structure made of plastic or metal is suitable. It is best to choose a rectangular shape. The perches in such a cage are located at different heights, which will help its inhabitant move from top to bottom with ease. In this case, the drinking bowl and container with grain are placed on the floor of the “dwelling.” It is better to make the tray retractable to make it easier to keep the cage clean.
Round designs are no less popular. Large vintage checks look very impressive. Such a house for birds can be equipped with swings, perches and other bright accessories.
This cage can also be hung or conveniently placed on a hard surface.
Kids can make these flowers
Very young children will also be able to present their flower gift by March 8th. The simplest manufacturing options are when the child is asked to decorate a drawn flower with pieces of plasticine - small colored balls, thin long sausages. They can simply stick them to a picture or make a curly curl. Such pictures-bouquets look very festive.
Orchid
You can create a floral composition provided you have the following tools:
- small pieces of strong wire;
- straight skewer;
- greenish, brown, pinkish and white plasticine.
Flowers from air plasticine - orchid step by step
You can make your own orchid by following these steps:
- Knead 3 pieces of material in your hands, cut the wire into pieces of the required length, having determined in advance what size the bouquet will be.
- In your hands, knead the brown composition in the form of an oblong ribbon, place the wire in the center and, securing the edges with oscillatory movements, rub the tube until smooth.
- Make blanks for 3 flowers in the form of 3 small and 3 large petals. Make a pink box that will be located in the center.
- Stick pink balls onto the wire edge, then remove them so that a hole is formed in their center. Give the petals a drop shape by squeezing each one lengthwise with the back of the mesh.
- Collect inflorescences based on 6 petals, fixing the box in the middle.
- Arrange green foliage in an elongated and flat shape.
- Assemble the branch by first fastening the frame and connecting the edges of the wire, which is covered with plasticine.
- Attach buds to the upper edges, place flowers and foliage along the entire length.
- At the end, attach the soft elements, pressing them to the frame.
Types of plasticineography in preschool educational institutions
At the preschool educational institution, six types of non-traditional plasticine modeling techniques are practiced, each of which has its own characteristics of performing a creative task:
- direct plasticineography - the picture is drawn up on a horizontal surface (children roll up parts from plasticine in the form of “balls”, “sausages”, place them on the base, while the outline of the picture can be applied to the substrate in advance) - starting from the second semester of the first junior group;
- stained glass or reverse plasticine (plasticine parts are laid out on the back side of transparent plastic or plexiglass along pre-applied contours) - children 5–6 years old;
- contour modeling - the picture is laid out with flagella (thin “sausages”) of different thicknesses (a drawing is applied to the base, with flagella laid out along the borders of the image - this gives it volume, then the internal elements of the picture are laid out with flagella) - second semester of the second junior group or middle group, depending on the level of preparedness of children, in particular, the development of the ability to roll thin sausages or squeeze plasticine from a syringe;
- multi-layer modeling - the image is obtained by successively applying layers of plasticine (from “flat cakes” of different colors we make a “layer cake” from dark to light shades, we bend the workpiece in the center or roll it into a “sausage”, cut it into parts) – older groups;
- mosaic technique - laying out a picture with plasticine balls of different sizes - second junior, middle groups;
- modular modeling - elements are made using different types of techniques (“balls”, “sausages” of direct technique, contour flagella, etc.), and then these modules are assembled into a single composition;
- textured technique - creating plasticine paintings of varying degrees of convexity (bas-relief - the image stands out from the background by less than half, high relief - the image appears above the background by more than half, counter-relief - the drawing goes deeper into the background) - preparatory group.
cornflower
Cornflower is a famous wildflower. Due to their unusual colors, cornflowers are often added to bouquets. We have prepared a step-by-step lesson on sculpting a cornflower from plasticine.
To make this craft you will need: 1. Plasticine of different colors: green, blue, purple, light purple and brown. 2. Stack with a spatula. 3. Wooden skewer.
We sculpt a cornflower step by step
Step 1: Form the base for the bud. To do this, take blue and light purple plasticine, knead it thoroughly and mix the two colors together. From this mass we fashion a drop-shaped piece and attach it to a skewer. Using a stack we draw the texture of the bud.
Step 2: Then take purple and light purple plasticine. Knead each piece and cut off a strip 2 mm thick. Using a stack, we make cuts along the edges of the strip. These blanks need to be wrapped around the base of the bud. First, we attach a strip of light purple color, and then purple. After this, we straighten the edges of the workpiece to the sides.
Step 3: We will make the main petals from blue plasticine. Roll out a sausage from half a block of plasticine and divide it into small parts. In order to make a petal, you need to roll a piece of plasticine into a ball, and then flatten it and give it the shape of a drop-shaped cake. Cut out three cloves on the petal in a stack. Glue the edges of the petal together. We repeat the same steps with the remaining part of the plasticine. There should be no more than 20 petals.
Step 4: We fix the made petals on the bud, below the stamens. Next, we make a receptacle from brown plasticine. We draw a relief on it.
Step 5: The skewer must be carefully covered with green plasticine.
Step 6: Let's make a couple of green leaves. We give the mass an oblong shape and cut through the veins with a stack. Then we fix the blanks in the middle of the stem.
That's all, the plasticine cornflower is ready.
Iris
To make irises from airy material, you need to prepare the following materials:
- a children's rolling pin or a cylindrical tube (for example, a lipstick cap will do);
- to create foliage with a stem you need green material and strong thin wire;
- flower heads require yellowish, white, bluish and blue material;
- match with a stack.
Flowers made of airy plasticine - iris step by step
Flowers made from air plasticine - iris step by step
Flowers made from air plasticine can be easily and quickly completed by performing the following step-by-step actions:
- Give the blue, bluish and white material a cylindrical shape and connect them together, forming an elongated sausage. Roll out the workpiece with a rolling pin to a thin strip.
- Gather the ribbon into a bundle so that the blue tint is on the outside, blue in the center, and white on the inside.
- Cut the tourniquet crosswise into small flat cakes. Press the workpieces with your fingers, leveling the surface of the material.
- Stretch all the cakes to a thin flower petal. The central area of each piece will be white, which will gradually begin to thicken.
- Apply furrows lengthwise to each petal using a match. Blue and light blue will be mixed with white color, which will make the part more like a real flower. It takes 7 petals to create one iris.
- Fix 4 petals around the circumference so that the corrugated section remains outside.
- At the bottom, press an additional 3 petals, lowering them down. The grooved area of the lower petals should face up.
- Attach a green sepal to the lower part of the bud. Take strong thin wire for the stem and sausages for the foliage made of green material.
- Form a stem base and stick it in at the bottom. Apply a small stripe of yellow material in the middle of each lower petal.
- Make thin and elongated leaves from green material, fixing them to the stem.
Plastids
Plastids (from the ancient Greek Πλαστόс - fashioned) are semi-autonomous organelles of higher plants, algae and some photosynthetic protozoa. Plastids have from two to four membranes, their own genome and a protein synthesizing apparatus.
According to the symbiogenetic theory, plastids, like mitochondria, arose as a result of the “capture” of an ancient cyanobacterium by the predecessor of a eukaryotic “host” cell. In this case, the outer membrane of the plastids corresponds to the plasma membrane of the host cell, the intermembrane space corresponds to the external environment, the internal membrane of the plastids corresponds to the membrane of the cyanobacterium, and the stroma of the plastids corresponds to the cytoplasm of the cyanobacterium. The presence of three (euglena and dinoflagellates) or four (golden, brown, yellow-green, diatoms) membranes is considered the result of two- and three-fold endosymbiosis, respectively.
Chloroplasts (from the Greek Χλωρός - “green”) are green plastids that are found in the cells of photosynthetic eukaryotes. With their help, photosynthesis occurs. Chloroplasts contain chlorophyll.
One leaf cell can contain 15-20 or more chloroplasts, and some algae have only 1-2 giant chloroplasts (chromatophores) of various shapes.
Chloroplasts are bounded by two membranes - outer and inner. The outer membrane delimits the liquid internal homogeneous environment of the chloroplast - the stroma (matrix). The stroma contains proteins, lipids, DNA (circular molecule), RNA, ribosomes and storage substances (lipids, starch and protein grains), as well as enzymes involved in the fixation of carbon dioxide .
The inner membrane of the chloroplast forms invaginations into the stroma - thylakoids, which have the shape of flattened sacs (cisterns). Several of these thylakoids lying on top of each other form a grana, in which case they are called grana thylakoids. It is in the thylakoid membranes that light-sensitive pigments are localized, as well as electron and proton carriers that participate in the absorption and transformation of light energy.
Figure 10. Chloroplasts.
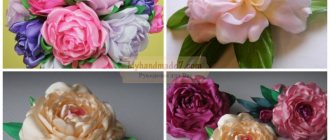
Country style roses
How to make a flower from plasticine
If the design of the chosen room consists of Provence or country elements, you can add a little originality and bright freshness by making some roses. The technique for rolling these roses is very simple, but you also need materials.
You need:
- Fabric of any color you like;
- Scissors;
- Glue.
Step-by-step instruction:
Cut the fabric into strips at least 50 centimeters long and 4-5 cm wide. In the future, you can use any strip sizes, but for a better understanding it is better to take standard ones. Place a little glue on one end of the tape and bend it along the side.
Start rolling the dough into a roll. It is necessary to make 3-5 revolutions. When the center of the workpiece is tight enough, fold the tape along a curve and continue winding it onto the roll. This way you will start making petals.
Cover the bottom of the flower with a piece of (preferably felt) fabric. You can use the resulting flower.