Where to begin?
First of all, it should be understood that it is not at all necessary to start sewing almost any suit, as they say, from scratch. It’s entirely possible to use ready-made clothes that you won’t mind, and add some thematic elements to them.
The bee costume is exactly that. Therefore, first of all, you need to get a plain black or yellow dress out of the closet. The style and material are completely unimportant. The main thing is that the child feels free and comfortable in it.
Next, you will need satin ribbons of the opposite shade - black or yellow, depending on the color of the dress. They should be sewn horizontally. The stripes may not run along the entire length, but only in the upper part of the outfit. You can also use a skirt and embroider only it.
Children's crafts from chocolate eggs
Crafts made from eggs from Kinder Surprise not only develop a child’s abilities well, but also help identify unnecessary “garbage” for making something unusual. We have already mentioned a rattle craft for the little ones. You can also make a crib pendant for them, which will not only decorate it, but also serve as some kind of protection against colds. So, to make such a pendant, you need to take the capsules, make holes in them on both sides using an awl and thread a thread or rope through them. And put a few cloves of garlic and a cotton wool soaked in tea tree oil into the container itself. You can also take this pendant with you to the garden, as well as to school.
With older children, you can already make crafts from plastic Kinder eggs together. For example, you can start by making a caterpillar. It is carried out similarly to a pendant; you can connect the capsules to each other with a rope or elastic band. You can decorate the caterpillar with crochet straps or colored paper confetti by sticking them to the egg. You can make confetti yourself if you have a hole punch. As for tying, this is perhaps the most successful option, since thanks to it you can create various animals that a child can play with without fear. And who exactly it will be depends only on your imagination. You can make a fictional character or embody one of your favorite cartoon characters.
In addition, by learning how to make basic crafts from Kinder Surprise chocolate eggs, your child will develop hand motor skills, imagination, and will also be able to have fun on occasion without his family and friends, which will be another reason for pride for you.
So, a bouquet of capsule tulips would be an excellent gift for a mother, sister or grandmother. To do this, you need to divide the egg into halves and cut out the cloves with scissors, resulting in petals, and make a stem from cocktail straws.
Bee antennae
A mandatory attribute of a bee costume must be antennae. Making them is not difficult at all. To do this you need to prepare:
- threads;
- yellow yarn;
- dark rim;
- black braid;
- wire.
First you need to make two small pompoms on any base, the technique and result will be the same. So, as an example, we will tell you how to make pompoms using a regular fork. The yarn needs to be wrapped around the sharp part of the fork and secured so that the wound part does not unravel. Then cut a small piece of yarn and tie the skein in the middle with a fork. You will get something like a bow. You need to tie it very tightly. Next, remove the “bow” from the fork and use nail scissors to carefully begin cutting the loops along the edges. Having fluffed the pompom on all sides, you should roll it a little in your hands so that it finally takes the desired shape. Make 2 of these pompoms.
Then attach the wire to the hairband on both sides. Wrap the braid around it in a circle and secure it. Once completed, secure the pompoms to the tops of the wire. The antennae for the bee costume are ready!
Making a large Kinder Surprise out of paper step by step with your own hands
A huge Kinder is the embodiment of dreams and delight for every child! They are especially loved for the surprises that are hidden inside, and we can fill this egg with those gifts and sweets that your child loves most. The shell or shell is made using the papier-mâché technique, I think every parent became familiar with this technique in school, so anyone can create this masterpiece!
We will need:
- Balloon - 1 pc.
- Paper (A4 form, newspaper)
- PVA glue
- Starch or flour for gluestar
- Gouache paint
- Brush
- Printout with inscription
Manufacturing process:
- As you probably already guessed, our Kinder is made from paper and a balloon; we will paste the paper over the balloon. You can use PVA or paste as glue.
I use PVA glue, first diluted with a small amount of water.
2. We inflate the balloon to the size we need, tie it with thread so that after we can untie it. Place it in a bowl or other container for ease of handling.
3. 1st layer - paper + water. We cut the paper into small squares or strips, dip them in water and cover our ball. You need to do everything intensively, as the water dries out quickly and the leaves will simply begin to peel off.
In this way we cover the entire ball and let it stand for 5 minutes and dry.
4. We glue the next layer using PVA glue or paste. We coat our ball with glue and glue the second layer of paper.
5. Then generously coat the third layer of paper with glue and glue and leave our egg overnight so that it dries thoroughly.
I left the ball to dry near the battery in a container with holes. You can dry it by tying it with a string, but I found reviews that when the ball hangs, wrinkles may appear during the drying process and I didn’t take any risks.
7. The next day I glued 3 layers of paper again and now my kinders are drying out, although they are quite strong and perhaps 3 layers would be enough.
8. The next step is painting our craft. Immediately paint the lower part red, having previously drawn out the waves with a simple pencil, and then the upper part white. You can paint with gouache, acrylic paint or water-based paint
Important! Add a little PVA to the gouache so that the paint does not stick to your hands and does not crack when drying. 9
Then you need to glue the inscription or draw the letters yourself. The easiest way is, of course, to print it, you can do it in color or black and white, and then color it yourself, so it will turn out the most realistic. Or attach a white piece of paper to the monitor and circle the letters
9. Then you need to glue the inscription or draw the letters yourself. The easiest way is, of course, to print it, you can do it in color or black and white, and then color it yourself, so it will turn out the most realistic. Or attach a white piece of paper to the monitor and circle the letters.
For you, I will leave the inscription in 2 options, and you choose the one that is convenient for you:
in color
black and white
10. Now you need to cut each word and glue it separately.
11. This is what Kinder ends up looking like
12. Now you need to make a door in the egg and fill it with a gift. Using a stationery knife, cut it into a square or round shape; for beauty, you can tie it with a ribbon.
Or you can even carefully cut off the top of the kinder, this is at your discretion.
As a result, we should end up with a large egg like this:
Really, it makes a great gift, doesn't it? It can be given as a gift for the New Year, for a birthday, or for any occasion! You can also make the kinder personalized, glue your child’s favorite cartoon characters on it, write a wish, and in a word, there’s room for your imagination to run wild!
You can make not only a kinder, but also a large mmdms or a smiley.
And so that the crafts are not matte, you can give them gloss with the help of varnish!
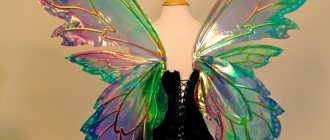
How to make wings?
To make your own bee wings, you will need:
- wire;
- thin white tights;
- thick thread;
- black ribbon;
- scissors.
First, you need to make blanks for future wings from wire. There should be 4 of them: 2 small and 2 large. To do this, fold the wire into a shape resembling a drop and secure the ends so that it does not unfold. Next, tie the small ones at the bottom of the large wings with a thick thread. Having made the blank, it’s time to start tightening the wings. To tighten them, take the prepared tights and pull them over the wings, one at a time on each one. Then tie it in the same place where you tied the 2 wings with thread.
Now you need to connect 2 pairs of wings. This can be done using the same wire, simply winding it between two blanks. And hide all the knots so that they are not visible.
Since the wings should be on the back, they need to be attached there somehow. To do this, you can take a strong black ribbon and, cutting off 2 pieces, tie it to each of the wings. To prevent the ends of the ribbons from fraying, lightly scorch them with a lighter.
Crafts from Kinder eggs for the New Year tree
The number of original children's crafts made with your own hands from Kinder eggs includes New Year's decorations, for example, in the form of the main characters of the New Year - Father Frost and the Snow Maiden, which can be used to decorate your Christmas tree. In order to make such toys, you will need:
- kinder eggs (2 pcs.);
- toy eyes (2 sets);
- PVA glue;
- napkins;
- double-sided colored paper;
- simple graphite pencil;
- ruler;
- scissors;
- needle;
- threads;
- glitter.
Work order:
- Attach strings to the capsules through the holes made with an awl, form a loop through which future crafts will be hung on the Christmas tree. Secure it with the support of the knot that will be inside the egg.
- Make 2 scarlet and blue rectangles from colored paper. The first will be preparations for Father Frost, the second - for the Snow Maiden.
- Make a beard from snow-white paper, cutting out a rectangle measuring 2x1.5 cm. Cut the fringe on one side of the workpiece, not reaching the edge by about 0.5 cm, twist it with a pencil. The blank for the Snow Maiden's hair is made in the same way, only the rectangle should be slightly larger than for the beard.
- Take a snow-white napkin, cut it into pieces and roll them into balls, which will be useful for decorating the costumes of New Year's characters.
- Take one scarlet strip and connect its ends with glue, forming a cylinder, which will become Santa Claus' fur coat. Then cut it 1 cm and put it on the body part of the capsule, tuck the paper inside.
- Glue napkin balls onto the top and bottom of the fur coat using PVA glue, attach the beard.
- Take the second strip of scarlet color, make a hat by forming a cylinder and cutting it 2/3, and then mold the top of the hat. Glue napkin balls in the place where the edge should be.
- Attach the released hat to the top of the egg using Moment glue, as well as toy eyes, nose and cheeks. Do similar actions with the Snow Maiden. Only the hair needs to be glued under the hat in advance.
- Decorate the crafts with glitter, make a bag for Santa Claus from half a capsule and scarlet paper. To do this, you need to wrap the egg in paper and tie the paper with a string.
Such crafts for decorating a Christmas tree can also be made from large Kinder eggs.
As you can see, the scope of application of Kinder Surprise capsules is quite wide. These can be crafts for kids, kindergarten, Christmas trees, as well as educational games intended for children of any year. So, this waste material can be very useful for children's creativity.
Decorative elements
In addition to the main costume, you can try to decorate it with some accessories. For example, make a bright flower brooch that will complement the look of a bee costume for a girl.
For a decorative flower, prepare:
- colored felt sheets;
- sequins or beads;
- glue gun;
- pin;
- scissors.
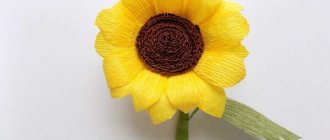
Making such a flower is very, very simple. All you need is to cut out the core from a dark sheet of felt, as well as light or yellow petals. And carefully use a glue gun to glue the petals to the circle. Then use thread or glue to decorate the core with shiny sequins or beads. Glue the flower to a special pin and decorate the bee costume with it. Exactly the same flowers can be glued to strong elastic bands and, having made 2 braids, decorate your hair with them.
What you will need
- Yellow duct tape
- Clothes hangers
- Black tights
- Pipe cleaners
- Pompoms
- Super glue
- Wire cutters
- Black rubber band
- Needle
- A thread
- Safety pins
- Clear adhesive/varnish
- Shine
- Brush
Adviсe
- You can base it on a yellow dress or shirt and use black duct tape if you like.
- You can also sew strips of fabric onto a shirt or dress with a sewing machine if you plan to wear this costume often. Cut off the back of the outfit to make sewing easier. Use threads that match the color and sew on the stripes. Then fold the front and back pieces so that the stripes match.
: The basis
This insect has a black body, and accordingly, to make a New Year’s bee costume with your own hands, you should choose clothes of a suitable color. It could be a dress, a T-shirt, a sweater or even a sweater. And the look will be completed with stylish striped stockings, wings, mustaches and a bag.
- To create bright stripes of rich color, electrical tape is best suited. It is easy to find in a hardware store, especially since the cost of such a purchase is minimal.
- Use sewing pins to mark the line of the armpits and back - this is best done during fitting to ensure the finished look looks flawless. Remove the outfit and lay it out on a flat surface.
- Glue pieces of electrical tape to the suit - from the armpits to the waist. They will become an imitation of stripes - this is a simple answer to the question of how to make a bee costume with your own hands.
Read also: How to use cocoa butter?
- A similar pattern is repeated on the back of the suit. It is important to glue carefully, because tearing off the strips several times can ruin the thing, and after that they will only last a minimal amount of time.
Shoes and tights
If we are talking about a children's party, then black ballet flats or soft shoes would be most appropriate. As for tights, the choice may fall on black, white or striped.
You can also give preference to knee socks with lush lace on the edges.
As you can see, there is nothing complicated in preparing for a children's party. And making a bee costume with your own hands is quite possible and even interesting. The main thing is enthusiasm, the right approach and a good mood!
Source
Flight aid
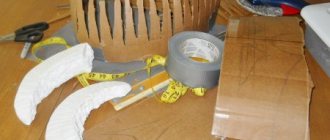
To make wings for this carnival costume, cut out two wings from cardboard and cover them with yellow satin. You can make harnesses with elastic bands or ribbon ties.
Consider the baby's age when making wings. If they are too large, the child will not be able to move freely, much less run. And look, it will tear them off completely.
Depending on the temperature in the room, the resulting sundress or T-shirt can be worn both over golf and over a T-shirt.
Bee costume
a DIY bee costume for a girl , even if you don’t have cutting and sewing skills.
The simplest option: a yellow T-shirt and a skirt made of black and yellow tulle, tights and a headband with springs on the head. The skirt is easy to make: strips of tulle are tied onto a thick elastic band that fits the child’s waist, alternating yellow and black stripes. The more stripes, the fuller the skirt. If you have at least basic sewing skills, then the skirt can be made multi-layered, alternating colors. You can knit a bee costume for a girl with your own hands if your mother knows how to do needlework. If you use knitting needles, knit in garter stitch. When using a crochet hook, the top and leggings are knitted with regular stitches, and the skirt with an openwork pattern. A knitted dress will look unusual on a little fashionista. When knitting from “grass” yarn, the fabric will not be smooth, but shaggy, like a real bee. Only in this case the skirt does not need to be made very fluffy.
Ideas that can be implemented using Kinder eggs
The simplest DIY craft made from Kinder eggs is a rattle.
To make it, you do not need to make any special efforts due to its simplicity. So, you will need to take any cereal you have in the house (rice, buckwheat, oatmeal), beans, coffee beans, hazelnuts, beads, etc. and place them in a kinder container.
In addition, such a craft made from Kinder eggs can be used for playing with children, guessing by the sound what is lying there. And then, finding the same sounds, collect them into groups. Then you can tie it with crochet and thread.
Also especially popular are baby sling beads made from chocolate eggs. They, like a rattle, are filled with various fillers. To make these sounding sling beads, you will need to take the capsules and pierce each of them with an awl on both sides. Then thread the ribbon through the holes and tie with crochet and thread. You can do this with yarn of different palettes so that the child can learn colors.
An interesting idea for crafts made from Kinder eggs are various little animals that can be used for theatrical performances. Together with them the child will explore the world. They are also made by crocheting and gluing eyes from small beads, as well as body parts from felt. You can also create animals using another principle: paint their faces with acrylic paints.
The resulting craft from Kinder eggs can be garlands. The scheme for their manufacture is similar to baby sling beads: holes are made on both sides of each capsule and a wire or fishing line is threaded through. You can decorate them using painting with acrylic paints. Wreaths on the door are made in the same way as garlands.
Self-production
If there are trees on the site, then bees and hives can be suspended from a branch using fishing line. This will create the effect of them floating. If there are no trees, then you can independently install a stick on which to mount a horizontal bar and again hang the crafts. Bees can also be placed on the railings of a porch or veranda if they are made with legs. The bees on the honeycomb will look even more interesting. So, we’ll tell you how to make a bee from a plastic bottle.
