It is not difficult to make a canopy with your own hands.
It is more difficult to heat your home. We will tell you about how warm shelter from rain and wind is made in Siberia and Altai. They warm themselves there with the help of nodes. If you are faced with the question of spending the night in the forest, but you don’t have a tent (you forgot it or, God forbid, you got lost), the nodya will be an excellent means of heating.
It is worth saying that it will not be possible to make a fire quickly - it is a rather labor-intensive process. It requires half an hour to an hour of preparation. But, having done everything correctly, you will not freeze even in frost.
In parallel with making the nodya, you can prepare some dishes according to a camp recipe
with stew.
Soup with stewed meat, porridge with stewed meat, or just a kettle or pot of water can then be hung over the node, which will provide warm food and drink for several hours in advance. Well, in order for the food to be satisfying and rich, you need to take the highest quality products with you - stewed meat
, cereals (rice, buckwheat or pearl barley), take potatoes, tea leaves, sugar, salt and spices.
By the way, in a camp kitchen for fast food, we recommend buying soups in cans
and
ready-made main courses
- you just need to heat them up.
Ready-to-eat canned porridge and pilaf with stew
. As they say, the main thing is to have fire for warmth and food.
Classification of shelter types
Types of shelters are classified purely conditionally:
- According to the method of protecting
animals from climatic influences, buildings are:
- closed (den, wigwam, tent, igloo, dugout, hut);
- open (canopies, hammocks in trees, decks in swamps).
- By capacity:
- individual;
- group.
- Intended purpose:
a winter shelter saves a person from freezing, a summer shelter protects from rain, wind, sun, mosquitoes, and snakes. - By service life:
- temporary (protection for several hours or days) are built for overnight stays, daytime stops, and during short-term natural disasters;
- capital (for survival that lasts indefinitely).
- By labor costs:
- easily erected (temporary shelters);
- labor-intensive (capital) - construction requires skills and the necessary tools.
- Based on source materials,
types of shelters are more widely represented:
- fabric (canopy, tent, bivouac bag) - if there is covering material;
- frame-fabric (plagues, wigwams) - you need a frame of poles, metal tubes, skis, covered with canvas;
- frame-deciduous (canopy, hut, hut, Adyghe house) - the fabric is replaced by spruce branches, branches with foliage, turf, tree bark;
- earthen (niche, hole, cave, dugout) - dig in the ground;
- snowy (they dig holes in snowdrifts, a hole, a trench, a cave, a man-made snow-covered den under a fallen tree - a winter shelter in the forest);
- snow-block - blocks are cut out of compacted snow to build an igloo, a snow house;
- reed huts made from bundles of reeds;
- stone (will only provide wind protection) - construction of sangars in the mountains, where the only building material is stones;
- adobe (huts made of adobe bricks, or fencing coated with clay, woven from poles and branches);
- wooden (hut).
- By origin:
- natural (caves, gorges);
- man-made;
- combined.
- By location relative to ground level:
at level, below or above.
Fishing umbrellas
For adherents of float and bottom fishing, a large umbrella will be an excellent fishing companion. A regular beach option is quite suitable.
It will perfectly protect your seat, equipment, bait and bait not only from rain, but also from the sun. After I became interested in feeder fishing, the umbrella took a permanent place in my rod case. With the advent of the umbrella, the problem of the “terrible fisherman’s tan”, the one that covers half the face, went away.
Fishing rain umbrella
Much more interesting are the umbrella models specially designed for fishing. Initially, they have a more powerful frame and higher density fabric. Even a powerful gust of wind cannot turn such an umbrella inside out.
In addition, fishing umbrellas have additional fastening systems, such as loops, cables and pegs, or special fastenings to a chair or chair.
Pros: Excellent option for sit-down anglers and provides comfortable protection from many weather conditions.
Disadvantages: small usable area in strong winds, in the absence of a branded chair + umbrella set, you have to be tricky with installation on hard soils, as well as concrete and asphalt.
Choice of shelter and types of shelters
There are more than a hundred primitive dwellings built by people in various geographical areas in emergency situations. Types of shelters differ in parameters and design, building materials, and construction method. Having a tent immediately solves the issue of a roof over your head, the main thing is that the type of material is suitable for the surrounding natural conditions.
The type of shelter is chosen depending on:
- functional purpose (from what unfavorable natural factors, how long protection is needed);
- specific conditions (geographical location, relief, season of the year);
- availability of materials and tools at hand;
- time for arrangement, having previously assessed the experience and strength of the workers.
It is important to build durable types of shelters that retain heat as much as possible. Otherwise, the predicament of the people may become disastrous. Simplification of the design is permissible only if there is a shortage of tools, materials, time, and effort.
Summer shelters in the forest
Classic universal shelters usually have 3 main components: floor, roof and walls. Depending on the goals and conditions of survival, some of them may be discarded as unnecessary. This often happens when there is a suitable place: a windbreak, a cave.
Arrangement of the canopy
A canopy is a primitive protection from precipitation and moderate wind, but it will not save you from the cold. It is easy to build such a shelter in the forest, having a large piece of polyethylene, and finding two trees standing next to each other. A ceiling pole is placed in their forks (or notches on the bark). You can replace the pole with a tightly stretched rope. Throw a film over the support, stretch the canvas to form a 3-angled entrance, press down the lower edges with stones.
If there are no trees, then 2 stakes are driven into the soil at an angle of 45 degrees; a regular triangle-entrance is formed. The ceiling pole rests with one end in the fork formed by the stakes, and rests on the ground with the other. A canvas (film) is placed over the pole, the edges of which are attached to stakes and rolled to the ground along the entire perimeter.
A shed with a U-shaped entrance is made for the group. You will need to place two parallel ceiling poles at the required height, resting their ends on stakes with forks dug into the ground. A film is placed over the poles, the lower edges of which are secured to the ground. The design is bad because water accumulates in the middle part of the “roof” and the canvas sags inward. Spruce branches are suitable for shelter in the forest for a roof.
Wigwam or chum
This is a frame shelter in the forest and in the field, capable of protecting from precipitation, wind, and even frost, if you light a fire of dry fuel in it so that there is no strong smoke (leave a hole at the top for smoke extraction).
Tie the poles (5 pieces are enough, but more are more reliable) into a bundle at one end, and place them on the ground in a circle at the other end. Spread the covering sheet over the frame. If it is not there, the wigwam is covered with bark from trees (birch bark, pine bark is suitable). The layers are arranged in circular rows, starting from the bottom. The pieces are fastened together with willow twigs if there is no twine.
On a note:
in their design and properties, tents and wigwams are in many ways similar to a circular hut. You can learn more about such shelters in the forest from the article about their arrangement.
In areas of strong winds, a shelter is erected around a tree trunk, first clearing it of knots. But in this case, it will not be possible to light a fire inside. For frosty weather, a tent or wigwam can be “insulated” by covering them with snow blocks, placing stronger ones at the bottom.
Adyghe house
Flexible branches (preferably willow) are dug into 2 rows parallel to each other, the tops are tied together - arches are obtained. Horizontal branches are passed through them. Spruce branches are laid on the sheathing in rows, starting from the bottom, or covered with film. If the area is overgrown with bushes, then tie the tops of neighboring bushes as arches and uproot the space between them.
In addition to the above, shelter in the forest can be found under a broken or uprooted coniferous tree (inversion). You need to check its stability, cut off all the lower and protruding branches, and place them on top of the remaining branches facing the ground.
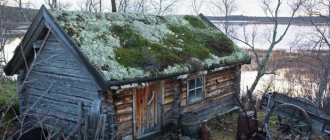
A hut is a favorite type of shelter for children.
The device is similar to a fabric canopy. The frame is made of poles, the fabric is replaced with spruce branches, branches with dense foliage, laid in rows on walls made of sticks leaning against the ceiling crossbar. The coating begins from below in rows. If there is snow, sprinkle the walls with it.
Winter shelters and their types
The simplest and individual snow shelter from light frost is a single hole in a snowdrift. To build a hole, a snowdrift 1 m high is enough. If there is no such snowdrift, then it is raked. First, they trample down the selected area, place a backpack on the center, and cover it from above. The snow is placed in a heap, periodically compacting it, then shoveled out from the leeward side with a shovel (or hands). Packed items reduce the amount of work required to remove snow.
Trench or hole
Snow shelters-trenches are dug in deep snow and, in the absence of tools, trampled underfoot. Width – 1-2 m, length – depending on the presence of covering material. On top of the trench across the trench, upon reaching a depth of 1.5 meters, “rafters” (skis, ski poles, poles) are laid 20-40 cm from each other and covered with film. The edges of the cloth are pressed with pieces of ice, snow, and stones. A layer of snow 20 cm thick is poured on top.
In loose snow cover, the cross-section of the trench is rectangular; in dense snow cover, it is trapezoidal (narrower at the top). If there is no artificial covering, slabs of crust and a thick layer of spruce branches are laid on top of the rafters (snow cannot be poured on top of it - it will crumble or melt).
A snow hole is a shelter made in a deep compacted snowdrift. First, they dig a well 2 m deep with a small diameter (up to 70 cm). Next, the person deepens the sides. The thickness of the ceiling depends on the strength of the snow. If it is loose - at least 80 cm, for dense it is enough 20 cm. At the top, in order to avoid the collapse of the vault, the construction site is fenced off with stuck sticks. At the bottom of the pit, make a bed half a meter high. The entrance is plugged with a backpack. The construction of the pit is labor-intensive.
Snow cave
A properly constructed snow cave is a reliable winter shelter. Usually built on mountain slopes with thick (at least 1.5 m) snow cover. The place must be avalanche safe. A hole is dug into the snowdrift with your feet, from which a narrow tunnel is dug deep into the depths - the most difficult stage of construction. Its dead end lifts up at an angle of 60 degrees and expands to the sides to the desired size. Waste snow is thrown into a tunnel, from where it is shoveled upward. The ceiling of the cave is spherical in shape. The construction is labor-intensive, requires skill and perseverance, but it is the warmest shelter.
Sometimes a person, once in the forest, can get lost. If this happens in the warm season, the chances of finding a way out (without much damage to health) are quite high. But if this happens in winter, the situation becomes more complicated. This article will help you understand how to build a shelter for overnight stays in winter.
Winter days are quite short, and it begins to get dark by 17:00. If, as dusk approaches, you have already realized that you will not be able to get to your home, then you need to carefully prepare for spending the night in the forest.
An alternative to an awning
If you don’t have enough money for an awning, you can use a piece of polyethylene instead. Although polyethylene is less durable and not as convenient to handle, it is usually much lighter than an awning (except, perhaps, for lightweight awnings) and is much cheaper.
It is recommended to tie polyethylene to a rope with a blind loop or a stirrup knot, and to prevent the polyethylene from slipping out, a smooth round pebble or pine cone is first wrapped in it. I once used burdock baskets molded into balls for these purposes: they are softer and during gusts of wind they partially absorb the shock, protecting the polyethylene from tearing.
In extreme cases, when there is no time to search for stones and burdocks, you can do it even simpler: tie the polyethylene to a rope using a “boa constrictor” knot. The polyethylene, well clamped with this knot, does not slip out, unless, in parallel with the rain, such an improvised awning is not torn from the rope by the wind.
The video below shows a rather complex awning made of polyethylene:
Having invented and tested this option for attaching rope to polyethylene several years ago, I now always use only it. The main disadvantage of this method is the difficulty of untying the knot after use. But these are minor things.
If neither an awning nor a piece of polyethylene were included in the things you took on a hike, a canopy can be made from a large garbage bag cut lengthwise, which is often used as a waterproof liner in a backpack to protect things from moisture. But in this case, you need to weigh the pros and cons so as not to end up at the fire, but with a backpack full of wet things.
In the old days, instead of an awning, a canvas raincoat could be used, which, if necessary, could easily be transformed from a cape into effective protection of the fire from rain. Although, as far as I can tell, raincoats are still quite popular today, especially among former military personnel.
A “space blanket” will do just fine as a mini-awning. It is durable, lightweight and very compact. Its disadvantages include its small size and loud noise created when used in the wind.
To protect the fire from rain, various options for tents, awnings and other stationary structures are also used, but these are more options for urban and country conditions than for tourism and survival conditions, so we will not consider them in this article.
If a person is left bare-handed in the middle of a forest or other wild area, then you need to know how to build a shelter from scrap materials.
Housing made of snow
The first option for overnight accommodation is a snow hut.
To build such a shelter, you must first find a good place. The most optimal terrain options:
- one or a group of fallen trees;
- roots turned out of the ground;
- hillside (preferably facing south).
The shelter will be located precisely under the cover of these trees or roots.
To start building a hut, you need to prepare the foundation - dig a hole or make a small depression in the ground. Next, you should make a frame from branches (coniferous ones are best), and if you have a piece of plastic film, oilcloth or cloth with you, cover the frame with it. Then you can pour a layer of snow on top.
Build an improvised “mattress” by laying fir branches on the bottom of your shelter. If you don’t find any, you can use dry grass or hay.
At night, the entrance to the snow hut must be covered with branches.
Despite the fact that such a dwelling is made of snow, it will be much warmer in it than in a wooden hut.
Feasibility of application
There are no restrictions or recommendations for using umbrellas while fishing. It is necessary primarily in order to make the rest more convenient and enjoyable for the fisherman. At the same time, the use of this device has certain features that must be remembered so that the umbrella does not turn from an object of additional comfort into a source of additional problems.
Naturally, when actively fishing using a spinning rod or feeder, such a device for a fisherman will most likely be superfluous. On the other hand, a small umbrella over the place where live baits are stored is, on the contrary, not only desirable, but also mandatory so that the bait does not deteriorate under the rays of the Sun.
Most often, umbrellas are used for leisurely fishing, which does not require frequent casts from the fisherman. This can be fishing using a fishing rod or a plug. The use of umbrellas or more advanced shelters - awnings or tents - when fishing for carp is highly recommended.
Don't forget about fishing in winter. The wind protection that awnings can provide will be more than welcome.
Hut made of branches
A wooden hut, like the previous housing option, can be built without any tools. Of course, if you have an ax or knife with you, they will not be superfluous. But we are considering the topic of survival and miss this option.
It is worth noting that there are undesirable places for spending the night, these are: lowlands, gorges, the foothills of mountains - in such places floods, rockfalls and avalanches are possible. You should not place it on hills either: the shelter will be vulnerable to the wind.
It is better to build a shelter on a flat surface, surrounded by trees: they will protect from the wind.
You should start by searching for debris. For the base of the hut, a small broken trunk is best suited, which can be placed at an angle on a reliable support. To do this, it is advisable to find a low branching tree or stick a slingshot-shaped log into the ground. At this stage it is also worth taking care of the flooring. Dry moss, leaves or branches are suitable for flooring.
So, on such a simple basis it is already possible to build the future “walls” of the hut. It is very good to cover the shelter with spruce branches. But if there are none, regular ones will do. First you need to lay out large logs, small branches on top, cover it all with moss and dry grass.
See the video below for more details.
How to heat your home
It is better to make a fire inside the hut. At the same time, it is important to ensure that there is no fire and that the fire is kept at a distance from the “mattress” and “walls”. Don't be afraid of smoke. At first there will be a continuous curtain, but then the smoke will begin to evaporate into the loopholes between the branches.
Even a small fire can raise the temperature in the shelter by 10˚C.
Earlier, “The Epoch Times” talked about how to do it in any conditions, and if you happen to have it with you (it’s not very difficult to do it yourself), then you can even make tea.
Since ancient times, the most important skill has been building a home. Housing saved people from cold, heat, and wild animals. Even now, a tent is a must-have item when camping. But if you find yourself in an extreme situation, you will have to find and equip shelter yourself. In this article we will look at how to arrange a temporary shelter in the forest.
Shelter classification
Shelters can be divided into the following types:
1) According to the construction method. Open (canopy, flooring) and closed (dugout, wigwam, hut).
2) By capacity. The shelter can be designed for 1 person or for a group.
3) By purpose. A shelter can protect from cold, rain, snow, animals, and insects.
4) By time of use. The shelter can be temporary, used for spending the night, resting, or shelter from bad weather. Capital shelters can be used for long-term living.
5) According to the expenditure of effort. They are divided into prefabricated (usually temporary shelters) and labor-intensive (capital, long-term shelters).
6) According to the materials used. To build a shelter, you can use many different materials: - Fabric shelters (tent, canopy) - Frame-fabric (wigwams, tents) - Frame-deciduous. In the absence of fabric, branches, grasses, and ferns are used to cover the shelter. - Earthen ones. Such shelters are dug in the ground. - Snowy ones. Caves are dug in the snowdrifts, and igloos are built from snow blocks. - Stone.
7) By origin. There can be natural (caves) and man-made.
Summer forest shelters
A shelter consists of three main elements: floor, walls and roof. Depending on environmental conditions, some of these elements may be discarded. Let's consider the main types of forest shelters in the summer.
A canopy is the simplest type of shelter. It is built quite quickly, but the functionality is very limited. A canopy can help provide shelter from precipitation and nothing more. To build a canopy you will need polyethylene or a piece of fabric. Find two trees standing next to each other and attach a ceiling pole to them, or string a rope. Place polyethylene on top and press down the ends with stones. If there are no trees, then several poles will do for construction. Drive 2 poles at an angle to form a triangle. It will serve as the entrance. Place the third pole on top of the formed fork with one end, and lay it on the ground with the other end. Place a film or cloth over this pole and press it down with stones.
Wigwam
It is a frame building. Able to protect from rain, wind, and help keep you warm. If you are going to make a fire, then take care of the hole for the hood. For construction you will need poles. On the ground they are lined up in a circle, and connected at the top into a bundle. The resulting structure is covered with film or cloth. If they are not at hand, then tree bark can be used as a covering material. They begin to lay it from below and fasten it with willow twigs. The frame can be built around a tree trunk. But in this case, you shouldn’t light a fire inside.
Adyghe house
To build this type of shelter, you will need flexible branches or bushes. Flexible branches must be dug into the ground in two parallel rows, and the tops must be fastened together. You should get arches. Attach branches horizontally to the arches. Spruce branches are placed on the resulting crate. If the area where you want to build an Adyghe house is overgrown with bushes, then instead of branches you can use nearby bushes. To do this, tie their tops and you will uproot everything between them.
Winter forest shelters
In winter, a shelter can be dug directly in the snow. You will need a snowdrift; if there is none, then you need to rake the snow into a pile.
Trench
In deep snow it is very convenient to dig a trench as a shelter. If you don't have tools, you can trample it with your feet. The width of the trench must be at least 1 meter, the length depending on the covering material. After digging a trench, place rafters on top; skis and branches are suitable for this. Cover everything on top with film, cloth, and cover it with snow 20 cm thick.
Cave in the snow
On slopes with very thick snow cover, it is most convenient to dig snow caves. Be sure to make sure that the terrain has minimal chance of avalanches. For construction, knock out a hole in the snow with your feet and start digging a tunnel. Dig the end of the tunnel slightly at an angle to the top and expand it to the desired size. This will help the warm air stay inside.
Den
Another good shelter in a snowy forest is a den. You can build it in deep snow among windbreaks and roots. Make sure the trees won't move and start building your shelter. A den is built by analogy with a cave.
Snow dugout
Building a snow dugout is very similar to building snow trenches. For a snow dugout you need dense snow. Using a hacksaw or other tools, snow slabs are cut out and placed on top of the trench.
“The material presented by the author will clearly show and tell how to make a shelter in a snowy forest so that you can spend some time and spend the night in it. Using for construction only those materials that were found directly in the forest itself, the author shows us that even in the most difficult and extreme situation there are positive aspects.
This material will be useful to lovers of hunting and fishing, as well as tourists, and you just need to know survival skills in the wild, everyone without exception, “you never know what can happen in life”
And so, let's take a closer look at all the stages of construction, and also get acquainted with what and how the author used.
Materials
1. spruce branches (coniferous tree branches) 2. poles 3. sticks 4. snow 5. rope (you can use bark)
Tools
1. ax 2. sapper shovel 3. knife
The process of creating a shelter in a snowy forest.
And so, construction will take place on a small hill in a cold, winter forest, all materials for construction will be taken in the immediate vicinity of the parking lot. This type of shelter construction is intended specifically for extreme situations, when you do not have a tent with you to shelter from the raging weather and spend the night, and you also have a minimum of tools and materials.
The first step is to choose a suitable location for your future shelter, preferably if it is built on a hill. Then you should clear the snow cover down to the ground, digging a kind of small trench in the snow; you can lay out a parapet from the snow for greater reliability and subsequent strengthening of the walls of the home. Here is an example of how the author did everything himself.
After the hole in the snow is completely dug, our tourist begins to collect branches of coniferous trees (spruce, pine, cedar) around the area; in common people this material is called (spruce branches) ATTENTION!
Branches should be cut from the lower parts of the tree; under no circumstances should young trees be broken! Take care of nature first!
From the prepared branches brought by the author, a flooring is made on the ground - this is done so that there is a layer between the icy ground and the feet of travelers. As they say, “Keep your head cold and your feet warm.” Because if your feet get cold, you can get pneumonia, or at best, just catch a cold, which is extremely undesirable during a hike.
Next, the frame of the future shelter is made from pine poles, the required length of the trunk is cut off with an ax or knife and stuck into the snow, and a jib is also installed for reliability. If you don’t have an ax with a knife, you will have to break the branches thinner and preferably dry, it will be easier to break them.
Then the roof is made, if you can call it (lathing), the sticks are laid next to each other at a small interval and tied to the frame with a rope. If you don’t have rope with you, you can use thin twigs (hazel, willow) or other wood, as long as they are not brittle in the cold, and they should also be warmed up a little by the fire.
As soon as the frame is ready, it is covered with spruce branches, starting from the bottom up.
The walls of the home should be sprinkled with snow for safety; this will also help retain heat inside the room.
ATTENTION!
The fire should be lit at a more or less safe distance from the hut and, if possible, surrounded with stones, “although it is unlikely to find them under the snow.” You also need to build a wind protection for the fire from sticks so that it does not blow in different directions. Follow the rules of “Fire Safety” because branches of coniferous trees, even damp ones, can burst into flames like “gunpowder”
Surviving in the forest is not so easy, unless, of course, you have long-term survival experience. Of course, in our age of high technology it is difficult to get lost in the forest with different GPS technologies, but what to do if you have an accident and the nearest populated area is no closer than 100 km? Or did you crash somewhere in the taiga and your phone broke? In this situation, our forest survival tips will help you. If you have carefully read our website, you know that we have already raised many questions, so we will simply refer to them here.
The article will be divided into subparagraphs, or rather into the sequence of actions that you will need to take. So, let's begin.
Campfire tents
Recently, rain awnings have become widespread among tourists and other outdoor recreation enthusiasts.
Their variety is such that everyone can choose an awning that best suits their requirements.
A very convenient and functional awning, which, however, is not suitable for hiking conditions due to its size and weight.
The production produces awnings of various sizes that can protect not only a fire, but also a group of people sitting around it from precipitation. Typically, the size of the sides of such awnings ranges from 3-5 meters.
The size of the awning can also be important if it is intended to be used as a tent. In any case, for a group of two people a square tent with a side of at least 3 meters will be enough.
Awnings also differ in water resistance. Some can only protect you from drizzling rain, while others allow you to feel confident even during prolonged downpours. This value is measured in millimeters of water. In order to stay dry in the pouring rain, you need to use an awning with a water resistance of at least 3000 mm.
No less important is the resistance of the awning material, which is supposed to cover the fire, to high temperatures. Special tents designed for fires do not become deformed, even if their fabric is exposed to fire for some time, while simple tents can catch fire even from sparks flying from the fire.
If you have to burn a fire under an awning that is not intended for this purpose, the awning should be pulled as high as possible above the fire, and the fire itself should be lit so that neither the flames, nor the sparks, nor the temperature can damage the fabric of the awning.
The photo below shows a situation where a fire is built too close to the awning - even if in most cases nothing bad happens, even the minimal risk of making a hole in the awning is grounds for some movement of the fire to the side:
Usually the awning fabric is made resistant to high loads and damage, but here everything is individual.
An important characteristic of an awning is its weight, because the tourist will have to carry all his equipment on his own back. The weight of most awnings varies between a kilogram and two. There are also special awnings for light-duty tourists, the weight of which is a few tens of grams, but they, as a rule, are the least resistant to sparks, moisture, and wind.
Prices for different awnings vary greatly, depending on the characteristics, sizes and manufacturers, and range on average from 50 to 150 US dollars. Although, of course, you can find cheaper tents.
The photo shows a universal awning for protecting a fire from wind and rain:
On the contrary, “easy-moving” awnings are very expensive - their price can exceed 300 USD.
Most often, the awning is stretched between trees so that water can flow freely from it without accumulating in the deflection of the fabric. If the water does not have the opportunity to drain, its mass may reach critical values - and the ropes or the awning itself will break.
Plan
Once you find yourself in the forest and realize that you won’t be able to get out quickly, then it’s time to think about shelter. Experienced survivalists put this point first because shelter helps solve many problems. It’s easy to do it yourself in a very ordinary forest.
So, if you find yourself in the forest in winter, then first you should follow simple rules. We have already written detailed articles on this topic:
- Emergency overnight stay in the winter forest
By learning these instructions now, you will be able to last much longer when you are in this situation.
In these articles, everything is chewed down to the smallest action. Now you know how to build a shelter in the forest at any time of the year. Next, you need to think about how to stay warm.
Place of construction on a summer cottage
The location of the tent should be convenient, located on the site without compromising other buildings or all kinds of plantings, so before starting work you need to choose a suitable flat place, cleared of plants, debris, and stones.
Drawings and instructions with photo and video materials will help you build a firewood shed for your dacha with your own hands. More details in the article.
An elegant plant that amazes the imagination with many types of hosta: planting and care in open ground. Features and rules.
Foraging for food
Shelter and a fire are of course good, but everyone always wants to eat. Now we need to find out where to get food in the forest and how to determine whether it is fresh or not. I have already published articles on this topic:
You won’t be satisfied with simple berries, so you often have to hunt. In this situation, you should read the article - Cutting elk, wild boar, hare, because suddenly you will be able to catch someone.
After you've resolved the food issue, you might want to make some homemade dishes with your own hands.
Homemade dishes in the forest
Making dishes is a second matter, because if you have a strong desire to eat, your hands can become a tool for eating food. But if you are thoroughly stuck in the forest and you have time, you can make your own dishes. In my article - how to make dishes in the forest with your own hands, you will learn how to make simple spoons and bowls.
Mining devices
I wrote above that it is possible and necessary to obtain meat in the forest. Of course, it’s smart to do this with a weapon, but most likely you won’t have one. Therefore, you will have to get meat with your own hands. Traps will help us with this, which we will have to learn how to make, because catching even a hare with bare hands is not easy. It will also be useful for you to read about hunting snare traps, which will also help catch the animal.
If you know how this is all done, even in its simplest form, then for sure your chances of getting food will be much higher.
Wind protection
In windy weather, starting a fire may be difficult.
First, the wind can blow out a burning match or lighter and prevent a person from igniting the kindling. And even kindling or brushwood that has begun to burn can be easily blown out by a strong wind.
Secondly, cooking over a fire whose flames are blown away by the wind will be problematic. The flame zone with maximum temperature will fluctuate and spread along the ground instead of fully heating the food container.
Thirdly, sparks and fragments of burning coals can be carried by the wind outside the safe zone and cause a fire.
In a strong wind, the flame is almost uncontrollable and it is difficult to cook food with it.
These inconveniences can be effectively eliminated with the help of a windbreak.
Umbrella tackle for winter fishing
The umbrella fishing tackle is intended mainly for winter fishing, but it is also used when fishing in other seasons, and you can also fish with it from a boat. In the Far East, the umbrella was called a grabber. Fishermen have been using this fishing tackle since ancient times, and it has not lost its popularity among modern fish hunters.
Features of the gear and its use
The umbrella is a fishing net stretched over metal knitting needles. In the classic version, these are four knitting needles. The external design of the gear is similar to a rain umbrella, only the top is located at the bottom.
The free ends of the spokes can be connected to each other thanks to the hinged fastening. At the end of each free spoke is attached a torso, when it is pulled, the spokes fold and form a fish trap from which it is impossible to escape.
Umbrella (grabber)
Advantages of the gear:
- provides a good catch;
- allows you to catch several individuals at once;
- Suitable for fishing at any time of the year.
For fishing in bodies of water with a current, small weights are attached to the ends of the spokes to ensure a stable positioning of the grabber at the bottom. The balance of the cable stabilizes the float attached to it. Among modern umbrellas, there are models equipped with additional meter-long floating cords and a central vertical spoke. These elements allow the grabber to be lowered to the bottom smoothly and without interference.
Umbrella fishing is carried out from a boat or in a hole cut in the ice. The operating principle of the gear is simple:
- The umbrella is pointed upside down;
- The bait is attached to the base of the tackle, on the net;
- The grabber is lowered to the bottom; when immersed, it opens;
- When prey is caught, the cord is sharply pulled and the umbrella folds, capturing the fish.
For winter fishing, a folded umbrella easily penetrates a hole cut in the ice. When it touches the bottom, the cable is released and the spokes automatically open. The bait attached to the net attracts fish. They hit the wing of the tackle, the float signals this to the fisherman. By sharply pulling the torso, the grabber folds up. The fish either gets entangled in the net or is trapped by a folded umbrella.
Fishing from a boat follows the same principle. In open water areas, it is better to use umbrellas that open when immersed in water. This will eliminate the imbalance and lower the tackle to the bottom smoothly and evenly.
A - horizontal part, B - umbrella assembly. 1 – springs; 2 – central load, 3 – horizontal lift network; 4 – frame rods; 5 – traction cord; 6 – float; 7 – vertical wing.
Where and when do they fish for grabbers?
Most often, grabbers are used in Siberia and the east. Some fishermen attach a flashlight to it if fishing occurs at night. The devices are used all year round. It is not as effective on rivers as on ponds.
In places with large concentrations of fish, you can catch several kilograms in 1 hour. You need to fish where the fish are actively moving and not settling on the bottom. If there is a strong current, you may be left without a catch.
Techniques and tactics of fishing for grabbers
The technique is simple, like the device itself. You need to secure the load and float well and lower the grabber to the bottom. If a fisherman fishes from the shore and not from a boat, then to pull the fishing umbrella towards him, he should use a long cane. You need to remove the device from the water with a sharp movement so that the catch cannot escape.
Disadvantages of a Grabber
Despite the extensive list of advantages, this gear also has negative properties. The product must sink to the bottom of the reservoir, which makes it difficult to catch fish at a significant depth. The catch is limited to species that do not hibernate and spend a lot of time on the move. A handmade grab-net often turns out to be sensitive to the current - the product does not fully open. If the bottom of the reservoir is covered with a layer of silt, the fishing process will be significantly complicated.