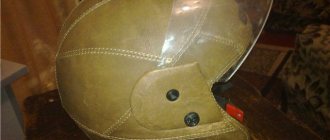
It is important for any cyclist that his bike works smoothly and without breakdowns, but for this it is necessary to regularly carry out technical inspections to identify problems in a timely manner. This also applies to the brakes; a quick and smooth (modulation) reduction in speed, and therefore traffic safety, depends on them. We will consider bicycle brake pads and their maintenance in more detail below.
When choosing new pads, you need to pay attention to the following important parameters:
1. What pads is your rotor designed for (unless, of course, you plan to replace it too)
2. What standard of pads is used now - dimensional characteristics
3. What material is used for the pads that are currently installed on the bike?
Pads, what is it and what is it eaten with?
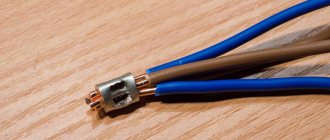
Brake pads (BC) are part of the bicycle braking system; they are the main component. Due to the contact of the TC with the surface of the wheel rim or disk, braking acceleration is created. Thanks to this, it becomes possible to regulate (slow down) the speed of cycling. The braking system on a bicycle, depending on the type, consists of:
- clamping claw or pistons;
- adjustment cable or hydraulic line;
- the main body on which the clamping components and caliper are fixed.
In the case of mechanical brakes, when you press the brake adjustment knob on the steering wheel, the cable is tensioned and brings the main body into working condition - it is compressed. When compressed, the pads touch the rim or rotor (brake disc). The magnitude and time of the braking distance depends on the force with which they are compressed. With strong and sharp compression of the pads, an instant stop occurs, with smooth and weak pressure - a more measured, slow stop. Professionals recommend learning how to properly use the bike’s braking system and not squeezing “all the juice” out of the pads unnecessarily. This leads to their rapid wear.
What can be made from old car pads?
As the brake pads on a vehicle undergo mechanical wear, their thickness becomes much thinner.
Caliper compression . This leads to the fact that the piston pressing on them gradually extends beyond its own “socket”. And to be able to install new brake pads, it must be pressed back. This is where a special device will help, the purpose of which is to compress the caliper.
In order to make such a device, you need to have two pads from the front disc brakes, one bolt with a diameter of 12 mm and a length of 120 mm, an M12 nut, one bolt with a diameter of 6 mm and a length of 30, and a small piece of steel chain .
Main stages of work. First of all, it is worth removing the remaining friction material from the selected pads. This can be done using an angle grinder. In the central part of the plates, after finishing the stripping procedure, it is necessary to drill holes with a diameter of 6 mm. After this, such a hole should be drilled to 12 mm in one of the blocks. Next, you need to insert a bolt into it, and screw the nut onto it. This nut is welded to the brake pad plate. To prevent damage to the thread during the welding process, it is worth putting a suitable piece of metal tube on it. At the end of the welding work, the tube is removed and a hole with a diameter of 5 mm is drilled in the central part of the bolt. After this, you need to use a tap to cut the thread for the M6 bolt.
Using a grinder, you should cut off the hook ears located on the brake pads. To give the part a more aesthetic appearance, you need to paint the finished product with spray paint. Three links are disconnected from a pre-prepared piece of chain and fastened together using welding, and a bolt is welded in the center of the entire structure. The homemade design is completely ready for use. But this is not the only device that can be made from brake pads.
DIY clamp. This device is absolutely necessary when performing any work in the garage or workshop. But there is absolutely no need to spend money on purchasing it. You can make a highly reliable clamp with your own hands. Old brake pads from a car are excellent materials for this.
First you need to connect two brake pads together so that they look like the letter C, and then scald them. Next, you should clean the resulting seams using a grinder, on which a petal-type circle is installed. This will give it a greater degree of aesthetics.
Next, you will need two M12 nuts of increased length, as well as a piece of a 12 mm diameter stud of the required length. The nuts are screwed onto the stud and then welded along the edges of the frame of the future product.
Main stages of work. The next necessary part will be a nut with a press washer. It is clamped in a vice, and the hole is drilled to the required diameter. After this, an M5 screw is inserted there, an ordinary washer is placed, and the entire structure is scalded. At the selected end of the stud, a hole is drilled for an M6 bolt, and using a grinder, a small piece is cut from it and a nut is welded to its end.
All that remains is to modify the main pin, after which you can begin assembling this homemade device.
Bottom line. Do not rush to throw away car brake pads that have become unusable. From them you can make several types of devices that will be quite useful both in car maintenance and when performing other work in the house or garage.
Bicycle disc brake rotor and its compatibility with pads
Rotors can be made from different materials and have different coatings. There are also combined rotors (using a spider to dissipate heat and lighten the structure). Some rotors are considered universal, while others are only suitable for a certain type of pad.
For example, if the rotor bears the inscription Resin PAD Only, then the rotor can only be used with soft organic pads (a little further on what organic pads are is described). The disc material in this case is softer and more viscous, which will not have a particularly good effect on the durability of the part and the quality of braking when using hard pads.
There is another problem - if the disc is soft and the pads are too hard, the metal will “wrap” on the surface of the pads and spoil the friction properties of the pads.
When choosing pads, study the characteristics of your rotor. This information is usually extremely difficult to obtain. Especially when we are talking about no-name Chinese hardware.
The only source of information is usually either the manufacturer's official website or an engraving on the disc itself. It is better not to trust the price lists of most bicycle shops. A shop worker, exhausted by life, beats all the disks with the same characteristics, but it is impossible to verify this. Therefore, you can get very burned when choosing. And in most catalogs there is simply no such characteristic. In this case, it would be logical to purchase the pads that you already had installed - the pads themselves often also have markings.
There are also more sophisticated ways, for example, to measure the hardness of a disk and thereby determine what material it is. But the method is very complicated, and such precision is rarely necessary.
Before we continue our discussion, we need to remember what brake modulation is. This characteristic is often found in articles and forums. Often experienced cyclists become clever, throwing complex terms at the beginner.
So, brake modulation is the ability of the brake to respond to the pressure applied. They pressed harder on the handle - they braked harder. This characteristic is not always linear and does not always correspond to the described pattern. On the contrary, some pads, when pressed hard, stop responding to an increase in the force of pressing the handle, and on cheap materials they may even begin to slip. Accordingly, the type and material of the pads directly affect the modulation of the brakes.
Pad standard and dimensional characteristics
Different brake pads are used for different brake machines. This is nothing new. It’s good when a manufacturer uses the same consumables for the entire line of its products. Then there will be no problems with the selection of pads.
All pads have different sizes. You can select similar ones either based on the markings on the pads, or based on the type of brake system used, or by directly measuring your pads and choosing the same ones.
The range of pad sizes for disc brakes is huge.
It is important to understand that 100% sizing is required. A deviation of a few millimeters can already make the use of a spare part impossible.
VARIETIES OF BRAKES
Pads can be of several types or types, designs and vary in price. The more expensive the braking system, the higher its quality, the more effective the braking and the more reliable it is.
There are different types of bicycle brakes:
- pedal or drum;
- stirrups;
- roller;
- rim;
- disk.
DRUM
The brake mechanism is located in the hub of the rear wheel of a bicycle and consists of a drum with brake pads. They can be hand- or foot-operated. Currently, the hand-type drum type is practically not found. It is quite heavy and not compatible with bike shifting.
The foot type is also found in urban, walking options. But it has low power and if the pedals are poorly positioned, an emergency stop will not work. If the chain falls off, then in the absence of a manual system, the bicycle cannot be stopped. They are also characterized by large mass and reduced maneuverability when driving.
The advantages of this type:
- unpretentiousness;
- infrequent maintenance;
- resistance to dirt, dust and bad weather;
- the possibility of braking when the wheel is bent in a figure eight (unlike pincer, rim systems).
MATERIALS OF MANUFACTURE
Bicycle pads for bicycles are made from different materials, and accordingly their quality and service life will also be different. Rubber or organics can be used on rim and disc brake systems, but metal pads are exclusively used on discs. For extreme skiing, the latter type is simply necessary. It will cope perfectly with prolonged braking on difficult routes where there is water, dirt, stones and in any bad weather.
RIM MATERIAL
In this case, only organic matter and rubber are used:
- Disposable brake pads for bicycles consist of a plate of metal and rubber components with bolts. They are cheap, have low noise levels, but wear out quickly;
- Cartridge versions have additional pads. The thickness of the working force increases, the service life becomes longer. It is recommended to use three-color overlays.
Bicycle brake pads are classified according to weather conditions:
- universal;
- for dry weather;
- for wet weather.
DISK SYSTEM MATERIAL
Brake pads for bicycle disc brakes come in the following types:
- Organic - they are light, inexpensive, provide excellent grip, but are short-lived. In bad weather, efficiency decreases and they are difficult to clean. Material composition – metal shavings up to 30% and organics – rubber, resin;
- Metal - contain crumbs or shavings of metal - steel or copper. They have wear resistance, increased reliability and quality. They provide instant braking to the bike, in any weather. The modulation is average, they do not require constant drying, and are suitable for heavy bicycle models. They have some disadvantages: more weight, higher prices, they make a metal-on-metal grinding noise;
- Semi-metallic - contain up to 65% metal components and an organic compound (resins, rubber and other components). This material is the golden mean between organics and metal. They are used in bad weather, have good modulation, effectively brake the bike, and wear out more slowly than organic ones;
- Ceramics – with increased friction properties. Rare, but found, has a high price, and fits only with a special rotor. The highest resource of all the above materials. In bad weather, the properties deteriorate and the clutch may crumble.
SELECTION OF PADS TO BUY
If there is a need to replace brake elements, before purchasing you should make the right choice:
- what type of brakes were on the bicycle - modern discs, rims, or drums;
- what material can and should be used to choose a brake system;
- depending on what model of bicycle and type of riding you can give preference to one or another system, if a choice is possible;
- it is necessary to take into account the weather and on what routes and routes the bicycle will be used.
Brake pads for discs must be selected depending on the model of the braking system - this can be determined visually by appearance and shape.
It is often appropriate to use one type of pad on one wheel and another on the other, for example:
- the rear wheel is a metal option for braking under increased loads in dirtier conditions. Since the weight distribution in extreme disciplines is such that the rider’s weight is often shifted behind the saddle and falls directly on the rear wheel;
- the front wheel is organic, it is appropriate because the load on the front is slightly less.
Barbecues, ovens
One of the most common designs made from used wheels are barbecues in various designs. In the simplest version, coals are simply placed in a disk, and on top is a grill for meat or skewers. The disk itself can either stand on the ground/rocks or on legs. It’s not difficult to build a brazier with legs if you have a grinder and a welding machine, but in addition to the tools and base, you will need a metal profile pipe for the frame.
The disk is cleaned of rust, a partition is cut out on one side, and a plug is welded into the bottom. Three legs are welded either into the bottom or on the sides, the optimal length of the legs is 40-45 cm - a barbecue of this height is easy to use. You can also immediately fix the grill grate and handles for transportation.
Two disks placed one on top of the other can be used without legs, and if you cut through the door, you get not only a barbecue, but also a potbelly stove.
If you need a larger potbelly stove, for a garage, greenhouse or other needs, you can weld a double one - from four disks, with separate loading.
By equipping the frame with a jack, you can adjust the intensity of heat treatment and change components depending on the desired dish.
MAINTENANCE
In order for the brake system to work properly, you need to regularly inspect your bike. Professionals recommend checking the system settings, ideally before each trip. If the system suddenly gets confused or falls off, then only one of the pads can clamp the rim. If you do not pay attention to this, it can lead to disastrous consequences on the highway or brake failure. The same applies to the disk system. It is imperative to keep your bike clean.
V-brake squealing
Rim brakes may squeak due to the following reasons:
- Pay attention to the material from which the pads themselves are made. The key is the hardness of the rubber. If it is soft, then squeaking is unlikely, but such products have a short service life. They are more likely to wear out. If the pads are made of hard rubber, they are more durable, but they creak more.
- Wheel rim. It creaks for two reasons: the surface to which the pad is pressed has become heavily contaminated, or it has become very worn. Sometimes a rim that has been in service for many years and is made of low-quality steel can simply fall apart because of this.
- Position of the pads relative to the rim. They must be strictly parallel, without visible distortion. The adhesion of the pad material to the rim should be over the entire area. This helps eliminate squeaks and extend service life.
- The pads themselves were damp. As a rule, in warm, dry weather their creaking is a much rarer occurrence than in rainy weather.
- The mechanics by which the process of braking a bicycle occurs. Everything is much simpler here: the brake squeaks even when the wheel is removed. Therefore, you need to thoroughly clean and lubricate the mechanism, and also lubricate the brake cables with WD-40 fluid.
Rotor [edit | edit code]
The rotor is a ring-shaped surface with which the brake pads come into contact during braking. This is the largest and heaviest part of a disc brake. Usually made of cast iron due to the high friction and low wear of the material.
To improve cooling, the discs are made ventilated. Ventilated discs between the two surfaces of the rotor contain radial cavities through which air flows circulate from the center to the edges.
The central part of the disk [edit | edit code]
The rotor is mounted on the central part of the disk, which, in turn, is mounted on the wheel hub. The central part of the rotor prevents heat transfer from the braking surface to the wheel bearings, so the bearings do not heat up.
The central part of the disk is made of cast iron or lighter materials, such as aluminum.
There are two types: soldered to the rotor and in the form of separate parts. In mass-produced cars, the central parts are usually made of cast iron and are integral with the rotor. In most racing cars, the center section of the disc is a separate part and is made of aluminum and titanium alloys, composite materials or ceramics. [1]
Disc brake pads squeak
The squeaking of disc brakes, due to their design, depends on the pads. Here the relationship between hardness and squeak level is exactly the same as with rim pads: the harder the material, the higher the level of squeak and even squeak. Don't forget to keep your rear and front disc brakes clean, especially the rotors. If they are scratched, the squeak will intensify. It is also important what steel the rotor is made of: the softer the steel, the less creaking. If the rotors are made of hard, hardened steel, the chances of squeaking increase.
- Metallized pads are the toughest, they do not smoke when overheated, but during heavy braking, especially in wet weather, they can make squeaking sounds. Since they provide greater clamping force, they are best used in areas with rough terrain. This disc brake is useful, for example, when doing mountain hiking. They are wear-resistant and have a long service life. They are able to grab tightly, this is sometimes necessary. Their biggest disadvantage is that they wear out the rotor more, since their structure is similar to an abrasive material. Worn pads look like this:
- If the pads are made of Organic material, then most likely they will be silent. But if they are installed on your bike, then they need to be changed more often, and it is even better to have them with you in stock. Their good feature is their quick “grasping”.
- Synthetic pads do not “grip” very well, but they last a long time and do not wear out the rotor as much.
- Another possible reason is the non-parallel position of the discs and pads.
How to restore ATV brake pads
For quite a long time I bought original front brake pads for an all-terrain vehicle, while they cost more or less reasonable money: 370 rubles per pair. The price is also crazy, of course, for a couple of wretched Chinese pieces of hardware, but... However, after the crisis, when people stopped buying ATVs at exorbitant prices, the supplier company came up with a brilliant idea: since they don’t charge ATVs for the price of an airplane, let’s make money on spare parts!
Of course, where will those who have already bought an ATV go? Let them pay. And today the picture with prices for pads is as follows:
Yes, yes, this is not a joke, according to the supplier, Chinese pads for a Chinese ATV should cost more than Japanese ones for a Japanese car. Moreover, the resource is tens of times less.
Therefore, with great pleasure I say “No” to brilliant businessmen and switch to making my own brake linings using a simple method that has long been tried by many ATV riders.
In order to restore used brake pads, we will need old worn out pads, epoxy glue and a clutch disc lining from a truck - KAMAZ, ZIL, etc.
For example, I bought an overlay from the 130th ZIL for 105 rubles. The thickness of this lining is 4 mm, like the pads.
It is a friction material similar in properties to the material of brake pad linings. Although, probably, this material is softer, because there is definitely less metal chips here. On the other hand, it is denser (as it subjectively seemed to me), you can’t pick it with a screwdriver.
Using the block as a template, you need to mark and cut out the required number of blanks with a hacksaw or jigsaw.
With a jigsaw for 4 pads it took me 4 minutes with photography. It is better to immediately cut out the blanks as close in shape as possible to the original. This is what happened.
They can be brought to an ideal shape using a sharpener (or file). It is necessary to sharpen using a dust mask. And when working with a sharpener, your hands should be without gloves, so that God forbid they get caught in the rotating disk.
Another 5 minutes and you're done.
You need to remove the old brake layer from the old pad. It is removed mechanically - for example, with a chisel or an abrasive wheel attached to a grinder or drill. But I had three blocks to tear it off with my hands. The old glue was bad, which means there is so much rust here. (True, these are not original CFMOTO pads, so I won’t criticize them).
Well, of course, you need to clean the metal from corrosion and dirt. This is a matter of minutes.
When everything is cleaned, you need to apply marks to the surface of the metal with coarse sandpaper. They are needed for better adhesion of epoxy glue.
Finally, all surfaces should be thoroughly degreased. Both the metal base and the linings. This is the final step before gluing.
To glue the brake linings, you can use epoxy glue, and it is advisable to choose the most heat-resistant one. Of course, the ATV brakes hardly heat up, but you still need heat resistance of at least +100 degrees. There are a lot of adhesives on sale (“cold welding”, “fast steel”, etc.). The temperature range of the popular “Poxipol” is up to 120 °C. The temperature range of ordinary “epoxy” (EDP epoxy glue) is 100-120 °C. Well, since epoxy is the cheapest thing that can be, I will use it. Another good thing about it is that it hardens slowly, which gives you time to coat all the pads without rushing.
So, apply the prepared glue to the surface.
Ready.
And for the best effect, we leave it to harden in a vice.
It is not necessary to use rivets to fix the linings; the glue holds stronger than rivets.
What's bad about epoxy is that you will definitely get it all over from head to toe, no matter how careful you try to be. Be sure to wear gloves. It’s such glue that just standing next to it is enough to make you smeared. It's better to think about it even less ;). And you will probably smear the pads with epoxy, especially when fixing them in a vice, when excess glue comes out. But it's not scary. While the epoxy has not hardened, it can be easily removed with solvent or acetone.
At first I decided to be a freeloader, I was too lazy to go for a vice - I tried to clamp this ammunition with a clamp. Bad idea, it's awkward and causes the pads to rotate, causing the pads to move relative to the base. Therefore, the most convenient thing is a vice. And to make it convenient to secure the pads in a vice, I took two pencils (see photo above) - it was possible to install them evenly and without shifting. Well, of course, the capabilities of a vice as a press are much higher than that of a clamp.
As a result, when the glue hardens, we will get these wonderful pads.
Here's a close-up photo of the braking layer. Various inclusions, grains of copper, etc. are visible in it.
It feels less abrasive (and finer-grained) than the original pad layer.
Of course, I will not claim that the replacement turned out to be equivalent. Still, the material of the brake pads and the material of the clutch disc are two different things. And this must be understood. I can’t say anything special about the braking efficiency; the Quad never skidded with the standard ones, and with these ones too. Well, I will soon (or not very soon) find out how long they will last and add to this article.
Please note: This article and the images in it are subject to copyright. Partial or complete reproduction on other resources without permission is prohibited.
Causes of pad squeaks
Squealing brakes are a fairly common problem among many cycling enthusiasts. Most often the problem is with the pads. There can be quite a few reasons why they squeak. For example, wet brakes can cause similar noises when braking. In wet weather, rim brakes squeak a lot and have poor braking performance. Also, the surface may be dirty, and this can also lead to squeaking. Even small amounts of oil, dust or other dirt can affect braking conditions.
Another cause of squeaking sounds is improper brake installation. If they are even slightly angled and not symmetrical, it will greatly affect their performance and the sounds they produce. They must be installed at a certain angle, and this must be done with extreme precision and accuracy. This problem is quite common, but can be easily solved at the nearest service center or on your own. Very often the cause of squeaking when braking is also very worn brakes.
Another reason for squeaking brakes may be a deformation of the brake disc, a figure-of-eight rim, or some roughness on the surface.
Performance characteristics[edit | edit code]
The performance characteristics of brake discs include:
- disc wear;
- temperature regime;
- geometric dimensions.
Wear [edit | edit code]
The discs last 100-150 thousand kilometers during quiet driving. With sudden and aggressive driving, the period is reduced to 30-40 thousand. The minimum thickness of brake discs is indicated on the brake disc. Check wear with a caliper. The maximum wear is 2-3 mm from the initial thickness of the disk. The width of cracks and chips is no more than 0.01 mm. If the width of the cracks and chips is greater, the discs should be replaced.
What to do about it?
If your pads are squeaking due to moisture, the only way to fix it is to dry them out. Naturally, this is unlikely to happen in wet weather, so you will have to get used to such a sound, but it is still better to avoid walking in the rain.
If too much dirt has accumulated on the surface, they can be cleaned. To begin with, they should be degreased using any available solvent, such as gasoline or white spirit. This will allow you to remove accumulated rubber bitumen and accidental oil. It is worth remembering that after the pads have been cleaned, it is also worth wiping the surface of the rim or brake disc with a solvent to also remove oil and dirt. Many cycling enthusiasts advise using dishwashing detergent to wipe the pads, as it perfectly removes grease and oil.
If this does not help, you can clean the surface with a stationery knife, carefully cutting off the layer of the damaged block. However, this is best done with medium-grit sandpaper. It will perfectly clean off all the excess accumulated on the pads.
Another way to clean it is to thoroughly bake it. This is done by constantly braking when rolling down a mountain. Thus, all excess that has accumulated over the entire period of operation is burned.
If the pads are installed incorrectly, they should be reconfigured. This can be done at the nearest service center or yourself.
- In order to set up the brakes yourself, you should first adjust the length of the cable. An indicator of the optimal length is a gap of 3-4 mm between the pads.
- Adjustment is done using a small screw. The result of the adjustment is that the clearance between the pad and the rim is absolutely the same on both sides. To increase the distance between the rim and the pad, you should turn it clockwise; if you need to decrease it, turn it counterclockwise. Do not forget that when you tighten the screw on one side by 1 turn, on the other side it is also unscrewed by 1 turn.
- The rear brakes are adjusted in exactly the same way.
- If everything is done correctly, the pads should no longer squeak.
Tips for eliminating squeaks
In order to eliminate squeaking, there are a number of tips for bicycle rim brakes:
- keep the rim clean. Most often it is wiped with solvent, gasoline or white spirit. The point of wiping is to dissolve the rubber from worn-out pads that has “stuck” to the surface of the rim and increase the friction force. If this does not help completely, then you need to use sandpaper with medium or fine grain and clean the rim. This will get rid of annoying sounds;
- Clean the pads in a timely manner. This can be done mechanically: you can scrape it with a knife, you can process it with sandpaper.
To prevent hydraulic brakes from squeaking, you must:
- checking the correct installation of the disc brake pads relative to the rotor. In addition, the surfaces of the pads themselves can also be cleaned;
- Disc brakes are sensitive to rotor cleanliness. They also need to be degreased in a timely manner, especially the rear rotor due to the greater frequency of use.
Driving tactics
In addition, you can give a number of tips on driving tactics:
- If possible, anticipate the length of the braking distance in order to brake shorter and press the pads more intensely;
- For pads, choose only high-quality material. This applies to both disc brakes and V-brakes;
- Disc brakes usually stop squeaking too much after they are dried out. To do this, you can do two or three emergency brakes. Why does the squeak disappear? During a series of emergency braking, the pads become very hot and the water evaporates.
Thus, despite the differences, there are common reasons why serviceable brakes can squeak: wet weather and the winter season (then the pads are always damp), the installation of new pads and the material from which they are made.
Making a press
The top eye of the old brake pad needs to be cut off.
Then a hole with a diameter of 14 mm is drilled in its center for a bolt. Since the steel is thick, it is better to start with a thin drill, and only then expand the hole to the required size.
Next you need to weld a nut to the block around the hole made.
In order for everything to turn out smoothly, you should screw one nut onto the bolt, insert it into the hole and tighten it with the second nut. After this, one of them is thoroughly scalded.
In the future, the weld will be subject to stress, so spot tacking will not be enough. If you have an M14 tap available, then it is better to also cut a thread in the block before welding; of course, before doing this, a hole is made in it with a 12 mm drill.
The bolt and second nut are removed, and the beginning of the thread is sharpened to make a cone.
Then 2 nuts are welded to its head to create a wide handle for easy finger tightening. If there are no extra nuts, you can simply turn the bolt with a wrench.
The modified bolt is screwed into the block, and the press is ready.
The only thing is that when trying it on, it may turn out that the block is too wide, then it will need to be cut off at the edges, but this can be solved in 2 minutes.
To use the press, you need to use a backing, which can be another old block. The device is installed in the caliper, rests, and presses the cylinder through the lining when the bolt is tightened. Having sunk it completely, the press is removed and a new block can be installed.
This is a cheap device in terms of manufacturing, assembled in 30-40 minutes, which can then be used for years. It will fit most cars with disc brakes, with rare exceptions when the cylinder needs to be turned as well as pressed in.
RESULTS
Usually no one ever thinks about brake pads until the moment when it comes time to replace worn-out “stumps” with new ones. Often, only at this moment do riders begin to figure out what pads they have had all this time and which ones should be replaced with. Braking force and modulation affect the behavior of the bike on the track. Metal pads are better for use in bad weather and for more effective braking, but they are heavier and put more wear on the disc brake rotor. Organic and semi-metallic ones provide better braking modulation and do not produce a metallic grinding sound, but are more likely to wear out. Everyone needs to choose on their own, and if you have difficulty choosing, you can always contact a specialist in a specialized store or bicycle workshop.
Sink
An even more original example of using disks for purposes other than their intended purpose. But, again, if you have the desire and ability, why not decorate the sink in the garage in a themed style.
Not only wheels, but also tires are recycled - they are used to make rubber tiles, and interesting garden structures are made from the remains of cinder blocks. In the video - how to cook grilled chicken, the recipe may be useful for those who decide to make a grill from disks.
Question answer
Why do the brake pads on a bicycle squeak? Weather. In wet or rainy weather, squeaking brakes is quite normal, as water prevents the smooth adhesion of the surface to the braking system. Material. When it comes to rim brakes, the softness of the brake pad is key. Soft analogues practically do not creak, but at the same time they have a shorter service life compared to a block made of hard rubber. Wheel rim. Creaking can occur when the rim surface is heavily contaminated or due to wear. This is a rare phenomenon, but it happens that the rim simply “wipes” during many years of braking. Brake pad position. Visual inspection allows you to determine the misalignment of the pad relative to the rim. A simple adjustment will correct this defect, which may be the cause of the squeak. Remember, the pad must be positioned strictly parallel to the surface of the rim.
How to get rid of squeaking brakes on a bicycle? 1. Remove the brake pads by first unscrewing the locking pin. 2. Unscrew the brake disc (rotor) from the wheel 3. Clean the special rotor. Liquid and wipe with technical wipes. 4. Now that the disc is clean, you need to sand it with sandpaper. Having placed it on a flat surface, we make circular movements with the sandpaper and remove the top layer evenly. 5. It is necessary to grind the brake disc so as not to create new pits on it and to remove old ones. It is necessary to make both surfaces as smooth as possible. After the desired result, you need to wipe the disc with a clean cloth or napkin, applying a special brake cleaning fluid to it. Place the disc in a clean place, on a cloth or napkin. 6. We also treat the brake pads with cleaning fluid, wipe them dry and put them in a clean place. 7. Grind the pads. Place a piece of sandpaper on a flat surface and make circular movements with the brake pads. We remove just a little layer from the working surface. 8. Install the rotor back onto the wheel. You should carry out the operation with gloves so as not to stain its surface and make it greasy. 9. Install the pads and secure them with a locking pin. 10. Grind in the disc brakes of your bicycle. Having accelerated to 20-30 km/h, press the brake handle firmly until the bike stops completely. We do this 15 times.
Bicycle brake pads are Brake pads (TC) are part of the bicycle braking system, they are the main component. Due to the contact of the TC with the surface of the wheel rim or disk, braking acceleration is created. Thanks to this, it becomes possible to regulate (slow down) the speed of cycling.
How to double the life of brake discs
What are brake discs made of?
The lion's share of brake discs is made of cast iron. Cast iron, as you know, is an alloy of iron with carbon and other elements (silicon, manganese, sulfur, phosphorus, etc.).
The use of such a composition is dictated by functionality. When braking, the pads clamp the disc on both sides, slowing the car down.
In places of friction, the temperature increases accordingly. The chemical composition of the cast iron alloy thus ensures resistance to high temperatures, as well as to sudden cooling.
Serial cast iron brake discs are, on average, designed for operation at temperatures of no more than 250° C. At the same time, more durable and flexible analogues are available on the market, for example, ceramic and composite discs, but the prices for such units, used mainly in motorsports, are high . But in sports cars, carbon-ceramic perforated discs do not deform even when heated to 1200° C.
Causes of extreme wear
The main enemy of brake discs is sudden temperature changes. Accordingly, vehicles whose brake discs are regularly in a heated state are at risk. Let’s say, while driving in an aggressive manner with frequent braking, you can quickly “heat up” cast iron brake discs to essentially their peak temperature of 300° C. This is fraught with smoke, which is easily recognized by the specific smell of the metal.
Another common cause of overheating is the use of the brake system on mountain descents (it’s safer to brake with the engine while shifting to lower gears), jamming guide calipers of the brake system, a faulty vacuum booster, the use of substandard brake fluid and low-quality, worn or unsuitable brake pads for this model.
Meanwhile, the brake disc guard is not protected from water. Therefore, when driving through puddles, fords and snowy areas, water will fall on the hot brake disc and, due to a sharp temperature change, will cause warping or cracks.
How to prevent overheating
With aggressive driving and active braking on mountain slopes, everything is clear - if you care about the durability of the braking mechanisms, it is logical to eliminate or limit this practice.
In addition, regularly send your car for inspection and ask service technicians to check whether the caliper pistons are working properly. This procedure can be carried out independently.
To do this, lift the car with a jack and spin the wheel. If a characteristic rustling or creaking noise appears, or the wheel turns with difficulty, the brake caliper is most likely faulty. In addition, change your brake pads on time (and even a little earlier than scheduled), and choose quality products from trusted sellers.
And most importantly, try to avoid situations where heated calipers, pads and discs come into contact with water. At a minimum, minimize aggressive driving in and after rain. Well, wash your car properly. Allow the discs to cool before using water! Many, unfortunately, ignore this simple rule.
How to identify the problem
A warped brake disc on the front wheels reveals itself through vibrations on the steering wheel. The beating of the rear discs is transmitted to the brake pedal and the body. In addition to characteristic vibrations, a visual inspection will also indicate the problem. If the disc is yellow, it has been regularly heated to an operating temperature of 150-280°C. Blue means the temperature of use reached 300-400°C, black - 500°C.
Serious deformation will also manifest itself through cracks, chips, gouges, a wavy surface, and even distortions of the disk. Beating and uneven wear of brake discs can also be caused by the presence of rust on the disc, which is usually caused by the car being idle for a long time. You can also check the condition of the disk using a runout measuring device.
To do this, remove the brake caliper, attach the brake disc using the hub nuts, install the device at a distance of 5 mm from the edge of the brake disc and take measurements. The value should not exceed 0.06 mm for the front wheel and 0.08 mm for the rear wheel.
Change or sharpen
If desired, and also if the remaining thickness of the brake discs is large (the tolerance varies for different models, the permissible thickness of the brake disc is indicated on its end), you can try to give them a second life. We are talking about grooving in service, which is carried out on special machines and will cost about 2 thousand rubles for a mass-segment car for a pair of disks of one axle.
It also makes sense to resort to grooving because factory parts, as a rule, are of better quality than analogues that you purchase in specialized stores. In addition, you can find a lot of reports on the Internet about how car owners sharpened brake discs themselves in the garage using grinding wheels and even a simple file.
If you do not have professional skills, we do not recommend sharpening a disc in this way in the garage, especially since the result most likely will not suit you. In any case, after grooving, you should change the brake pads, since the set that worked with the problem disc has flaws and will damage the treated disc.