Pine nuts are popular not only in Siberia and the Far East, but throughout the country. However, their procurement takes place precisely in the Siberian region - in the taiga. For people living in Southern and Eastern Siberia, collecting pine nuts is an important trade, since the seeds of Siberian pine cones are a valuable food product. Most often, pine cones are extracted using a wooden hammer. However, recently a tool has appeared that makes it easier to shake off the pine cones. Let's look at how to make a cedar shaker (cone shaker) with your own hands with step-by-step instructions.
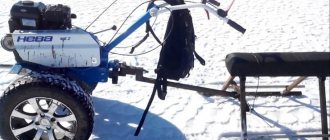
Self-production of a walk-behind tractor from a Ural chainsaw
The procedure for assembling a walk-behind tractor with an engine from the Urals is no different from the instructions presented above.
Differences may occur due to the design chosen, but are generally minor. Be sure to test the equipment after assembly, using extreme caution. Do not forget to install the weighting material in the front part of the walk-behind tractor, securely fixing it to the body
If the part is not secured securely, the cultivator will begin to vibrate during operation, which will lead to engine damage.
It is advisable to assemble the structure under the supervision of an experienced specialist who is well versed in technology. Assembling homemade equipment for the first time, without experience in this field, is fraught with unpredictable consequences. At best, you will simply ruin the saw, and at worst, your health will suffer. Remember that compliance with safety precautions and care when performing all stages of assembly is the key to stable operation of the device. If possible, purchase a normal walk-behind tractor, and use a homemade machine in extreme cases.
Pros and cons of homemade design
Having analyzed the results of this homemade product, based on reviews from owners and videos of operation, the conclusion suggests itself that the design is effective. With a competent approach to business, a walk-behind tractor with an engine from Druzhba is not much inferior in its characteristics to its factory counterparts.
The main advantage of homemade products, of course, is saving money. You can find the necessary parts and materials by simply rummaging around in your garage or shed, or you can purchase them for a small amount of money.
Also among the advantages of a homemade unit are:
- sufficient power of the resulting device – up to 4 hp;
- compactness, small dimensions of the walk-behind tractor;
- light weight, maneuverability, mobility;
- economical fuel consumption;
- the Druzhba engine is not whimsical in terms of the choice of fuels and lubricants;
- The walk-behind tractor is capable of performing various operations.
The engine used in chainsaws, especially in the Soviet “Druzhby” chainsaws, is durable and capable of withstanding long-term loads.
The main disadvantage of a homemade walk-behind tractor from a Druzhba chainsaw is that with any design you won’t be able to get a real walk-behind tractor. The power of the walk-behind tractor is enough to cultivate areas with good soil. There are also restrictions on operations. It will most likely not be possible to use the entire arsenal of attachments on a factory walk-behind tractor.
Chainsaws "Friendship"
The legendary Druzhba chainsaws come from the USSR. Nowadays, they are no longer produced, but they can be found in the garages of our fathers and grandfathers and, surprisingly, are still in working order. The year of production of the first petrol saw “Druzhba” was 1955. Development began two years earlier. On the territory of the USSR, two machine-building plants were engaged in the production of these chain saws: Perm and Biysk. The developers were constantly improving things and introducing new technologies.
These changes can be observed in chronological order:
- 1953 - the beginning of the development of the first chain saw “Druzhba”.
- 1955 - the first chainsaws “Druzhba-2” (the saw handles are attached directly to the fan) and “Druzhba-4” (the handles are attached to the clamp connecting the motor and the saw gearbox) came off the assembly line; serial production of chain saws was launched.
- 1958 - victory at the international exhibition in Brussels, after which chain saws began to be supplied abroad.
- 60-80s - production of the modernized Druzhba 4-A chainsaw, a chain lubrication system, magneto and KMP-100 carburetor appeared.
- 1990 - modernization of the Druzhba 4A chainsaw, release of the improved Druzhba-4A-Electron model. In this model, electronic ignition was installed for the first time and a new KMP-100U carburetor was installed.
Features of the walk-behind tractor
Structurally, a homemade walk-behind tractor is a two-wheeled unit on a frame, producing up to 4 liters. s at an average speed of 2.5-2.7 km/h. Features, as well as operational tasks, are largely determined by the choice of power plant. If we are talking about a conversion from “Friendship”, the following parameters will distinguish it from a purchased walk-behind tractor:
- small size, lightness;
- savings on fuel and lubricants;
- the ability to assemble a unit tailored for specific work (required frame size, mounting unit).
A homemade walk-behind tractor can plow, hill up crops, harrow, mow or remove tops, and apply fertilizer. Due to its small size, it can be used in hard-to-reach places (for rocky, poor soil, the power of a homemade product may not be enough). It will be especially useful for those in whose area the strength and power of a large purchased walk-behind tractor will be excessive.
Selecting a power plant
You can make a homemade walk-behind tractor with your own hands from almost anything that could be lying around in the garage, but the homemade products will be structurally different. Most often the following are used as power plants:
- automobile engine (mainly a four-wheeled, powerful design on a frame, which can also be used for transporting goods);
- a chainsaw of the “Friendship” type, which, despite its small dimensions, has good performance (a two-wheeled small-sized design that copes well with ordinary agricultural tasks);
- the power unit of a moped (often “Karpaty”), especially a motorcycle (“Minsk”, “Voskhod”) will make it possible to make a more powerful two-wheeled homemade product up to 13.5 liters. With;
- electrical installations (motoblock from a washing machine, for example) are also used, but are not very popular.
The most successful basis is a chainsaw and a motorcycle (moped), which allows you to make a non-bulky simple unit. The difference is in power and size. However, from the point of view of the feasibility of a homemade walk-behind tractor and its economy, the power plant of a chainsaw is undoubtedly better.
Step-by-step instructions for making a walk-behind tractor from “Friendship”
The manufacturing process depends on the chosen design option and drawing. Step-by-step analysis of one of the modifications:
- Two bases (spars) are made from a steel pipe or profile with a diameter of at least 20 mm. The bend is made so that the ends are bent upward.
- On the long part, a steering wheel is welded, either welded at random or taken from a motorcycle. The bases are connected and reinforced by cross members. Also, platforms for the battery and gas tank are welded or screwed to the bend of the base.
- To mount the engine, a structure in the form of a slide is made from pipes or profiles. The motor is attached to it, and then to the base.
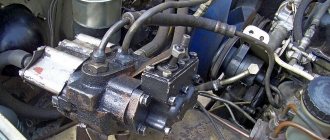
- Next, the RU-32 collar flange from the VAZ car is installed. Thanks to it, the shaft transmitting forces from the motor will be fixed. It is also recommended to use a VAZ gearbox shaft as a shaft. To fix the shaft in the flange, bearings with a diameter of 30 mm are used.
- The transmission link is made from sprockets from any old car or moped. One is mounted on the gearbox shaft, the other on the shaft on which the cutters or wheels are located. A chain from an old motorcycle is connected to each other.
- Next, all parts are installed and connected.
- You can also make wheels and cutters yourself, using old wheels from a car or agricultural machinery as a base. The resulting parts are mounted on a steel pipe or circle of the required diameter.
You also need to consider an effective forced-type cooling system. Several options are offered. The simplest option is to install a fan. More complex designs offer the use of water cooling.
Blueprints
As a drawing, you can use your own design or proposed successful designs on the Internet. Here are some of them:
Features of creating a cultivator from a Druzhba chainsaw
A DIY chainsaw cultivator “Druzhba” will become an indispensable assistant when cultivating soil in small areas. The big advantage of this method will be the absence of the need to resort to turning work - you can limit yourself to spot metalwork modifications. Future homemade chainsaw motor cultivators will operate in only two gears, and the maximum speed of the units will reach 2.5 km/h. The engine power will be a little more than 4 liters. With. Such indicators will be quite sufficient for effective soil milling, hilling and digging up potatoes.
The creation of an aggregate is performed according to the following algorithm:
- To begin, place a metal collar flange RU-32 on the main shaft;
- After this, screw on the axle gear sprocket;
- Next, attach the shaft of the bridge gearbox - the part can be taken from a UAZ car and polished to a diameter of 3 cm;
- To increase the distance between the gearbox axle and the ground, use a double-row chain and two “VAZ” sprockets - they will increase the cultivator’s ground clearance to 150 mm;
- Next, install and secure the housing bearing on the main axle - its internal diameter should be no more than 3 cm;
- The engine from the Karpaty moped can serve as a gearbox and gearbox;
- To complete the configuration, take a centrifugal clutch from the same moped;
- To install the cutters and wheels, use a steel pipe 32 cm long.
Thanks to a completely sealed fuel supply system and a membrane-type carburetor, the owner will be able to work with the unit in any conditions, be it heavy rain or unbearable heat. The manufactured structure can be successfully used in areas with a total area of 10 to 20 acres.
Winch
The mechanism is designed for horizontal movement or lifting loads to a height. Does not depend on the availability of electricity, can be used outdoors, on hiking trips.
A prerequisite for this is that the engine power of a do-it-yourself chainsaw winch should not be less than 2.5 kW.
An important element of the device is the drum - it can be made independently or used from a hand winch. In addition, you will need:
- gearbox to reduce the speed of the chain saw;
- metal pipes or rolled profiles, levers, cam clamps, clamps.
The procedure for making a winch:
- A rigid frame is made from pipes. Welding is used.
- Attach the chainsaw motor to it. The gearbox is connected to it with clamps, and the drum is connected to the output shaft of the latter.
- Install a lever equipped with cam clamps connected to the drum shaft. This control element allows you to control the work process: when you move the lever in one direction, the drum rotates, and in the other, it stops.
- An anchor is made with which the winch will be secured in the soil or cling to any stationary object. Use pointed corners that are welded or hinged to the frame.
- A cable is wound onto a drum, the free end of which is equipped with a hook. It is used to capture and attach to a load that needs to be moved.
The device exists in 2 versions. Do-it-yourself chainsaw drills are made for the ground or for drilling ice. In the first case, the device facilitates the construction of deep holes for poles, fence supports, and other structures. In the second, he helps fishermen drill holes in winter. They differ in the drill used.
The design of a gas drill involves combining a finished drill and a chainsaw engine into one unit. To make a motor drill from a chainsaw, the latter must have a high-power motor - at least 2 liters. With. In addition, you will need:
- Gearbox. This is an important element of the device. It is necessary to reduce the speed of the saw motor, because when the drill rotates quickly, the engine power may not be enough, and it is difficult to work under such conditions.
- Bulgarian.
- Metal pipe.
- Drill.
- Welding machine.
Drill assembly sequence:
- Two rectangular frames are made from a metal pipe. The size of one is 45x35 cm, the second is 10x10 cm.
- The frames are connected to each other, placed parallel to one another at a distance of 30 cm. This is done with identical pieces of metal pipe, welding adjacent corners of the frames with them.
- Inside the resulting truncated pyramid, a gearbox is attached to the smaller frame.
- According to the drill assembly diagram, a motor is installed on top, connecting it to the gearbox with a short shaft (pre-made). The handle that regulates the fuel supply is placed on the upper large frame. It also houses an emergency engine shutdown system.
- Connect a drill using a piece of pipe to the output shaft of the gearbox. The parts are connected with dowels or studs.
Description of a walk-behind tractor with a chainsaw engine
So, we have a chainsaw that is not used very often or is completely lying around. In this case, having made some calculations and prepared the necessary materials, our saw turns into an excellent walk-behind tractor. The principle of assembling homemade agricultural machinery, depending on the brand of the manufacturer, may vary, but the general principles are as follows:
- The most important step is the preparation of a drawing, guided by which you will assemble the required structure. You can create drawings and diagrams of a walk-behind tractor using a chainsaw yourself, or by downloading ready-made calculations from the Internet. Finding them will not be difficult, just enter a query into a search engine and select the assembly option you like.
- The drawings have been found, which means it’s time to assemble the frame for our motor cultivator.
- Once the frame is ready, the saw motor and its gas tank are attached to it.
- Lastly, additional system elements are installed that are responsible for controllability and other functionality.
Note! Not only a chainsaw motor is suitable as a motor, but also an engine removed from a motorcycle or moped. In this video we’ll look at the friendship chainsaw motor cultivator:
In this video we’ll look at the friendship chainsaw motor cultivator:
To implement the idea, prepare the following materials:
- Motor from any existing chainsaw. The Druzhba and Ural saws are best suited for this.
- A handlebar removed from a moped or motorcycle.
- Welding machine.
- Pipes and sheets of metal, in the quantity necessary to assemble the walk-behind tractor frame.
- Wheels from non-working equipment.
- Transmission.
Having prepared all the structural elements and assembled them in accordance with the drawing, you will receive a device with the following characteristics:
- Powerful. Some homemade designs have a power of 9 horsepower.
- Lung.
- Small-sized.
- The motors used in chainsaws have a large margin of safety, which allows you to work on a homemade installation for a long time.
- Economical.
As an example for assembly, we will consider 2 engine options taken from Druzhba and Ural chainsaws. They are considered the most suitable for our venture, and here's why.
Friendship
Chainsaw Friendship has the following characteristics:
- Motor with a power of 3.5 horsepower.
- Weight – 7 kilograms.
- The volume of the gas tank is 0.55 liters.
- The volume of the oil tank is 0.26 liters.
For assembly, it is recommended to use the 4th generation Friendship model.
Products manufactured under the Ural brand have different characteristics from Druzhba. The differences are in the following details:
- The power of the Urals is higher than that of Friendship, and is 5 horsepower.
- The engine produces a lot of soot during operation.
- The gearbox installed on the saw tends to jam from time to time.
- Small specks, getting into the Ural saw engine, burn out without causing any special damage to it.
As you can see, each model has its pros and cons. It’s up to you to make a walk-behind tractor from a Ural chainsaw motor or construct a homemade walk-behind tractor from parts of a Friendship chainsaw.
Additional units
Before making a light motor cultivator, you will need to prepare drawings of this unit. The design of the manufactured machine is simple: the engine rotates the gears, transmitting increased traction force to the drive wheel.
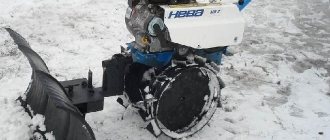
To make a snow blower, it is recommended to decide on the design and loads that will be placed on the machine. If you need to clear a small area of snow, then a homemade snow blower can be equipped with a motor from Druzhba. To assemble a more powerful unit, you will need a Shtilev engine (power 3 kW). To create a simplified model, ordinary sled runners are used.
When carrying out the above work, special attention is paid to the screw unit. It begins to move due to a gear pair and chain
Thick cord rubber is used to make the blades. The intake device can be made of galvanized steel. For easy operation of the resulting machine, a sewer pipe is installed under the snow thrower.
DIY chainsaw snow blower
A snowplow with a factory-made chainsaw engine is a budget option for assembling high-quality, passable and fairly maneuverable equipment. A chainsaw snow blower has much smaller dimensions than store-bought equipment, so it can cope with snow removal in the most difficult to reach places.
Before you begin, you will need to select drawings. The diagram used must accurately indicate the dimensions of all components, and must also be capable of installing them into a common device.
To assemble the homemade product, you will also need to prepare parts. Their list includes:
- pipes of different diameters made of steel and aluminum;
- forged metal shaft;
- several bearings;
- Sheet steel;
- welding machine;
- hand tools: wrenches, screwdrivers.
Assembling a homemade household snow blower from a chainsaw consists of several stages. Their list includes:
- Frame assembly and engine installation. A homemade snow blower must be equipped with a durable and impact-resistant frame. The stability of the snowplow when moving off-road, as well as the protection of its internal parts from mechanical damage, largely depends on its quality and balancing.
It is best to weld a durable frame from solid steel and aluminum pipes. The base of the frame should be assembled from pipes of the same diameter. Next, pipes of smaller thickness will be welded to them.
During assembly, you need to pay attention to the 2 installed longitudinal pipes, which in the device will not only play the role of one of the parts of the frame, but also perform the function of snowplow skids. When connecting, all their holes will need to be welded so that snow does not clog in them, causing corrosion.
2. Assembling the housing of the working auger and the drive mechanism of the snow blower. To create a working auger, a pipe of small diameter, 80–85 cm long, is best suited. On an auger of shorter length, it will be difficult to install a reliable drive located in front of the main part of the later-made bucket. One of the main roles when making an auger yourself is played by correctly selected bearings for the shaft.
3. Making a snow blower bucket. To assemble the bucket yourself, you will need 2 round metal sides, the initial size of which should initially exceed the immediate dimensions of the auger by about 7 cm.
Before you finally secure the auger for the snow blower, you will need to put bearings on the shaft;
4. Assembling the ejection chute. To make this part of a snow blower from a household chainsaw, you will need an aluminum pipe, at least 10 cm long and about 15 cm in diameter. To install the aluminum pipe, you will need to make several holes in a homemade auger. Next, a solid metal pipe is inserted into them and secured with bolts.
5. Final assembly of a snow blower with an internal combustion engine from a chainsaw. To assemble a homemade product, first of all, you need to weld a bucket and auger to the longitudinal parts of the manufactured frame. Next, you will need to install a chain on the manufactured drive. To make this easier, you need to use a tension sprocket, which will be attached to the auger with bolts.
Next you will need to make a handle using several metal pipes. You will need to display the controls on it: the throttle position adjustment lever, the ignition on and off button, as well as other switches.
A snow blower assembled in this way from a household chainsaw will be able to clear areas ranging from 5 to 25 acres. The homemade product will be quite easy to maintain and suitable for independent repair.
What else can you do
There are many options for possible homemade products. It all depends on the imagination and skills of the craftsman. In addition to what is described, you can make from a chainsaw:
- a generator that will provide electricity to a cottage far from communications, a comfortable outdoor recreation;
- a grinder capable of cutting metal, stone, concrete, and polishing surfaces;
- a winch that makes life easier for motorists who like to drive off-road;
- cultivator for processing the garden, harvesting.
The list includes motorized drills for making holes in the ground for poles and planting trees. Its winter variety is an ice drill for winter fishing.
Step-by-step instructions for making a snowmobile from a Druzhba chainsaw
As has already been said many times, the manufacturing process depends on the chosen design option and drawing. There are complex schemes, but there is one fairly simple option using a regular snow scooter as the basis for the design. It is captivating because it already has a ready-made supporting base, steering and a completely comfortable seat. The task is to strengthen the side skis, as well as mount the engine, transmission and track to the frame.
Step-by-step assembly instructions:
- First of all, it is necessary to strengthen the side skis. This can be done by welding a profile or pipes to them. The support bearings of the front and rear tension shafts are also attached to them. The size of the reinforcing base depends on the diameter of the front shaft. For best grip, the bottom of the shaft should be level with the skis.
- The next stage is the manufacture of the track mounting frame. It is made from a corner and a profile pipe measuring 30x30 mm. The length of the frame is taken to calculate the dimensions of the frame for mounting the engine with a gas tank in the rear of the snow scooter. The width is within the width of the snow scooter.
- The track is tensioned using shafts. It works on the principle of tensioning the chain in a chainsaw. The tension shaft is moved by a bolt, which in turn is fixed to the frame. As tension shafts, you can use tubeless wheels from hand trucks, rollers from agricultural machinery, or make them by hand cutting them out of plastic. It is also necessary to install support rollers for the caterpillar, only without a tensioning mechanism. They are made in the same way as tension ones. To ensure the required clearance and prevent the rollers from moving, insert bushings are installed on the axle.
- The caterpillar is made of a conveyor belt with a thickness of at least 3 mm. Gear wheels from the Buran snowmobile are mounted on the tension shafts in the center. The tape is cut into two parts and placed along the edges. Between the pieces there is a distance commensurate with the width of the gears. Hitch tracks can be made from halves of a plastic water pipe or an aluminum profile. The thickness of the tracks is recommended to be more than 5 mm. The tracks are fastened with bolts or rivets. The gap between the tracks should correspond to the pitch of the gear wheels from the Buran.
- A platform with an engine is still mounted on the back of the snow scooter. A gas tank is also installed on it. A drive sprocket is mounted on the drive shaft, and a sprocket is also mounted on the engine. The power transmission is carried out by the drive chain. To ensure chain tension, the frame with the engine must be movable, the sprockets must be at the same level.
- After securing the main parts to ensure safety during operation, the moving parts of the snowmobile are covered with protective covers made of metal or plastic.
Improvement of the chassis
The first thing users of a walk-behind tractor think about is how to make a cart with a seat for it. Using equipment in normal mode using levers requires the application of great physical effort. However, the use of a trailer reduces the stability of the vehicle. This problem can be eliminated by extending the wheelbase.
This is done using extensions that are attached to the axle shaft with pins or bolts. Having solved the stability problem, the operator is faced with another issue: the unit is poorly controlled. The differential for the walk-behind tractor helps to give it good maneuverability. This device is made by analogy with components of passenger cars. Homemade unlockers for walk-behind tractors are made using ordinary household tools - an angle grinder, welding and a sharpening machine.
The low weight of the walk-behind tractor causes poor traction between the wheels and the ground. Slipping is a common occurrence when lifting virgin soil, working on wet ground or driving in snow. To avoid slipping, weights are attached to walk-behind tractors.
These devices are divided into the following categories:
- Wheeled. They are discs that are mounted on wheels or hubs. Disks are made monolithic from metal, concrete or hollow, filled with sand. The weight of wheel weights can be 30-70 kg.
- External. Made from any heavy material (steel, lead, concrete). Attached to the body using hooks or bolts. Some craftsmen weld a frame from a corner to the body. Sandbags, bricks, scrap metal and other heavy objects are placed in it.
You can improve the transmission by installing a homemade variator on the engine. The system of belts and discs will allow you to smoothly change the speed of the unit, without jerking or vibration.
Walk-behind tractor from a chainsaw - manufacturing, drawing, instructions
The simplest and easiest option for creating a homemade walk-behind tractor is to remake it from a chainsaw. Any model you have at home can be suitable for these purposes. Thanks to the powerful motor, lightweight design and high performance, such homemade ones are well suited for effective cultivation of the land on the site.
How to make a walk-behind tractor from a chainsaw with your own hands?
To create such a homemade unit, it is recommended to use special drawings. You can draw these diagrams yourself if you have some knowledge and idea about the walk-behind tractor, or you can choose one of the proposed options
A homemade walk-behind tractor from a chainsaw is created in several stages, and it is important to follow all the nuances indicated in the diagram
- Making the frame. To do this, use a thick-walled pipe, from which you should create a cube with corners of 32x32mm.
- Installing the motor on the upper frame corners of the frame, which are transverse. You also need to attach the fuel tank using brackets (the tank must be placed below the engine).
- The frame on the front part is equipped with vertical posts, which serve as intermediate shaft supports.
- Special supports are attached to the longitudinal corners, which will then allow the installation of running shaft bearings.
- A metal weight is installed on the front element of the frame, which will ensure the stability of the walk-behind tractor.
- Handles for control are constructed from small metal pipes.
- The walk-behind tractor is equipped with old small wheels, and can also be made from metal plates.
As a result, you can get a good walk-behind tractor, whose center of gravity is located above the wheel support surface.
Creating a walk-behind tractor from a Druzhba chainsaw
The Druzhba chainsaw is considered the best choice for making a walk-behind tractor. This simple and very productive technique is probably in the arsenal of many owners. Using its structural elements, you can make a fairly powerful walk-behind tractor, as it has the following features:
- Due to its low weight, such equipment can be used for work of any complexity.
- Very productive engine.
- Compact and durable.
Based on this device, a high-quality walk-behind tractor is obtained, the speed of which is 2.5 km/h and the power is about 4 hp.
The process of creating a unit is similar to the method that is used for all other models, but it also has its own nuances:
- The main shaft of the future design is equipped with a special flange, which is of the collar type, RU-32, which will then make it possible to easily screw on bridge type gearboxes.
- Sprockets are taken from the UAZ and, together with a double-row chain, are installed on the future device and allow you to increase the distance from the gear axle to the ground. Timing sprockets allow you to increase the distance to the soil by 15 cm.
- The housing type bearings are screwed to the main axle and their diameter is 30 mm.
- The gearbox with gearbox can be constructed from the motor from the Karpaty motorcycle; it is necessary to provide a standard centrifugal clutch.
- To install the cutters and then install the wheels, you need to use steel pipe.
You need to install a load in front of the frame that can hold the center of gravity.
A pipe with a diameter of 30 mm is welded as handles.
As soon as the chainsaw walk-behind tractor is ready, it can be tested on the site. To do this, fill up with fuel and try to complete the work. Modify your device if necessary.
The advantages of such a unit are:
- the ability to use a variety of lubricants and combustible materials;
- work in completely autonomous mode;
- suitability for any type of work.
To create this type of technique from a chainsaw, you do not need specific knowledge. All it takes is a little ingenuity and the desire to get an effective technique. A homemade walk-behind tractor suitable for use on private plots and dachas. sadovaja-tehnika.com
Types of sawmills
The most widespread today are the following three types of devices for sawing logs with a chainsaw with your own hands, which differ in their design:
- Tire.
- Tape.
- Disc sawmill.
https://youtube.com/watch?v=XR_TrDiAqQU
Disk installations
The relatively simple design of disc installations makes them easy for most homeowners. Due to their ease of assembly and versatility, these types of woodworking machines are most widespread and are found everywhere. The basis of this design will be a circular saw, which is mounted on the spindle of an electric motor. Additionally, a strong base is made, above or below which a shaft with a saw and an electric motor are fixed.
A durable and reliable frame for a disk unit can be made of metal or wooden parts that are welded or fastened together with nails and screws. The work table can be made of sheet metal; you just need to ensure the ideal geometry of the structure, which allows you to guarantee the highest possible quality of wood cutting.
The use of disc saws allows you to make slats of various sizes, produce timber, veneer, and cut boards to the required length and width. Thanks to the high rotation speed of the saw, it is possible to ensure that logs are cut with smooth, high-quality edges and cuts.
Band sawmill
Belt-type installations combine simplicity of design and excellent performance. Accordingly, they are popular not only in everyday life, but are also widely used in sawmills and enterprises that produce lumber. The advantages of this type of equipment include its high productivity, as well as the ability to cut large logs weighing more than 300 kilograms.
To make a band sawmill you will need the following:
- Pulleys.
- Channel.
- Metal corners.
- Pipes with different diameters and sizes.
- Metal structures for the production of sleepers.
The production of such a sawmill begins with the construction of a frame, which has the shape of the letter P and is made of a corner or channel with dimensions of 50 by 100 millimeters. The standard dimensions of the frame are a length of 8 meters and a height of at least 15 centimeters. To increase the strength of the base, the channels are additionally tightened with pipes and angles, which will allow the base to withstand the maximum possible load.
Next, they begin to build the mobile cart. For this, a steel plate is used, the thickness of which is 40 millimeters. An electric motor will be responsible for driving the trolley, the power of which should be 10-12 kW.
A saw is attached to the trolley with a chain drive, which is fixed to the electric motor shaft through a pulley. A handle-steering wheel is welded to the side of the movable cart, which will be responsible for moving the mobile structure along a fixed base.
https://youtube.com/watch?v=MVx1lq1COng
Tire sawmills
Tire sawmills or logosols differ in their design from other similar devices. Using this manual technique, you can longitudinally saw logs, producing high-quality slats and veneer. Thanks to its compact dimensions, logosol can be installed both outdoors and inside a small workshop or wooden shed. At such a sawmill it will be possible not only to cut logs, but also to produce small-sized workpieces with a non-standard shape.
Having a high-quality sawmill diagram in hand and choosing the correct length of the chainsaw blade, you can independently create a machine that will provide high-quality sawing of logs. It will be possible to decide how to make a sawmill with your own hands, saving on the purchase of components for equipment.
Do-it-yourself walk-behind tractor from a chainsaw
A chainsaw is a device that is most popular among craftsmen. It can be used as a kind of universal drive in order to produce a walk-behind tractor with your own hands. This instrument perfectly combines important qualities:
1. Quite solid power;
3. Maximum compact dimensions.
Using a chainsaw, you can create and assemble winches, bicycles and other objects.
A chainsaw allows you to make a wide variety of interesting designs with your own hands. For general activities, you will need knowledge of drawing, design, and so on. These skills are important for subsequent high-quality assembly, obtaining accurate dimensions and simply for a normalized work process.
Rework principle
The basis of almost any homemade chainsaw is its use as a universal drive that can be used for a huge number of different devices. The scope of their use is very wide: cutting stone and metal, pumping water, removing snow, drilling wells and holes, driving, moving various objects, swimming and even flying.
Realize the potential capabilities of a chainsaw using a variety of accessories and attachments. The basis of any modification is the simple principle of engine power take-off: the device necessary for the master is connected to the output shaft. The presence of a powerful motor, compact dimensions and relatively light weight of this tool, autonomy and the ability to work in almost extreme conditions make its capabilities truly limitless. Of no small importance is the practical design of the clutch, which protects the components and systems of the saw from damage and overload. The tool, made from a chainsaw, is distinguished by its tightness, so it can be used in almost any position.
How to make a walk-behind tractor from a chainsaw with your own hands: several design options
A walk-behind tractor based on a chainsaw can be recreated using different methods:
- universal, designed for any type of powerful chainsaw;
- specific, applicable to a specific modification, for example, “Friendship” or “Ural” of the Soviet or modern type.
Walk-behind tractor from a chainsaw: the easiest and most universal way
For it we will need:
- motor base from any productive professional chainsaw;
- steering wheel (motorcycle steering wheel will do);
- a transmission that can be removed from an old car or moped;
- electric welding;
- stainless steel pipes;
- metal sheet for designing lugs or old wheels from used equipment;
- connecting parts that will be needed to fasten the frame and engine.
The home production process can be divided into several stages:
drawing up a detailed drawing. If it is missing, you can use the one we offer;
Read also: Blackening stainless steel at home
- frame production;
- modification of the power plant;
- design and assembly of additional units - clutch, gearbox, steering, headlights for night work, chassis.
Making a frame for a walk-behind tractor from a chainsaw
The work process looks like this:
- we take a metal pipe with a cross-section of at least 20 mm and bend it so that the overall appearance resembles 2 spars, the edge of which is directed upward;
- We weld the steering wheel in the rear part of the spar;
- we strengthen the base with crossbars;
- We weld a support platform for the battery to the rear bends of the side members.
Assembly of the motor block
For a homemade walk-behind tractor from a chainsaw, it is ideal if the motor power is in the range of 10-13 hp.
The creation of a power plant in the presence of a ready-made, serviceable engine is carried out as follows:
- Take a pipe 7 cm in diameter, from which 250 mm is cut with a grinder - it will become the future muffler. It is filled with wood waste and diverted so that the exhaust is directed away from the operator. Ensure that the exit circumference does not exceed 1.6 cm in diameter;
- A frame made in the form of a slide is adapted from a stainless steel pipe with a cross-section of about 4 cm. To secure bolt ties, we weld metal brackets to its periphery and middle part;
- We connect the engine and the frame structure.
After that we move on to the chassis.
The most popular ways to recreate it are:
- the use of old Zhiguli tires (all 4 pieces), which are connected in pairs by axle shafts reinforced with a cotter pin;
- assembly of lugs based on tires without rubber (drawing below). For better adhesion to the soil, they are retrofitted with a metal corner.
After installing the transmission, steering wheel, and gas tank on the homemade product, the unit can be tested in the field.
How to create a lawn mower using improvised materials
To quickly deal with tall grass or tidy up the lawn, a lawn mower must be among the owner’s tools. You can purchase an ordinary factory version of the equipment, which is convenient to use, but you should keep in mind that the price of the lawn mower will be significant. A homemade “Friendship” chainsaw made by yourself will cost one and a half times less than a factory device, and the power is quite enough for standard household use.
Regardless of the type of design chosen, the trimmer will consist of a drive, frame, control system and knives. For ease of operation, the device is additionally equipped with wheels, legs, handles and a protective casing in which the mowed grass is collected. The process of making a lawn mower begins with creating a frame of a convenient size, most often made of metal corners. The optimal size is 25x25 cm. In general, the progress of work on the manufacture of equipment looks like this:
- Using bolts, iron handles are attached to the finished frame, and wheels are mounted on the side parts.
- Having previously studied the characteristics of the Ural chainsaw or any other model, remove the handle and tire from the device.
- Using studs and nuts, the remaining part of the equipment is attached to the base. This must be done so that the gearbox shaft, rotated 90˚, looks down.
- At the next stage, you will need to lengthen the gas cable, and use two tubes to make a sliding shaft connected to the gearbox.
A lawn mower made from a chainsaw will cost much less than a store-bought one.
Helpful advice! Some people make their own lawn mower blades, for example from parts from a handsaw. It is much easier to purchase a finished product, which is then connected to the shaft using bolts or a welding machine.
Elements from old baby strollers or wheelbarrows are used as wheels. If you use several pipes of different diameters for manufacturing, you will be able to make a device with a telescopic operating system that can change the length.
This is especially important if the device is often used by people of different sizes. Also, the creation of a telescopic shaft will help to regulate the height of the grass after the lawn mower passes
To ensure that the device lasts longer, does not fail after encountering hard stones, and effectively fights small bushes, it should be equipped with high-quality steel knives. For convenient use, it is recommended to additionally equip the mower with a grass catcher so that you do not have to collect the remains of the mown grass.
Peculiarities
Before you start producing a motor cultivator, you should decide what type of agricultural unit you will design: with an electric motor or with an internal combustion engine.
It is important to remember the fact that a motor cultivator with an electric motor will only be effective if there is an energy supply system in the area that is planned to be processed. On the contrary, a device incorporating an internal combustion engine can be used in the field, since it runs on fuel, namely gasoline
Another important nuance is the method of tillage. There are cultivators that have driven wheels, as well as those units that are equipped with mounted tools (the latter can serve not only as walk-behind tractors, but also as vehicles).
What elements are needed for assembly?
If you decide to design a walk-behind tractor yourself, then you need to prepare the following set of components:
- motor or internal combustion engine;
- gearbox - it is able to reduce speed and increase forces on the working shaft;
- frame on which the equipment is mounted;
- handles for control.
These are the main parts - without them it is impossible to make a machine for agricultural cultivation at home. Therefore, before starting the manufacturing process, make sure that each of the elements described above is present.
Principle, device diagram, theory, how everything should work out
All work begins with a plan and drawings, which can then be relied upon. Diagrams and drawings will be required in order to take into account all the components and their location, the relationship between each other and the operation of the mechanism as a whole. Pay close attention to the location of each unit, as if you make a mistake, the snowmobile simply will not move.
Work plan:
- First, the chainsaw motor is attached to the made frame.
- Skis are installed in the steering part of the snow scooter, which are the main element of movement.
- Then the steering is installed.
- To set the mechanism in motion, it is necessary to install tracks at the rear.
- Connect the track disk and the chainsaw motor sprocket.
- Finally, the driver’s seat is installed, which is mounted on a specially equipped place.
To equip the steering on a snowmobile, borrow the handlebars from a moped or bicycle. The main task will be to properly secure the steering wheel so that when you turn, the skis also turn.
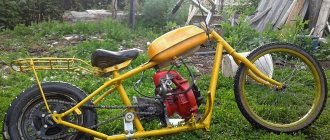
How to make a moped from a chainsaw or a bicycle with a motor
A homemade moped made from a chainsaw is unlikely to compare with the industrial version of the device, but it is quite suitable as a kind of adult toy. By and large, the device is not a moped, but a bicycle with a chainsaw engine. This is due to the fact that most often it is the old frame from this vehicle that is used.
A moped using a chainsaw can accelerate to 30 km/h. Note! More advanced craftsmen do not take a ready-made frame from an old bicycle, but independently make a welded structure for this purpose from metal pipes or a square profile. But the main components, including bearings, prefer to use factory ones.
Before installing a chainsaw engine on a bicycle, you should ensure that you have parts, such as:
- frame;
- engine with gas tank;
- gearbox with gear ratio 18:1;
- shock absorbers;
- brakes
Any engine for a bicycle from a chainsaw must be supplemented with a gearbox so that it is possible to regulate the rotation of the wheels. Sometimes, instead of a gearbox, gear pairs are used, connected to each other by a chain from a bicycle. If we take a mountain bike as a basis, then a gearbox with a gear ratio of 1:15 or 1:20, supplemented by a variator, is more suitable here. The main advantage of a mountain bike with a chainsaw motor is that, unlike a conventional device, it can be accelerated to 30 km/h.
Another simple vehicle to use is a chainsaw kart, which resembles a simplified model of a car, which is used mainly for circuit racing. The device does not have a solid body and does not have shock absorbers. The minimum number of parts makes it possible to lighten the design and provide it with greater speed of movement.
For a bicycle you need not only a chainsaw engine, but also a gearbox.
The frame is most often welded independently from a metal profile, and old carts are used as a wheel donor. A bicycle chain is used as a drive for the rear axle, and you will also need a steering linkage. To assemble the housing, you will need to use a welding machine. Some people consider a home-made kart to be a children's car with a gasoline engine, but you need to keep in mind that the vehicle is capable of developing a decent speed.
Benefits of the product
The benefit of a homemade walk-behind tractor from Druzhba is that purchasing a factory-made device is quite expensive. Having a small plot or using a walk-behind tractor infrequently, purchasing it is not always advisable. And you can assemble a generally productive homemade device from what you have lying around at home.
Parts can be assembled absolutely free if desired. And it would not be a pity to spoil them under unfavorable circumstances. The chainsaw engine itself is quite economical and unpretentious. You can use inexpensive fuels and lubricants, which also affects the overall benefit.
A walk-behind tractor is not the only thing that can be made from a Druzhba chainsaw; using this tool you can make many other useful devices; read about how and what is needed for this in the article at this link.
Creating a walk-behind tractor from a Druzhba chainsaw
The Druzhba chainsaw is considered the best choice for making a walk-behind tractor. This simple and very productive technique is probably in the arsenal of many owners. Using its structural elements, you can make a fairly powerful walk-behind tractor, as it has the following features:
- Due to its low weight, such equipment can be used for work of any complexity.
- Very productive engine.
- Compact and durable.
Based on this device, a high-quality walk-behind tractor is obtained, the speed of which is 2.5 km/h and the power is about 4 hp. The process of creating a unit is similar to the method that is used for all other models, but it also has its own nuances:
- The main shaft of the future design is equipped with a special flange, which is of the collar type, RU-32, which will then make it possible to easily screw on bridge type gearboxes.
- Sprockets are taken from the UAZ and, together with a double-row chain, are installed on the future device and allow you to increase the distance from the gear axle to the ground. Timing sprockets allow you to increase the distance to the soil by 15 cm.
- The housing type bearings are screwed to the main axle and their diameter is 30 mm.
- The gearbox with gearbox can be constructed from the motor from the Karpaty motorcycle; it is necessary to provide a standard centrifugal clutch.
- To install the cutters and then install the wheels, you need to use steel pipe.
You need to install a load in front of the frame that can hold the center of gravity.
A pipe with a diameter of 30 mm is welded as handles.
As soon as the chainsaw walk-behind tractor is ready, it can be tested on the site. To do this, fill up with fuel and try to complete the work. Modify your device if necessary.
The advantages of such a unit are:
- the ability to use a variety of lubricants and combustible materials;
- work in completely autonomous mode;
- suitability for any type of work.
To create this type of technique from a chainsaw, you do not need specific knowledge. All it takes is a little ingenuity and the desire to get an effective technique. A homemade walk-behind tractor suitable for use on private plots and dachas.
Let's look at how to make a walk-behind tractor from a chainsaw. The chainsaw works in all positions thanks to the fuel supply system; it is very powerful and unpretentious.
Power station
For a mobile power plant with a power of up to 5 kW, there is a time-tested solution: a homemade generator based on a motor from a Druzhba or Ural saw. They are actively used on expeditions and at remote logging sites. The device includes a steel frame, welded from a corner, on which an engine, a generator and a waterproof electrical distribution box with sockets for connecting electrical equipment or an extension cord are mounted. Through the gearbox, torque is transmitted to the generator shaft.
For low-speed generators, there is an option for a homemade power station with a belt drive. This design is smaller in size.
Making a walk-behind tractor from a chainsaw with your own hands
According to the owners of land plots, who have already experienced all the features of handicraft motor vehicles from a gasoline saw, assembled with their own hands, “Druzhba” demonstrates excellent results after modernization. With the right choice of power plant for a homemade unit, it works no worse than its industrial prototypes.
The absolute advantages of this device are:
- high power, reaching up to 4 horsepower in some samples;
- lightness - a small mass will not make the unit heavier and will increase its mobility;
- compact size - a small engine does not require reinforcement of the frame, which reduces the financial costs of its manufacture;
- economical consumption of fuel and lubricants;
- performance, which is determined by readiness for prolonged loads;
- possibility of using all kinds of fuels and lubricants;
- functioning in a completely autonomous mode;
- applicability for various types of work.
The assembly procedure depends on the drawing used and may vary, but the main points of assembly include the following activities. The frame is assembled in accordance with the drawing.
The work process is organized as follows:
- we take a metal pipe with a cross-section of at least 20 mm and bend it so that the overall appearance looks like 2 spars, the end of which is directed upward;
- a motorcycle handlebar is welded in the rear area of the spar;
- we strengthen the base with crossbars;
- We electric weld the support platform for the battery to the rear bends of the side members.
Further work continues on the following points.
- Now we mount a specialized flange, with the help of which the shaft will be fixed to the main structure of the unit from a gasoline saw.
- We buy sprockets from a UAZ car at the used parts market. Through them, ground clearance (ground clearance) will be formed between the ground plane and the connecting wheel beam.
- We take bearings with a 30 mm diameter. We fix them to the main bridge.
- The gearbox, equipped with a gearbox, is assembled from a motorcycle engine.
- The wheels and cutters of a handicraft cultivator are installed on a metal pipe of the required diameter.
- Due to the fact that the walk-behind tractor has a low speed, a forced-type cooling system is required. The simplest solution is to install a fan. And so that the air flow is directed towards the cylinder, a protective coating is used. It could be an old motorcycle gas tank.
After completing the assembly work, be sure to test the equipment, doing this with extreme caution.
Do not forget to install the weighting material in the front part of the unit, firmly securing it to the body. This will enable homemade agricultural machinery to maintain its center of inertia. If the element is fixed unsteadily, the walk-behind tractor will shake during operation, which will lead to failure of the motor.
Operating principle
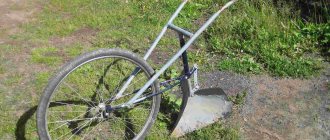
A manual hiller works according to a seemingly primitive scheme. However, this has little effect on efficiency. One of the farmers presses on the traction handle located in front, and the other presses on the same handle at the back. As a result, the mechanism is set in motion, and the working disks are immersed in the ground. When moving, the soil layer is loosened, then, by installing or removing several special parts, they change the distance separating the disks.
Self-production of a hilling device is available to all farmers. All you need is basic mechanical knowledge and experience in day-to-day operation of agricultural machinery. Do-it-yourself equipment turns out to be much cheaper than factory-made analogues. There is no need to talk about satisfaction with one’s own skill.