Greetings, dear readers. Despite the fact that the Internet and e-books have firmly entered our lives, textbooks and works in the classical version will always be side by side with us. And it would seem that such a simple thing as a bookmark is very necessary. I know from myself that when I didn’t have anything at hand to cover a page or a textbook with, I had to commit a crime - fold the page. And to prevent this from happening, you need to prepare a “book-bookmark” set in advance.
The best thing is when this wonderful and useful thing is made with your own hands or given by a child. A wide variety of materials can be used, including crocheted ones. From felt and textiles, from genuine leather and even from the spines of old books.
But today we will look at options for making bookmarks for books from paper. And even if they are not as durable as from other materials, any child or adult can make them.
Bookmarks for books made of paper (diagram): paper heart
You will need:
- colored cardboard or old cover, postcard, magazine page
- a sheet of white paper
- pencil
- scissors
- glue stick or PVA
- envelope.
1.
Take a sheet of plain white paper and fold it diagonally. Use a pencil to draw an arch (see image) - this will be half a heart. When you straighten the sheet, you will get a full-fledged heart.
* You can simply draw a heart on paper; it does not have to have ideal shapes.
3.
Cut out the heart. You have a template.
4.
Place the heart on the edges of the envelope, trace it and cut it out. You now have a corner for a book or notebook. It needs to be decorated.
5.
Draw a smaller heart on thick paper and cut it out.
6.
Glue the small heart to the big one.
Bookmarks Various products – Beads
Bookmarks can look like woven braid or thin cord. It all depends on your experience, availability of free time and imagination.
Bookmark with tassels
• nylon thread No. 40K or 50K in the color of the background bead bookmark with tassels • milky white, blue, golden, brown, dark brown beads • 2 beads black bookmark with colored diamonds • black, white, blue, yellow, green, red, golden beads red bookmark with ornament
• red, white, golden beads
In Fig. 1.1 shows a general view of the product. Start weaving according to fig. 1.2 from the bottom corner. String 8 beads onto the middle of a white nylon thread, pass through the first bead from left to right so that the bead threads come out from different sides, align the ends. Pass the needles along 2 beads on the left and right sides (Fig. 1. 3, conditionally the ends of the thread are shown in different colors). Next, string 4 beads onto the right thread II (black), pass the needle from right to left through bead 5 and string 2 more beads. Thread 2 beads onto the left thread I (red), thread 2 beads onto the left needle and pass the needle from left to right through the last bead on the right thread. In it, the threads intersect (key bead), coming out from different sides of the bead, and change sides (Fig. 1.4). Pull the threads.
According to Fig. 1.5 on the first needle (red thread), first weave a row of 3 brown beads from left to right, then on the same needle weave a row from right to left. Thread 2 beads onto the second needle (black thread). Pass the needle through the yellow bead (the threads cross in it), the needles change sides. So continue working, first weaving 2 rows on one needle, changing the needles in the key bead on the left, then on the other needle - the next two rows, again changing the needles in the key bead.
In Fig. Figure 1.6 shows the completion of a bookmark in the form of an angle. Secure the threads by passing the needle along the beads of rows 2 and 3. Using a new thread, braid pendants on one and the other side of the bookmark in the form of a tassel with three loops. When making a new loop, each time go through the bead and the bead above it.
Advice. If it is necessary to weave a new working thread, bring the work to the key bead, where the threads change places. Secure the short ends by passing through 6-8 mesh beads, cut off the ends and carefully singe them, forming knots that will prevent the thread from slipping out of the beads. Pass the new working thread through the key bead, align the ends - the threads are ready. For the strength of the bookmark, it is better to weave it on threads in two folds.
The ends remaining at the beginning of the work can be tied in a knot, cut off the excess and carefully set on fire with a lighter.
Black bookmark with colored diamonds
In Fig. Figure 2.1 shows half of the bookmark, but its length can be changed by changing the number of diamonds. Using a black nylon thread, weave the base of the bookmark according to Fig. 2.2-2.6. The bookmark has even end sides, so it can be woven both from the middle and from the edge, as in the pictures.
Weave the pendants to the beads marked with a cross. Pass the thread in one fold (for 3 pendants you will need 1.5 m of thread) with a needle at each end into the leftmost marked bead, align the threads, weave the first pendant. Along the woven pendant, pass first one needle in the opposite direction, then the second. Walk along the beads of the bookmark to the place where you will braid the next pendant and similarly braid 2 more pendants. The pendants repeat the color of the beads used when weaving rhombuses. The middle suspension is 2 links longer than the outer ones.
Red bookmark with ornament
In Fig. Figure 3.1 shows half of the bookmark. The length can be changed by alternating the elements of the ornament in different sequences. With such a width it is convenient to weave from the middle. The final corner of the bookmark with this width is made with one needle (Fig. 3.2). Work on red nylon. Weave one side through the bead marked with a dot, pass a new working thread, align the ends and braid the second side in the same way. Weave pendants in the form of loops, decorated with a cross link, either on the remaining threads from weaving or on new threads according to Fig. 3.3.
Source: Lena magazine Author: Yulia Lyndina
683
biserok.org
How to make a felt bookmark for a book: felt heart
You will need:
- sheet of felt
- scissors
- thread and needle.
1.
Fold a sheet of felt in half, draw a heart (or use a paper template) and cut it out.
*You can cut two triangles. Choose the shape of the bookmark yourself, the main thing is that both halves are the same.
2.
Using thread and a needle, sew both halves together, but leave the top of the heart (or the base of the triangle) intact so you can place the bookmark on the page.
Simple origami options
An unusual bookmark for a book in the form of an origami corner, made by yourself, will help you avoid losing the right page, and also will not take up much space on a shelf or in a drawer.
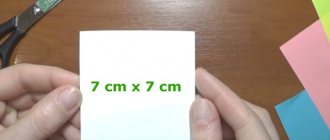
An even square is cut out of paper and folded diagonally. Then the smaller corners are turned towards the top. Next, the edge is bent so that the corner touches the middle of the original fold line.
At the end, the narrow corners are bent, and the protruding sides are folded inward. The resulting corner can be decorated to your liking.How to make a bookmark from toys for a book
You will need:
- small plastic toy
- knife or scissors
- paperclip
- a lighter or matches (to heat the tip of the paperclip).
1.
Cut off part of the toy.
2.
Heat the tip of the paperclip. It is advisable to hold the paperclip with pliers to avoid getting burned.
3.
Insert a paperclip into one of the parts of the toy - since it is hot, it will go into the plastic toy easily (the plastic will melt).
4.
Wait until everything cools down, and you will have an original bookmark - as if the toy is inside a book.
Heart-shaped corner bookmarks
For such a corner bookmark, you don’t even need to master the origami technique - just prepare a stencil according to the template on the diagram. Fold the piece so that the halves of the heart come together.
To keep them on their own, you can make small cuts. Seal the joint with small multi-colored hearts on top, paint or decorate with colorful stickers.
Photo: obustroystvodoma.ru
Photo: obustroystvodoma.ru
Beautiful bookmark for books and notebooks: bookmark with bracelet
You will need:
- thin wire
- wire cutters
- different beads
- tape (braid)
- scissors.
1.
First you need to make a small bracelet. To do this, cut a small piece of thin wire, put several beads on it, twist the ends and insert them into one of the beads.
*If necessary, cut off excess wire.
* In this example, the diameter of the bracelet is about 4 cm.
2.
Cut a long piece of ribbon (2 times the height of the page). Tie the ribbon to the bracelet.
* Try to take a thicker tape so that it does not slip out of the book.
Double-sided bookmarks
Beautiful DIY bookmarks, finished on both sides, look original and practical. They will not accidentally fall out of the book and will not get lost inside it. To create them you need to use felt and silk or velvet ribbons.
Felt blanks are attached to the tape at both ends. The craft can be supplemented with colored threads, buttons or rhinestones. Instead of tape, thread, cardboard or soft fabric are often used.
Bookmarks for textbooks: bookmark with bead
You will need:
- beads and other decorations that can be threaded
- thick thread or rope
- paper, glue and matches or skewers to create your own bead (if desired).
*You can use purchased beads, you can make your own, or both.
1.
Cut a piece of thread or rope. Its length should exceed the height of the book. Tie a knot at the end of the thread.
2.
Place one or more beads on the thread and tie a knot again.
* To make your own bead you need to wrap a strip of paper (newspaper) around a match, adding glue periodically.
3.
Tie a knot at the other end of the thread, put the bead back on and tie another knot after it.
*If necessary, cut off the excess ends of the thread.
Multifunctional craft
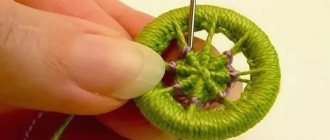
There is an interesting option for a multifunctional bookmark for a book made of paper or cardboard with your own hands. Its second purpose will be to hold a skein of thread.
The reel craft is made from a dense material that holds its shape. A blank in the form of a hare or cat is cut out of it.
Approximately in the middle of the bookmark there will be legs - they need to be cut on three sides so that they can hold a skein of thread.
The basis of the basics is the corner
The variety of “page storage devices” using the origami technique is simply amazing. But most of them have a common base - a corner, which is then decorated in accordance with the preferences of the master.
If you wish, you can settle on a basic figure, choosing for it beautiful paper with an exquisite texture and pattern. This happens quite a bit, especially if the book has a luxurious classic design.
An origami “corner” bookmark is placed on the side of already read pages, which allows you to carefully open the publication in the right place without flipping through it again. As a result, the book retains its original appearance longer.
To work, you will need a sheet of fairly thick paper. Ideally, it should match the color and pattern of the overall design of the book.
Work algorithm:
- Take a square sheet. At the first stage, we place the one-sided one with the wrong side up. Draw a diagonal fold.
- Turn the sheet over 90°. Fold in half diagonally.
- Bend the corner marked with a pink dot towards you. We do this only with the top layer of the workpiece.
- We have 3 identical triangles. We bend the corner of the right one towards the center.
- We do the same with the left one.
- Open both side triangles.
- Raise the right corner up.
- We do the same with the left corner. We get the basic “double square” fold.
- We tuck the upper half of the triangles inside the workpiece. Smooth out the fold lines well so that the origami bookmark does not open.
- The “corner” is ready.
Master class - weaving baubles from ribbons
We will need: 1. 2 satin ribbons of different colors, 2 meters each. Scissors3. Matches
We take the ribbons, fold them and tie a knot at the bottom, stepping back from the edge about 4 cm (since I am making a bookmark, 4 cm will be enough, and if you want a bracelet, 8-10 cm) I used ribbons of blue and gold colors.
Take a blue ribbon and form a loop on the long side.
Sorry that under the photo it says “Photo 5”, it’s mixed up, it happens))) Well, shall we continue? Having formed a blue loop, take a gold ribbon (the one that is long, not the tip) and wrap it around the blue loop, 2 circles is enough)
Having made a blue loop and wrapped it, we proceed to the yellow one. Holding the blue loop so that it does not unwind, we make a yellow loop.
Insert the yellow loop into the blue one
Tighten the blue loop at the end. We only have one yellow loop left
Holding the ribbons, we form a blue loop again
We insert it into the yellow
We tighten the yellow one, as we did earlier.
To avoid such sloppy loops, do not forget to periodically pull the sides of the ribbons
Weave a bauble of the length you need as indicated above. Are you done? Well done! Now we will finish the bauble itself. Leave one loop.
We take the ribbon whose color is not the last loop, and without making a loop we insert it into the blue one.
Tighten the blue one
We make a knot from the resulting 2 ribbons. However, it often happens that one tape is longer than the other. No problem! Let's cut!
To prevent the ribbon from unraveling...
...We burn around the edges! Be careful not to get burned!
Voila!
If you make this bauble longer, you can stick it on a headband! Or tie it like a bracelet!
I have a bookmark
This is the variety of baubles I have woven together)) There were more - I gave them away!
Many hearts
If figurines of animals or birds, flowers and other object bookmarks are more suitable for young readers, adult romantics are unlikely to refuse origami in the shape of a heart. It can be given as a gift for Valentine's Day or another similar holiday. From the pages of the book, a mini-confession made of paper will remind you of yourself every time and cause a happy smile.
Origamists have come up with several schemes for folding “hearts”. The simplest of them takes no more than 3 minutes, but looks very impressive. It is recommended to use beautiful scrapbooking or origami paper with an elegant pattern.
Simple heart in 3 minutes
You will need a square measuring 15x15 cm. It should be folded in half and cut along the fold line into two rectangles. Let's take one of the figures with dimensions of 15x7.5 cm. Fold it in half lengthwise. If the paper is single-sided, the “face” should be on the outside.
Let's denote the second axis by bending the figure in the transverse direction and straightening it.
Fold the right side at a 45° angle, aligning it with the center line. We repeat the technique with the left side of the workpiece.
We turn the figure over. Bend its upper part 1/3 of the height. Now you need to give the workpiece a heart shape. To do this, we bend the upper corners, both internal and external. The bookmark has a “pocket” at the bottom where the pages will be placed.
Exquisite "heartfelt" corner
Making the next origami Heart bookmark will be a little more difficult. But she also looks luxurious. Therefore, the model should also be taken into account and, if necessary, folded.
It is based on a 15x15 cm square. For convenience, it is better to use a double-sided type of decorative paper, although this is not essential.
Simple weaving technique
To create a simple accessory, you need to prepare two multi-colored, but well-matching ribbons. It is desirable that their length be at least two meters.
To create a simple bracelet, you need to perform the following manipulations:
First, you need to lay one ribbon on top of the other, and do this so that both ribbons are face up.- These ribbons need to be tied at approximately a distance of 15 cm. This gap is left for ties.
- Now you need to secure this knot, but do it so that the weaving is located away from you.
- For more convenient work, it is recommended to secure the material with tailor's paper; you can also use tape.
- Now you need to make a loop on both strips, pull one into the other and tighten.
- Next, they make a new loop on the strip where it broke, and thread it into the existing one. After this, tighten the tape again.
- Continue these steps until the required length of the bracelet.
- At the very end, make a neat knot, trim off the excess length and hide the ends.
Products that are woven from two ribbons are the basis of any weaving. This technique is usually used to weave elementary products such as bookmarks, keychains and baubles. Once you get the hang of it, you can make such an accessory in a few minutes. Having understood how these actions are carried out, you can begin to weave more complex patterns and patterns, and also try to make some large item with your own hands and decorate it.