Buying a notebook that will suit you completely is quite problematic. Either you don’t like the drawing, or its design. If there is something you like, the price for it will be significant.
You don’t have to worry or waste time searching, but do it yourself. Show your imagination, take into account all your preferences, create the notebook of your dreams. Creating an original, unique notebook yourself is not difficult.
DIY miniature notebook
If you need a small notebook, you can make it in ten minutes. No staplers are needed to work. Required:
- sheet A4;
- scissors.
We work as follows:
(Step 1)
- Fold the material in half. We repeat the action. The sheet should be folded in four.
- Unfold the paper. Now you need to fold it in half, but across it. We repeat the action and unfold again. The result is a base divided into 16 rectangular sections.
Miniature Notepad (Step 2) - Take scissors. Make 3 cuts to the nearest fold. Let's add them up.
- Fold the bottom of the material up and the top down. We fold these parts and iron them with the palm of our hand.
(Step 3) - Place the resulting workpiece on its edge so that a hole is formed in the center. We fold the product so that we get two additional pages. If necessary, all pages can be additionally secured with glue.
(Step 4)
As you guessed, we told you how to make a notebook out of paper using the origami principle.
Fast and easy notepad
In a quick way you can make a classic notebook with any thickness. This booklet is used for personal purposes and as a gift. Before making such a notepad out of paper, prepare:
- paper (the number of sheets depends on the expected thickness of the product);
- strong threads and a thin needle;
- PVA glue (if possible, it is better to use Moment glue);
- thin gauze or bandage for making binding; select the width of the material depending on the thickness of the future notebook;
- knife for office work;
- thick cardboard;
- material for decorating the cover.
There are many instructions on how to make a classic notebook out of paper. We recommend following these steps:
- We cut the prepared sheets to get future pages. The standard size is 10 by 15 centimeters. You can select other parameters. Fold the sheets in half and place under the press. This will make further work easier. Keep the sheets in this form for several hours, it is better to leave them overnight.
- We combine the resulting blanks into miniature notebooks. For each, take 3 sheets. Make holes in them for firmware. The distances should be identical on each of the workpieces, so use a ruler.
- The resulting sheets need to be stitched. For this purpose, you need to use a thread, a needle and a “needle forward” stitch. Leave the end knot outside.
- Each subsequent stitched workpiece must be connected to the previous one using the remaining thread. When all the parts are connected, we fasten everything with one tight knot.
- From the outside, you need to thread gauze under the seams. We coat the entire spine with glue. Place the product under the press and leave until completely dry.
- While the workpiece dries. You can work on the cover. Cover it with fabric or decorate it using the technique you like. We connect the blank to the cover using glue and place it under the press again.
The notepad is ready. If you handle the product with care, it can serve you for a long time.
If desired, the notebook can be made larger or smaller in size. It can also be created in the form of a diary if you first print the pages on a printer. And if you want to give the product an aged look, soak the prepared sheets in coffee or wipe with a tea bag. Dry the workpieces and iron with a warm iron without steam.
Notebook for girls
Before you make a paper notebook for girls, you need to carefully think through all the work. The most original design should be used.
The finished product can be decorated with:
- sequins, sparkles, rhinestones, glue;
- multi-colored paper;
- a mandala or pattern printed on a printer;
- multi-colored backing.
The last method requires a creative approach; be patient before making a paper notebook for girls.
You will need:
- cover made of strong cardboard;
- wax colored chalk;
- shower gel;
- acrylic paints.
How to make a paper notebook step by step for girls:
- We color the cardboard. To do this, use crayons and draw lines or shapes in a scattered manner. You can paint cardboard with circles of different diameters.
- Mix acrylic paint and shower gel in a one to one ratio. Apply paint to the surface of the previously made drawing. When the first layer has dried, apply another one.
- Take a sharp wooden stick and scratch out the designs. This will give the cover some volume.
It is more convenient to use stencils for drawings in this work. It is acceptable to draw any other drawings that the girl likes.
And, to make inner sheets for a notebook, you can use the methods already given for making notebooks above, or those that will be discussed further.
You can decorate your finished notebook with a homemade bookmark. We described how to make them in one of the previous articles.
Master class on creating a cover for a notebook or diary
Let's figure out how to make a notebook cover with your own hands. To do this, prepare the following set of tools:
- photographs or pictures from the Internet;
- decoupage glue;
- brush;
- notebook.
First of all, you need to print images or photos selected from the Internet. It is advisable that they are not large. Next, carefully cut them out and place them on the surface of the notebook in the desired order.
Then we glue the photographs to the notebook, having first applied glue to their back side.
To make the glued photos shine a little, you can lightly grease their front side with decoupage glue, moving in one direction.
When the glue dries, you can additionally attach a bright ribbon with any inscription to the notebook.
Thanks to this experience, you will know how to make a diary cover with your own hands. The technology of action in this case is similar.
Notepad made of A4 paper
Basically, notebooks are not made from large formats. But if there is a need for this, we suggest using any of the methods given below.
How to make your own notebook from A4 paper:
- The first method does not require stitching. You need to fold all the sheets, glue them with glue, seal the workpiece with gauze and cover with a cover.
- You can stitch a notebook using a hole punch and a spiral. This method is more convenient than the previous one, since the sheets move freely in a spiral and do not need to be bent. The cover of such a notebook can also be punched with a hole punch. The whole job takes several hours.
- Choose large sheets. Fold them in half to form a notebook. Now use one of the methods suggested earlier.
You don't have to use regular office paper. You can use multi-colored material, cardboard or checkered/line sheets. The cover is decorated depending on creative skills and preferences.
Some decorating tips
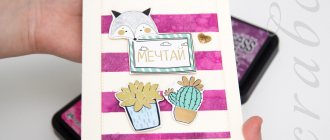
The process of design using the scrapbooking technique requires not only a creative mood and imagination without boundaries. The art of decoration is subject to important rules. Knowing the secrets, you can turn your favorite pastime into a profitable business.
Tip #1
Materials needed for work
The choice of materials and decor for scrapbooking is important at any stage. Beginners should know that any decorations, chipboards, brads and even scrap paper can be easily made with their own hands. The most unusual objects are often used as materials; the main thing is not to be afraid to experiment, using the ideas of experienced designers using the scrapbooking technique.
Tip #2
Composition - composing, linking elements of an artistic form into a single whole
Follow the rule of composition. It doesn’t matter whether we are making an album cover, a postcard or decorating a notebook, the composition must be consonant and balanced in style, color scheme, and semantic content.
Errors and inconsistencies that seem insignificant at first glance are the first to catch your eye, disrupting the aesthetics and overall impression of the appearance of the product.
It is important to learn how to combine decorative elements, bringing the composition to a single style, achieving integrity in meaning and color palette.
Tip #3
In the composition, the decorative colors and background color should correspond to the theme of the product
Using the rule of the semantic center. When designing a product using the scrapbooking technique, it is important to place the accents correctly. The semantic center is always the same in the composition; other elements are just a beautiful addition. For example, for album pages this is a photograph. It is on the semantic center that we will first of all focus our attention. The main mistake of beginners is the lack of a semantic center, chaotic, illogical decor.
Basic rules for composing a composition in scrapbooking
How to choose the right palette for a composition
Making a notebook without stitching
At home, you can make a notepad that will not be inferior to a factory-made one. The product can be decorated the way you want based on your creativity.
Materials you will need:
- watercolor paper, you can use other paper, but it is desirable that it be thick;
- high-quality glue;
- clothespins or stationery clips;
- multi-colored paper;
- ruler;
- cardboard for the cover.
Now let's look at how to make a durable paper notebook with your own hands:
- Bend each sheet and stack them. We divide the folded material into small notebooks. We secure it with a clothespin on each side.
- We coat the future back of the notebook with glue and apply a bandage. It will help hold the sheets together.
- Making the cover. It should be different in size from the inner sheets. It is enough to take more cardboard 5-10 millimeters larger than the inside. Glue the inside of the cover with colored paper.
- We attach the cover to the block of made pages. Place the product under the press and wait until it dries.
The quality of the finished notepad will depend on the materials and glue used.
A little history
The current century is marked by innovation and technology. They allow all information to be entered into the memory of electronic gadgets. But you should not rely on chance, because as a result of a malfunction of the device, you can lose extremely useful information. That is why the demand for notepads does not fall; the elegant paper assistant is a classic. The creators of the first copies were romantic, loving French. During the reign of the “Sun King” Louis XIV, a fashion for secret notes was introduced at court. Particular attention was paid to exclusive design, which emphasized refined manners and excellent taste. For the convenience and safety of romantic and secret behind-the-scenes messages, small books were invented, which were the first prototype of the modern notebook. Later they began to be used for important records and information. To keep the notebook pages safe, they were “packed” under a thick black cover called moleskine.
Literally translated, it meant “mole skin.” Small functional books were loved by bohemians and prominent statesmen. Talents such as Picasso, Van Gogh and Matisse were fans of notebooks. They entered not only reminders of important matters, but also sketches of their artistic masterpieces. Today, at the famous Sotheby's auction, sketches of famous artists on the pages of a notebook are valued at tens of thousands of dollars! The tear-off notepad was invented by none other than the author of the famous “The Adventures of Tom Sawyer,” writer Mark Twain. Only a person with creative thinking could come up with the brilliant idea of perforation for ease of turning pages. Often precious thoughts elude us, and in the fast pace of life we often forget about important events. The art of scrapbooking is a great opportunity to make an exclusive notebook with your own hands, which will become a relevant holiday gift.
Scrapbooking: handicraft stories
Notepad without glue
If for some reason you cannot make a product with glue. Use other manufacturing methods. The assembly principle can be chosen from one of those proposed earlier. The only difference is the method of binding the pages.
Which method can you choose:
- Use a spiral and hole punch. Detailed instructions on these devices have been described above.
- Using thread and needle. In this case, one or more sheets are folded in half and fastened on the folded side. This method has one drawback. It will not allow you to fasten more than 24 leaves. But it depends on the thickness of the paper.
- A quick and easy way is to use a hole punch and a binder. You can even make your own folder from cardboard. And the cover itself can be decorated to your taste. All that remains is to make holes in the sheets and insert them into the binder.
If we talk about the most convenient manufacturing method, it is stitching using a spiral. The work is very simple, the notebook comes with a large number of sheets. The cover of such a product can be decorated at your discretion.


