The overall efficiency of the entire mechanism depends on each of its individual parts. In the case of a modern electric jigsaw, with a relatively complex design, this is exactly the case. Each element of this device is designed to perform a specific function for the sake of the overall result - performing a controlled cut. If problems occur on one of the mechanism components, the performance of the tool may decrease, down to zero. To return your device to service, it is enough to find and eliminate the “weak link”. We will tell you further how to repair a jigsaw with your own hands and reduce further wear of its parts.
We understand the design of an electric jigsaw and the principle of its operation
It will be easier to repair a jigsaw if you know what this tool consists of and how it works. Knowing the design and principle of operation, there will be no difficulties with repair work. First, let’s find out the main components of the power tool in question:
- Housing - it is usually made of impact-resistant plastic. This is the base of the device, inside which the component parts are located
- An electric motor is a commutator-type AC motor.
- Gear unit - a transmission mechanism through which rotational energy is converted into reciprocating movements
- A rod or pin with a spindle for securing working attachments. The rod is a cylindrical shaft that is connected to a plate. The shaft is located inside a fixed frame in which it moves
All these parts are power tools that can be used to cut sheet materials made of wood, metal, plastic and even concrete. For this purpose, appropriate types of saw blades are used, which are mounted in the chuck (spindle) of the power tool. A jigsaw is used not only for direct cutting, but also for cutting shaped holes in sheet material.
The operating principle of an electric jigsaw is to transform electrical energy into mechanical force. The operating diagram of the power tool in question is that alternating current is supplied to the electric motor, through which the armature begins to rotate. A gear is attached to the armature shaft, through which rotational movements are transmitted to the gearbox. A pendulum type gearbox is connected to a rod that moves up and down. When the blade is secured in the tool spindle, it will perform similar reciprocating movements, ensuring sawing of the material.
To simplify the work and expand the functionality of the tool, a start button, speed control and other additional functions are installed in the jigsaw design. When using the tool, breakdowns occur, which can be eliminated in two ways:
- Repair by cleaning, lubricating or reworking
- Replacement is the most common repair method, since when a gearbox, rod or motor breaks, they need to use new parts
The material describes all types of jigsaw breakdowns, as well as methods for self-repair. To repair a jigsaw, it is not at all necessary to take the tool to workshops and service centers. However, remember that if the warranty period has not yet expired, then it is better not to rush into self-repair, since this is the responsibility of the manufacturer or selling company.
This is interesting!
Any repair of a power tool begins with disassembling it, but the material describes ways to repair a jigsaw without disassembling it.
Operating a jigsaw
Before work, prepare the necessary equipment.
Take a bracket to replace the blade. Loosen the mounting bolt. Insert the desired file and tighten the bolt. The file is replaced in the same way.
Replacing the file
If you have a quick blade change function, then turn the lever of the corresponding unit.
Quick blade change function
Set the stroke frequency. The harder the material, the lower the frequency. The tree is cut at maximum speed. Metal is two times lower. For plastic, the speed is 2.5 times less than the maximum. The tiles are processed at low speed. Install the pendulum stroke. It is used for thick wooden blanks. There are three positions of the regulator: 1 - thickness 30–40 mm; 2 — thickness 40–50 mm; 3 - more than 50 mm.
Swap switch
Secure the part to the workbench. Place the device with the cutting part facing the workpiece. Turn it on. Without pressing on the canvas, move it along the drawn line. If you apply excessive force while sawing, the blade may break. Replace dull equipment immediately so that there is no heavy load on the engine and the device does not fail. To make a long cut parallel to the edge, use a straight edge and a ruler. Measure the required distance. Position the strip along the cutting line and secure it to the workpiece with a clamp. Move the tool parallel to the staff. To cut at an angle, loosen the platform. Set the angle to the desired value. Tighten the fastener. To cut an even circle, connect the guide to the center. It is included in the tool kit. Secure it in the middle. Guide the jigsaw around the center. When cutting patterns, secure the jigsaw to the table. Then you will see the entire drawing. You can guide the part along the desired path with both hands. To work with thin metal, place plywood under it so that the workpiece does not deform.
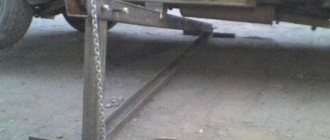
How to secure a jigsaw to a table
If you convert an ordinary jigsaw into a desktop version, its capabilities will expand.
Take a tabletop 12–15 mm thick. Drill four holes in it and in the jigsaw platform. Place the tabletop on a base that is at least 22mm thick. Screw on the jigsaw.
Attaching the jigsaw to the table
If it has a sawdust blower, you can connect a vacuum cleaner. To do this, make a round hole in the back of the table base and route the hose from the vacuum cleaner.
Connecting a jigsaw to a vacuum cleaner
Now you can saw.
Ready table with jigsaw
How to use a jigsaw
First, identify one of the two reasons, then proceed to eliminate it.
Make cuts along and across the grain. If the file only moves along, replace it. If the defect is repeated in both cases, the guide unit must be adjusted. For some, the problem is solved by adjusting the video.
Support roller
To do this, loosen it and move it forward or backward.
Setting up the video
Others have adjustment of the guide crackers. They are fastened with bolts. Loosen them and adjust to the desired position.
Guide crackers
Make control cuts. Repeat the adjustment if necessary.
Types of jigsaw breakdowns and how to fix them
You can avoid jigsaw damage if you operate the tool in accordance with the manufacturer's recommendations. To begin with, let us remember that tools are classified into two types - household and professional. They differ in quality, so household jigsaws cannot be used for long and often, unlike professional ones. How to find out what type of jigsaw - household or professional? To do this, you need to take the instructions or technical description and read the manufacturer’s recommendations. If the manufacturer recommends using the tool for 15-20 minutes, alternating with 10-minute breaks, then this device is of a household type. You can work with professional tools for up to 2-3 hours continuously without worrying about overheating and breakage.
Domestic and professional type jigsaws break equally often, and their repair depends on the type of breakdown. Failures are conventionally divided into mechanical and electrical. Mechanical failures include malfunctions of the gearbox, rod, bearings and cartridge, and electrical failures include the motor, button, regulator, power cable, brushes. Next, we will find out in detail the types of malfunctions, as well as ways to quickly and correctly eliminate them.
Bosch jigsaw: high price and expensive repairs
And of course, Bosch. Power tools from this manufacturer are distinguished by high quality components, assembly and a long service life, provided they are treated with care. It also has a drawback - the price. Moreover, both the product as a whole and spare parts are expensive.
It should be noted that Bosch tools practically do not break, but there are some nuances that appear during long-term use. For example, wear of the electric motor brushes, failure of the speed controller or saw blade fastening device. There are even more complicated accidents, failure of the rod or armature, but this is most likely due to incorrect handling.
As in the case of Metabo, Bosch jigsaws are best repaired at service centers. They will install original spare parts and provide a guarantee for the repairs performed. But this is an expensive pleasure.
After reading the article, the user gained theoretical knowledge about failures in the operation of jigsaws. Now, in the event of a breakdown, he will be able to determine the cause and make the right decision, and maybe even perform minor repairs.
If the jigsaw does not turn on when you press the start button - where to look for a breakdown
When a power tool connected to an outlet does not show signs of life, the following parts may be damaged:
- No voltage in the network. Using a probe or multimeter, you need to make sure there is voltage in the outlet
- Damage to the network wire - usually the defect can be identified visually in the form of an insulation failure, but there are also breakdowns of damage to the current-carrying conductor. To avoid having to guess, you should use a multimeter, and in the dialing mode, check the serviceability of each core. If one of the wires is damaged, but the location of the defect cannot be identified, then the power cord should be replaced
- The start button is faulty - voltage is supplied to the engine after pressing the “Start” button. This button consists of a normally open contact on which carbon deposits may form. This deposit is an obstacle to the path and passage of current, so the tool does not show signs of life. This type of damage can be eliminated by disassembling the button and cleaning the contact. If the button is not removable, or the cause of its malfunction is the built-in speed controller chip, then it must be replaced
- Overheat protection - when the engine on the tool overheats, a protection is triggered that prevents combustion of the power unit. Such protection devices are not available on all power tools, but if the element is present, it is possible that the lack of operability of the device is associated with this particular part
- Engine malfunction - this will require a thorough check of the power unit
When the motor of a power tool does not start, the most important thing is to correctly identify the part that has failed. In addition to the absence of signs of the instrument’s operability, electrical breakdowns also include other types of malfunctions.
How to use: operating instructions and safety precautions
- If the cutting speed needs to be increased, there is no need to put pressure on the jigsaw handle and “adjust” it. It is better to adjust the rotation mode of the motor and pendulum. The correct selection of the file is also important.
- The workpiece must be securely mounted on the workbench. You should never saw while holding the workpiece suspended in your hands. Good fasteners will give good results - cutting accuracy, speed and quality of sawed edges.
- Straight cuts are made using a ruler that is included with the jigsaw (linear clamp).
- Round holes and curved lines on thin plywood or plastic are cut better when the jigsaw is secured with the blade up and the part is fed to the cutting tool. Smooth circles can be made using a circle cutter.
- Making a cut on a thin metal surface is much more convenient if you put plywood under the sheet. This will prevent the edges of the metal from deforming.
- If there is a noticeable decrease in sawing speed, it is recommended to immediately replace the saw blade. Prolonged use of a dull blade will cause engine overheating with all the ensuing consequences.
- If the cut needs to be made at an angle, the support sole is shifted by the required number of degrees.
- When working in cold weather, it is advisable to run the engine at idle speed for 1–2 minutes. After this, you can work in load mode.
- Take breaks from work whenever possible. Stop for 5-10 minutes every half hour.
Currently reading: Semi-professional jigsaw
We also list the basic safety rules.
- When working, it is recommended to wear work clothing that does not have fluttering hems or dangling sleeves. Hair must be tucked under a headdress. Body position is stable.
- Do not slow down the movement of the saw with your hands or a clamp.
- It is unacceptable to leave a switched on and working tool unattended.
- Use the tool only for its intended purpose. Do not hammer nails with a saw.
- If you discover damage to the housing or other functional breakdowns, you need to stop working and fix the problem.
- The power cord can only be turned on and off when the engine is off.
- Do not allow minor children to play with the instrument. Is it dangerous.
With practice and experience comes knowledge. But at first, a novice user will need information on how and with what to cut different parts.
- Wood, plywood and laminate are the main materials that a jigsaw is designed to cut. If the cut is rough, you can use high speeds and oscillations of the pendulum. This will increase speed, but reduce quality and accuracy. Precise sections, depending on the density of the material, are sawed at medium speeds, with the pendulum turned off. This is especially true for laminate if it is precisely adjusted. On a six-point scale - 5.6.
- Metal parts, including pipes, are cut at low speeds without turning on the pendulum (or use the pendulum at low speed). 1.2 speed. Corrugated sheets and sheet iron are sawed at speed 1, making sure that the edges do not curl. For aluminum and other non-ferrous metals, the speed can rise to 3–4 levels.
- Plastic and plexiglass can be cut at high speeds, but care must be taken to ensure that the material does not melt. 4–6 on a six-point scale.
- Ceramic tiles, as well as other hard types of stone cladding, are processed at speed 4–5. The pendulum is installed in the initial positions.
- Drywall can be cut at high speed and with maximum swing of the pendulum. A natural limitation is the level of dust. If cutting occurs indoors, the dust from cutting can be very high. And so the speed is reduced.
Laminate is cut at high speed with the pendulum mechanism turned off
If the jigsaw engine is unstable - it sparks and there is a burning smell - how to repair it
A common situation is when the jigsaw is unstable. The reasons for the unstable operation of the jigsaw electric motor are the following factors:
- Graphite or carbon brushes are worn out or worn out - through these parts, electric current is supplied to the armature winding, which causes it to rotate. The brushes are in contact with the collector unit, which is a set of copper lamellas or plates. When the brushes wear out, the contact decreases, so the tool begins to spark during operation, a burning smell appears, and the body may even melt. The damage can be eliminated by replacing the brushes with new ones.
- Collector malfunction - if the copper plates show signs of blackening, as well as defects in the form of scuffing, chips and uneven wear, then this is also the cause of unstable engine operation. Signs of carbon deposits on the plates can be removed with alcohol, and to eliminate chips, scuffs and distortions, you will need to use fine-grained sandpaper
- Motor malfunction - if the resistance in one of the stator or rotor windings is different, this will lead to unstable operation of the tool. To eliminate the breakdown, you will need to diagnose the electric motor and identify the defect. To eliminate the malfunction, you will need to rewind the electric motor or replace the faulty part - stator or rotor.
- Button malfunction - if the tool’s motor malfunctions, it is possible that the cause is the switch. To make sure that the problem is not the button, you should directly connect the motor and check the functionality of the tool. If the symptoms of malfunctions are repeated, it means that the cause of the breakdown is not in the switch
Finding a fault in the electrical part may take a long time, which is due to the difficulty of carrying out diagnostic work. In addition, one of the most expensive parts of the tool in question is the engine. If the engine fails and there is significant wear on the gearbox, then it makes sense to purchase a new power tool.
Communities › Kulibin Club › Blog › Tools. Repair of the DWT jigsaw blade clamp.
Today I want to touch on a very painful topic for the “Kulibin residents”, namely, the repair of power tools.
Personally, I stopped taking it to the workshop a long time ago for the simple reason that they refused to repair it, citing the high cost of repairs, saying it would be cheaper to buy a new one. The second and important factor was the repair time, which could take up to a couple of weeks. The last incident that finally turned me away from repairmen was when they took my grinder for diagnostics, it sat there for a week, waiting its turn, and then they quoted me an amount almost equal to the cost of a new one.
I took it, disassembled it and, guided by tips from the Internet, found out that only one armature had burned out, but not in tandem with the stator. Having called back to Kharkov, I ordered a spare part and two days later I “enjoyed” the squeal of the grinder.
Impatient readers begin to fidget, especially nervous ones have already left the article, but in vain, because I ask a simple question: -Where do such queues for repairs come from?
Yes, it all comes from the same place - a modern electrical tool, just like a modern car, is a disposable product, the service life of which is only until the end of the warranty period.
This leads to a lighter design, a minimum of copper in the windings, low-quality components, and so on, so on, so forth... They may object to me about professional tools, well, well, it’s been a while since you looked into workshops where whole mountains of “pros” are lying around.
The second reason lies in the peculiarities of the “thinking” of designers. When I see what these “engineers” came up with, I always remember the unforgettable Michal Mikhalych with his “brain drain”.
In fact, this “leak” is more relevant for “post-Sovka”, because in the “decaying” there is nowhere to leak, not to “sunny” Magadan.
The only thing that leaked there was the brains of the developers from their heads to their ass. It is difficult to explain otherwise what they “do”, in other words, because almost every tool, with a complexity of little more than titanium scrap, has to be adjusted to real “field” operating conditions, or remodeled so that you can work without fear of injury.
To confirm my words, I suggest dear “Kulibinsk residents” to read how I repaired a “DWT” jigsaw
.
Some might argue that this renovation is off topic for the community, which I strongly disagree with. It is the presence of all kinds of tools that distinguishes a real “Kulibinets” from a “beggar” who every now and then comes running to borrow a tool “for five minutes.” These “five minutes” can drag on for a very long time; who hasn’t had to forcibly take YOUR instrument away from money grabbers after six months?
And he is still offended: Yes, you have three of these drills, you should take another one and work!
The cretin does not understand that each drill is designed for a specific job; you will not drill with a two-handed two-handed hulk with a power of a couple of thousand watts.
Out of the kindness of my soul, I was initially led by the tears of the “beggars,” but after another “hand-cutter burned my beloved “grinder”, making innocent eyes in response, I immediately sent him on an erotic journey on foot in the direction of the nearest store.
Thank God, the hungry years are over, the population has money (especially for “show-offs”), otherwise I wouldn’t work non-stop, and therefore: GO and BUY! I'm not giving it!
And even if they look at me askance after that, I don’t care about their opinion. As Mikhail Alexandrovich wrote in “Virgin Soil Upturned”: “Give your wife to your uncle, and go to b...
So, Gentlemen of the Jurors, this jigsaw fell into my tenacious clutches.
As it turned out, the saw clamp broke. What kind of moron came up with the idea of making it out of “aluminum”?
Steel, steel and more steel! Instrumental!
So she will live and not grieve.
For obvious reasons, I didn’t have a similar grade of steel; I’m still a taxi driver, not a hereditary blacksmith, and I won’t go to the Poles in Ulaanbaatar, after all! I had to make do with the rogue Article 3.
To begin with, I disassembled the jigsaw into small components and pulled out the movable bar itself. In principle, you don’t have to do this, especially after reading this article.
Then I found a piece of steel 10 mm thick in my wide trousers. I don’t recommend smaller ones, the clamp may bend, thicker ones are also not advisable, the M4 screws may not be long enough, and replacing them is not so easy - they are hardened.
I tried it on in place and drilled two 4.2 mm holes for screws.
I screwed the clamp to the plank and measured the position of the cut using the cuts on the plank.
I removed the clamp and clamped it in a vice, after which I used a hacksaw to cut a groove 5 (five) mm deep. I don’t recommend using a grinder; you can easily make a mistake.
Then, using a cutting disc 1 (one) mm thick, I developed a groove so that the file fits tightly into the groove. I did this slowly, as it was time and effort.
Then it turned out that it was necessary to make a recess for the file retainer.
You could try to select it with a drill with a diameter of 1 (one) mm, but this is a risky business, for the reason that it costs nothing to break such a miniature drill, and therefore I took and drilled a hole with a diameter of 3 (three) mm from the reverse side of the clamp. Its depth is such that it reaches the groove and that’s it.
Having finally assembled and carried out a “test of the pen” on the board that turned up, I was convinced that the clamp with its responsibilities ( Grab and don’t let go!
) copes perfectly, and if so, then two hours of not only work, but also deep reflection, did not pass by.
Those who have already relaxed in anticipation of me shutting up my fountain will have to be patient a little more.
If the first “jamb” was caused by the fact that the choice of “aluminum” for the clamp material was due to the warranty period, then the second case clearly demonstrates the stupidity of the designer, who has no idea what the moment of force application is
.
Each jigsaw has a file in its middle part with a rear support. If there is no such, the load on the clamping site increases many times with subsequent breakage of the clamp (“DVT”) or the movable bar (“Fiolent”).
The support of this jigsaw is an L-shaped structure made of stamped steel 1 (one) mm thick, to which a roller is attached without a bearing on the axis.
Any sane person understands that living in such a structure is nothing at all. An attempt to weld the broken bracket did not yield anything; it broke off again and disappeared in an unknown direction. A dog came with the police, but they never found him.
I had to take some kind of bearing with an internal diameter of 6 (six) mm, make a small mount and tightly weld it (the mount, not the bearing) to the sole.
Source: www.drive2.ru
Article rating:
Save to:
The jigsaw does not hold the file, what to do Link to the main publication
Other types of electrical breakdowns of jigsaws and their elimination
In addition to the above defects, when operating a power tool, other types of breakdowns associated with the electrical part may occur:
- Doesn't cut under load. Failure occurs when, when attempting to saw a material, the performance of the tool decreases. To eliminate such a defect, you will need to diagnose the motor. Another reason could be poor contact in the button or significant wear on the brushes. Graphite brushes must be replaced when worn more than 40%-60%
- The speed fluctuates during operation - the cause may be weak contact. If a burning smell is heard during the operation of the tool, then due to weak contact the insulation of the wires or the button body melts. To identify a breakdown, you will need to disassemble the tool and inspect it.
- If the brushes spark during operation, they need to be replaced. It is unacceptable when significant sparking of the brushes is observed, since this not only reduces the power of the tool, but also the following negative consequences arise - the load increases, which means the current in the stator and rotor windings increases, and sparking also contributes to the deformation of the copper lamellas of the commutator. You cannot use a tool with faulty brushes for a long time, and they should be replaced as quickly as possible. Sparking can be detected through ventilation holes or cracks in the tool body.
To replace the brushes on a jigsaw, you will need to disassemble it. Some professional tool models have special channels for quick replacement. The brushes are mounted in brush holders. Fastening can be of two types - in the form of a latch or a screw. After unscrewing or snapping off the brush, it must be removed, disconnect the wire and install a new graphite element in the same order.
This is interesting!
For low-power electric motors, graphite brushes with a low copper content are used.
Choosing a professional or household appliance
The main difference between professional jigsaws and household jigsaws is their high wear resistance and more intensive work. They can be used for 10 hours, changing attachments and processing different materials. At the same time, the quality of the result does not decrease. Unless the master gets tired and starts making mistakes. When using household tools, you must take a break of at least 10 minutes every third of an hour. And work no more than 3-4 hours a day. As a rule, this is enough for household use with a jigsaw.
When choosing a more powerful tool, keep in mind that as this characteristic increases, the weight also increases. The most suitable option for everyday use is jigsaws with a power of 500 to 650 W. They allow you to achieve cutting thickness in wood up to 70 mm and in metal up to 5 mm. If you need 160 mm for wood and 35 mm for metal, then take a more powerful jigsaw.
Diagnostics of an electric motor or how to identify a malfunction of the stator and rotor
If there is a suspicion of malfunctioning of the electric motor, then the exact breakdown can be identified using diagnostic measures. To do this, you will need a multimeter, as well as a diagnosable rotor and stator. First, let's find out how to check the suitability of the rotor (aka anchor):
- Carry out a visual inspection. If there are signs of soot and deformation, then there is a high probability that the part has burned out. It is also necessary to inspect the collector unit, on which the presence of soot, chips and distortions is unacceptable. Misalignment occurs when the brushes wear unevenly.
- Use a multimeter to measure the resistance of the armature winding. Set the device to 200 Ohm resistance measurement mode or continuity testing
- One probe should alternately touch the collector plates, and the second should touch the steel core. The presence of resistance indicates a violation of the insulation. To eliminate the problem, you will need to replace the rotor winding
- If a breakdown between the winding and the housing is excluded, then the rotor must be checked for signs of insulation failure. To do this, use a multimeter in resistance measurement mode to check the quality of the insulation between the plates. A mark is placed with a marker from the beginning, and after that the resistance between the plates is checked one by one
- The resistance value should be approximately the same. A difference in resistance value of more than 10% from the standard value indicates an insulation failure. You will need to rewind the rotor winding or replace the part completely
- Interturn short circuit - another cause of failure may be the presence of an interturn short circuit. However, it is impossible to check the presence of such a defect with a multimeter. To do this, a special device is used, which must be guided through the collector. If there is an interturn short circuit, the device will make a corresponding sound. The defect can be eliminated by replacing the winding
If it is determined that the defect is with the armature, then it must be rewound or replaced. If the rotor is working properly, then we move on to checking the serviceability of the stator - a stationary mechanism, which also consists of a winding and a steel core from a set of thin plates.
The algorithm for checking the health of the stator is as follows:
- The absence of breakdown of the winding to the housing is checked. To do this, touch the winding terminal with one probe, and the steel core with the second. The device should not show the resistance value, otherwise a breakdown may occur and the stator must be rewinded
- The resistance in the windings is checked by touching its terminals one by one. The resistance value in all windings should be approximately the same value, which indicates its serviceability
- Check the integrity of the metal plates of the steel core. It is unacceptable for them to delaminate, so you will need to replace a separate unit
It doesn’t matter what brand the jigsaw is - Interskol, Makita, Bosch, Skill, Metabo and others. When purchasing a new motor, you need to take into account its parameters and dimensions. There are markings on the motors that you need to use when purchasing a new electric motor for a jigsaw.
This is interesting!
It is almost impossible to repair the electric jigsaw motor yourself, since this will require rewinding the winding. This can be done at a service center, but the cost of such a service is almost identical to the price of a new part.
Where can I get it repaired in St. Petersburg?
Location: On the ground floor, section 015. Nearest addresses - Avenues: Bogatyrsky, Ispytatelei, Sizova, Streets: Tupolevskaya, Gakkelevskaya, Baikonurskaya, Staroderevenskaya. .
Metro station:
Pionerskaya
—> Working hours:
from 11:00 to 21:00 (Sat-Sun until 19:00)
Location: In the shopping center Trading yard Archimedes, 1st floor, room 7A. Nearest addresses - Metro: Politekhnicheskaya, Ploshchad Muzhestva; Avenues: Sciences, Civil Invictus, Northern; Streets: Vernost, Butlerova, Gzhatskaya, Favorskogo, Karpinskogo. .
Metro station:
Academic
—> Working hours:
from 10.30 to 20.00
Location: How to get there? Magnit store, checkout area, Umedia Serivis sign. Nearest addresses - Metro: Ploschad Muzhestva, Vyborgskaya, Chernaya Rechka; Avenues: Lesnoy, 1st Murinsky, Polyustrovsky, Bolshoi Sampsonievsky; Streets: Kantemirovskaya, Kharchenko, Litovskaya, Vyborgskaya. .
Metro station:
Lesnaya
—> Working hours:
from 10:00 to 20:00 (7 days a week)
Location: On the 2nd floor of the Termin shopping center. Nearest addresses - Metro: Dybenko, Bolshevikov; Avenues: Dalnevostochny, Podvoisky, Iskrovsky, Tovarishchesky; Streets: Dybenko, Antonova Ovseenko, Oktyabrskaya embankment, Podvoisky. .
Metro station:
Dybenko
—> Working hours:
from 10.00 to 20.00 (7 days a week)
Location: On the 2nd floor in the Rzhevka shopping center, room No. 2-07b. Nearest addresses - Avenues: Irinovsky, Kosygina, Industrialny, Nastavnikov; Streets: Communes, Progressives, Enthusiasts, Shockers. .
Metro station:
Bolsheviks
—> Working hours:
from 11.00 to 20.00 (7 days a week)
Location: In shopping center Paktor (Bada Bum). 5 minutes from Ozerki metro station. Siqueiros, Yesenina, Vyborg highway, Thorez Avenue. .
Metro station:
Ozerki
—> Working hours:
Mon-Fri: from 10:00 to 20:00, Sat-Sun: from 10:00 to 19:00
Location: On the 2nd floor in the Morskoy shopping center. Nearest addresses - Metro: Vasileostrovskaya, Primorskaya; Avenues: Morskaya Embankment, Vasileostrovsky; Streets: Korablestroiteley, Nalichnaya, Uralskaya. .
Metro station:
Primorskaya
—> Working hours:
from 10.00 to 20.00 (7 days a week)
Location: In the Cosmos shopping center, 2nd floor. Nearest addresses - Avenues: Kolomyazhsky, Bogatyrsky, Ispytatelei, Korolev; Streets: Parashutnaya, Gakkelevskaya, Staroderevenskaya, Planernaya, Sharova, Dolgoozernaya. .
Metro station:
Komendantsky Avenue
—> Working hours:
from 10:00 to 20:00 (7 days a week)
Location: Second floor of the Pyaterochka store. Nearest addresses - Avenues: Levashovsky, Chkalovsky, Petrovsky, Dobrolyubova, Kamennoostrovsky; Streets: Zhdanovskaya, Bolshaya Pushkinskaya, Bolshaya Zelenina, Lenina. .
Metro station:
Chkalovskaya
—> Working hours:
Mon-Fri from 10:00 to 20:00, Sat-Sun from 11:00 to 19:00
Location: on the 2nd floor. Neighbors FIX-PRICE. Nearest addresses - Metro: Bukharestskaya, Mezhdunarodnaya; Avenues: Slavy, Vitebsk; Addresses: Sofia, Salova, Bela Kuna, Fucik, Budapest, Paris, Turku. .
Metro station:
International
—> Working hours:
from 10.00 to 20.00
Location: Two end entrances to the Magnit Cosmetic Store. Nearest addresses - Avenues: Novgorodsky, Vitebsky, Moskovsky Streets: Shkolnaya, Pushkinskaya, Okulovskaya.
Metro station:
Shushary
—> Working hours:
Mon-Fri: from 10.00 to 20.00; Sat: from 11.00 to 19.00; Sun: closed
Location: On the 2nd floor of the Yugo-Zapad shopping center near Media Markt. Nearest addresses: Metro Kirovsky Zavod, Avtovo; Leninsky Avenue, Stachek; street Marshal Kazakov, Marshal Zakharov, Valor. .
Metro station:
Kirov plant
—> Working hours:
from 10.00 to 20.00 (7 days a week)
Location: Front entrance from Valor. Nearest addresses - Avenues: Leninsky, Kuznetsova, Geroev, Peterhofskoe highway; Streets: Valor, Marshal Kazakov, Marshal Zakharov, .
Metro station:
Leninsky Prospekt
—> Working hours:
Mon-Fri: from 10.00 to 20.00; Sat: from 11.00 to 18.00; Sun: closed
Location: On the 1st floor in the Plovdiv shopping center, near the cash register area. Nearest addresses - Metro: Park Pobedy, Mezhdunarodnaya, Moskovskaya; Avenues: Vitebsky, Cosmonauts; Streets: Tipanova, Titova, Baseinaya. .
Metro station:
Moscow
—> Working hours:
from 10.00 to 20.00 (7 days a week)
Location: Entrance to the ground floor, near Magnit. Nearest addresses - Avenues: Severny, Prosveshcheniya, Lunacharsky; Streets: Kirishskaya, Toksovskaya, Luzhskaya, Ushinskogo, Kirishskaya. .
Metro station:
Civil Prospect
—> Working hours:
from 10.00 to 20.00 (7 days a week)
Location: Entrance from Saperny Lane. Nearest addresses - Avenues: Liteiny, Suvorovsky, Nevsky, Ligovsky; Streets: Zhukovsky, Nekrasova, Vosstaniya, Radishcheva, Mayakovsky. .
Metro station:
Chernyshevskaya
—> Working hours:
Weekdays: from 10:00 to 20:00; Saturday: 10:00 – 19:00; Sun: 11:00 – 18:00
Location: Entrance from the parking lot. 6 steps up. Nearest addresses - Metro: Kupchino, Zvezdnaya; Avenues: Vitebsky, Slavy, Danube; Addresses: Sofia, Bukharestskaya, Malaya Balkanskaya, Oleko Dundicha, Budapestskaya, Kupchinskaya. .
Metro station:
Kupchino
—> Working hours:
Weekdays: from 10:00 to 20:00; Sat, Sun: from 10:00 to 18:00
Repair of the speed controller on a jigsaw instructions
Almost all models of electric jigsaws are equipped with a device such as a speed controller. What it is and what it is needed for, every owner knows independently. Structurally, the part is a board on which a wheel or switch is placed.
By moving the wheel (switch), the speed of the reciprocating movements changes. By acting on the wheel, the resistance changes, therefore the speed decreases.
To repair the speed controller on a jigsaw, it is not at all necessary to have an understanding of electronics. To do this, use a multimeter to check the serviceability of all resistors and the capacitor. Usually, a breakdown can be determined externally, since when it fails, the board will show signs of blackening and soot. In the photo above, the fault is a damaged power cord. A failed element on the board or a wire tip should be replaced, and this completes the entire repair of the jigsaw speed controller.
This is interesting!
If the regulator burns out, it should be replaced with a similar one in design and parameters.
Jigsaw Interskol: correction of sawing curvature
It is worth paying attention to the domestically produced Interskol jigsaw. It is produced in Izhevsk. For domestic use this is a completely acceptable option. It has many positive qualities, and the most impressive is its low cost. But there are also disadvantages.
Replacing the quick release saw blade mount
This is the curvature of the saw. What is the problem, and is it possible to get rid of it? The culprit was the quick-release fastening of the file. The fact is that it is designed for saw blades of maximum thickness. All cutting tools of smaller thickness simply dangle in the mount.
How to get out of this situation? You need to replace the quick-release mount with a simple device with regular bolts. It's not difficult to make. You need to take a square rod, cut two blanks, drill holes in them and connect them with two M5 bolts and nuts. The procedure for attaching the saw blade will become somewhat more complicated, but the tool will produce an even cut.
Refinement of jigsaw design
In addition, you can modify the design of the tool itself and limit the movement of the file in the transverse plane.
To do this you need:
- take sheet aluminum and cut the plate to the size of the jigsaw sole;
- In the front part of the workpiece, it is necessary to make a cut to the size of the working area of the cutting tool. File all edges, make bevels on the inner longitudinal edges of the cutout;
- You need to cut a plate from plexiglass to the size of the working area of the saw blade. File all sharp edges and make reverse bevels on the outer longitudinal edges;
- The aluminum plate must be marked for its installation on the jigsaw base. Drill holes and make chamfers for installing countersunk screws;
- A piece of plexiglass must be inserted into an aluminum plate, having first made a cut at its location.
Now, during operation, the saw blade will be limited in transverse movement almost in the cutting zone, which will give it even greater straightness.
Mechanical breakdowns on jigsaws and how to fix them
Mechanical failures include types of failures such as wear of bearings, gearbox, rod and cartridge or head. Mechanical type breakdowns are much easier to identify than electrical ones, and repair also comes down to replacing a failed unit, mechanism or part. Next, we will consider all types of mechanical faults on jigsaws, as well as ways to quickly eliminate them.
Worn bearings on a jigsaw, how to replace them
Bearings are consumables, so when they wear out, they need to be replaced. They cannot be repaired, and in order to extend their service life, you should regularly not only apply lubricant, but also perform preliminary cleaning.
If the bearings are worn out, then to replace them you will need to disassemble the tool and replace it with ones with similar markings. The bearings are pressed out and pressed onto the rotor shaft manually or with a special tool. Before installing new bearings, it is recommended to apply additional lubricant.
This is interesting!
To determine bearing wear, you should check for play in the outer race relative to the inner race.
Jigsaw maintenance and prevention
Like any technical device, a jigsaw needs preventative maintenance. After the warranty period has expired, you need to carry out several simple operations and the shelf life of the instrument will again be extended by a year or two, depending on the intensity of use.
- Replace the graphite brushes on the motor commutator.
- Inspect current-carrying conductors, including the power cord. If damage or wear is found, replace it.
- Clean the internal cavity of the tool from dust, debris and chips.
- Replace the lubricant in the mechanical components - bearings and gearbox.
Today, rarely does anyone sharpen files themselves. Especially if the blade has triangular teeth, which have increased maneuverability and chip emission. It is impossible to sharpen such a tooth at home. Moreover, such attempts can lead to the jigsaw starting to beat and the vibration level to increase.
How to disassemble a jigsaw, see the video below.
Repairing a jigsaw gearbox and how best to lubricate it
If, while working with a jigsaw, a sound in the form of a crack is detected, then there is a high probability that the transmission mechanism is jammed. A gearbox failure can be identified visually, which requires disassembling the housing and inspecting it. If the gears are missing teeth, they will need to be replaced for repair. If the cause of the malfunction is metal shavings getting into the mechanism, then to eliminate the malfunction you will need to perform the following steps:
- Remove the gearbox from the tool, and thoroughly clean it and rinse it in solvent or gasoline. This will clean the part from metal dust and grains.
- Place the part in place, having previously assessed the wear of the teeth on the gears. If the wear is severe, which entails the gears slipping relative to each other, then the mechanism needs to be replaced
- When installing old or new gears, it is necessary to apply lubricant in excess
What is the best way to lubricate the gearbox on a jigsaw and other types of power tools? For this you can use Litol-24, if there is nothing else, but if you want to extend the life of the mechanism, then it is recommended to use a special lubricant from Bosch. This is an expensive lubricant that not only reduces friction between parts, but also protects them from dust and grains.
This is interesting!
For each model of power tool, manufacturers indicate in the instructions the recommended types of lubricants for the gearbox. If there is no such recommendation, or it is impossible to find such a lubricant, then a universal substance from Bosch is used.
This lubricant is sold not only in large tubes, but also in compact packages, which allows you to save money. In addition to Bosch lubricant for the jigsaw gearbox, you can use other options that are somewhat cheaper in price, but no less effective:
- Optimol Longtime 2 from Castrol. This lubricant is slightly cheaper than Bosch
- Huskey Coolube is not only the most affordable, but also the most effective. If Bosch lubricant is expensive, then it is recommended to choose Huskey Coolube
There are many other brands available in specialty stores, so you should rely on your budget. And remember that Litol-24 is used as a last resort if nothing else is available. It is unacceptable to contain not only metal dust in the lubricant, but also shavings and sawdust that enter through the ventilation holes. All blockages must be removed, and then lubricant must be applied and the tool reassembled.
This is interesting!
If there is a malfunction of the bracket (mount) in the gearbox design, it should be replaced, as shown in the video below.
Jigsaw Fiolent: main reasons for failure
Replacing the rod
In the first case, to avoid this damage, it is enough to handle the tool carefully and carefully. But if this happens, you will have to replace the damaged rod. To do this you need:
- Remove the housing cover by unscrewing the 4 screws.
- Remove the rectangular washers and retaining guides from the rod.
- Unscrew the 4 bolts and remove the mechanism cover. Below it is the flywheel and the rod itself.
- Unscrew 2 screws each, remove the lower and upper rod holders. The latter has a spring, so you need to remove it carefully.
- Remove the damaged rod with guide washers.
- Lubricate the flywheel and eccentric with special gearbox lubricant.
- Place the guide washers on the new rod and install it in place.
- Attach the saw blade holder to the lower part of the rod.
- Install the upper and lower holders, screw on the mechanism cover and install washers and retaining guides.
- Insert the cutting tool and test the jigsaw at idle and under load. If the check does not reveal any deviations, install the housing cover.
Tool lubrication
In the second case, everything is much more serious. It would seem that what is so difficult about lubrication? But due to the fact that the tool constantly operates in extreme conditions, wood dust cannot be avoided getting inside the device; service work has to be carried out according to the intensity of use, but at least once a year.
All mating parts and assemblies need to be lubricated. To do this, you need to disassemble the jigsaw. But if in the first case you, for example, limited yourself to only dismantling the rod, now we disassemble the tool completely and smear all the rubbing surfaces of the parts.
For lubrication, the manufacturer offers Litol 24, but it will not work in a jigsaw gearbox due to its thick consistency, so it is usually lubricated with oils. You can combine Litol 24 with graphite-containing lubricant Feol 2U in a ratio of 3:1.
Finalization of the design
However, it should be taken into account that now the fluidity of the lubricant mixture is higher, and after some operating time it will begin to enter the engine rotor. The reason for this is the left-hand transmission. As the rotor rotates, the lubricant mixture is captured by the teeth and fed to the rotor as if through a screw. The oil separator installed inside the electric motor housing does not perform its functions. In theory, it should reject the incoming mixture, but in practice this does not happen. This is evidence of the imperfection of the design proposed by the manufacturer.
To avoid this problem, some modification needs to be done. Or rather, place the oil sump not inside, but outside the electric motor housing. At the same time, in order for the oil separator snail to work and reject oil, it is turned over.
One more nuance. The diameter of the mounting hole is Ø 9 mm, and the diameter of the outer part of the oil separator is Ø 9.2 mm - it will ideally block the passage for the lubricant mixture. But when installing it, you need to apply a certain force and an attachment in the form of a pipe of a suitable size.
In addition, it is advisable to install a dust shield on the rear armature bearing. It will protect it from wood dust and extend its service life.
After this, you need to assemble the lubricated jigsaw and test it for functionality. After operating for 10 hours, you need to check the tool for grease getting into the motor housing. If everything is done correctly, then this option is excluded.
Replacing the rod on a jigsaw step by step description
Failure of the rod on jigsaws occurs in rare cases, but if this happens, then it needs to be replaced. The replacement principle is simple and straightforward, for which you need to disassemble the tool, remove the rod and install a similar one in its place. The most important thing here is to find a rod of a similar design for the corresponding brand of tool.
Rods or pins serve as guides through which reciprocating movements are created. After replacing a failed rod, it is also necessary to thoroughly lubricate this part. A saw holder is attached to the rod, which can be installed together with the new part.
This is interesting!
The rods on different models of jigsaws differ in design, so the replacement principle is slightly different. Difficulties do not arise if you install a new part in the reverse order of dismantling the standard one. To avoid mistakes when assembling the tool, it is recommended to take photos before removing parts.
Blade holder faults
Many modern jigsaws are equipped with bells and whistles, which are their weak points. For example, some models often require repair of the saw blade mount due to the presence of such functions as:
- A quick clamp that does everything for the tool owner: just move the lever, place the blade and work. Over time, the structure becomes loose and fastening parts become unusable. Unfortunately, most of these clamps cannot be repaired; they must be completely replaced.
- Lightweight screw fastening is a real problem for owners of cheap and mid-price tools. The rod attachment, made of weak alloys, has low strength, breaks, and the bolts break the seats. Repair consists only in the handicraft production of the appropriate product from durable steel, since each line of cheap tools often has its own saw blade holder configuration.
https://youtube.com/watch?v=gjTvIKJsoAY
If the jigsaw has a classic screw fastening of the file, then repairing it will not be difficult. This is a durable and time-tested design; you can use bolts for a Phillips screwdriver or a wrench. The clamping blocks are standard; finding a replacement for an extremely worn part is not difficult. There is a problem with thread wear, but in this case a new one can be cut.
Saw holders on jigsaws - the weak link and its repair
To replace the saw blade holder on jigsaws, you don’t even need to disassemble the tool. After all, they are attached to the tool rod using one or more screws. However, there are saw holders that cannot be replaced without removing the rod from the jigsaw.
General information about the design of saw blade holders on jigsaws is as follows:
- Devices are classified into two types - quick-release and conventional. Quick-clamping ones are more popular, but due to their complex design, it is difficult to replace
- Quick-clamping heads of saw holders are classified into three main types - radial, lateral and frontal. While radial heads are the most popular, side and front heads are rare. However, if the tool has a quick-clamping side or front head, then it will be impossible to find spare parts for it. To do this, you will need to order the part from the manufacturer.
- Quick-clamping radial heads of saw holders - consist of a base, which, when displaced, opens a hole for securing blades by recessing the balls, as well as a spring and locking rings for fixation. To disassemble the head and remove it from the rod, you will need pliers to remove the retaining rings. The design is simple and primitive, and for repair or replacement you do not need to disassemble the entire instrument
- Quick-release saw holders on jigsaws have a similar operating mechanism as hammer drill chucks. The mechanism is based on two balls, which fix the blades by their protrusions.
A faulty jigsaw head is detected by the following sign: the blades do not hold on, and when exposed to the material, they fall out of the fastening. Below is an example of a worn saw blade holder that needs to be replaced.
A detailed video description of how to replace the saw blade holder on a jigsaw is presented in the material.
Replacing the saw holder
Figure 6 – Saw holder
There are several types of saw holders.
Changing them is not difficult; it is much more difficult to find the same element to replace it.
The procedure is simple and does not require disassembling the jigsaw; just pull the rod to its lowest position.
The block and screw holders are secured with two screws, so replacement is easy.
If you use a quick-release saw blade, you will have to spend time and effort searching for a replacement.
Sometimes you can only find a repair kit from the tool manufacturer. Experts recommend purchasing the entire rod assembly, since it is difficult and impractical to sort out the quick-release saw holder with your own hands.
How to extend tool life
In order for the type of tool in question to serve for a long time and not break, it is necessary to regularly carry out preventive measures. They consist in the fact that it is necessary to disassemble the tool, check the integrity and serviceability of all parts, clean the mechanisms of old lubricant and replace it. Do not overload the tool with work for which it is not intended.
Repair work on a jigsaw should begin with troubleshooting. In 99% of cases, successful identification of a malfunction allows you to eliminate a breakdown quickly and efficiently. To eliminate breakdowns, you will need spare parts, which can be purchased at any tool store. By devoting a couple of hours of time, you can prepare a power tool for the new season, and not worry that it will break at the wrong time.
Tool prevention
The long service life and constant efficiency of the tool depend not only on the characteristics of its operation, but also on timely care of its mechanism. Regular preventative measures will significantly reduce the wear of parts, reducing the likelihood of serious breakdowns.
Carrying out such a procedure requires only a screwdriver, a piece of rag for cleaning and a little grease. The whole process takes no more than an hour and consists of disassembling the jigsaw and carefully cleaning its parts. The gearbox and rod assembly must be cleaned and lubricated most thoroughly. Prevention should be carried out as the tool becomes dirty, based on the frequency of its use.article from the Rating section
- 80
Power tools Repair and modernization Carpentry tools (for wood) For working with metal
Save this page on your social media. network and return to it at any time.
ADD A COMMENT