Video lesson
When you have already gained a lot of experience in weaving bracelets from rubber bands, you want something like this to further decorate your bracelet or surprise others.
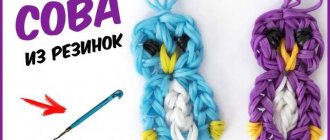
Many people buy figurines to decorate bracelets, but I suggest you weave an Owl from rubber bands! I have a large collection of animals and I will share the methods of weaving them with you.
Model "Tail"
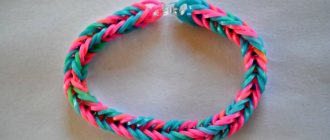
An excellent scheme, suitable for beginners. The process lasts depending on the desired length of the bracelet. A beginner will only need his fingers and a lot of rubber things of different colors. For convenience, you can use tools.
To make a decoration, you need to prepare eight rings and put them on your fingers. The bottom side needs to be pulled to the middle by moving both rings up. Repeat everything, but without folding. Raise the bottom part again to the middle and repeat until the desired length.
Note!
- Scrapbooking for Beginners
- What you can do with your own hands
- Crafts made from polyurethane foam
Tools slingshot and hook
A slingshot for weaving is sold in stores with almost every set of elastic bands. This is the most common lumigurumi tool due to its compactness and ease of use. A mini-machine slingshot is a plastic device with two “horns” and a handle for holding the tool. The horns on one side are convex, which gives shape to the elastic and protects it from twisting. On the other hand, they are equipped with concave grooves, from which it is easy to pick up the elastic band. When working, the slingshot is positioned with its horns facing up.
How to weave an owl from rubber bands on a slingshot?
We will perform the weaving of the owl in two stages.
First, let's prepare rubber bands in the form of a pattern for the owl's body and weave it, and then move on to the head.
Let's start with red color. We put the first elastic band in three turns on the right column. Then we put two red ones on two pins.
The first of the three turns will be thrown to the center.
Then release the right column by moving the elastic bands to the left side.
Now let's make an owl's foot. We wrap one orange elastic band four times on the right side of the slingshot. We usually wear two red ones.
We lower the orange one of the four turns onto the elastic bands. From the left column we send the bottom two pairs to the center so that the orange one remains to the right of them.
Again we throw on two red ones,
and send the lower ones to the middle.
Then we will put the second pair of red ones on two columns, and send the lower ones to them.
And we’ll throw the third pair over both parts of the slingshot, dropping the lower ones into the center.
Let's move the rubber bands from the left side to the right.
We insert the hook into the initial elastic band of three turns.
and put it on the left column.
See also: How to weave a carrot on a hook Photo and video tutorials
Now we will weave an owl's belly from white rubber bands. Throwing on the first two white elastic bands,
Let's send a triple rubber band to the middle.
We put on the second white pair in the same way as the previous one and lower the lower white ones from the columns.
We also weave the third and then the fourth pair of rubber bands.
Let's move the white elastic bands from the left side to the right.
Once again, insert the hook inside the initial triple elastic band and put it on the left pin.
We weave again with red rubber bands. Let's put two on both columns.
We will send three turns from the left to the center.
Let's move the left rubber bands to the right, and on the left pin we'll screw 4 turns of the orange rubber band.
We throw on a couple more red ones and lower the orange one from the pin.
From the right column we will throw off the top two pairs of red ones so that the orange one remains on the left.
We’ll also put on two red ones, and send the previous ones to the center.
We put on a pair of red ones again and lower the previous ones from both columns.
We also put on the next pair and drop the previous ones from the columns.
Using the next pair of red rubber bands we will connect everything together i.e. putting a pair on both parts of the slingshot,
We send all the lower elastic bands from the slingshot to the middle of the weaving.
Next we move on to weaving the owl's head. Let's prepare the rubber bands and arrange them in the form of a diagram, as in the photo.
Having put on a pair of red ones in the usual way from the right row of the diagram, we will throw the lower ones in the middle.
Then we'll put on another pair,
and we will send the lower ones again to the center. Let's move the left rubber bands to the right.
Now let's weave the owl's eye. Throw the black rubber band four turns onto the left pin.
Again we will put on the usually red pair and remove the black 4 turns on it.
We will also send both lower pairs from the right side, but so that the black one is on the left.
Let's throw on two more red rubber bands, and send the bottom ones to the middle.
Let's release the left column by moving the elastic bands from it to the right one.
We will insert the hook into the loop from which we started weaving the head and throw two orange ones on the hook. Let's pull it through the loop and put the second part on the hook too.
And already from the hook we lower the orange ones onto the left pin.
We put a pair of red ones on both posts and remove the orange rubber bands on them.
We transfer from the left side of the elastic band to the right.
We insert the hook again into the loop from which we started. We throw a couple of red ones on the hook,
we pull out one side and put the other on the hook.
We lower the rubber bands from the hook to the left column.
Again we put two red rubber bands on both columns. We lower two pairs of red ones on the left into the center of the weaving.
Another interesting master class: How to weave a pumpkin from rubber bands on a slingshot
On the right column we hook the top two elastic bands and transfer them to the left. We put a black single elastic band in four turns on the right side of the slingshot.
Let's put a pair of red ones on both columns and lower the black turns.
Next, we’ll remove all the rubber bands from the left side of the slingshot so that the black one is to the right of them.
Let's continue with red hair. Having put on a pair, we send the previous ones to the middle.
Now we connect all the rubber bands on the slingshot. Let's put one red one on two posts. We will send all the rubber bands from the slingshot to the center.
We transfer one of the rubber bands to the post next door. We lower the lower one to the center. Tighten the loop well.
Now we will make tassels for our owl. Insert the hook into the upper left loop of the head and pull one red one through it.
Let's make a loop using a method already known to you.
We'll do the same on the right side.
Now take scissors and pull out each of the prepared elastic bands and cut off about half.
The owl is ready! Happy weaving!
Let's start with the torso
For the torso we will need bright pink elastic bands. We take two at once and stretch both in the middle row between the fifth and sixth pegs.
Now repeat this step until you run out of bright yellow rubber bands. Remember that each time you need to pull two elastic bands at once and each new row must be on top of the previous one.
For relax
Fans of sewing and knitting will appreciate all kinds of life-size owl pillow patterns. A voluminous item will not only highlight the interior of the room in an original and unique way, but will also become quite practical.
After a difficult day at work, sometimes you just want to come home and lie down on the sofa, and when a soft and fluffy pet is waiting for you, then a trip on public transport will fly by in an instant.
Reading books or magazines will be more convenient if you place a small support in the shape of a bird under your head. To start crafting, you don’t need to buy a mountain of fabric; unnecessary scraps of a suitable shade will come in handy in such works.
Everyone dreams of successfully recycling leftovers and getting a beautiful scops owl pillow with their own hands.
From the large number of proposed options, you can find very modern and cute specimens, for the design of which beads or large beads are used. When experimenting with the front of the owl pillow, it’s worth adding something of your own.
A person’s preferences can be different, whether it’s a decorative camera sandwiched between the wings of a bird or a bright ball, the craft will look cute and fresh.
We weave an owl figurine with a job description for beginners
This owl figurine can be woven in just a few minutes, spending a minimum of effort and materials. Owls made from rubber bands in natural colors look good: gray, brown, reddish-yellow. But rubber band figures made of bright neon colors look no less impressive and original. The eyes and beak are woven from contrasting colors of the main part; the standard colors are black and red.
It is most convenient to weave it on a slingshot or on a machine. If you do not have a suitable tool, you can weave such a keychain without a machine, for example, on a fork. And you can see how to make such an owl in the video clips after the article.
How to weave from rubber bands: a review of techniques and tools
You can weave a decoration or product from rubber bands using several techniques. We’ll tell you in more detail about each, and you decide which one suits you best.
Finger weaving technique
The easiest way to knit from elastic bands is on your fingers. To do this, you need to choose bright circles and follow all our recommendations.
- Place a figure eight circle between your index and middle fingers.
- Put 2 more rings on top, choose any colors.
- Remove the bottom loop from the index finger and leave it between the phalanges. Carry out similar actions with the lower ring on the middle finger.
- Take the next loop and put it on both fingers without twisting.
- Remove the bottom loop first from the index finger, then from the middle finger. Inside it turns out to be a pigtail.
Instructions on how to weave a bracelet from rubber bands using a slingshot
Using a special device - a slingshot, which is sold in stores for needlewomen, and a hook - you can weave a thicker bauble.
- Place the first rubber band in the shape of a figure eight on the slingshot.
- Place two more pieces on top without twisting them.
- Use a hook to pick up the bottom loop and move it to the middle of the slingshot. Perform similar manipulations on the other side.
- Place the following part on the slingshot.
- Continue weaving in the same way until the required length is reached.
How to weave a beautiful bracelet from rubber bands on the Rainbow Loom machine
If you liked the weaving technique and want to do something more complex with your own hands, it’s time to go to the store for a large set of beautiful elastic bands and a special Rainbow Loom machine.
- Take the first part and hook it onto the middle and left pins.
- Hook the next part to the left post on top of the first circle, fasten the second side to the second pin in the middle.
- Tension all parts in the same way.
- After we have secured all the rubber bands, we begin weaving. Take the bottom piece from the middle post with a crochet hook, throw it to the top and swap places with the adjacent loop. Fasten the removed loop to the adjacent post. It should be an eight.
- The work should always be located to the left of the craftswoman.
- At the end of the work, remove the finished product from the machine with a crochet hook.
Step-by-step instructions for weaving with a fork
Another interesting technique for weaving things from rubber bands is using a regular fork. Let's make a heart keychain together.
| Illustration | Description of action |
| Place the white part on the left clove, twist it in a figure eight and hook it onto the right one. | |
| We hook the second red circle to the leftmost and rightmost clove, without twisting it. | |
| Remove the white loop on the left and drag it between the teeth. Remove the red one on the right and transfer it to the left tooth. | |
| Place a red rubber band on the outer teeth without twisting. | |
| Remove the white loop from the right side and release it between the central teeth. From left to right, throw the red one. | |
| Place the white piece on the outer teeth without twisting. | |
| Remove the top red loop, first from the left side, then from the right. | |
| Secure the red part in the same way. Then put on a white elastic band. | |
| Remove the top red part on the left side, then the bottom one, repeat everything on the right side. | |
| One element of the bracelet is ready. Then repeat all steps in the same way until the desired length is woven. |
At the end of the weaving, attach an S-shaped clip to the last 4 loops
Quick weaving on a hook
Using rubber bands, you can use a crochet hook to weave not only an openwork bauble, but also more complex decorations and products. Let's start with a simple bracelet weave. You need to prepare a metal hook, a set of bright circles and an S-shaped clip.
Weaving pattern.
- We squeeze the first yellow circle in the middle with our hands and put a clip on it, after which we put both halves on the hook.
- We put on green details.
- Using your fingers, stretch the green parts so that they catch on the hook, then remove the yellow loop from them.
- We put the green parts on the hook to form a loop with a yellow elastic band in the middle.
- We put on 2 blue parts and repeat the manipulations of steps 3 and 4.
- We repeat similar actions with circles of different colors.
- To complete the work, you need to take the purple circle and put it on the hook.
- Stretch the purple loop and remove the last blue loops onto it.
Paws
Now take one yellow elastic band and wrap it around the hook THREE TIMES. Then take 2 light pink elastic bands and hook them as shown in the third photo. After this, stretch the yellow elastic band so that it wraps around the pink elastic bands in a ring and is approximately in the middle. Place the resulting figure-eight link on the pegs, connecting the left and middle rows of elastic bands diagonally.
Repeat the same for the right side.
Model "Owl"
To make a clear owl appear in 20 minutes, you should:
- Attach three elements to the first strip.
- Attach the sides on two lines, and install three more rings on top, going into other columns.
- From the point in the center, install a ring of a different size for the beak.
- Secure the fourth with edges from the fifth point.
- Then move the center and edges with rings 5 points forward.
- Wrap the ends, and add a couple of other colors for the legs on top of the edges.
- Then carefully touch the owl with the hook to firmly fix the object.
- Form the owl's eyes by attaching circles of a different color and gradually, starting from the head, remove the finished owl.
Finishing Owl
Now we have everything ready and all that remains is to remove the owl from the machine. There are no secrets here, just remove the rubber bands from each peg one by one.
The owl is ready! You can attach it to a bracelet, bag, cosmetic bag, or leave it on its own.
Share your photos in the comments or ask questions, I will try to answer them.
