A grinding or polishing machine is required for painting work. There are many models of such devices available in tool stores and other retail outlets. However, in some cases it is advisable to create a polishing machine yourself. This article discusses various options for such homemade devices and describes the process of their creation.
The basic structure of a grinding machine
Without thorough knowledge of the design of grinding machines, it is impossible to assemble a high-quality device with your own hands. Before moving on to the structure, let's get acquainted with the most common types of grinders:
- Corner. Simply put, Bulgarian. Consumables are discs. Grinding wheels are designed for surface grinding. Pressure adjustment is carried out manually.
- Tape. Surface treatment is carried out with a sanding belt. Suitable for working on flat surfaces only.
- Delta sander. For processing products with a curved structure.
- Vibrating. Ideal for finishing smooth surfaces.
In addition to the above, there are several more devices that are less common:
- straight;
- polishing;
- eccentric.
Regardless of whether the device is factory-made or self-assembled, the main design elements are:
- Drive unit. The performance of the device depends on its power. Do-it-yourself devices use an electric drive, but there are pneumatic homemade ones powered by a compressor.
- Gearbox. Transmits torque from the drive to the working tool. The basic part of the gearbox is the spindle.
The gearbox is an integral part of tools such as an angle grinder or a drill. Some models, especially those assembled with your own hands, can do without it.
- Working platform. An abrasive material is attached to it. For this you can use circles, tapes, disks.
- Frame. Protects the structure from mechanical damage and dust, which is why many factory models are equipped with dust collection systems. The materials used to make a device with your own hands, as a rule, are not able to compete with high-quality polymers that are used in the production of professional tools.
- Control system. Includes turning off the power, as well as adjusting the abrasive speed.
Tips from service technicians
It is recommended to make such machines only from metal elements - bed, pressure sleeve, stand. Wooden construction is easier to assemble, but has a shorter service life. It can fail even from minor mechanical damage - accidental impacts.
In addition, a wooden stand can withstand less pressure; using such a machine it will be more difficult to drill a hole in solid material.
It is recommended to choose a drill model only from a series of professional tools designed for long-term and frequent use.
You should think in advance about the fact that you may have to process particularly durable materials, so it is better that the drill has an impact function.
It is important to understand that the power of a hand drill and its speed of rotation are significantly less than that of electric motors on industrial machines. Therefore, you should not overload the tool to avoid burning its motor.
To learn how to make a machine out of a drill with your own hands, see the following video.
Let's block ads! (Why?)
Making a grinder from a computer hard drive + ()
Any old hard drive can be converted into a miniature grinding machine. To do this you need to follow these steps:
- completely disassemble the hard drive and remove from the case everything that is located to the left of the magnetic disks;
- cut out a working circle from sandpaper, make a hole in the center of the circle for the spindle;
- stick several strips of double-sided tape onto the rotating disk of the hard drive and secure it with sandpaper;
- make a protective screen to protect the eyes from the possible ejection of the manufactured sanding disc;
- connect the finished design to the power supply from the computer and use it.
Of course, this design does not have high power, but it is quite possible to sharpen a small knife or scissors.
Making a grinder from a drill
To transform an ordinary, household electronic drill into a grinding machine, you need to equip it with a special attachment - a working drum or a special support plate, depending on the intended purpose.
The support is a plastic or rubber base with glued sandpaper and a shank for clamping. Discs with a flexible shaft are suitable for working with a loose drill, while those with a rigid shaft are best used only for a perfectly secured drill.
Sanding drums for a household drill are structurally an ordinary cylinder, a shank and sandpaper glued to the cylinder. Using drums, the working surface of the grinder is placed parallel to the axis of rotation.
Grinding accessories
True, this is more common in a car, but you can also encounter this during ordinary apartment renovations. So, to tighten and unscrew screws in hard-to-reach places, a special drill attachment is used, which is called a “flexible shaft extension.” One end of the flexible shaft is fixed in the drill, and the other is a magnetic bit holder. You install the desired bit into the holder, and now, your tool for tightening screws in hard-to-reach places is ready:
Mixer functions.
When you really get involved in renovation work, you will be faced with the fact that you will constantly need to mix something: wallpaper glue, cement-sand mixture (CPS), floor leveler, glue for gluing tiles, plaster, putty and other. I’ll tell you right away that you can’t do this with your hands. Firstly, you will quickly get tired, and secondly, you will never be able to mix cement mortars with your hands to the state of thick, smooth sour cream! Therefore, a drill and a mixer come to the rescue. The mixer looks like this: Installed in a drill, the mixer looks like this:
How to use an impact drill
Before you start working with an impact drill, you need to set up the tool and prepare everything you need for work. Now I will talk about my drill, but for other drills the principle will be similar.
Setting the operating mode. First, understand what type of work you have to do. An impact drill has only 2 main modes - drilling mode and chiselling mode. In accordance with this, you need to set either a “drill” or a “hammer”. Let me immediately note that you set the hammer only for operating the drill in hammer drill mode. In other cases: drilling, grinding, tightening screws, mixing cement mortars is done when the switch is set to the “Drill” position.
Speed setting. For different types of work you will set different speeds. For example, if you need to drill holes in a metal plate that you want to use for a bracket, then it is better to turn on the 2nd speed. If you are going to mix cement mortar or want to tighten screws, you need to set the 1st speed. If you are going to work with a cord brush, then usually when purchasing attachments, the recommended operating speed is indicated on the packaging. Thus, you can navigate in choosing the speed. If you suddenly don’t know what speed to set for a certain type of work, consult with professionals.
Reverse setting. For all types of work, except for unscrewing screws, the direction of rotation of the drill chuck should be clockwise. To do this, the reverse switch must be set to the position where the arrow points to the cartridge.
Installation of the nozzle. Depending on the nature of the work, you install the desired attachment on the drill. I have been telling you about attachments throughout this book. So, just look at the desired section.
While working. The drill is started by smoothly pressing the start switch. (See Impact Drill Design section.) Moreover, the harder you press, the faster your drill accelerates. When pressed as hard as possible, the maximum speed will be the one you set when selecting the mode: “1st speed” or “2nd speed”. Thus, by switching the starting switch and switching speeds, you achieve a very wide speed range. If you have been drilling a surface for a long time and are tired of pressing the start switch, then for these purposes press the “Lock button” by releasing the start switch. In this option, the drill will continue to work. This is convenient because... saves your energy. You can disable this mode by pressing the start switch again.
Finally, if you are unscrewing a screw, then set the reverse switch to the position where the arrow points towards your hand. When the drill is turned on smoothly, the chuck should rotate counterclockwise.
Dangerous experiments
An impact drill will be your indispensable friend and assistant in many jobs. But there are still things that are unacceptable in operation, and I will now briefly talk about them. We will talk about a circular saw blade, which, for some reason, some people also want to install on a drill, thus building an electric saw:
Remember the rule: do not put a saw blade on a drill. Firstly, because there is no protective casing. Secondly, there will not be the necessary pressure on the material being processed. Thirdly, the drill will “walk” in your hands, and if the saw lies unevenly on the surface being sawed off, then either the disk will fly apart, or the drill will be torn out of your hands, and no one knows where it will fly! Injury guaranteed! This is very dangerous and let's not experiment like that!
Manufacturing algorithm
Considering that home machines will be interchangeable in terms of the type of processing, and the decisive role will be played by the attachment installed in the drill, we will consider two main options for home-made units - horizontal and vertical.
The procedure for assembling a vertical machine is as follows.
- Cut a square base 50 by 50 cm from a piece of metal or wood, with a thickness of 10 to 20 mm.
- Drill a hole in it exactly in the center at a distance of 1-2 cm from the edge for mounting the stand. The diameter of the stand must be at least 5 cm.
- Install the stand, center it using a level and weld it with a welding electrode. If you are making a wooden machine and the stand will be wooden, then firmly fix it with self-tapping screws.
- Using metal clamps, secure the drill to a movable element that will be put on the stand, forming a lowering/raising spindle.
- Place the spring on the strut. Its length must be at least 2/3 of the rack.
- Having placed the drill on the stand, mark the place where the drill will hit when lowering the spindle.
- According to this place, cut two through hollows in the frame crosswise.
- A table is installed in the groove on the threaded pin on which the workpiece will be mounted. A nut is screwed onto the pin from the bottom side; it will fix the table in the desired position. You can also attach the table to the pin from the outside with a nut, recessing it into the surface of the table so that it does not interfere with the placement of workpieces.
- It is important that after securing with a nut, the length of the outer part of the pin is flush with the top surface of the table.
The workpiece is placed on the table (fixed with clamps if necessary) and moved along the grooves in the desired direction. The drill is lowered manually and raised back up by a spring. To convert the machine into a milling or grinding machine, it is enough to replace the drill with a corresponding attachment - a milling cutter or a sanding block.
The assembly algorithm for a horizontal machine looks like this.
- Cut a rectangular frame - dimensions are determined individually.
- At one edge, secure a seat for a drill with a hollow in the upper part corresponding to the size of the tool.
- Secure the drill to it with a clamp.
- Cut a through groove for the pin along the frame, and install two metal corners along the edges along which the pressure sleeve will move.
- The width of the pressure sleeve must exactly match the distance between the guide angles (runners). A threaded pin is screwed into it from below, which will move in the hollow.
- By moving the sleeve close to the drill chuck, determine the place where the special headstock will be installed for fixing the workpieces.
- Attach the headstock to the bushing with a metal cone-shaped pin placed in the center.
- The sleeve is fixed in the desired position (for clamping the workpiece) with a nut screwed onto the pin from below.
Just like the previous one, this machine can be used not only as a lathe, but also as a milling or grinding machine. You just need to clamp the necessary working element in the drill chuck - a milling cutter, a sanding block, a drill.
In both options, it is necessary to provide special adjustable legs for the frame.
If the bed rests flat on a workbench or table, it will become impossible to adjust and fix the clamping sleeve on a horizontal machine or the workpiece table on a vertical one.
Required materials and tools
The torque-creating element, and accordingly the main working part in each type of machine, is the drill. The type of processing will largely depend on the attachment installed in its cartridge. Therefore, identical materials will be needed to assemble them.
To assemble a lathe, grinding machine:
- rectangular metal or wooden base, bed;
- clamping sleeve;
- a clamping head, which will be attached to the drill chuck;
- runners for the pressure sleeve;
- seat for fixing the drill.
Materials for assembling a drilling and milling machine:
- square bed;
- a metal stand on which the spindle with the drill attached will move;
- a spring corresponding to the diameter of the rack;
- table for workpieces;
- pin for fastening the table.
Tools you will need:
Read also: What to wear with a brown sundress
- screwdriver;
- pliers;
- hacksaw for wood or metal;
- fastening elements - bolts, screws, nuts;
- welding machine.
If you plan to make a metal machine, then a necessary condition will be the presence of a welding machine. Since the machine is intended more for home use, its drawings and dimensions of its component elements are set individually.
How to Make a Sander From a Drill
How to make a sander
When work with a wooden surface comes to an end, the final sanding step begins. To perform grinding without burrs, scratches, and to perfectly round the sharp corners of any part, you need to use a wood sander. This tool will help to perform masterful grinding even for a new person who has picked up the device for the first time. If desired, perform the grinding machine independently, using only the means at hand.
Do-it-yourself grinder from a drill
A belt grinding machine is used in cases where it is necessary to perform finishing processing of parts, that is, as equipment for carrying out finishing technological operations.
Most often, such machines are used in the furniture industry; they are used to process parts made from various types of wood.
But a belt grinding machine can also be used to process metal parts, for which a belt with an appropriate abrasive material is used.
Belt grinding machine
Application areas of the machine
The main tasks performed by the belt grinding machine are: final leveling of the surface being processed, bringing the level of surface roughness to the required level, bringing the processed surfaces to the level of smoothness before covering them with varnish and other finishing materials. The belt machine is also used to eliminate minor defects of the processed surface: depressions, elevations and burrs, processing the finishing coating: removing sagging primer and varnish, burr, grinding internal surfaces, processing roundings on the surface of the part.
A factory-produced option, the drawings of which can be used to create a similar homemade device.
The tape machine can be used for processing parts made of various materials: wood, plain and alloy steel, non-ferrous metals.
What’s convenient is that using a belt machine you can process parts that have different shapes: quadrangular, round and flat.
Using such equipment, it is possible to process round and tubular parts with a large cross-sectional diameter.
Design features of the machine
The working tool of any belt surface grinding machine is a belt on the surface of which abrasive powder is applied. It is made in the form of a ring and is placed between two rotating drums, one of which is the leading one and the second is the driven one.
Recommendations for the direction of rotation of the machine belt
Rotation to the drive shaft of the tape machine is transmitted from an electric motor, which is connected to it via a belt drive.
The speed of movement of the belt mechanism can be adjusted, thereby changing the processing modes of parts.
The belt of a surface grinding machine can be positioned horizontally or vertically, as well as at a certain angle, which is allowed by some models of equipment in this category.
When choosing a belt sanding machine model for processing a particular part, it is important to consider the length of the surface that needs to be sanded. It is much more convenient to process parts on such machines whose surface length is shorter than the length of the abrasive belt and work table. If such conditions are met, the quality of processing will be much higher.
A homemade version of the machine is not so difficult to implement in a home workshop
The belt grinding machine can have different designs: with a movable and fixed work table, with a free belt.
A separate category includes wide-belt equipment, the peculiarity of which is that their work table, which is also a feed element, is made in the shape of a caterpillar.
In those equipment models that have a work table in their design, the abrasive belt is located in a horizontal plane, and in equipment with a free belt that does not have a work table, it can have a different spatial position.
A mandatory structural element of any belt sanding machine, including a tabletop one, is an exhaust device, which is necessary to remove dust generated in large quantities during the processing process. Both a professional and any homemade grinding machine used in a home workshop or garage are powered by an electric motor.
Principle of operation
The main operating parameters of a belt sanding machine include the feed speed and the force with which the belt is pressed against the workpiece.
Parameters such as the degree of grain size of the abrasive belt should be selected depending on the material from which the workpiece is made, as well as the degree of roughness that the surface of the machined product should have.
https://www..com/watch?v=KNo6GXiM54s
The characteristics of the material being processed, in particular its hardness, primarily influence the grit size of the abrasive belt to be selected. Processing modes that are directly related to each other are feed speed and tape clamping force.
So, if grinding is carried out at high speed, but with insignificant pressing force of the abrasive belt, then some areas of the surface of the part may turn out to be untreated.
If, on the contrary, you increase the clamping force and reduce the feed speed, you may encounter the fact that burns and blackening of the material may appear in certain areas of the surface being processed.
Another variation of the machine - view from the working surface of the belt
The results of grinding are also influenced by how well the abrasive tape is glued together.
In order to obtain high quality processing and not encounter malfunctions in the operation of the belt machine, you should not use abrasive belts that are glued incorrectly or have torn edges.
When putting the tape on the equipment shafts, it should be positioned so that the overlapping end of the seam does not ride up against the surface of the workpiece, but slides along it. Learn more about gluing tape in the video below.
Any, including a manual grinding machine, must provide the ability to adjust the belt tension, which is ensured by moving a movable shaft that is not driven. Tape tension is a very important parameter, when choosing which you should follow the “golden mean” rule.
The main characteristic for determining the degree of tension of the tape is its deflection, which is measured by lightly pressing on its surface in a tense state.
A manual belt grinding machine can be serviced by one operator, who moves the work table with the workpiece and rotates it so as to bring all areas of its surface under the abrasive belt.
How to make a belt sander
Many home craftsmen and professionals are wondering how to make a grinding machine with their own hands. The reason for this question is quite simple: the high cost of serial grinding equipment, which not everyone can pay off if not used regularly.
In order to make such equipment, you will need several main components: an electric motor, rollers and a reliable frame. Naturally, drawings of such a device or a photo of it would not be superfluous. Also at the end of the article you can watch videos on assembling a tape machine on your own.
The motor for belt grinding equipment is not difficult to find; it can be removed from an old washing machine. You will have to make the frame yourself; for this you can use a sheet of metal with dimensions 500x180x20 mm.
Such a platform must be secured to the frame very securely using several bolts.
Another version of the bed
The efficiency of a belt sanding machine directly depends on the characteristics of the electric motor that is installed on it.
If you are planning to make a grinding machine with your own hands, then an electric motor with a power of 2.5–3 kW, developing about 1500 rpm, is quite suitable for you.
In order for the sanding belt to move at a speed of 20 m/s when using such a motor, the drums must have a diameter of about 200 mm. What’s convenient is that if you choose an engine with these characteristics, you won’t need to make a gearbox for your grinding machine.
The drive shaft is connected directly to the electric motor shaft, and the second - driven - must rotate freely on an axis, which is installed in bearing units. In order for the abrasive belt to touch the surface of the workpiece more smoothly, the section of the frame on which the driven shaft is installed should be made with a slight bevel.
You can make shafts for a belt sanding machine from a chipboard with minimal financial costs.
Simply cut square blanks of 200x200 mm in size from such a plate, drill central holes in them and place them on the axle with a package with a total thickness of 240 mm.
After this, all you have to do is grind the resulting package and make it into a round shaft with a diameter of about 200 mm.
Rollers
The roller must be equipped with bearing seats and have a hollow design necessary to reduce weight. It is worth noting that after belt grinding machine is assembled, all the rollers must be on the same mowing line; failure to comply with this rule will lead to frequent jumping of the abrasive element.
The width of the rollers can be different; it is selected depending on the size of the abrasive tape, which can be purchased ready-made or glued yourself. Before starting to manufacture the rollers, it is necessary to draw up a drawing, and the products should ultimately acquire a barrel-shaped shape, which is necessary to prevent the tape from sliding off the surface during operation.
There should be no roughness or burrs on the outside of the rollers. It is not recommended to use open type bearings, as they will quickly fail due to the large amount of dust generated during processing. The best option would be high-quality parts manufactured by reputable companies, since the rollers have fairly high speeds, especially for smaller parts.
How to make a belt sander
Many home craftsmen and professionals are wondering how to make a grinding machine with their own hands. The reason for this question is quite simple: the high cost of serial grinding equipment, which not everyone can pay off if not used regularly. In order to make such equipment, you will need several main components: an electric motor, rollers and a reliable frame. Naturally, drawings of such a device or a photo of it would not be superfluous. Also at the end of the article you can watch videos on assembling a tape machine on your own. The motor for belt grinding equipment is not difficult to find; it can be removed from an old washing machine. You will have to make the frame yourself; for this you can use a sheet of metal with dimensions 500x180x20 mm. One side of the frame should be cut very evenly, since it will be necessary to attach the platform on which the electric motor will be mounted to it. The platform for the electric motor should also be made of a sheet of metal with dimensions 180x160x10 mm. Such a platform must be secured to the frame very securely using several bolts.
Another version of the bed
The efficiency of a belt sanding machine directly depends on the characteristics of the electric motor that is installed on it. If you are planning to make a grinding machine with your own hands, then an electric motor with a power of 2.5–3 kW, developing about 1500 rpm, is quite suitable for you. In order for the sanding belt to move at a speed of 20 m/s when using such a motor, the drums must have a diameter of about 200 mm. What’s convenient is that if you choose an engine with these characteristics, you won’t need to make a gearbox for your grinding machine.
The drive shaft is connected directly to the electric motor shaft, and the second - driven - must rotate freely on an axis, which is installed in bearing units. In order for the abrasive belt to touch the surface of the workpiece more smoothly, the section of the frame on which the driven shaft is installed should be made with a slight bevel.
You can make shafts for a belt sanding machine from a chipboard with minimal financial costs. Simply cut square blanks of 200x200 mm in size from such a plate, drill central holes in them and place them on the axle with a package with a total thickness of 240 mm. After this, all you have to do is grind the resulting package and make it into a round shaft with a diameter of about 200 mm.
Drawings and detailed analysis of some parts of a machine made of wood.
Wood belt sander (click to enlarge)
In order for the tape to be located strictly in the middle of the shaft, the diameter of its central part should be 2–3 mm larger than at the edges. And to prevent the tape from slipping on the drum, it is necessary to wrap a layer of thin rubber on it, for which you can use an old tire from a bicycle wheel, having previously cut it along its entire length.
The sanding belt for such a machine, the optimal width of which should be 200 mm, is made from ordinary emery cloth. The standard cloth is cut into strips of the required width, and an abrasive tape is already glued from them. It should be borne in mind that the material is glued end-to-end; for this purpose, dense material is placed on the reverse side, which will strengthen the resulting seam. The properties of such a seam are greatly influenced by the glue; it must be of very high quality, then the material will not tear along the seam after a short period of use.
Several more options for manufacturing belt grinding machines can be seen in the video below.
https://youtube.com/watch?v=opM1afRob6o
Fan Maintenance
Remove the dust bag to position the dust bag body on the side of the sander.
There are models where the motor fan serves to blow dust into the dust collector. These models require engine maintenance.
Otherwise, unscrew and remove the fan housing and remove the cover. Using an old toothbrush, clean any debris from the fan blades (fan cover and dust bins). Turn the fan by hand to make sure it moves freely. If the fan does not move freely, unscrew it, slide it out, and use a small stick to dislodge any dust buildup.
Methods for cleaning a machine fan.
Wear safety glasses and blow compressed air through the fan and fan housing to remove any remaining particles. Reinstall the fan if you removed it, install the fan cover and screw the housing.
Design
There is nothing particularly complicated in the design of a belt grinder. The device consists of a motor, drive and guide rollers. A sanding or roughing belt of the required grain size is passed through them.
When the engine is turned on, the drive roller mounted on its shaft begins to rotate, and through the tensioned working belt, the rotation is transmitted to the guide rollers. By pressing the part to be processed in the working area against the belt, the operator performs the required operation, changing the position of the workpiece relative to the surface of the belt if necessary.
By adjusting the distance between the guide rollers, it is possible to process surfaces with defects of different depths. During prolonged use, the sanding belt may not stretch much. To compensate for possible slack, a tension mechanism is provided in the design on one of the rollers. Typically, such a function is assigned to a roller located at the same distance between the leader and the slave.
The grinding machine is supplied with a support table, which also serves as a surface for fixing the workpiece. As a rule, such a table should be able to rotate 90 degrees about one axis. In this case, it is possible to process two perpendicularly located planes without reinstalling the part on the support table.
Of course, a grinder control panel is required! For safety reasons, it is recommended to mount it on the machine frame in close proximity to the operator’s working area. Portable machines are equipped with a stand made of durable steel with mounting holes on the base, allowing you to fix the unit on a wooden surface.
If you look at the design details, you can immediately notice some visual instability of the assembled grinding device. The overhang of the side dimensions of the installed rollers significantly exceeds the supporting surface on the base. In addition, the absence of a support table makes it difficult to effectively process relatively large surfaces, and holding the part in a canopy is inconvenient and quite dangerous.
An increased length of the working belt leads to additional losses due to friction. It is necessary to use a higher power power unit in the drive, and this increases energy costs. The tension unit is simple and functional. Adjusting the tension is a matter of seconds. The machine comes with replaceable sanding attachments, which can be used for sanding even on internal surfaces. Despite this, the cost is 100 thousand rubles. makes me think.
Making your own grinding machine
It is impossible to make a grinding machine yourself without knowledge of the design and types of tools. The most common grinders:
- corner or otherwise Bulgarian. Discs must be replaced. The surface is polished with cleaning wheels. You can manually adjust the pressure;
- tape. For use on flat surfaces only. The work is done with a sanding belt, suitable for woodworking;
- vibration Used at the stage of finishing smooth surfaces;
- delta sander. Suitable for products with a curved shape.
Less common tools are straight sanders, polishers, random orbit sanders, and brush sanders. The device, made at the factory or with your own hands, does not differ in design. The main elements can be identified:
- Drive unit. Its power regulates the performance of the device. Mostly an electric type drive is used, but there are pneumatic devices made with your own hands. They are powered by a compressor.
- Gearbox. A machine element present on an angle grinder or drill. The basic part is the spindle. It transmits torque to the tool. There are also models that do not have a gearbox.
- Working platform. Tapes, disks or circles are used under it. Serves for fastening abrasive materials.
- Frame. The function of this element is protection from damage and dust. Factory devices have dust collection systems. When made with your own hands, the material is not able to compete with the factory analogue, since the quality of the factory model is better.
- Control system. Regulates the speed and power of the device.
Making a homemade grinder is not as difficult as it might seem. The main criterion is the correspondence between the capabilities of the device and the planned work. To save money, it is better to take the components that are on hand. There is no point in buying spare parts. Then the device will be comparable in price to the factory model. Naturally, the quality of a tool from a store is better than a home-made machine and it is more logical to take a ready-made device. Let's consider grinding machines made from scrap materials.
From the Bulgarian
The grinder is designed for grinding. We can say that it is an angle grinder, but there are some subtleties. The tool copes well with rough work, for example, removing old paint, removing corrosion or stains on metal. For factory models, there are attachments that allow for more delicate cleaning. This is possible thanks to the different grain sizes of the sanding sheet. For household appliances, operation occurs only in one mode with speeds of up to 14-15 thousand per minute.
IMPORTANT: This speed is suitable for sawing materials, but is high for sanding work.
The motor of the grinder has too much power. You need extensive experience in polishing with an angle grinder, in the presence of special polishing discs and circles. For delicate work, for example, for polishing a car, an angle grinder is not suitable. One careless movement and there will be a hole in the transport. A grinding machine needs a power of 300-400W. A do-it-yourself grinder made from an angle grinder is heavier than its factory counterpart, but you can customize your homemade grinder to suit your needs, which will make using the machine easier.
You can make an attachment for a homemade sanding machine, which will allow you to turn the device into a small belt sander. This option does not use a protective casing. If there is no possibility and desire to create nozzles, you can change the speed. Independent change will require knowledge in radio engineering. We need to create a voltage regulator. The operating procedure is as follows:
- solder using a printed circuit board;
- thyristors are adapted to radiators;
- testing is being carried out. Connect the light bulb and turn the toggle switch. The light should fade out smoothly;
- The device is mounted under the tool casing.
On expensive devices you can adjust the speed, but they cost from 10,000 rubles.
From a drill
A household electric drill equipped with a special attachment can be converted into a grinder from a drill. Depending on the task, this may be a special plate or drum. Or make a belt sander out of the tool.
- Sanding pad. It is a plastic or rubber base with sandpaper and a tail for attaching to a drill. The flexible shaft is suitable for working with a loose drill. With hard ones, they are used with a well-fixed drill.
- Sanding drums. The drill attachment consists of a regular cylinder, sandpaper and a tail. When used, the axis of rotation is parallel to the working surface of the grinder.
- Belt sander. The drill operates as a drive. For production you will need: rods with and without threads, profile pipe, plywood, steel sheet, bearings, various hardware and wood glue. Before manufacturing, make sure that you have a metalworking tool, a device for sawing metal. The assembly diagram is publicly available.
Orbital sander
Can only be made from a broken orbital machine. The main problem in manufacturing is the rotation of the disk. Self-production is too problematic due to the rotation device. In addition, the factory version is not too expensive, and there is no point in wasting time on this kind of machine.
Belt sander
Making this tool is not at all difficult. Follow these steps to create a belt sander:
- selection of necessary parts and materials;
- making a reliable base for mounting the tool;
- installation of countertops;
- securing the racks with the drum and tensioner;
- mounting drums and motor;
- fastening the sanding tape.
Processing large parts requires creating a large copy of the grinding machine yourself. If you install an electric motor with a power of more than 2 kW and a rotation speed of about 1500 rpm, then this is enough to rotate a drum with a diameter of 20 centimeters. This device is already used to process parts about 2 meters long.
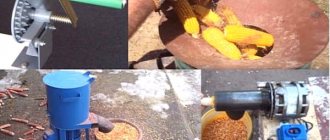
Homemade grinder from a computer hard drive
An old hard drive can be turned into a miniature grinder. The advantage of this model is the complete absence of investment, except for the cost of abrasive wheels. Follow the easy steps to create the device:
- disassemble the hard drive and remove everything to the left of the disks;
- take sandpaper and make a circle out of it with a hole for the spindle in the center;
- secure the sandpaper by gluing it onto the rotating disk of the hard drive;
- make a screen to protect your eyes from the sanding disc flying out;
- connect to the power supply and use.
The device allows you to do small jobs. For example, you can sharpen a drill, knife or scissors. The average rotation speed is about 7600 rpm, but it all depends on the hard drive manufacturer.
Repair of front drum and roller assembly (belt sander)
Removing the front drum.
Turn off the machine and unplug it, then remove the sandpaper. Remove the snap ring from the front drum shaft using pliers. From the opposite side, pull out the front drum shaft.
Pull the front drum out of the arm (top) and remove the metal cover from each end. Inspect the front drum for wear or worn edges and deep grooves.
If any component is damaged, replace it with an exact duplicate. Otherwise, replace the metal covers and reposition the front drum. Push the shaft into place and install the retaining ring. If the problem persists, remove the support tank assembly.
Removing the support tank assembly
To dismantle and subsequently repair the stove, it is necessary to unscrew the lid and cork gasket and remove them from the support container. Inspect them for deep lines and rough cuts.
Disassembling the support container of the grinding machine.
Then unscrew and remove the support container and inspect it for cracks or bends. If the protective cover, cork gasket and plate are not damaged, inspect the belt guide. If the cap, cork gasket or plate is damaged, replace it with an exact duplicate. Replace it and screw the cork insert and cap onto it. If the problem persists, remove the cradle assembly and inspect the belt guide.
Checking and repairing the belt guide (belt sander)
Locate and remove the belt guide screw on the sander side near the drive belt housing (insert).
Checking and replacing the belt guide.
Pull out the belt guide on the side of the sander opposite the screw and inspect it for grooves or broken edges. If the belt guide is not damaged, install it on the machine with its flange edge on top, holding it in place, screw it on the other side. Then repair the belt release assembly.
If the guide is damaged, replace it with an exact duplicate. Place the base plate in place and screw the cork insert and cover onto it. If the problem persists, remove the container assembly and perform maintenance on the belt release assembly.
Servicing the belt release unit
Release the belt lever; then, wearing safety glasses and standing away from the front drum, unscrew it and remove its latch.
Servicing the belt release unit.
If the lever is bent or broken, replace it with an exact duplicate. If the spring is broken or has lost tension, pull out the front drum and drum bracket to remove it from the shaft; replace it with an exact duplicate.
Have an assistant assist you to reinstall the belt release assembly. Insert the spring into place on the shaft and install the front drum and drum arm; Helper hold the front drum and drum bracket, install the spacer and screw the belt arm. Place the base plate in place and screw the cork insert and cover onto it.
Horizontal drilling machine
This device will be useful for carpenters and furniture makers who constantly work with wood. This machine allows you to make strictly perpendicular and even holes in wooden parts in a matter of seconds, without spending a lot of effort and time.
A device that allows you to work with a drill in a horizontal position is made of the following materials:
- chipboard;
- plywood;
- tree.
First you need to drill a small hole in a piece of plywood. Next, another piece of plywood is taken, into which screws are screwed, used to drill a hole for the drill chuck.
Make sure that the hole is as precise in diameter as possible, and to do this, measure the drill chuck. After this, you can make a round blank from a piece of wood. Next, you need to glue all the parts together using PVA glue. Then clamp the parts with clamps and let them dry completely, then strengthen the fastening by screwing in several self-tapping screws. Using a round wooden piece, the exact diameter of the chuck is adjusted.
The tabletop for the machine is made of chipboard. Holes are made in it that will fix the machine in the future. Using wooden waste, you need to make stops for the drill that follow the contour, size and shape of the power tool. Please note that the drill should “lie” on its side strictly in a horizontal plane. If necessary, measure the position of the drill using a hydraulic level.
Fixation of the drill is ensured by free-running screws. The tool is ready! After completing the final calibration, you can safely use it.
Introduction
Drilling a thin workpiece is not a problem - even if the drill is not perpendicular to the drilling plane, it will not be easy to visually notice that the hole is not level, so, as a rule, the master will be satisfied with the result. In such cases, you can drill “by eye”. When the depth of the hole is large, then even with a slight deviation of the drill from the perpendicular, the “curvature” of the hole will be noticeable. For such cases, it is necessary to use special devices, or better yet, a drilling machine. Therefore, this time we will try to make a homemade machine from a drill or screwdriver.