- August 23, 2019
- Children under one year old
- Lida Utkina
A cap for a newborn is not just a wardrobe item. It performs a protective function, protecting the fontanel from drafts, wind and temperature changes. The hat that mom sewed will keep her hands warm and will certainly be of better quality than the one purchased in the store.
Anyone can sew a cap for a baby. This is not a labor-intensive process that does not necessarily require the use of a sewing machine.
Tools and accessories
First you need to choose the right fabric. Main criteria: naturalness and quality. Cotton with a small amount of elastane is ideal. This will make the hat easy to put on and fit perfectly. The edge is finished with bias tape. It can be purchased at the store or cut out yourself from the same fabric. You can sew a knitted hat for a newborn using the pattern given in the article. To decorate the product, you can use various laces, ribbons, and appliqués.
The necessary tools can be found, perhaps, in every home. This is a needle, thread, several pins, and a sewing machine if available.
How to choose a hat size for a child
When a child is very small, he is only a few months old, it is difficult to take him to clothing stores, so you need to buy hats according to your own measurements. Determining the size of a children's headdress is quite simple. It is recommended to use a centimeter, or, as a last resort, a thread that does not stretch. The centimeter must be applied to the most convex point of the head, and placed in front above the child’s eyebrows.
Pattern of a cap for a newborn
Do not tighten the tape, and if necessary, round the result up. The number that turns out will be the size of the headdress. For example, if the measurements give a result of 42 cm, then it is better to take the size of the product 43. When purchasing, you need to focus on the age of the baby.
Use of baby fabric
In the first years of life, the baby grows very quickly, so it is not advisable to buy many hats of the same size at once. Approximately every 2 months you need to take new products. Sometimes you can buy things to grow. For babies, size 44 is suitable, in six months you can safely buy 46, and in a year from 48 and above. These are averages and may vary for different babies because each person is different.
After one year, the size of the head will change, but not at a rapid rate. It is advisable to take measurements every six months and note changes. For sewing, regular knitwear is perfect, which is easy to care for. For the winter option, plush fabric is suitable, but in this case it is necessary to make a lining so that the headdress keeps its shape well.
Knitting a cap like Cinderella's
Construction of a two-piece cap
The pattern of a hat for a newborn from two parts is considered the easiest to make. In addition, it gives the needlewoman the opportunity to dream up how to decorate the cap.
The pattern itself can be printed ready-made. Of course, another option is available: make the pattern yourself. Next we'll look at how to do this.
The pattern is always built from the back of the head. From the upper left corner of the drawing you need to move to the right and down respectively. From point A a value equal to a quarter of the semicircle of the head is deposited.
We get: AB = 1⁄2 OG ÷ 4 + 1.5 cm = 24 ÷ 4 + 1.5 cm = 7.5 cm AD = 1⁄2 OG ÷ 2 + 3 cm = 24 ÷ 2 + 3 cm = 15 cm.
We connect the rectangle with the vertices ABCD point by point. Along the bisector from B we set aside 2 cm, from D - 5 mm and from C - 2 cm. We combine all the points. The result was a back part folded in half.
Then you should measure the sewing line. Let's move on to the pattern of the second part. For it you need to draw a rectangle with vertices ABCD, where AB = 1⁄2 OG ÷ 2 = 24 ÷ 2 = 12 cm, AD = length of the sewing line. In this case, it is 20 cm. From point D you need to mark 1 cm up and to the right. Connect all the dots.
The seam allowances have already been included in the dimensions; there is no need to make any additional ones. The pattern for a newborn's hat is ready.
Lined
A lined hat is made from a knitted outer material and lining fabric. If you plan to wear a hat with a lapel, then the color of the lining should be chosen so that it is in harmony with the main color of the hat. To sew, you need to create a pattern or use a ready-made printed pattern. A lined hat can have a classic cut, a beanie shape, or a model with triangular ears.
To sew a hat with a lining, you need to do the following:
- Cut out 2 pieces from the main and lining fabric.
- Turn the hat base blank inside out and sew the back seam and darts.
- On the lining piece, sew a back seam and a front dart. Leave the middle undercuts unsewn.
- Place the lining piece into the base blank. The front sides of both parts should be facing each other.
- Sew the bottom edges with an overlock stitch.
- Turn the hat right side out through the hole in the lining. Sew the hole closed with a blind stitch.
Sewing a two-piece cap
You can learn how to sew a hat for a newborn in this section. First you need to cut out the cap correctly. The parts are laid out on the fabric in the direction of the grain thread and cut out with sharp scissors.
It is important to note that if you are planning a lush frill of lace or openwork sewing near the face, then it is better to cut the side part a little narrower.
The cap must be swept away. If you want to make a frill at the back of the head, you need to start there and baste it to this part, carefully and evenly laying out the folds. The parts must be sewn in the same plane. This means that the frill should protrude straight up, otherwise the cap will look sloppy.
The details of the cap are fixed with pins where the center lines coincide. All parts are sewn together with a basting stitch. You need to be especially careful when working with knitwear and constantly ensure that the tension on the parts is uniform, otherwise they will warp. Then the cap is stitched using a machine stitch or a small zigzag in the case of knitted fabric. If there is no sewing machine, then the parts are stitched with any seam convenient for the needlewoman.
The front edge must be machine stitched with large stitches and gathered slightly. Thanks to this small gathering, the hat will fit perfectly.
All seams were made on the wrong side, and therefore they need to be decorated with bias tape so that they do not rub the skin. For the baby's delicate scalp, the cap is sometimes sewn with the seams facing outward to make wearing as comfortable as possible. It is better to sew seams treated with bias tape. A small gathering is also made along the bottom or small folds are laid for a better fit.
The final stage can be called processing the lower edge of the cap with a facing, which smoothly turns into ties. The facing can be either bias tape or a piece of suitable fabric.
Rules for taking measurements
A knitted hat for a child is sewn according to 2 main measurements. This is the circumference of the head and the depth (or height) of the product. For a hat with ties that covers the ears, you also need to know the measurements for the side depth of the hat.
The main measurements and measurement technology are given in the following table:
| Measurement name | How to measure |
| Head volume | Place the measuring tape above the ears at the level of the eyebrows, at the back - along the most convex part of the back of the head. |
| Cap depth | Measure the distance up to the forehead from the crown to the point between the eyebrows, back to the base of the skull and along the sides to the edge of the earlobe. |
| Rear Width | Measure the distance from your earlobe to the posterior center line at the base of the skull. |
To create a hat pattern, take any pattern from a sewing magazine as a basis or print out a ready-made pattern. You can also trace the outline of another baby hat and add seam allowances.
Decorative finishing
The pattern of a hat for a newborn is very simple and allows you to experiment with finishing.
The easiest way to decorate a cap is with a fluffy frill made of lace or main fabric. This hat is more suitable for girls or newly born boys. You can use openwork sewing as fabric for a hat. The result is a festive option that can be used for christenings or photo shoots.
You can experiment with facing, because it is not at all necessary to do it using bias tape. You can also use contrasting fabrics or colored fabric with a large pattern. The ties can be made not only thin and almost invisible, but also, on the contrary, wide, which can be tied with a lush bow.
Any mother who has held a needle in her hand at least once can sew such a cap on her own. The pattern of a hat for a newborn is complicated only at first glance, and sewing will take no more than one hour. The result can always be different due to the variety of finishing and decor options.
Size chart for newborn hats
The size of the headdress can be found out without measurements; approximate figures are known depending on the child’s age. Since the Soviet Union, children's things have been bought this way. Size chart based on child's age:
You might be interested in: Patterns and sewing of women's sweatshirts with your own hands
| Age (months) | Product size |
| 0 to 1 | 35 |
| 3 | 40 |
| 6 | 44 |
| 9 | 46 |
| 12 | 48 |
Using this table, you can buy hats and bonnets for children, but since there were no specific measurements, it is better to take products from stretchable fabrics. Because all babies have different head shapes. Modern doctors insist not to buy children's caps at all if the manufacturer relied on age and medical statistics when producing them. Below is how to sew a cap with your own hands.
How to take measurements correctly
Useful tips for sewing fleece hats
- To create a truly comfortable and beautiful thing, you must always carefully think through the sewing process before starting work.
- Select materials and threads to match the color, think over the style, and carefully draw out the pattern. And then you are doomed to success.
- Fleece is relatively easy to work with. It is easy to cut, does not crumble, does not require special threads or complex sewing machine settings. A regular seam with a stitch length of 3-3.5 mm will work fine.
- Since this type of fabric has good elasticity, the edges must be pinned together before sewing them on a machine.
- Experienced craftswomen sometimes advise finishing all the seams with an overlocker. Then they will turn out more accurate.
A smart fleece hat will come in handy in any wardrobe.
Mink hats 2022: fashion trends
Short fur coat - what is it (photo)
For children of any age!
It is a mistake to assume that such hats are only for babies. For example, we can take the “pumpkin” hat model. The volume is achieved by sewing “slices”. Due to the similarity with a beret, it is easiest to use circular knitting needles (they are knitted with thick fishing line or cord). One of the options is sewing with satin stitch, but needlewomen prefer to make jewelry with it. This type of hat is perfect for girls 2-5 years old.
Nice gift
As a bonus, we offer a small step-by-step master class on an angora cap. Mostly the size will be just right for babies up to three months.
For the product you will need any angora yarn with parameters 106m per 25g. It’s best to take Anny Blatt, but it’s okay if you pick up a similar one, Knitting needles No. 3.5.
- Remember! Let's start with the front loops, so we string 51 pieces onto 11 lines.
- We return to standard knitting (knit stitch/purl stitch), add another 20 stitches to each side. The total number is 71 stitches. 15 more such lines are needed.
- -1 r.: 25 knits, add (knit two from one), increase 20 more, add 2, 26.
- 2 r. and all even ones: purl.
- 3 rubles: 26 persons, increase by 2, 22, 2 additions, 27.
- 4 rubles; 27 knits, increase by 2, 24 knits, 2 additions, 28 knits.
- We follow the odd lines in the same order.
- Knitting 18 rows will be sufficient. As a result, 107 stitches were strung on the knitting needle.
- The loops intended for the ears are not needed in further work, so it is better to put them on the cord connecting the knitting needles.
- We assemble the central zone with six rows of stockinette stitch.
- The next step is combining the central part with the sides. Center: chrome, 2p.together, 14, 2p.together. We combine the outer loop with the side one together with the front one.
- For the fourth and fifth rows, use the back-and-forth technique, grabbing 1 stitch from the middle and side.
- On the sixth row, decrease by joining the second and third stitches from the beginning and end.
Sewing from angora suits a newborn with its softness and coziness. A warm hat can be worn on holidays and events as a separate distinctive sign.
Begin
To compare styles of hats for children under 1 year old, simple and popular patterns will be shown here. There are many analogues, but these are classics.
A classic cap is suitable for both boys and girls. It is a favorite due to the density of the product and the absence of seams. Most often there are ties; they secure the hat along the oval of the head.
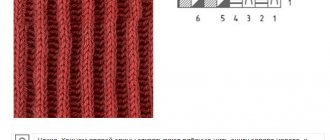
- The frame for the cut is based on elastic. Alternating loops of the front and back sides occur at 4 cm along the entire length.
- Without stopping, we knit in parallel already 6 cm.
- We divide the almost finished piece of fabric into six equal parts. From each compartment we remove the 1st loop from the front side (in general, subsequent lines are reduced by six loops).
- Afterwards, leave 3 loops on each side and knit the remaining part. 3 loops will be needed for ties.
