In many countries, the tradition of sprinkling newlyweds with rice or millet cereals, coins, nuts, sweets and flower petals is still maintained. The rules of the ritual from different nations have long been mixed, and now everyone conducts it as they wish. But in any case, the important question remains: where to get the change from for sprinkling? This can be a specially sewn bag or an openwork bag, but according to the old Russian tradition, a sieve is intended for this.
Photo of a sieve for a wedding
Baskets or bags for rose petals
Every detail is important at a wedding. If you are planning to hold a ceremony of showering the newlyweds with rose petals, then it should be beautiful. Plastic bags of all colors, in which petals are still often placed, will not decorate what is happening. In addition to their unsightly appearance, they have another drawback: they rustle loudly. Therefore, it is better to order special baskets or beautiful fabric or paper bags for the petals.
Simple wedding sieve decoration in 10 minutes
When you don’t have a lot of time to decorate wedding attributes, you can use a simple sieve to make something elegant and beautiful in just 10 minutes. A detailed master class will tell you how to do this. For decoration you will need :
- sieve (not very large in diameter);
- lace fabric;
- organza ribbon;
- rhinestones;
- sequins;
- Super glue.
How to make a sieve for a wedding with your own hands:
- Cut a strip of lace fabric equal to the inner diameter of the sieve. The height of the lace should be about a centimeter less.
- Glue the lace from the inside of the sieve. If you use light-colored lace, then instead of “Moment” it is better to use hot-melt glue: it will not leave unsightly yellow spots after drying.
- Cut another strip of lace to cover the outside of the sieve. Now the height of the material should be approximately 1.5 cm above the sides.
- Glue the lace along the outer circle, and bend the free edge inward. The junction of the two strips should be almost invisible.
- Tie an organza ribbon around the outside of the sieve and tie a bow. The width of the tape should be approximately 3-4 cm.
- Glue a beautiful button or brooch to the center of the bow.
- Place sequins and rhinestones on small drops of glue, distributing them evenly over the lace.
The wedding sieve is ready - all that remains is to fill it with coins, rose petals or candies.
Wedding sieve with lace trim
Plate
This item also came into the modern wedding from the Russian traditional one, just like the sieve. Previously, in front of registry offices or restaurants, one could often see the following picture: newlyweds breaking glasses or a plate on the asphalt. There is such a sign: broken dishes are good luck. Perhaps the newlyweds became happier after this, but it is unlikely that the employees of restaurants and registry offices, who then had to remove this glass from the road.
That’s why a special plate was invented as a wedding accessory. It is placed in a special beautiful fabric bag. After the newlyweds break it, the fragments do not scatter in different directions, but remain in it. If desired, they can be kept as a souvenir.
Why do you need a sieve at a wedding?
Despite the fact that the wedding sieve is inherent in the Russian people, it is becoming less and less common at weddings, as its importance and meaning have been forgotten. Why do you need a sieve at a wedding? , great importance was attached to this household item .
It was believed that water poured through a sieve was healing, and grain sifted from the husk promised a rich harvest. That is, the sieve is a symbol of health, abundance and fertility
Among the Slavic peoples there are at least two rituals with a wedding sieve:
- When the groom leaves his house to go get his bride, his aunts and mothers ask him to drink the water pouring through a sieve. She runs in different directions and does not get into her mouth, and at this time the women say: “So that you have so much grief in your life, you drink so much water from calico”;
- When the bride and groom leave the house together, the girl’s mother sprinkles them with coins, grain and nuts, as symbols of family wealth and well-being. They are put in advance into a festively decorated sieve.
put in a sieve:
- grain - so that young people can have children;
- flower petals or confetti - so that love and romance do not leave their lives;
- coins - for prosperity;
- sweets - for the sweet life.
Photo of a DIY wedding sieve
Dummy bouquet or duplicate bouquet
This bouquet is needed by those brides who do not want to throw their own to their bridesmaids. Sometimes the bride’s bouquet is too big or heavy, and it’s simply scary to throw it away. Or it is not made very durable, and may fall apart in flight. In this case, the bride throws the double, and then gives the real bouquet to the friend who catches it.
DIY wedding glasses with lace
Another very simple way to decorate glasses is to use lace.
.
Lace is an ideal ready-made material that already contains an intricate design and looks great on glass. Ideally, wide white lace is suitable for wedding glasses.
To make the lace richer, it can be supplemented with beads, satin ribbons and other decorations
. In this case, the glasses were decorated with rhinestones.
Advice:
To better attach the beads to the uneven surface of the glass, it is better to use flat beads or rhinestones.
Decoration with garlands
The easiest way to create homemade garlands is to use threads and colored paper
. For this you will also need a sewing machine. Such garlands look very stylish, especially in large quantities, despite the simplicity of their material and ease of manufacture.
Cut out circles of different sizes from colored paper.
Then, using a sewing machine, sew the circles of paper so that they are connected into one long garland
. In this case, you can leave a small distance between the circles.
You can make entire compositions from these garlands and decorate your wedding hall with them.
Making a sieve for sifting glass chips and more
When working with decorative glass, it is unwise to ignore glass chips, in the sense of using them for decoration. For example, it is extremely common to work with such crumbs when sintering glass blanks in a special suitcase oven (fusing). There, interesting effects are achieved with different-sized crumbs. At the same time, they are sprinkled on the workpiece - all or the desired place, sometimes through a stencil. The use of small crumbs and glass dust in the artistic version of glassblowing also allows you to enrich the master’s arsenal; there, heated glass is dipped in them.
Stop! Look and listen, baby!
Consumers, greedy for sophisticated names, stimulate this widespread transcriptional word formation - but there is nothing to be done; most often, glass chips are presented as “frits”.
Frit is crushed or crushed glass used to decorate the surface of glass products in the fusing process, and also as a base material in furnace and glass casting processes.
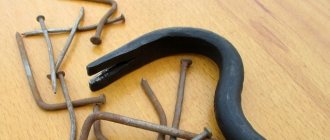
Of course, glass chips can be purchased, but it is much cheaper to make them yourself, especially since this automatically recycles your own art glass waste. At the same time, you can conjure with flowers, make crumbs for decorating glass with a non-standard TCR (temperature expansion coefficient). The most convenient way to chop glass for your own needs is in a special metal (black steel) mortar. After the ritual, a pile of glass of various sizes is formed; for practical use, it should be scattered into fractions. A similar operation is widely used in industry in the preparation of raw materials. For this, a set of special sieves, traditionally called screens, are used.
Screen - one or more vibrating sieves (sieves) for separating bulk materials according to the size of pieces or particles (fractions). When mechanizing a process, it is a machine or apparatus. It got its name for the characteristic noise during operation.
It is clear that “for-the-home-for-the-family” use much more modest versions of sieves, calling which screens, we greatly flatter their pride. Often, household sieves are used - from a hardware store, and there is a reason for this - as it is much more common and as practice shows, household analogues, even if they are three times the same, cost much less than “special” ones. Another thing is that it is not always possible to select the cell size for several dispersion stages.
Faced with this problem, I solved it simply and, to my taste, quite elegantly - I made the missing sieve myself. I managed to find two factory sieves in my trash - one of them with a mesh size of about 1 mm, the other (more like a colander) - about three. At the same time, even with such a modest composition, it was possible to obtain a practically usable fraction - dumping the crushed glass from a mortar into a colander, we sift out the poorly crushed, large pieces - back into the mortar. Everything that falls into a 1mm sieve is sifted out of coarse grains such as “sand” or even “dust”. The rest looks good and can be used. However, crumbs that are more uniform in size look much prettier. The use of just one additional sieve with a mesh size of 2mm will allow you to add two more fractions to your arsenal - 1-2mm, 2-3mm. Practice has shown that they can be easily and easily distinguished and look better than the more heterogeneous 1-3mm.
It was decided to make the design of a homemade sieve similar to a colander - a thin metal sheet with drilled holes was used as a mesh. The obvious lack of manufacturability does not play a role in a single production, but the advantages are obvious - holes can be drilled of any diameter, even the most exotic, while a mesh with the required cell is sometimes difficult to find. The design turns out to be very reliable, almost eternal, while sieves based on woven wire mesh spread quickly, most often at the embedment site.
What was used in the work
Tools, equipment.
To make a strainer, you needed an ordinary metalworking tool, definitely metal scissors. A marking tool, whatever for convenient drilling - a drilling machine was used, but you can get by with a screwdriver. The anvil, of course, is a file. For soldering, an electric soldering iron with a power of 65 W was used, with accessories.
Materials.
Sheet steel of a suitable diameter - galvanized “roofing” steel, 0.5 (0.45) mm thick, is good. Medium-sized sandpaper.
Let's get started.
In the house on Smolny Street there was a roar and ringing all night until the morning...
Crematorium. “In a house on Smolnaya Street.”
A suitable piece of sheet steel for the bottom is selected, its center is found - by crossing the diagonals or, if the piece is irregular in shape - with a special center finder or simply - with a reserve and by eye. The center is capped. To draw an indelible circle, I used the sharp legs of a caliper, the movable frame of which was fixed in the desired position. The hardened tool steel of the caliper is much harder than the zinc coating - no damage is caused to the tool.
Sieve - a symbol of heaven and fertility
Among the Slavic peoples, the words “sieve” and “sow” have always been closely connected with each other. When healthy grain was sifted from the husk through a sieve, a rich harvest was already born. Sifting in this case was considered as an act of purification not only of the sowing grain, but also of the peasant himself.
People of Christian culture believe that a sieve is very similar to the firmament
, and the light rain was called rush and was considered healing.
A very similar meaning of the sieve is described in Hinduism: the sky is like a sieve for the juice squeezed out of Soma (the lord of the nectar of delight), the drops of which turn into rain of fertility. Moreover, Hindus symbolize with the sieve the discerning kindness of God.
The picture shows an unusual use of a sieve in the interior.
How to make a rose out of ribbon
Wedding glasses are often decorated with small roses
, made from the same narrow satin ribbons. You can buy ready-made roses at a jewelry supply store, but they are easy to make yourself. There are several ways to create a rose from ribbons, we offer you one of the simplest.
To make roses from satin ribbon you will need: ribbons, scissors, thread and a needle
.
Let's get started:
Take the edge of the ribbon in your left hand, and with your right hand begin to fold the ribbon so as to get the middle of the rose
. Then secure the result with thread and needle.
Continue to twist the ribbon, not too tightly, remembering to periodically make stitches to secure it.
At the end, do not wrap the ribbon too tightly so that you get a half-opened bud
. Secure the base of the rose with thread. Cut off the excess with scissors.
Advice:
In order to easily attach the rosette to the flat surface of the glass, make it as flat as possible.
By the way, it’s a great idea to cover the glass with real rose petals.
, however, such decoration is short-lived and will look perfect “fresh”.
In addition to glasses, you can also beautifully decorate a bottle of champagne. You can read more about this here.