In an attempt to do something new and special, motorcycle owners resort to tuning their two-wheeled friend. Often the appearance of the bike is simply boring, and the engine power is no longer enough. That is why such a thing as tuning was invented. By improving your motorcycle, you may end up with a completely different bike that will delight not only you, but also those around you. In addition, when upgrading a motorcycle, you can pay great attention to detail and modify the bike so that it is more comfortable to sit and move around. In general, tuning a moped is a purely individual thing, but motorcyclists sometimes lack inspiration to come up with a new look for their bike. That’s why in this article we will look at tuning an alpha moped.
DIY moped from a chainsaw
Moped from a chainsaw - made by a craftsman with his own hands: photo and description.
In the last article we already looked at the step-by-step production of a moped from a Druzhba chainsaw, this time we’ll take a look at another homemade product - this is a mini moped from a Stihl-MS180 chainsaw. So, to build a homemade product you needed the following materials:
- Chainsaw.
- Square pipe.
- Wheels from a walk-behind tractor.
- Handlebar, fork, chain and sprocket from a bicycle.
The mini bike assembly process is shown in the photo. Trying on all the details.
Making a frame from a profile pipe.
Finalization of the leading star.
Video testing a homemade moped.
Mini bike after painting.
The result is such a simple and compact mini moped, all that remains is to install the fuel tank, a protective cover for the chain and make the brakes. The moped can easily carry an adult weighing 90 kg and accelerates to a speed of 30 km/h.
Homemade cars
Homemade automoto equipment
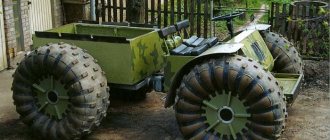
Do-it-yourself tricycle from a scooter (14 photos)
A simple homemade tricycle with a 6.5 hp engine: below is a photo and description of the trike assembly.
Hi all! The idea arose to create a tricycle from a scooter, the design is as simple as possible. The process of making homemade products is shown in these photos:
The rear axle is taken from a VAZ “classic”, the stockings are shortened to reduce the track.
The levers were made from longitudinal rods from the “classics”. I welded ears to attach the levers to the bridge and to the moped frame. The levers were bent by sawing.
I made a platform for installing the engine.
Let's try on a 6.5 hp Lifan engine, with a 2:1 reduction gearbox and a centrifugal clutch.
The front part and fork with the front wheel are from a scooter.
A chain drive goes from the engine to the rear axle.
The shock absorbers are also taken from a scooter.
The tricycle is assembled and working. I secured the plastic covering. I filed it where necessary. All that remains is to make protection for the chain and fender liners.
Watch the video:
Source
How to make a homemade moped from a bicycle?
7 minutes Author: Sergey Morskoy 274
A moped, like a bicycle, is a very convenient vehicle. Moreover, it drives faster than its older brother, thanks to its built-in drive. The ability to move quickly without much effort – isn’t this the dream of every cyclist? It’s quite possible to bring it to life - equip your bike with a gasoline engine or an electric motor.
An assembled moped from a bicycle is a fairly common occurrence in rural areas or regional towns. It is there that they like to put innovative ideas into practice, in particular, to make nimble and economical transport out of an ordinary old bike. Have you noticed a similar interest in yourself? Then it's time to get down to business!
Option 1: how to quickly assemble a moped with a gasoline engine
Before you start creating a new moped from a bicycle, you need:
- bike;
- gasoline engine and gas tank;
- battery;
- pulleys or gears;
- transmission belt or chain;
- drive cable;
- fastening clamps.
Recommended power – 2 l. s., and the engine volume should not exceed 50 cubic meters. see. A weaker engine will not allow you to move the bike; you will have to pedal for a while. An engine of sufficient power can be taken from an old moped. Other options are with a chainsaw or lawn mower.
The working unit of the engine, gas tank and battery are securely fastened to the frame using fastening clamps. Convenient location:
- on the top pipe there is a battery;
- the junction of the lower front and seat tubes is the engine;
- Next to the engine is a gasoline tank.
At the next stage, you need to make pulleys - special transmission units through which the engine force will be transmitted to the rear wheel. The source material for the pulleys can be small wheels with external barriers, the size of a CD. Mandatory conditions are the strength of the material and reliable fastening.
Do-it-yourself installation of pulleys on a bicycle:
- The front gear wheel is attached to the motor shaft.
- A second pulley is attached to the hub of the rear wheel of the bicycle.
- A belt is placed on the pulleys. The tension force is approximately the same as that of a chain. The belt must hold firmly to the wheels; this determines how accurately the engine will transmit force to the wheel.
If a chain drive is used instead of a belt drive, then gears are installed on the motor and wheel instead of pulleys.
So, the transmission is ready, now let's move on to connecting the engine:
- The working motor housing is connected to the battery.
- Assemble the “ignition” mechanism: a regular brake lever is attached to the steering wheel, then it is connected to the engine body through a cable.
- Set the tension so that the engine starts freely through the handle.
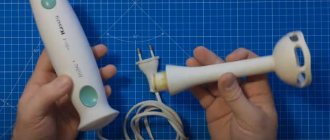
Electric skateboard motor assembly
The power plant for an electric skateboard is assembled from the following components:
- electric motor;
- speed regulator;
- controller;
- speed control board.
The first two parts are joined together by soldering. The wires are insulated with tape specially designed for this purpose. It is better to choose black, it is less noticeable. The image below shows a thin white wire - it will later be attached to the board.
It is very important to decide on the future location of the working elements on the board before starting assembly, so you will avoid confusion during assembly.
Option 2: assembling a moped with a gas engine
This is an advanced method, and the result is more reminiscent of a real moped. To make it, we need:
- gasoline engine;
- moped parts: wheels, shock absorbers, exhaust pipe, brakes;
- proven bike frame;
- tools.
Since here we are going to get a real moped, the frame must have increased strength and weight. Also, mopeds have a slightly different frame design, which may require some modifications.
Wheels from a moped are put on the frame. It will be necessary to change the fork design, since the width of the wheels will be wider than the distance between the dropouts. If possible, install shock absorbers on the fork.
Carefully overhaul the moped power unit and replace all faulty parts. The propulsion system will require a separate space; for this, a welded metal platform at the bottom of the frame would be a good option. The engine and fuel tank are secured to the site using metal fasteners. It is better to place the battery closer to the steering wheel. An exhaust pipe is connected to the bottom of the engine. The pipe must be firmly secured to the frame so that it does not dangle while driving.
Transmission. Next, you will need to make the engine torque transmission system:
- Remove the pedals and chainring from the bicycle frame.
- Install sprockets on the rear wheel of the moped and the engine shaft. A star on a wheel with a larger diameter.
- Place the rear wheel on the frame.
- Connect the stars using a chain.
Motor connection. The clutch and throttle valve are connected to the ignition lever via drive cables. The tension is selected so that the engine can immediately start and start spinning the wheel.
What you might need
In order to make a homemade moped, you first need to decide on the parts that will be used during assembly. In most cases, the basis of the design is an unnecessary bicycle. You immediately need to think about where all the details will be placed. The most cumbersome of them is the engine. It is usually located in the rear trunk or at the bottom of the frame. If the frame has such a structure that placing the engine will create inconvenience when moving the moped, then it can be made separately. This will require welding work. The frame should be made from bicycle parts that are specially designed for the appropriate load. If necessary, you can change the geometry of the desired part. For this, a stop is used and the use of water pipes is strictly prohibited, since they do not have sufficient strength. Such a homemade moped will not go far. Engine mounts can be cut from sheets of iron with a thickness of at least 5 mm and welded to the frame.
How to make an electric bike
If you don’t want to bother with a gasoline engine, there is another option - install an electric motor. It can be purchased or installed from another device. The first option for creating electric mopeds is preferable, since the engines already provide the necessary power.
Options for installing an electric drive on a bicycle are a wheel motor and a separate engine on a chain or belt drive.
The wheel motor differs from the usual one by the presence of a drive mechanism in the central part. It is connected to the control unit using wires. A significant advantage is the ability to make the bike front-wheel drive without making changes to the classic transmission. And if you wish, you can even install two motor wheels. Installation is quite simple, provided that the bike itself allows it. However, it’s a stretch to classify a bike with such wheels as a moped.
An electric moped, that is, an analogue of the one discussed above, is a completely different matter. Of course, an exhaust pipe will not be needed here - this is a plus both in terms of reliability and overall weight.
Assembling an engine from scratch at home will be problematic, so let’s look at how to install a ready-made shaft motor.
- Install a new sprocket and belt pulley onto the carriage axle.
- A shaft with a drive pulley is attached to the seat tube.
- The pulleys are connected by a belt.
- The shaft is connected to a power source through wires.
- Route the wires from the battery to the switch on the steering wheel.
The location of the battery is on the lower front tube of the frame or trunk. Electric motor operation diagram:
- When the electric motor is turned on, the rotating roller engages the rear tire tire, pushing it.
- The pulleys and front sprocket transmit torque to the transmission.
- Changing gear causes a change in torque output. At the same time, the rotation speed of the roller remains constant.
DIY electric bicycle:
Additionally, you can connect a second shaft to the front wheel by connecting it to the driven pulley of the main drive.
The engine allows you to reach the optimal speed faster and maintain it longer. A bicycle-based moped is a budget option to become the owner of a faster and more powerful vehicle. Transforming a bicycle into a moped in most cases does not make irreversible changes to the design, so it is possible to return everything to its place.
Work algorithm
Step 1
First you need to make bearings and mounts for the rear axle. Fastenings are best made in the form of a pair of brackets. To prepare them, steel plates are used, in which it is necessary to cut grooves corresponding to the cross-section of the axis. It is necessary to provide 2 holes into which the bearings are inserted.
From the bicycle frame we need only one pipe, the end of which is a carriage with pedals. Places of future welds are cleaned of paint and dirt/rust with a grinder.
Step 2
In addition, the brake disc and sprocket must be fixed on the rear axle. To do this, you will need a lathe and a good turner to bore the holes in the star and disk according to the diameter of the axle. A sprocket from a motorcycle and moped is best suited. Select the number of teeth so that a large gear ratio can be provided (if an increase in traction force is necessary). The more powerful the engine, the smaller the sprocket can be installed without losing power at high speeds.
Step 3
We install the brake pad. It is most advantageous to install a hydraulic brake system on the rear axle.
The front brake can be left from the scooter.
Next, the engine is mounted on the frame, the front and rear parts of the frame are assembled, the exhaust system is mounted, the seats are mounted, the exhaust pipe is attached and the electrical components are installed.
The final stage is painting the frame and installing the wheels.
Another manufacturing option can be seen here:
Source
DIY moped from a chainsaw
Moped from a chainsaw - made by a craftsman with his own hands: photo and description.
In the last article we already looked at the step-by-step production of a moped from a Druzhba chainsaw, this time we’ll take a look at another homemade product - this is a mini moped from a Stihl-MS180 chainsaw. So, to build a homemade product you needed the following materials:
- Chainsaw.
- Square pipe.
- Wheels from a walk-behind tractor.
- Handlebar, fork, chain and sprocket from a bicycle.
The mini bike assembly process is shown in the photo. Trying on all the details.
Making a frame from a profile pipe.
Finalization of the leading star.
Video testing a homemade moped.
Mini bike after painting.
The result is such a simple and compact mini moped, all that remains is to install the fuel tank, a protective cover for the chain and make the brakes. The moped can easily carry an adult weighing 90 kg and accelerates to a speed of 30 km/h.
Work algorithm
Step 1
First you need to make bearings and mounts for the rear axle. Fastenings are best made in the form of a pair of brackets. To prepare them, steel plates are used, in which it is necessary to cut grooves corresponding to the cross-section of the axis. It is necessary to provide 2 holes into which the bearings are inserted.
From the bicycle frame we need only one pipe, the end of which is a carriage with pedals. Places of future welds are cleaned of paint and dirt/rust with a grinder.
Step 2
In addition, the brake disc and sprocket must be fixed on the rear axle. To do this, you will need a lathe and a good turner to bore the holes in the star and disk according to the diameter of the axle. A sprocket from a motorcycle and moped is best suited. Select the number of teeth so that a large gear ratio can be provided (if an increase in traction force is necessary). The more powerful the engine, the smaller the sprocket can be installed without losing power at high speeds.
Homemade moped: manufacturing features and video instructions
Nowadays, many people have begun to engage in constructive creativity. Fortunately, there is time for this, materials and video instructions that can be easily found. If a homemade bicycle is interesting to some part of our society, then there is nothing to say about a homemade scooter or tricycle, which are easy to make. In city conditions, this is a very useful type of transport, which can be maneuvered quite successfully. You can buy a scooter or a tricycle, but making them yourself means turning all your ideas into reality, a unique opportunity to save money, and much more. You can always make it using a high-quality video guide.
Main parts of a moped
First, let's look at the main parts of this technique. In other words, let's take our future scooter apart, so to speak, and find out its main elements so that making a moped is easy.
Main moped components
It is clear that without a good engine you cannot go far on a scooter. In this case, it is usually installed on the D-6 power unit. Recently, chainsaws have also become very popular, from which a homemade moped is made. In the video instructions you can see in detail how to do this. Chainsaws will be discussed in more detail below.
Appearance
And if tuning a moped with an engine may seem too boring, then by transforming the appearance of the “Alpha”, everything becomes much more interesting. In fact, if you are going to make a really decent tuning, then you cannot do without imagination. It is important to imagine the future appearance of the moped - what colors it will be decorated in, what character it will have, aggressive or classic. Make a few sketches, and then you will get a more interesting result. We will tell you what can be added and modified.
The first, and most common thing, when you are tuning an alpha moped is updating the rear view mirrors. The factory mirrors on the Alpha moped look quite sad, so you can buy new ones. A good idea would be to install mirrors with turn signals, which will not only improve the appearance of the moped, but also make the mirrors more practical.
Speaking of turn signals, the turn signals on the Alpha moped are quite small, although they shine well. There is nothing stopping you from updating them, for example, painting them, changing the light bulb to a brighter one, or simply buying new turn signals. The same applies to the brake light and headlight.
Some people prefer to replace the disks with more interesting ones. Of course, buying and installing new discs is not the easiest option, but the result will be much more noticeable than, for example, replacing turn signals. In general, the wheels of a moped play an important role in the appearance, so if you choose some unusual wheels, the result can be a completely new look.
Scooter and tricycle made from a chainsaw
Chainsaws, as mentioned above, are very popular among home craftsmen. They are distinguished by their light weight and dimensions, and in terms of power they are what you need. Today on the Internet you can watch many video tutorials on how to make a tricycle, scooter or moped from a chainsaw . More often mopeds and scooters are made from the Druzhba chainsaw. An old bicycle is also taken, onto which all the parts are installed, including a forward flow muffler.
An example of a homemade tricycle scooter
It is the forward flow muffler that becomes almost the main feature of making a homemade scooter, because you need to know some of the secrets of its installation. The forward flow muffler was originally invented for sports cars. A forward flow muffler in itself already increases the power of a scooter engine.
Air filter
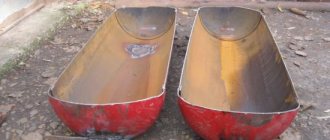
An air filter for a homemade moped or tricycle is also made by hand. First of all, the filter must be reliable. It is recommended to use an oil filter from Moskvich, a washbasin siphon, a metal pin, silicone and a self-adhesive micro-pork to make such an element.
- The filter is clamped between the neck of the siphon and the rest of it;
- The whole thing is held together with a metal pin, the length of which is selected on the spot;
- Place the plug on the metal pin;
- We collect everything and treat the cracks with silicone;
- We glue a micropork onto the flange of the siphon neck.
Homemade air filter
The result is a quite attractive-looking and very functional filter for any homemade product, including a moped or tricycle.
In conclusion, I would like to remind you that while making a homemade product, it will be useful to watch a video that gives practical understanding.
Electric board battery
The battery section is an integral part of your future electric skateboard. The ideal solution would be a compact and lightweight lithium battery. It is quite capable of providing the required amount of electrical energy. The most important point related to the battery is its fixation - it must be securely fastened and protected from external influences.
For an electric board, you can use a pair of parallel-connected 4S1P batteries. They have a capacity of 5000 milliamps per hour.