A caliper, like other calipers (caliper gauge, caliper depth gauge), has a measuring rod (hence the name of this group) with a main scale and a vernier scale - an auxiliary scale for counting fractions of divisions. The accuracy of its measurement is tenths/hundredths (for different species) of a millimeter.
Using the example of the ShTs-I
:
- barbell;
- movable frame;
- rod scale;
- sponges for internal measurements;
- sponges for external measurements;
- depth gauge ruler;
- vernier;
- frame clamp screw.
Taking readings
Based on the method of taking readings, calipers are divided into:
- vernier,
- dial - equipped with a dial for convenience and speed of taking readings,
- digital - with digital display for error-free reading.
The order of caliper readings on the rod and vernier scales:
- count the number of whole millimeters, to do this, find on the rod scale the stroke closest to the left to the zero stroke of the vernier, and remember its numerical value;
- They count fractions of a millimeter; to do this, find the stroke on the vernier scale that is closest to the zero division and coincides with the stroke of the rod scale, and multiply its serial number by the value of the division (0.1 mm) of the vernier.
- calculate the full value of the caliper reading by adding up the number of whole millimeters and fractions of a millimeter.
Hardening
Heat treatment will give the knife the necessary hardness; it will not become dull during use.
To harden the knife from the saw, it is necessary to heat it to a temperature of 750–920 degrees. If you do not reach this temperature, the steel will not be hardened, and if it is heated too much, the blade will be too brittle.
At home, it is not possible to determine the exact temperature. However, there is a way out. A simple magnet is suitable for temperature control. As soon as the blade blank stops being magnetic, it is heated to the required temperature.
After the temperature of the workpiece has reached the required limits, it must be kept in this state for approximately 1-1.5 minutes for every 1 mm of thickness. In the case of a homemade knife from a saw, the holding time for hardening is 3–5 minutes. It would be enough. Next, the workpiece is lowered into vegetable or machine oil preheated to 50 degrees.
This procedure should be performed carefully. Oil vapors can ignite from a hot workpiece, so you should have a fire extinguisher on hand.
A little about the hardening forge. If it is not possible to use industrial equipment, then you can make a forge yourself. To do this, it is necessary to build a fire of such a size that it is possible to evenly heat the workpiece. Next, as the firewood burns and coals appear, a homemade knife is placed on them. You can use a household hair dryer or a pump for inflating mattresses as bellows.
Types of calipers
- ШЦ-I
is a caliper with a double-sided arrangement of jaws for measuring external and internal dimensions and with a ruler for measuring depths. - ШЦ-IC
- (caliper with arrow reading) for reading readings, instead of a vernier, it has a reading arrow head. In the recess of the rod there is a rack with which the head gear is engaged, so the readings of the caliper corresponding to the position of the jaws are read on the circular scale of the head according to the position of the arrow. This is much simpler, faster and less tiring for the performer than reading a reading on a vernier; - ШЦТ-I
- with one-sided arrangement of jaws equipped with a hard alloy for measuring external dimensions and depths under conditions of increased abrasive wear. - ШЦ-II
- with double-sided arrangement of jaws for measuring external and internal dimensions and for marking. To facilitate the latter, it is equipped with a micrometric feed frame. - ШЦ-III
- with one-sided placement of jaws for measuring external and internal dimensions. - ШЦЦ
- with digital display (electronic).
In conditions of active work with a caliper, it is recommended to wipe it with a cloth soaked in a water-alkaline solution, then wipe it dry, and upon completion of work, put it in a case. It is not advisable to allow rough impacts or drops of the instrument during operation to avoid bending of the rod, as well as scratches on the measuring surfaces or their friction against the part being measured.
The procedure for checking calipers is determined by GOST 8.113-85 [2].
The invention relates to the field of manufacturing welded calipers, mainly calipers of the ShTs-Sh-400 type. 1000-0.1 according to GOST 166-89 and can be used in tool factories producing calipers and similar tools. To increase durability by increasing resistance to electrochemical corrosion and reducing manufacturing defects by reducing cracking of welds, medium-carbon chromium steel of the martensitic class is used for the manufacture of jaws, low-carbon chromium-nickel austenitic steel is used for the manufacture of the rod and frame, and before welding, the surfaces of the jaws are normalized, intended for welding, by decarburization until they have a carbon content of 0.07. 0.15%. ate C
REPUBLIC(S)5 G 01 B 3/20
USSR DEPARTMENT (USSR STATE PATENT) uch / jf,,(1
FOR THE AUTHOR'S CERTIFICATE (21) 4925235/28 (22) 04.04.91 (46) 04.23.93. Bull. yt 15 (71) Donetsk Polytechnic Institute (72) V.I. Alimov, A.P. Shtykhno and V.G. Onoprienko (56) Technological process for manufacturing calipers type Sh Ts-Sh-400-1000-0.1 Stavropol instrumental plant, Stavropol, 1981, USSR Copyright Certificate
N 1700351, class. G 01 B 3/20, 1989. (54) METHOD FOR MANUFACTURING VERNIER CALIPS (57) The invention relates to the field of manufacturing welded calipers, mainly calipers of the type
The invention relates to the field of manufacturing a measuring instrument, mainly a welded caliper type ШЦ-Ш 400. 1000 - 0.1 according to GOST 16689, consisting of a rod welded with a fixed jaw and a frame welded with a movable jaw, wherein the jaws have measuring surfaces for external and internal measurements, and can be used in tool factories producing calipers and similar tools.
The purpose of the invention is to increase the durability of the caliper by increasing resistance to electrochemical corrosion and reducing manufacturing defects.. Ж 1810735 А1
Sh Ts-Sh-400. 1000 - 0.1 according to GOST 166 - 89 and can be used in tool factories producing calipers and similar tools. To increase durability by increasing resistance to electrochemical corrosion and reducing manufacturing defects by reducing cracking of welds, medium-carbon chromium steel of the martensitic class is used for the manufacture of jaws, low-carbon chromium-nickel austenitic steel is used for the manufacture of the rod and frame, and before welding, the surfaces of the jaws are normalized, intended for welding, by decarbonization until their carbon content is 0.07. 0.15%, ° May due to reduction of cracking of welded seams, b
Giving the workpiece its final shape
The rough workpiece is brought to its final shape using a file or emery. To avoid overheating of the future knife from the saw, when processing it with sandpaper, it is necessary to periodically lower it into a container of water. This will allow the workpiece to cool. When processing a workpiece with a file, no additional cooling is required. The most optimal way would be to roughly process the workpiece on sandpaper, and then fine-tune it with a file.
Processing the knife blank
During finishing, special attention should be paid to smooth bends.
It is important to ensure that the bend is smooth, without depressions or bulges. Miniature depressions can be easily checked with a file
To do this, use a marker to paint over the end of the workpiece being checked. Next, apply a file with light pressure along the workpiece along the entire bend. In those places where the marker trace remains there are depressions
Miniature depressions can be easily checked with a file. To do this, use a marker to paint over the end of the workpiece being checked. Next, apply a file with light pressure along the workpiece along the entire bend. There are depressions in the places where the marker trace remains.
Processing continues until not a single depression remains.
Next, the workpiece is cleared of burrs and sanded using sandpaper. You can start with 60 grit and finish with 320 grit. The workpiece will still be subject to heat treatment, so finishing the blade will be polished later.
Purpose and principle of operation
The purpose of a caliper is to take high-precision measurements inside and outside the objects being measured, as well as the depths of various holes.
The peculiarity of the tool is its versatility.
Shtangel - a common name for calipers among those who constantly use them, is a common abbreviation of the word.
This tool can measure the outer and inner diameters of round and cylindrical objects, such as nuts and bolts, and is suitable for internal groove measurements in all respects.
The principle of measuring with a caliper is to determine the size based on the position of the measuring frame, which moves freely along the rod with a printed scale.
The size value itself is determined by the coincidence method, and its accuracy, depending on the accuracy class itself, can reach hundredths of a millimeter.
Blacksmith chisels
The main design difference between a blacksmith's chisel and a mechanic's chisel is the hole in its middle part for mounting on a wooden handle. The cutting part of a forging chisel is called a knife, its length is from 30 to 50 mm. The length of the entire tool for cutting cold metal is 16-19 cm, for cutting hot metal – 18-24 cm.
Cold cutting forge chisel
Device, characteristics and properties
If you use your imagination, then externally the bar looks like a symbiosis of a hammer and a ruler.
The classic instrument consists of the following elements:
- Barbell with marked scale. The maximum measurement value depends on the length of the rod.
- The measuring frame is a movable part of the rod that can move along the rod. It has a vernier scale on it, allowing you to determine fractions of a millimeter. A spring with a fixing screw is installed inside the frame, pressing it against the rod, which reduces the measurement error, which can increase as a result of the skew of the moving part relative to the stationary one. Instead of a vernier, a dial scale or a small digital display may be installed, depending on the caliper model.
- Fixed jaw - structurally is part of the rod or is rigidly fixed to it, and is located on one side of the tool. The working area is the inner edge of the stationary sponge; during measurements, it is tightly applied to the object being measured.
- The movable jaw is structurally part of the frame or is rigidly fixed to it. The working part is also internal, and the part itself is located exactly opposite the fixed jaw in such a way that when the frame is moved, the edges of both jaws touch. In this position, the zero parameters of the rod and vernier scales must coincide.
- The retractable bar is a structural part of the measuring frame, its purpose is to measure the depth of objects.
The considered design, which has one-sided jaws, allows one to determine only the external dimensions of objects.
For internal measurements, you will need a caliper with double-sided jaws.
The second ones, as a rule, are smaller in size, located similarly to the first ones, but on the opposite side of the bar, and the working edges are the outer edges.
Material
Metal calipers are made mainly from carbon and stainless steel, low-alloy tool steels 9ХС, ХВГ.
Stainless steel tools are a classic, however, in the production of modern booms, composites are also used, for example, based on carbon fiber and polymer resins.
Dimensions
Typical sizes of classic calipers:
- Jaw length for external measurements: 35 – 300 mm.
- Jaw length for internal measurements: 6 – 22 mm.
- Measuring range – up to 2 m.
- Vernier length: 9 – 39 mm.
- Weight (depending on material and dimensions): 0.2 – 8.9 kg.
Models with a measuring range of up to 5000 mm can weigh more than 35 kg.
The following current GOSTs regulate both the verification and production of calipers:
- GOST 166-89 – defines technical conditions
- GOST 8.113-85 - determines the verification procedure
Accuracy
Vernier calipers are characterized by several accuracy classes:
- class - error is 0.05 mm (twentieth of a millimeter)
- class - error is 0.1 mm (tenth of a millimeter)
For high-precision measurements, a completely different instrument is used - a micrometer.
To clearly show what the accuracy class affects, it is enough to assume that it is necessary to determine the diameter of several drills without markings.
A second-class accuracy bar will allow you to find drills with a diameter of 6.7 or 6.8 mm, and a first-class one with a diameter of 6.75 mm.
For electronic instruments, the error may reach 0.01 mm.
Verification
While working with a caliper, there may be a violation of its settings, various deformations of individual elements, and simple wear.
All this affects the accuracy of the measurements, which, moreover, can be distorted by adhering dirt, grease, or metal filings covering the instrument with a magnetized layer.
Every owner of a boom needs to handle it with care and keep the tool clean.
In order to avoid various distortions in measurement results, the instrument is checked annually.
To do this, just contact a specialized service center for setup and repair.
Based on the verification results, a corresponding certificate is issued.
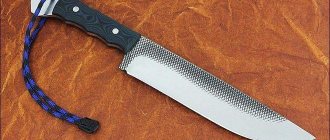
Description of the progress of work on making a knife
The material used for the production of the blade was a mechanical saw made from a quick cutter.
The reason for this choice was the fact that reliable industrial hardening steel is used to manufacture this saw. It is difficult to process, but due to the fact that it is red-resistant - it can withstand heat for a long time without losing its hardness - it does not need to be cooled.
The mechanical saw has a thickness of 2 mm - this is the optimal indicator for the blade. The disadvantage is that steel can crumble under lateral loads, as well as its poor protection against corrosion.
The excess was cut off, and the outline of the future blade was made using sandpaper.
Using a caliper, the lines of future descents were marked, and the synchronism of their exit to the butt was carefully checked.
The blade is mounted on a special device for removing triggers. Rough metal removal was performed with a yellow Cubitron II from 3M with P24 grain on a machine with an abrasive belt (grinder).
Then the tape was replaced with P60 abrasive, the master moved on to leveling the descent line - then P80, P120. A quick-cut knife does not need to be constantly cooled during processing, which greatly simplifies the work process.
It is not advisable to press the metal against the abrasive once again.
Using a felt wheel with polishing paste, traces of tarnish on the alloy were corrected. It should be recalled that we make a knife from high-speed steel, which does not lose its properties when heated.
After marking the spots for the two holes on the shank with a felt-tip pen, the holes were made using a 6mm tile drill bit.
The next step is making the handle. The workpiece is cut on a band saw to the specified dimensions, a shank is attached to the workpiece, and the first hole is drilled in the wooden workpiece using a regular drill.
In theory, it was a straight-shaped handle of a universal blade, which in cross-section appears to be an octagon. All work was done on a grinder using wood tape.
Next we move on to installation. After measuring the thickness of the handle at the attachment points, 2 millimeters were added and pieces of tube of the required length were cut using a small pipe cutter. The shank of the blade is inserted into the slot of the handle.
Using a press, the tubes are carefully pressed into the handle, right through the shank, and flared.
Popular publications
latest comments
From the outside it seems that making a knife is easy, that it is just a sharpened steel strip and a wooden handle. But when it comes to practice, the picture changes dramatically. The main thing in this process is knowledge and experience. When you know, everything is simple, when there is no experience, everything is difficult.
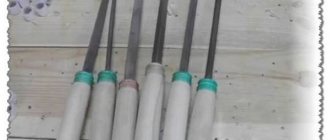
I recently posted on the Internet a photo of seven blades made in one day in a Stakhanovite impulse.
Alexander Kudryashov asked in a comment to tell me how I make smooth and symmetrical descents.
In response, I joked: “It’s simple: you take a “magic marker”, draw smooth slopes, say wonderful words, and smooth slopes are ready.
But is this really a joke? A joke, of course, but the truth is somewhere nearby.
Later, I offered to come and see in practice how the correct triggers and the entire knife are made. And this proposal was accepted.
According to my idea, Alexander should have participated a little in the production himself: choose a blank for the blade, material for the handle, the preferred length of the blade and handle. Alexander had to leave our experiment with a ready-made, good-quality, and most importantly, working knife.
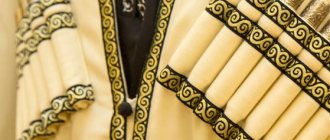
Alexander arrived dressed up, wearing light sand-colored pants and a coyote-colored fleece jacket, which was completely unsuitable for the work ahead. We had to give him work pants and a camouflage shirt in case he got dirty. Everything fit perfectly - he and I are the same size.
In the workshop, work went according to a pre-planned plan. The material chosen for the blade was a good old mechanical saw made from a quick cutter. Why?
Read also: Instructions for the electronics charger
This is a widely known and repeatedly tested industrial hardening steel. Yes, it is difficult to process, but due to its red resistance (the ability to withstand heat for a long time without decreasing hardness), it does not require cooling.
photo: Kudryashova Alexandra
The thickness of the mechanical saw is 2 mm, this is enough for most working knife tasks. Knives made from mechanical saws are light, hold an edge well and, most importantly, are completely legal: the thin blade thickness eliminates any suspicion of involvement with edged weapons.
In general, there are many grades of high-speed steels, but the manufacturer does not always indicate a specific grade, often limiting itself to the HSS (high speed steel) brand. New saws are rare and more expensive.
photo: Kudryashova Alexandra
For a knife maker, the novelty of a saw does not matter at all, so to make a knife you can use either a new saw or a saw that has worked hard and even broken. The result will bear little resemblance to the source material. Disadvantages include the tendency of steel to chip under lateral loads and its susceptibility to corrosion.
Alexander chose a suitable saw blade from a quick cutter (HSS made in USSR). I cut off the excess and made an outline of the future knife on sandpaper, then treated the workpiece with a brush - a rotating steel brush, giving it a noble black shine, and painted the blade part on both sides with a blue wide marker intended for warehouse work.
photo: Kudryashova Alexandra
Using the paint on the marker, I used a caliper to mark the lines of future descents, paying special attention to the synchronization of their exit to the butt. The resulting lines were outlined with a “magic marker” with silver paint, which is nothing more than aluminum powder in a polymer binder.
Why them? Very simple. This paint can withstand high temperatures, adheres well to metal and is durable. When processing metal, the colors of conventional colored markers fade, wear off, and crumble. But the silverfish holds on. That's all the magic.
photo: Kudryashova Alexandra
I installed the blade on a special device for releasing triggers (a cheaper version of the device from Chapay, made independently from a steel angle). I marked with a marker the place where the descents would begin and fixed it with a hand vice.
I performed rough metal removal with a yellow Cubitron II from 3M with P24 grain on a machine with an abrasive belt (on a grinder). For uniformity, I started removing metal from the mark with a marker at the future handle and moved towards the tip with uniform, gentle pressure.
photo: Kudryashova Alexandra
In this case, it is very important to apply the future blade to the tape evenly, parallelly, without distortions. I let Alexander stand at the machine for a while at the initial stage, using special devices. Drawing descents is a process that requires experience.
A little short of reaching the silver lines of the “magic marker,” I changed the tape to P60 abrasive and began to level the line of descent. I made several movements from the tip to the handle, creating a right angle at the beginning of the descent. Then work began on the risk of descents.
photo: Kudryashova Alexandra
For this, it turned out that working with P80 and P120 abrasives was enough. It is unjustified to use P180 and finer abrasives for very hard high-speed steels. This is not a cubitron II, and abrasives do not work well and do not last long on such hard steels. It is important that the finishing of the blade is done on the same tape, otherwise the sides will look different.
A quick-cut knife does not require constant cooling during processing, and this is one of the pleasant moments in its manufacture. Of course, the knife should not be overheated, because the increased temperature of the steel leads to the rapid clogging of the abrasive with sticky metal particles - to clogging.
photo: Kudryashova Alexandra
Excessive pressing of the metal onto the abrasive is undesirable for the same reason. A tape clogged with metal, which no longer “gnaws” but “licks,” can be refreshed. To do this, you need to remove the licked ends of the abrasive that are clogged with metal and free the grains that lie deeper.
It's easy to do. You need to take a quick-cut saw blade and easily, like a file, move it diagonally, towards the moving belt at the bend (on the contact roller). This action will not give the abrasive its original aggressiveness, but it will refresh it and allow you to work more.
photo: Kudryashova Alexandra
After the first side was finished, I turned the blade on the jig to the other side, fixed it and started working on the second side. It is always more difficult to make, because it needs to be the same as the first one.
In addition, the workpiece is less visible, it heats up more, and the contact with the massive device that performs the function of a heat exchanger is no longer so tight. However, the blade was ready.
photo: Kudryashova Alexandra
Using a felt wheel with polishing paste, I corrected traces of tarnish on the metal. Once again I would like to remind you that this was high-speed steel, the hardness of which does not suffer from heating.
After marking the locations for two holes on the shank with a felt-tip pen, I drilled them with a 6mm tile drill bit. It must be said that on the first of these holes the drill exhausted its service life (this was approximately its 50th hole).
photo: Kudryashova Alexandra
Without the slightest frustration, I took another cheap feather drill from the blister, completed the unfinished first hole and drilled the second in about 40 seconds. Then, using a larger diameter drill with a carbide tip, I chamfered the holes.
And then there was lunch. After refreshing ourselves with chicken ramen prepared by our beautiful wife, we began making the handle. Alexander chose rosewood for the handle.
photo: Kudryashova Alexandra
I cut the workpiece on a band saw to the specified dimensions, attached a shank to it and drilled the first hole in the wooden workpiece with a regular drill. I inserted a six-millimeter pin into the hole, put a shank hole on it and drilled a second one. I marked with a marker where the edge of the shank would be in the handle, and started marking for the future slot for the shank. The cut for the shank was made on a band saw.
Read also: Copper tips for a soldering station
I know that this particular blade makes a 1.5mm wide cut. I needed a cut for a shank with a thickness of 2 mm, so to the left of the workpiece I inserted a sheet of cardboard folded in half with a total thickness of 0.5 mm and sawed the slot to the required width.
photo: Kudryashova Alexandra
After that, I started shaping the blank into a handle. According to the plan, it was a straight handle of a universal knife, representing an octagon in cross-section. This was not the first knife I had with an octagonal handle, which looks strict, but is grippy, very comfortable and does not turn in the hand.
I did all the work on a grinder using wood tape. I set the required edges and started removing the marks while reducing the abrasive grain. At the end, I smoothed everything by hand with Scotch Brite abrasive, similar to a hard, flat washcloth.
photo: Kudryashova Alexandra
And now it's time for installation. Having measured the thickness of the handle at the installation sites, I added 2 millimeters and cut off pieces of tube of a given length with a small pipe cutter. The blade's tang was inserted into the slot in the handle. It moved with tension, so we even had to use a manual rack press (up to 600 kg).
Using a press, he carefully pressed the tubes into the handle through the shank. Then I started directly flaring.
photo: Kudryashova Alexandra
I took out a set of shiny balls from bearings of different diameters, put one small ball on the lower platform of the press, and the second on the upper cut of one of the tubes and stretched the edges of the tube. I did the same with the second tube.
I performed this operation with a gradual increase in the diameter of the balls. Now all that remained was to do the finishing operations of flaring with a jewelry hammer with a polished head.
photo: Kudryashova Alexandra
A jar of natural beeswax has already been heated in a water bath. The handle of the knife went into wax for impregnation and subsequent cooling. Beeswax is a natural food polymer. Wood impregnated with it does not accept moisture and does not slip in the hand.
In my kitchen, all the knives are treated with wax, and they do nothing. You can keep the knife in the wax in a water bath for as long as you like - at least an hour, at least two, or even five minutes.
photo: Kudryashova Alexandra
It is always good to refresh the wood of the handle of a knife or the butt of a gun from time to time with ballistol or oil - linseed, vegetable. An alternative to hot wax would be natural oils, latex-based compounds, silicone oil, special oils for wood (once sold in Ikea), and varnishes.
Each option has its pros and cons. Thus, the disadvantage of wax is that it is undesirable for knives that were assembled using glue (it usually does not tolerate elevated temperatures well).
photo: Kudryashova Alexandra
Natural oils take a long time to polymerize (forever). Ballistol, when used regularly, gives a pleasant, smooth surface.
Silicone oils do not polymerize, but they penetrate wood well and are moisture resistant. Varnishes provide only superficial protection. After the wax cooled, I removed the excess from the handle, polished it on a felt wheel, and then polished it by hand with a paper towel.
photo: Kudryashova Alexandra
The last thing left is sharpening. You cannot simply leave the blade reduced to zero - it will crumble, and this has been verified. We need to make a small connection.
I did it on Russian diamond bars (towards reducing the grain size), after wetting them and rubbing them with a piece of soap. Soapy water sticks to the stones better and provides better lubrication.
photo: Kudryashova Alexandra
I did the final finishing without pressing the edge forward with soapy water on Green Brazilian slate. All! The knife shaves. Taking a test birch log that had been well dried in the workshop (it had been lying around for 5-6 years), I tested it with dashing planing for the sharpness and durability of the cutting edge, the convenience and controllability of the knife.
photo: Kudryashova Alexandra
The result: the knife is inclined to viciously burrow into the wood, it cuts vigorously, it is comfortable in the hand, the cut of the wood shines as if polished, and the edge is intact and does not shine. In general, you can safely put the knife to work.
photo: Kudryashova Alexandra
It's nice to see the childish sparkle in the eyes of a healthy man looking at a new useful toy that was born with him!
Did you like our site? Join or subscribe (you will receive notifications about new topics by email) to our channel in MirTesen!
There are a large number of knives available in stores. They have different designs, purposes, and are made using modern technologies. In addition, the materials for production can be not only metal, but also ceramics of special rigidity. These knives are very sharp and do not require sharpening for a long time, but they are also quite fragile. Once a chip occurs, it is not possible to restore the knife to its previous appearance, especially at home.
The blades of the knife should be made of hardened steel so that it is comfortable to use.
In order for a knife to be pleasant to work with and at the same time convenient to cut, it must sit securely and comfortably in the hand. With a comfortable handle, it can be used for a long time. But it is not always possible to find such a knife ready-made. Then you can do it yourself. This takes into account the characteristics of the palm, the length and shape of the cutting blade. Knives must be made of hardened steel. Therefore, homemade knives from saws will fully meet the requirements.
Types of calipers and their prices
Calipers are divided into the following main types:
Analog
The counting is carried out according to the vernier. Another name is vernier. Cost – from 400 rubles.
Switch
Does not require calculations, easier to use, since the measurement results are displayed on the dial with a dial scale.
Cost – from 1700 rubles.
Digital
With a small display on which the measurement results are displayed digitally. Has the highest accuracy.
Another name is electronic. Cost - from 700 rubles for the simplest models.
In addition, booms are available with a depth gauge (type T-I and I) and without it (type II and III).
Precision calipers is a general name for models with increased measurement accuracy.
By the way, a monoblock instrument (fixed jaws are not fixed to the rod, but are an integral part of it) gives the most accurate readings.
There are tasks that a standard tool simply cannot handle.
Then the master picks up a special caliper.
Special calipers
Vivid examples of specialized models:
Marking
With sharpened carbide jaws and a special compass mechanism.
In addition to taking measurements, it allows you to draw arcs directly with sponges on solid material.
Marking calipers are similar to options without a compass mechanism with jaws based on hard alloys.
Price – from 2.5 thousand rubles.
For brake discs (ШЦЦД)
Design with one-sided elongated jaws for external measurements, which have teeth on the working surface to increase the accuracy of measurements.
There are options that allow you to determine the thickness of brake discs on cars and motorcycles without the need to dismantle the wheel.
The cost of the simplest models is about 1 thousand rubles.
Traveler
To measure the parameters of the rail surface.
Price – from 20 thousand rubles.
Analogs of calipers include the following measuring instruments:
Vernier gauge
A tool designed to measure rack and pinion teeth with an accuracy of 0.02 mm.
Vernier depth gauge
A tool designed to measure depths and heights of blind holes, protrusions, grooves, and grooves.
Shtangenreysmas
A tool that allows you to measure heights without specialized skills and make vertical markings of parts with an accuracy of 0.05 mm.
Another name is height gauge.
Techniques for handling metal
In order for the blade to be strong and tight, during its creation it is necessary to adhere to the rules of handling iron.
The semi-finished product should not have noticeable or unexpressed defects. Before starting work, the workpieces must be examined and tapped. A complete element sounds loud, while a defective element sounds muffled.
Circular disk for making a knife.
When creating a design and drawing of a cutting component configuration, you need to avoid corners. In such areas, steel can break. Transitions must be made smooth, without sharp turns. The bevels of the butt, fuse and handle must be ground at an angle of 90 degrees.
When cutting and processing, do not allow the metal to overheat. This leads to a decrease in strength. An “overcooked” blade becomes fragile or soft. During processing, the part must be cooled regularly by completely immersing it in a container of cold water.
When creating a knife from a saw blade, you must not forget that this element has already undergone a hardening procedure. Factory saws are designed to work with strong alloys. If you do not heat the product excessively during turning and processing, then it will not need to be hardened.
How to choose a good caliper?
The main advantages of the barbell are its measurement accuracy.
For this reason, a good tool, first of all, must be made of durable material, have easily visible markings and withstand active use.
Stainless steel calipers with engraved divisions are popular among experienced craftsmen because of their high corrosion resistance and durability.
Main principles of selection:
- Length – determines the measurement range. Selected depending on the task. For everyday use, a 125 mm tool will be sufficient, but for building a house, for example, you will need a 5-meter boom.
- Measurement step. Roughly speaking, the measurement result is more accurate for models with the smallest distance between adjacent scale divisions.
- Cost – there is no need to buy an expensive model for infrequent household use, however, a good boom bar cannot be cheap. For craftsmen whose main measuring instrument is a caliper, it is better to look towards proven Japanese, German and Swiss models. A high-quality caliper, especially an electronic one, is a fairly expensive tool that is bought once, one might say, for life. This is what we should build on.
Before purchasing a caliper, you should make sure that there are no backlashes between its moving and stationary parts, as well as that the zero marks of the two scales coincide when the jaws are closed.
Yakut knife without forging with simple tools (from mechanical saw)
Hello everyone, I suggest you study the instructions on how to very simply make a knife in the Yakut style, having a minimal set of tools.
Although of course the fact that it is Yakut, the point is controversial because forging is not used in the manufacture of the blade. In any case, the blade here is very strong and can be sharpened to a blade-like state, since it is made from a saw blade. As for the fuller, characteristic of a Yakut knife, it was made by etching, and it turned out no worse than a real forged Yakut knife. If the project interests you, I suggest you study it in more detail. Materials and tools used by the author:
List of materials:
- mechanical saw blade; - a block for making a handle; - steel rod; - sheet brass; - oil for impregnating wood.
List of tools:
- grinder; — orbital sander or other; - drill; - tap and die for thread cutting; - sandpaper; — machine for sharpening knives; — a device for etching; - nail polish; - hammer, vice and other simple tools.
Knife making process:
Step one. Main profile
First, let's cut out the main profile from the saw; there will be very little work here. The author easily copes with this task on a sharpening machine. Just be careful about overheating the metal, since we will not be hardening it in the future. If the workpiece is too hot, dip it in water from time to time.
The other end of the rod needs to be threaded. The backplate will be screwed here; it is made of sheet brass; we drill a hole in it and also cut the thread.
Step six. Making a pen
Before installing the handle, be sure to wrap the blade with electrical tape or tape to avoid injury.
For the handle we need to find beautiful wood, we will need a small block, you can also use bones or animal horns. We drill a hole for the shank along the material and the handle can be assembled. The handle is pulled together by the back and there is no need to glue it together. Next, we cut off the excess with a regular hacksaw and proceed to processing the handle on a sharpener, and then on a disc grinder. If desired, you can also use wood files to form the desired handle profile.
Finally, we proceed to manual processing, for this we use sandpaper. We achieve such a result that the wood looks like bone and is perfectly smooth.
What you need to know about calipers?
The caliper needs careful, careful handling, as the following factors can reduce its accuracy and distort the measurement results:
- Damage to work surfaces. Even the presence of small nicks or scratches can be decisive.
- Lack of strict parallelism between the jaws, or their wear.
- Accumulated dust or dirt between the moving parts of the caliper.
- Zero readings are not set correctly.
The instrument is stored in a case, which must be included in the kit.
Malfunctions
Among the most common breakdowns of a forging chisel are:
- break;
- dullness;
- the appearance of notches;
- deformation, curvature of the striker;
- cold hardening on the striker, which is fraught with chips and flying fragments.
Chisel striker broken
Malfunctions arise in the event of incorrect cutting, during prolonged use of the tool, or in the presence of manufacturing defects. Periodically (at least once a quarter) it is necessary to inspect the chisel for any damage to the striker or handle. Faulty tools that have defects must be removed from service.