Experts in the knife craft manage to make blades out of anything. There was a piece of iron lying around in the barn - a couple of days of work, the blade was ready. Not being surprised by such people is simply nonsense. Invariably, individual products turn out to be works of art. And the knife made from springs looks unique in its own way. Let us sanctify the theme of the painstaking work of the master.
Homemade knife made from springs.
What is special about a knife made from a spring?
The reason for the popularity of such a product as a spring knife lies in the properties of the metal. High wear resistance and strength combined with high ductility have allowed many generations of craftsmen to use springs as the main source of raw materials.
Characteristics of spring steel
The springs are made from spring steel 65G, but other grades can be used: 50HGSA, 50HGA, 50HFA. These are also spring steels - it is possible to determine which of them was taken as the material for the blade only through chemical analysis. Or according to the nuances of the behavior of the metal during processing, but only experienced craftsmen can handle this. For a novice manufacturer, the difference between the listed materials will be almost invisible.
Application of spring steel
65G is considered one of the cheapest spring steels. At the same time, it has a number of unique properties that make it indispensable for creating springs. Spring steel for a knife contains chromium, nickel, manganese, and silicon. These elements provide the properties for which manufacturers choose this particular material:
- good flexibility;
- high impact strength;
- hardness;
- wear resistance;
Heat treatment plays a big role in improving the qualities of the material. The steel becomes stronger and its hardness increases. Unfortunately, it is not resistant to corrosion and tends to rust. But the advantages outweigh the disadvantages and it is often used as a material for a blade.
Such knives are used in a variety of fields. First of all, as kitchen utensils - strong, durable, durable - what else is needed for daily work in the kitchen and, for example, for cutting meat? The same considerations forced hunters, fishermen and tourists to try to get this high-quality “homemade product” into their arsenal. Therefore, many craftsmen made tourist and hunting knives for sale.
Due to the good characteristics of the steel, these knives were popular among the military. Conscripts who had access to tools for metalworking made army knives in makeshift conditions. Over time, manufacturers began to aim at more serious products: axes, swords, machetes, katanas. Due to their good toughness, spring steels are excellent for forging. Forging can be used to make a blade of any shape, even the most bizarre.
What is design like?
Machete knives come in many varieties. Before you make such a tool yourself, you need to decide for what tasks it will be used. If the goal is to create a universal tool, then you can make a machete knife with a wide, massive blade that is convenient to use with both an ax and a sapper shovel.
The classic version did not have any protection for the hand. Because it was only used for cutting down bushes. Military varieties have already received a guard so that the palm is protected during a strike. When making a homemade knife, you can make a small hand rest. This will provide the necessary protection, but will not allow the knife to be classified as a bladed weapon.
How to make a knife from a spring
Making a knife from a spring can take a lot of time and effort, especially if a person is doing it for the first time. But spring steel lends itself well to processing and will “tolerate” the mistakes of a beginner, so it is best to create your first knife from it.
Typically, the material is found outdoors: on the street, in car depots, next to garages, in car dumps and other similar places. Therefore, the spring may be covered with dirt and rust and must be thoroughly cleaned before work. If it is necessary to straighten a bent spring, then it is heated until red-hot, and then allowed to cool under normal conditions - at room temperature.
Materials
To create a strong machete you will need a wood saw blade. It’s good if there is a saw left in the garden or at the dacha that has become unusable, because it can be given a second life.
Different types of wood are used for the machete handle. Craftsmen, experimenting, glue handles from different woods, but a solid handle will be much stronger.
Machete from an old saw.
How to make a knife from a spring using forging
All spring steels, including 65G, have one quality in common: they are perfectly forgable. Knives made of spring steel, made by forging, will be more reliable and durable, because during the processing process the metal is strengthened due to plastic deformation and changes in the macrostructure.
Before forging the spring, it is necessary to cut out the profile of the future blade from it. Then the workpiece is securely fastened and heated until red hot. Forging creates a point and blade. This method makes it easy to give the blade the required shape, as well as set its width. Spring forging is good for making axes and various exotic things, such as a machete or sword.
The blade is allowed to cool to ambient temperature after the job is completed.
Making a blank
After you have decided on the model and selected the material, you need to make a pattern from thick cardboard. It is better to experiment on paper rather than on a blank. After the final edits, the workpiece is outlined on the metal. You need to take a small reserve, leaving allowance for processing.
You can cut the workpiece in 3 ways. Each of them has advantages and disadvantages:
- Laser cutting. High precision method. It is used in enterprises for the manufacture of new parts. This method is good because further processing after it is minimal. It is also suitable for cutting neat holes in solid materials, which is much more difficult to do with a drill. The disadvantage of this method is that it is not available to everyone. In addition, the laser overheats when cutting metal, so the cutting edge may not hold its edge well.
- Waterjet cutting. This is a method of cutting with a jet of water with the addition of abrasive particles. This method is ideal except that it is difficult to access.
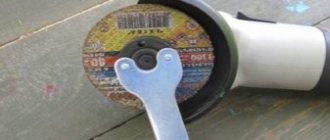
- Cutting using a sander. This is the most affordable and time-consuming option. To work with an angle grinder, you need to stock up on used circles that have the smallest diameter. This is necessary in order to make curved cuts. It is dangerous to work with circles of large diameters. Moreover, the cuts will be sloppy. You need to leave a large margin for processing.
How to sharpen a knife from a spring with your own hands
It is necessary, first of all, to decide on the appearance of the future product. The shape depends on the purpose of the knife: kitchen, hunting, souvenir or some other. As a result, the blade can be anything - this is influenced only by the imagination and capabilities of the manufacturer. If the choice is made, then you need to take a ready-made template or make it yourself from cardboard or thick paper.
Next, to make a knife from a spring with your own hands, you need to be ready to start working with metal. First, the template must be attached to a metal workpiece and traced with a marker, pencil, scriber (GOST 24473-80) or other marking tool. According to the contour obtained using the template, it is necessary to cut out the profile of the product. The following tools are suitable:
- band-saw;
- an angle grinder, also known as a grinder - it is important not to overheat the workpiece when cutting;
- drilling machine or drill - in this case, holes are drilled along the contour, then the partitions between them are broken or cut out;
- you can use hand tools;
The processing process itself is quite simple, although it requires a certain concentration to cut the workpiece in accordance with the markings. When the processing is successfully completed and the workpiece begins to correspond to the template, you can begin to form the blade. The main task is to make bevels. The blade is again marked, determining the size of the bevels. During further processing, you should strictly adhere to the markings.
Electric sharpener
For work, it is best to use an electric sharpener. A belt sander and an angle grinder are also suitable, but in the case of the latter, good command of the tool is required. You can sharpen the bevels by hand - with a file. At this point, the metal work should be completed, because then the blade will undergo heat treatment, after which it will be very difficult to do anything else with the workpiece.
Handle
Individual production is good because you can adjust the handle to your hand. It needs to be made a little larger than the width of the palm, and a stop should also be provided. Several holes need to be drilled at the bottom. One is for attaching the lanyard, the rest are for rivets that will secure the handle lining.
You can use different materials for the overlays, depending on your imagination: wood, plastic for shoe heels, textolite. It is better to use hardwood: oak, beech. A wooden handle can be treated with wax or hot linseed oil. In this case, the oil polymerizes in the wooden pores and will reliably protect the handle from water. In addition, such processing will reveal the texture of the wood and give it an aesthetic appearance.
Blade hardening
The main type of heat treatment is hardening. It is needed so that the blade is durable and can remain sharp for a long time after sharpening. There are different methods:
— hardening, with heating only the cutting edge;
— hardening of the cutting edge by heating the entire product;
— hardening and tempering;
— full hardening;
In the first case, only the outermost part of the blade is heated to a non-magnetic state, after which it is placed in oil and kept until the oil stops bubbling. The second method is more complicated: the entire knife is heated, but it only needs to be immersed in oil by a third - so that the cutting edge is covered with liquid.
Quenching and tempering is a method in which the workpiece is cooled in two stages: first at an elevated temperature, but below the quenching temperature, then at room temperature.
The simplest method of hardening is to completely harden the blade, but with this method there is a chance that the blade will lead. Then it is necessary to straighten the damaged workpiece. This can be done either by preheating the blade or in a cold state.
Final revision
Sometimes you can't make a tool that's completely satisfying the first time. The problem may be in the sharpening or shape of the handle. After working for some time, the owner may feel the weight of the knife as a drawback. Then you will have to eliminate the shortcomings by modifying the design. For example, a cleaver weighing 1.5 kg can quickly cause fatigue when working, then you will need to cut off the excess part of the blade, making the tool lighter.
If cutting wood is ineffective, you can resharpen the bevels, thereby reducing the sharpening angle. This will allow the blade to penetrate the hard material better. If you don’t like the wooden or plastic handle, you can remove the pads and wrap the handle with cord. Such a handle will definitely not slip in your hand. Thus, you can bring the machete to perfection.
Making the handle
A handle can be made from almost any raw material, but wood, plastic, leather, and bone are especially popular. Inlaid handles with alternating layers of, for example, leather and birch bark look beautiful.
Bone is a traditional material for making a variety of trinkets and household items. Having the skill of bone carving, you can make a unique, beautiful handle. But the easiest way is to take two wooden or plastic pads, place them on both sides of the shank and secure them together with rivets, and for greater strength, also with epoxy glue. Sometimes screws and nuts are used for fastening, but if appearance is important, then it is better not to use them.
The handle should be comfortable, so great attention must be paid to its processing. To do this, use files first and then sandpaper. If the overlays are wooden, then they must be impregnated with oil to ensure the durability of the wood. Impregnation emphasizes the structure of the wood and gives the product an attractive appearance. After fixing the handle, its final grinding is carried out.
Materials
To create a strong machete you will need a wood saw blade. It’s good if there is a saw left in the garden or at the dacha that has become unusable, because it can be given a second life.
Different types of wood are used for the machete handle. Craftsmen, experimenting, glue handles from different woods, but a solid handle will be much stronger.
Machete from an old saw.

