Friends, it's time to show off. Guess what this means? You need a pocket square on your chest. We will help you sew a handkerchief with your own hands and show you how to fold it beautifully.
There's nothing hotter than a man in a suit, and especially a man in a suit with handmade accessories. Of course, store shelves are full of different pocket squares, but why be lazy when you can show your personality by getting your hands a little dirty and making your own pocket square? Even if you have not taken cutting and sewing courses, you will easily master this lesson. It's simple. We'll help you fold small origami pieces of fabric to turn them into perfect pocket squares. Don't forget your thimble and let's get started.
How to make beautiful handkerchiefs with your own hands - master class
A simple tutorial on how to create an elegant accessory
How to make beautiful handkerchiefs with your own hands? In a modern world obsessed with utilitarianism and sanitary standards, this question may seem strange and irrelevant. Disposable paper tissues are in use. Simple, cheap, hygienic. One can argue about environmental friendliness: paper napkins themselves decompose, but cellophane packaging does not. And production is associated with the release of harmful substances into the environment, and disposable handkerchiefs are produced in gigantic volumes.
Fabric scarves are used much less frequently today, but they are confidently changing their status. From a mundane everyday item, these fabric squares are gradually turning into elegant works of art. Aesthetics come to the fore. Each scarf strives for individuality and even uniqueness.
Handmade is a luxury in the world of stamping. And handmade handkerchiefs are a luxury that even beginning craftswomen can afford. Don't sew? Don't know how to knit? The last time you embroidered a flower for your mother was on March 8 (and that was a long time ago, long and not very beautiful)? It doesn’t matter – this lesson shows you step by step all the steps (simple and completely doable) for creating beautiful handkerchiefs. Patience, perseverance, accuracy and, of course, artistic taste will help you create a spectacular detail of your image that will certainly not go unnoticed!
Tags
Selecting fabric for fabric edges handkerchiefs handkerchiefs
handkerchiefsembroidery of the first color master threads sewing stitchedges edges pins needlework something simple class sew become and one work such end processed threads the most stitches our on the back stitches decorative size better products are there were materials stitching stitch simple way help site home here for a long time your thin which other clothes you want nasal only now lace for example side all pave selection guns performed under the gate toys iron watches response goods
DIY handkerchiefs - step by step tutorial
Materials:
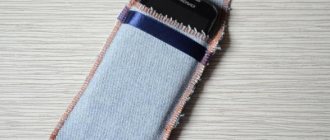
1 Cut handkerchief blanks, usually they are square in shape. The size is arbitrary.
2 Finish the edges of the handkerchiefs with a blanket stitch on a machine or do it by hand.
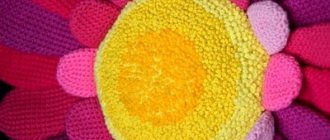
3 Crochet the edges of the scarves in a circle. Chains of 10 air loops are connected to the base with a connecting post. The color of the binding is determined by the color of the future embroidery.
4 For openwork you need to knit 2-3 rows. In the second row, the arches are connected to the middle of the arch of the previous row.
5 The openwork can be one-color, or you can combine colors in accordance with the color of the intended embroidery.
6 In the corner of the scarf, mark the embroidery pattern with a pencil. This can be done using carbon paper.
7 Perform embroidery. For convenience, you can use an embroidery hoop. Plant stems and thin lines can be made with a simple split stitch.
8 The main embroidery is done using satin stitch.
Simple flat satin stitch is a double-sided embroidery that looks the same on both the front and back sides of the product. The satin stitch is made with stitches that fit tightly together. The direction of embroidery is arbitrary (stitches are performed both straight and diagonally), each element is performed separately. If you are new to embroidery, a simple satin stitch is the best option.
In large elements (leaves, petals, buds), when choosing the stitch direction, take into account the contour and overall shape of the part. This will make the embroidery more realistic.
Trust your artistic taste and intuition. Don’t be afraid to experiment, use all the embroidery techniques within your control, combine them, come up with your own options. The creative process is wonderful!
Source
From the newspaper
This option will help out if you need to protect your head and hair, for example, during repairs, but there is nothing suitable at hand. To make it, just unfold a sheet of newspaper.
The cap is folded using the origami technique. Below are several diagrams step by step. Watch and apply.
DIY embroidered handkerchief
These elegant handkerchiefs, decorated with lace and monograms, cannot be used for their intended purpose.
You can only admire them. It will be all the more pleasant to receive them as a small but elegant gift on March 8th. And the work on them itself will give you a lot of pleasure.
The “needle lace” technique is perhaps the simplest. Take silk or polyester threads to match the material. Having secured the thread in one of the corners of the scarf, sew all the edges with loop stitches, then make arched loops of the same size at equal distances from each other.
Squirrel costume for the New Year in kindergarten or school for a girl + photo
How to make a carnival squirrel costume for a girl for the New Year
Squirrel ears
- Find a regular plastic hair band. Wrap it with an orange satin ribbon, secure the ends well with glue so that the ribbon does not slip off the hoop.
- Cut out 2 small isosceles triangles - blanks for the ears. Transfer the pattern to the foam rubber (you can use regular hangers).
- Fold the orange organza onto the foam ears so that one side is transparent and the other is not. Sew the ears, cut off the excess fabric.
- Sew the ears to the hoop, folding them in half so that they stand upright on the top of the head.
- Make faux fur tassels at the tips of the ears.
Ears for a squirrel can be easily made using a hair hoop.
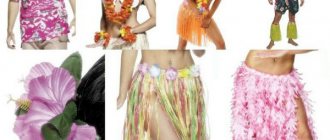
Squirrel skirt
The easiest way to sew a skirt is from a rectangular piece of thin orange fabric. Gather it at the waist and sew it at the back. Insert the elastic into the waistband. If desired, decorate with satin ribbons. Make a cute tail and bib from felt. Make arm ruffles from the leftover fabric from the skirt.
Advice. Use lining fabric or tulle so that the child does not feel hot at the matinee during games and competitions.
Squirrel Costume Variations
- The suit can be combined from a vest and shorts or a skirt, sundress or dress. The main thing is to maintain the color - reddish-brown and orange tones. The fabric can be used as a regular lining (as an option for an economical suit), or crepe-satin, thick knitwear, or faux fur. Attach the tail to shorts or a skirt, securing its top to the back.
Advice. It is worth noting that the tail can be sewn not only from fur, but also from ordinary fabric, stuffed with padding polyester or rags.
- Make an outfit from a combination of a high-waisted fur skirt and a fur cape, trim the collar with rain or Christmas tree tinsel. Cut the skirt into a rectangular cut, in which the width will be equal to the circumference of the hips with an allowance for allowance. The waistband of the skirt is gathered with elastic. The cape is cut in the form of a circle with a slit at the neck.
- A cape and a skirt are a good combination, even if the skirt is cut with flares.
- Using the simplest T-shirt pattern, you can sew a sundress dress made of plush or faux fur. It costs skilled craftswomen nothing to complicate the pattern with more interesting details: flaps, pockets, etc. You can complement the suit with an apron as a fun accessory for a household squirrel.
Squirrel Costume Ideas
- The top of the costume can easily be made from a scrap orange T-shirt. To do this, you need to embroider the neck with fur, and sew a brown satin ribbon on the back, which will be useful for holding an unruly fluffy tail. If you want to make the squirrel even cuter, sew white fur on its tummy, so your image will turn out even more touching and cute.
- For the tail, you can use the collar from an old coat: fold it in half and sew it, bending the tip slightly, like a real animal.
- With a basket full of nuts and mushrooms, even toy ones, the squirrel will look very authentic and natural!
Advice. Use face painting to create a squirrel's face on a girl's face. Children usually enjoy the process of face painting with great pleasure.
Use proven face painting to avoid causing an allergic reaction in your baby. Ready-made animal masks are quite common in stores before the New Year, and you can also find a color mask pattern on the Internet and print it on photo paper in a salon or at home on a color printer.
Subscribe to blog Subscribe to blog
Embroidered handkerchief as a gift
Handkerchief and embroidery on it
In our time of widespread use of paper handkerchiefs, a fabric handkerchief made of natural cotton or silk seems like some kind of ancient relic of the past. Little does the average person think about the fact that a handkerchief can be used for more than just the practical purposes of wiping one's nose or hands.
Most likely, it is for this reason that embroidery on handkerchiefs is not as popular as, for example, a gift, as embroidery on towels and bathrobes. But they also embroider on handkerchiefs.
The essence of the action
The “Soldier’s Shawl” campaign originated in 2004 and was initially planned to be held in most of the capital’s schools. But the increased interest in the event influenced the fact that it grew into an all-Russian scale. During the event, a common canvas is demonstrated, consisting of small scraps, which are brought with them by those who are not indifferent to the actions that took place in 1941-1945.
The main goal of the action is to preserve the memory of great warriors. Considering that not all of them are immortalized in books and other historical publications, each family can make their contribution by designing a memory scarf with their own hands. Students of Russian schools along with their legal representatives can become participants in the action. Moreover, the fallen hero does not have to be a relative, he can just be an acquaintance.
To perpetuate the memory, it is enough to find out information about the participant in the Great Patriotic War: last name, first name, patronymic, year of birth, military rank. You should also indicate the places where he fought for his homeland and provide information about the awards he received. All collected information is displayed on a piece of plain fabric.
The essence of the action is to preserve the memory of great warriors
What types of handkerchiefs are there?
Expensive and not so expensive handkerchiefs are made from thin, highly dense, therefore delicate and often natural fabrics. For example, made of silk or cambric (100% cotton). The sizes of scarves vary from small children's 20x20 cm to large men's 45x45 cm. But all scarves are square. The pattern on the scarf can be printed or jacquard. And it doesn’t necessarily have to be a cage. There can be any picture even on a man’s scarf. This is its main highlight. And the design on the scarf does not interfere with embroidery on it.
A little history
The history of this neckerchief begins in Old England, in the 19th century. The small village of Ascot, famous for the largest and most famous horse races on the entire European continent, attracted gentlemen from different cities and countries. A striking accent for men of that time was a neckerchief, not a simple one, but tied in a unique way. Since then, this tie has been called Ascot, given to it in honor of that very village. In those years, it was a piece of fabric cut obliquely. It was tied much simpler than now: one corner of the scarf was placed on the chest over the shirt, and the other two were tied around the neck, going around it. The tails were hidden on the chest under a triangle. In the 21st century, the neckerchief was modified into a much more complex, but at the same time more convenient form during tying. The most classic modern model, which we will sew right now, is practical from all sides: it has a comfortable length, neat ends are easily tucked into a shirt and do not interfere with wearing, and the width covers only the neck. We will also learn how to tie an extremely simple knot for every day, but first things first;)
What is embroidered on handkerchiefs?
Based on the popularity of embroidery on scarves, the simplest thing that is usually done is the name or initials of the future owner. It can be absolutely any font. The choice of options is huge and everyone will find something to their liking. Traditionally, for us, the letters of the first and last name are separated by dots, but they can also be done without dots. The letters are arranged in a line or with a slight offset relative to each other.
The second most popular embroidery is various monograms and crowns framing initials. It is not necessary to order the development of a monogram embroidery design. A large number of patterns, crowns and shields ready for embroidery can be selected in our catalog. All that remains is to choose the font and adapt the selected monogram to the density of the fabric and the desired embroidery size. This will significantly reduce the cost of application.
Two corners
This option is suitable for stylish guys who like to add details to their look. The handkerchief, folded in half, sticks out slightly, as if it wants to say “Hello” to us.
Fold the square vertically once. Connect the top and bottom, making a smaller square. Rotate it 45 degrees to create a diamond shape. Bend the bottom corner, moving it slightly to the side. Connect the right and left corners and turn your scarf from the wrong side to the front side. Ready.