When did ceramics appear?
Until recently, the first examples of ceramics known to us belonged to the Upper Paleolithic era (Gravettian culture). The oldest object made of baked clay dates back to 29-25 millennia BC.
Interesting materials:
Do I need to disable ESET Live Grid? Should I turn off my modem at night? Do you need to pour boiling water over raspberries? Do you need to water flowers every day? Do flowers in a box need to be watered? Do I need to rinse Jasmine rice? Do I need to sift flour for yeast dough? Do I need to dismantle a frame pool for the winter? Do I need to defrost shrimp before cooking? Do I need to grease baking foil?
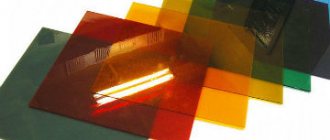
Transferring a design to glass
Glass painting poses many questions for beginning artists. And one of the first is how to transfer a drawing to glass.
So, you bought a glass object, figured out what to draw on it, and even made a sketch.
The most logical and easiest way to transfer a drawing to glass is to simply put the sketch on the back of the object and immediately redraw it with the outline for the glass. This method is applicable if the glass is flat, smooth, without thickening or distortion. For example, on a window or on a photo frame.
This method can also be used to paint a simple mug like this.
Hold the drawing on the inside, or better yet, stick it with tape in several places. You can see how I painted the mug in a small video master class on glass painting.
If your glass object has a more intricate shape and the paper on the back side simply does not hold, you can soften the paper a little.
Soak the sketch for a few seconds and glue it to the back of the jar.
The drawing takes the shape of the object and holds perfectly without additional help. This is how I painted round candlesticks.
The only drawback of this method is the fragility of the sketch. If your glass is opaque - for example a mirror, then good old carbon paper comes to your aid.
Carbon paper will also help to transfer the design to a glass bottle and jar. The inside walls of these objects have a curved shape and it will not be possible to lay out the pattern evenly and neatly. In addition, it is impossible to place a sheet of paper into some bottles at all.
And my hands are so scary because I washed the windows before the photo shoot. 
Here it is important to accurately measure the size and very securely attach the carbon copy drawing to the object. Otherwise, the drawing will move and all your, let’s be honest, very tedious and painstaking work on tracing the contours will be in vain.
The disadvantage of this method of transferring a design to glass is that the lines from the carbon copy remain under the outline, and if the outline and traces from the carbon copy are of different colors, the result may look sloppy.
What's good about this method?
1. The drawing can be translated very accurately.
2. lines on glass are not easy to erase, which means you will have the opportunity to trace the outline today, and tomorrow you can carefully wash the glass to degrease it before painting, and begin applying the outline.
This is roughly what the painting looks like with carbon marks.
After the circuit has dried, the bottle can be washed from the auxiliary lines using detergent and then everything continues as usual.
Using the methods listed above, you can transfer a design to almost any glass object. Good luck!
Preparing the template and design
If you are a beginner artist, then it is better to think through your future drawing in as much detail as possible in advance. Print the print on paper. If you are painting something like a cup, cut the paper to fit inside the container. You need to choose simple contour templates that will be clearly visible through the glass.
Place the template. If you plan to use the glassware for eating or drinking, you should not paint the area where your mouth will come into contact with the glass. Even if the paint is labeled as “non-toxic,” it is still best not to taste it. Here are some tips to help you:
- If you are drawing on a flat piece of glass, place the design face down. Secure the edges with tape and turn it over.
- If you are drawing on a cup, place the drawing inside. Press the paper against the wall and secure it.
- Remember boundaries. If you are going to frame your finished work, make sure that your drawing does not extend beyond the frame.
Preparation
First, find a surface to draw on. You can use flat glass, such as a photo frame. When you're done painting, you can simply slide the finished painting into the frame. However, before you start, make sure that the material in front of you is glass and not acrylic.
Until the last day she performed on the front line: “The Blue Handkerchief” by Klavdia Shulzhenko
15 Frenchmen will spend 40 days in a cave without phones, watches or daylight
Only the best memories: Stotskaya admitted that she separated from her husband 2 years ago
It will also be more convenient if you remove the glass from the frame and place it on paper. Most paints are translucent, so they will be easier to see on a white background.
Then you need to clean the glass. Even if it's fresh out of the package, there may still be foreign particles on it that will make the painting process difficult. First you need to wash the material with water and soap, and then wipe it with a degreaser.
Paints, stencils and equipment for silk-screen printing on glass
The technology involves the use of specific paint - polymer compositions are used on glass in silk-screen printing:
- one-component, ceramic and UV - curing occurs under the influence of high temperatures or ultraviolet radiation (with UV paints);
- two-component - UV and chemically curing (with solvents, polymerize at low temperatures) compositions.
Ceramic one-component compositions are the most popular option. They are resistant to mechanical stress, moisture, UV rays and can be applied to outdoor structures.
Ceramic paints are used in large-format printing, as well as for glass work on cars, furniture and household appliances, and shop windows. They are baked into the surface layer using thermal hardening or bending (molding to produce shiny glass). UV pigments are suitable for decorative purposes.
Manufacturers offer innovative combination paints. They consist of two components and are dried under UV rays. They have an optimal balance between mechanical resistance and speed/ease of application - subject to careful surface preparation.
You can even stretch the screen printing mesh onto the frame by hand.
Necessary materials
Glass painting requires a little more than just paints and brushes. First, you need a work surface - something that you will paint. It is better to take a flat and even object - it will be easier to transfer the design onto it.
You will also need to properly prepare the glass so that the paint is applied evenly. Some dyes need to be baked in the oven in order for them to acquire the desired properties. Here's a list of what you'll need:
- Glass object.
- Cotton balls.
- Medical alcohol.
- An image printed on paper.
- Insulating tape.
- Paints for glass (regular or acrylic will not work).
- Paint brushes.
- A plate or palette to mix colors.
Drawing
Wipe the surface of the glass with alcohol. Moisten a cotton swab and thoroughly degrease the surface. Any oil particles left on the material can ruin the design, so try not to touch the area where the template will be.
The Englishwoman was laughed at for being overweight, but she pulled herself together and lost weight
A Japanese satellite for collecting space debris will be launched from a Russian side
This chair looks unpresentable: how I replaced the upholstery for 55 rubles
Then take a paint liner and squeeze some of the contents onto a piece of paper. As a rule, the top contents of the tube dry out and therefore turn into a lump. It is better if it is on paper rather than on the work surface. After this, you can start tracing the template.
Hold the tip slightly above the glass and use long, continuous strokes. If you apply paint in too short stripes, the line will turn out uneven and bumpy. Also, try not to touch the tip to the glass - this will cause the paint to apply too thinly and unevenly.
Features of double-sided and 3D printing, applying images to a textured base
If it is necessary to create a two-sided image with different photographs for each side, laminated glass is used.
The desired pattern is applied to the inner surface of the layers (by any of the methods listed above) and covered with an opaque film on top. Then the layers are folded with the images facing outwards and the glass is baked at a temperature of 130-140 degrees. As a result of the procedure, a triplex with different patterns on each side is obtained. The advantage of this method is that the image is protected from external damage; The disadvantage of double-sided photo printing on glass is the price, which is significantly higher than that of one-sided analogues. To create a 3D image, the method of layer-by-layer reproduction of the picture is used, dividing the overall plan into areas. Paintings created using this technique, even on a plane, have depth and volume, look alive and natural.
Film technology allows you to create images on a textured surface - in this case, the designs become multifaceted, and their individual elements stand out and look very impressive. Volumetric photo printing is used in the design of interior doors, partitions, decorative stained glass windows and installations.
A simple way to transfer images from paper to various surfaces
To carry out this procedure we will need:
• a picture printed on a laser printer or a photograph (the ink of an inkjet printer will “float” when transferred, so such pictures cannot be used); • canvas (or other surface) where you want to transfer the image; • wide tape; • sprayer; • water; • brush with fine bristles; • soil; • acrylic paint.
First of all, it is necessary to prime the surface - in this case the canvas - onto which the image will be transferred from the paper. In the absence of a special primer, this can be done with the same acrylic paint (only diluted) that will be used in the future.
For example, the author of this transfer method uses green paint as a primer.
For better results, you can cover the canvas with diluted paint two or three times. We wait until it dries completely and move on to the second stage.
We take our image, place it on the work surface and completely cover the back side with tape. We apply it in overlapping stripes so that there are no gaps left. Thanks to the tape, the image will become denser and will not warp during transfer.
After gluing our picture, we turn it over and cut off the ends of the tape that extend beyond the sheet.
Now we need a primed canvas (either a wooden or chipboard surface) where we need to transfer the image. We apply a thin layer of acrylic paint on it and carefully distribute it over the entire surface.
Once the paint is applied, you should carefully press the base onto the image.
After this, we wait for the paint to dry completely.
Once the paint is dry, you can begin to remove the layer of tape from the canvas. You just need to drag one of the corners of the image. We remove it carefully and slowly, without applying much force, so as not to damage anything.
As a result, only a paper layer will remain on the canvas. It needs to be moistened with water from a spray bottle.
All that remains is to remove the soaked paper. This must be done very carefully so as not to damage the image. The author of the method removes the unnecessary layer simply by hand. It doesn’t work too quickly, so with proper skill you can use, for example, a sponge - it will allow you to remove wet paper faster.
After removing the soaked layer, you should also wait until the image dries.
That's all, the image transfer has taken place. Since only the printed lines are transferred to the canvas, the main background is only partially covered by the image, which is why it looks like it was painted.
Thanks to this simple and budget-friendly method, you can give a non-trivial gift to friends or family. In addition, it can be used for design purposes or to add uniqueness to any interior objects. Thank you for your attention!
Types of photo printing
Photo printing on glass is divided into types according to several criteria:
- Color range - a monochrome or color image is applied to the glass.
- Transparency – the surface with a photo pattern can remain transparent or be given a matte appearance.
- Volume – transfer is carried out on a flat plane or on a raised surface.
A separate group includes photo printing in 3D format, which adds volume to ordinary drawings and creates the “effect of the presence” of a person inside the depicted picture.
Monochrome printing involves applying a one-color pattern to glass according to a sketch prepared in special programs (CorelDraw, Color Gate, Wasatch, Onyx, etc.). Can be performed on a transparent or matte surface, as well as on sandblasted material.
Color photo printing is carried out in CMYK and CMYK white formats, in which, as a result of a combination of 3 basic inks (red, yellow and blue), more than tens of millions of shades can be obtained. Modern technologies for color printing on glass make it possible to transfer photographs onto surfaces in exact accordance with the source - without loss of quality or changes in color.
Printing on a matte basis in some cases increases the decorativeness of the image, emphasizing its features and individual fragments. It can be performed in color or monochrome on surfaces that have been matted by chemical or sandblasting. The image is transferred to smooth glass or glass with slight relief. Photo drawings on a colored matte base - blue, purple, beige - look unusual.
Next stage
Once you've finished outlining your figure, inspect it carefully. If you see lumps or spades beyond the line, carefully remove them with a cotton swab dipped in alcohol. If the paint has already dried, use a craft knife.
Wait until the contour is completely dry. Typically this takes about eight hours. If you need more precise information, check the label instructions as each brand has a different range. If you want to dry the paint faster, use a fan or hair dryer. However, do not set the speed and temperature too high.
“Sensual perception of life”: Alexander Baluev about his hero from “The Gloomy River”
How to make a cake that will help out if your birthday falls on Lent
Wet a Paper Towel: How to Chop Onions Without Tears
Second way
It is based on the use of tracing paper. You need to do the following steps:
- We draw the drawing itself with a helium pen.
- Disinfect the skin and apply soap.
- We apply tracing paper and trace the contours with a sharp object.
- Now let's paint over the drawing.
If you do decide to apply a permanent design to your body, approach this very carefully. The main thing is to choose a good salon, undergo an allergic reaction test and check that all instruments are disinfected.
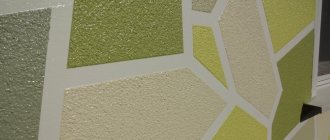
How to paint ceramics correctly?
To paint
For DIY ceramic tiles, it is better to use spray paint for ceramic coatings. Shake the can thoroughly for 20-30 seconds to thoroughly mix the paint. Slowly, with sweeping movements, spray paint over the surface from a distance of 20 - 30 cm.
Interesting materials:
How much can you pay with bonuses at Delimobil? How long can you park in the parking lot without paying? How much will sick leave be paid? How much to pay for the tricolor? How much interest does the post office take for utility bills? How much interest do they charge for housing and communal services when paying at the post office? How much interest can I pay with points at Crossroads? How long does it take to make a payment through government services? How many payouts from 3 to 7 are considered? How long does it take to process an application for payment of 10,000?
Ancient technologies with a modern interpretation
Silk screens were known to the ancient inhabitants of Mesopotamia and Phenicia, the countries where this technology originated. The Phoenicians invented a way to transfer designs using matrices that hold the paint. It bore little resemblance to modern silk-screen printing on glass, but served as its starting point. Thousands of years later, at the end of the 12th and beginning of the 13th centuries, a technological breakthrough occurred in this area, and the printing method began to look more like the modern one.
The craftsmen of Kamakura, a city on the Japanese island of Nipon, learned to decorate armor with complex relief. They used thread nets onto which they glued decor. The canvas was fixed on a wooden frame. Printers then applied coloring pigments through it using tampons.
Having arrived in Europe during the Middle Ages, silk-screen printing quickly spread among artisans. But it was only in 1907 that the method of working with rubber squeegees, knives that distributed the ink layer over the matrix, was patented, which was most important for the development of technology. They pressed pigment through open areas on the template and greatly simplified the work of printers.
Modern flat screen printing machines apply decor measuring 120x180 cm or more onto a variety of materials.
Second way
It is based on the use of tracing paper. You need to do the following steps:
- We draw the drawing itself with a helium pen.
- Disinfect the skin and apply soap.
- We apply tracing paper and trace the contours with a sharp object.
- Now let's paint over the drawing.
If you do decide to apply a permanent design to your body, approach this very carefully. The main thing is to choose a good salon, undergo an allergic reaction test and check that all instruments are disinfected.
Shutdown
Be sure to rinse and dry your brush before using another color. Lightly wipe the brush with a paper towel. If you see color remaining on it, then rinse your brush again. It is important that the pile is completely dry before you begin painting again.
With a leather shirt: stylish looks with jeans for ladies over 50 from Instagram bloggers
Roza Syabitova advised women how to avoid divorce
Vodianova’s mother told why she liked her daughter’s first husband better
Examine the painting carefully and see if some areas need to be touched up. It's much easier to do this while the brush is still dry. Also use a toothpick dipped in alcohol to remove excess paint. And the formed bubbles can be pierced with a needle or pin.
Read the instructions on the paint bottle. Some stamps need to dry for several days before they can be used. Others take up to 31 days. Also, some of the paints must be baked in the oven. In any case, the product must be left to dry for at least 48 hours. If it seems sticky when you touch the paint, you need to give it a little more time.